Table of Contents
Advertisement
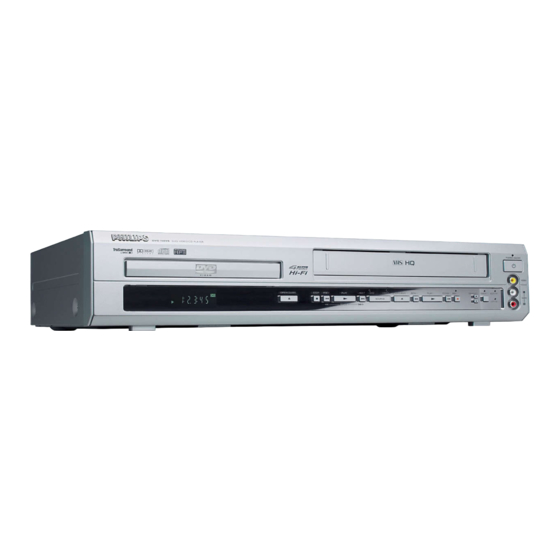
Digital Video Disc Player &
Video Cassette Recorder
Read this manual first!
Congratulations on purchasing this Philips product.
Weíve included everything you need to get started.
If you have any problems, Philips Representatives can
help you get the most from your new product by explaining:
• Hookups,
• First Time Setup, and
• Feature Operation.
Do not attempt to return this product to the store.
Tel: see back page of your manual
Thank you for making Philips a part of your home!
For fast help, call us first!
R
740VR/
740VR/
DVD
DVD
001
001
1
Advertisement
Table of Contents
Troubleshooting

Related Manuals for Philips DVD740VR/001


Summary of Contents for Philips DVD740VR/001
- Page 1 • First Time Setup, and • Feature Operation. Do not attempt to return this product to the store. For fast help, call us first! Tel: see back page of your manual Thank you for making Philips a part of your home! 740VR/ 740VR/...
-
Page 2: General Information
General Information The region code for this set is 2. Since it is usual for DVD movies to be released at different times in different regions of the world, all players have region codes and discs can have an optional region code. If you load a disc of a different region code to your player, you will see the region code notice on the screen.The disc will not playback, and... -
Page 3: Table Of Contents
Introduction Environmental Information ..4 Supplied accessories ....4 Safety Information ....4 Symbols Used in this Manual . -
Page 4: Introduction
Introduction Thank you for purchasing this Philips DVD/ VCR player.This Owner’s Manual explains the basic operation of this DVD/VCR. Environmental Information All unnecessary packaging has been omitted. Packaging has been made easy to separate into three materials: cardboard (box), polystyrene foam (buffer) and polyethylene (bags, protec- tive foam sheet). -
Page 5: Functional Overview
Front Panel DISPLAY – shows the current status of the player Disc Tray – insert a disc here Remote Sensor – receive signals from remote control Cassette Compartment – insert a tape here SOURCE (OUTPUT) – to select between DVD and VCR mode j PREV / i NEXT (DVD) –... -
Page 6: Display Front Panel
Functional Overview Display front Panel – light appears during recording, it flashes when a recording is paused DVD (green light) – light appears when DVD/VCR in DVD mode.You can only watch DVDs when the green DVD OUTPUT light is on. VIDEO (green light) –... -
Page 7: Rear Panel
Rear Panel AERIAL – connect to an antenna or cable VCR (AV2 Decoder) – connect SCART cable from another VCR, camcoder or an audio/video source DVD/VCR (AV1 TV) – connect SCART cable to a TV AERIAL RF-OUT AV2 (DECODER) RF OUT –... -
Page 8: Remote Control
Functional Overview Remote Control – to put the DVD/VCR into standby mode for a timer recording – to access or remove the DVD setup menu (DVD) – to choose audio languages or sound modes (DVD) – to choose sound modes (VCR) –... -
Page 9: Remote Control (Cont'd)
Remote Control (cont’d) – switch DVD/VCR ON or OFF – press once to start recording or repeatedly to start (VCR) – repeat chapter, track, title, disc (DVD) – repeat a specific segment (DVD) – to display title menu of a disc (DVD) –... -
Page 10: Setting Up Your Dvd/Vcr
Setting Up your DVD/VCR Basic Connections G Please refer to the instruction books of your TV,VCR, Stereo System or other devices as necessary to make the best connections. G Make one of the following connections, depending on the capabilities of your existing equipment. -
Page 11: Simplest Connection Using Only Supplied Black Rf Coaxial Cable
Simplest connection using only supplied black RF coaxial cable Disconnect the antenna or cable from your Connect the antenna or cable to the AERIAL of your DVD/VCR. Connect black RF coaxial cable to the RF OUT on the rear panel of the DVD/VCR and to the ANTENNA IN on the TV. -
Page 12: Connecting To Optional Equipment (For Dvd Features)
Setting Up your DVD/VCR Connecting to Optional Equipment (for DVD features) G A digital component with a built-in MPEG 2 or Dolby Digital decoder allows you to enjoy the surround sound while producing the effect of being in a movie theater or a concert hall. G The player outputs the surround sound signals from the DIGITAL OUT COAXIAL or OPTI- CAL connector. -
Page 13: Playable Video Cassette Tapes
Playable Video Cassette Tapes Philips Consume Electronics recommends that only video cassette tapes that have the VHS mark and High Quality (HQ) system is compatible with this DVD/VCR.This DVD/VCR has an Automatic Head Cleaner. Recording Prevention Video cassette tapes have record tabs to ensure recordings are not erased accidentally. -
Page 14: Automatic Channel Setup
Setting Up your DVD/VCR Automatic Channel Setup You can programme the tuner to scan only the channels that you can receive in your area. Turn on the TV and select the TV channel to the video channel on the TV. Press the VCR button, then the MENU but- ton. -
Page 15: Adding/Deleting Channels
Adding/Deleting Channels Press the VCR button, then the MENU but- ton. Press the PLAY B or STOP C button to select INITIAL, then press the FF g button. Press the PLAY B or STOP C button to select CH TUNING, then press the FF g button. -
Page 16: Setting The Clock
Setting Up your DVD/VCR Setting the Clock This DVD/VCR incorporates a 24-hour clock. The clock must be set for the Automatic Timer Recording function to operate correct- If your DVD/VCR is fitted out with PDC and the PDC signal is available in your area, your DVD/VCR can get the current time from your local PDC broadcast. -
Page 17: Changing The Language
Setting Up your DVD/VCR, VCR Operation Changing the Language If you want to change the language used on the TV screen menus, follow the steps below. Press the VCR button, then the MENU but- ton. Press the PLAY B or STOP C button to select INITIAL, then press the FF g button. -
Page 18: Recording One Channel/Watching Another
VCR Operation Recording One Channel/ Watching Another Press the VCR button, then the REC button to record the current TV channel. Use the TV remote control to select the chan- nel you wish to watch. To return to the being recorded channel, use the TV remote control to select similar chan- nel set on the DVD/VCR (eg. -
Page 19: Checking Or Cancelling Timer Recording
Checking or Cancelling Timer Recording Press the TIMER button. Press the VCR button, then the MENU button. Press the PLAY B or STOP C button to select TIMER, then press the FF g button. Press the PLAY B or STOP C button to select programme number, then press the FF g button. -
Page 20: Show View
VCR Operation ® Guide Channel Set First, fill in the boxes below: Write your local channel numbers in "VCR Channel" column, corresponding "TV-Station" and "GUIDE Channel" columns, using see your TV guide magazine or the TV listings of your local newspaper. Guide TV-Station Channel... -
Page 21: Timer Recording Using The Show View System
Timer Recording using the System You can programme the timer using the numbers that are printed in TV guide magazine.You can set seven pro- grammes to record. With the clock set to ON, press the VCR button, then the SHOWVIEW button. ShowView will be displayed. -
Page 22: Rerecording (Tape Duplication)
VCR Operation Rerecording (Tape Duplication) G Connect the recording DVD/VCR (this unit), playing DVD/VCR (another VCR) and your TV as outline in the following diagram. Recording DVD/VCR Back of Playing DVD/VCR AERIAL DVD OUTPUT ONLY DVD/VCR ANALOG S-VIDEO RF-OUT AUDIO OUT AV2 (DECODER) AV1 (TV) ¤... -
Page 23: Time Search
Time Search Press the VCR button, then the TIME SEARCH button. Within 30 seconds, use the PLAY B , STOP C button or the TIME SEARCH button to enter the desired length of time to skip for- ward or backward. Press the FF g button or the REW h button within 30 seconds. -
Page 24: Special Effect Playback
VCR Operation Special Effect Playback Forward and Reverse Searching During playback, press and release the FF g or REW h button. a A fast forward or reverse picture search will begin. To return to normal playback, press the PLAY B button. Super High Speed Searching During playback, press twice the FF g or REW h button. -
Page 25: Hi-Fi Stereo Sound System
Hi-Fi Stereo Sound System G Your DVD/VCR can only receive and record in Hi-Fi stereo or second audio programs that are broadcast in stereo or second audio. G You can only play in stereo or second audio tapes that were recorded in stereo or second audio. -
Page 26: Dvd Operation
DVD Operation Basic Playback G Before begin, turn on the power of the TV, audio receiver and any other equipment con- nected to the DVD/VCR. G Make sure the TV and audio received (option- al) are set to the correct channel. Press the STANDBY-ON button on the front panel. -
Page 27: Step By Step Playback
Step by Step Playback During playback, press the DVD button, then the PAUSE k button. a Playback will pause and sound will be muted. The disc goes forward by one frame each time the PAUSE k button is pressed. To exit step by step playback, press the PLAY B button. -
Page 28: Title/Chapter
DVD Operation Title/chapter Press the DVD button, then press the SEARCH MODE/TIME SEARCH button to display the Title/ Chapter Search on the TV screen. To select Title/Chapter, press 3 to move to the desired title/chapter, then enter the title/chapter number using numerical key pad button. -
Page 29: Mp3 Playback
MP3 Playback When a CD with MP3 files in the DVD/VCR, the MP3 menu will appear on the TV screen. In stop mode, press the K or L button to select the desired Album or Track. G To play a choosen track, press the PLAY B or the OK button. -
Page 30: Subtitle Language
DVD Operation Subtitle Language The DVD/VCR allows you to select a language for subtitle during DVD disc (if available) playback. Press the DVD button, then press the SUBTI- TLE button during playback. Press the SUBTITLE button repeatedly to select your desired subtitle language. a The available languages appears on the right of the subtitle display. -
Page 31: Marker Setup Screen
Parental Level Parental Level allows you to set the rating level of your DVD discs. Playback will stop if the disc’s ratings exceed the level you set. Press the DVD button, then press the SETUP button during playback is stopped. Press the K or L button to select PARENTAL, then press the OK button. -
Page 32: Dvd Setup
DVD Setup Audio Setting Choose the appropriate Audio settings for your equipment as it only affect during the playback of DVD discs of the DVD/VCR. Press the DVD button, then press the SETUP button during playback is stopped. Press the K or L button to select AUDIO, then press the OK button. -
Page 33: Language Setting
Language Setting Language options are not available is all discs. Press the DVD button, then press the SETUP button during playback is stopped. Press the K or L button to select LAN- GUAGE, then the OK button to confirm. SET-UP LANGUAGE CONTROLS 1. -
Page 34: Specifications
Cleaning the disc lens G After prolonged use, dirt or dust may accumulate at the disc lens.To ensure good playback quality, clean the disc lens with Philips CD Lens Cleaner or any commercially available cleaner. Follow the instructions supplied with the cleaner. -
Page 35: Troubleshooting
WARNING Under no circumstances should you try to repair the system yourself, as this will invalidate the warranty. Do not open the system as there is a risk of electric shock. If a fault occurs, first check the points listed below before taking the system for repair. Problem No power No picture... -
Page 36: Troubleshooting
Troubleshooting Problem The DVD/VCR switches from DVD mode to VCR mode after 35 minutes The VCR do not record a TV program The DVD/VCR do not perform a timer The motor (cylinder) rotates even when tape playback is stopped You cannot insert a tape You cannot remove a tape DVD/VCR ejects the tape when you press the REC or TIMER button for a... - Page 37 20052 Monza - Milano ITALY Phone: 800 820026 PHILIPS MÁRKASZERVIZ Kinizsi U 30 - 36 Budapest 1092 HUNGARY Phone: (01)-2164428 Meet Philips at the Internet http://www.philips.com PHILIPS PORTUGUESA, S.A. Consumer Information Center Rua Dr. António Loureiro Borge, nr.5 Arquiparque, Miraflores...