Philips DVP3040 User Manual
Dvd video player
Hide thumbs
Also See for DVP3040:
- User manual (43 pages) ,
- Software upgrade instructions (4 pages) ,
- Quick start manual (2 pages)

Related Manuals for Philips DVP3040


Summary of Contents for Philips DVP3040
- Page 1 DVD VIDEO PLAYER 01-43_dvp3040_37_eng2.indd 1 01-43_dvp3040_37_eng2.indd 1 DVP3040 DVP3042 2006-07-14 3:35:12 PM 2006-07-14 3:35:12 PM...
- Page 2 Registering your model with PHILIPS makes you eligible for all of the valuable benefits listed below, so don't miss out. Complete and return your Product Registration Card at once, or register online at www.philips.com/usasupport to ensure:...
- Page 3 Class II equipment symbol This symbol indicates that the unit has a double insulation system 01-43_dvp3040_37_eng2.indd 3 01-43_dvp3040_37_eng2.indd 3 2006-07-14 3:35:22 PM 2006-07-14 3:35:22 PM...
- Page 4 WARNING To reduce the risk of fi re or electric shock, do not expose this equipment to rain or moisture. Use of controls or adjustments or performance of procedures other than herein may result in hazardous radiation exposure. The set complies with the FCC-Rules, Part 15 and with 21 CFR 1040.10.
- Page 5 01-43_dvp3040_37_eng2.indd 5 01-43_dvp3040_37_eng2.indd 5 Index English ------------------------------------------6 Français -------------------------------------- 44 Español --------------------------------------- 82 This product incorporates copyright protection technology that is protected by method claims of certain U.S. patents and other intellectual property rights owned by Microvision Corporation and other rights owners.
-
Page 6: Environmental Information
BACKPLATE OF THE SET NEVER MAKE OR CHANGE CONNECTIONS WITH THE POWER SWITCHED ON. Specifi cations are subject to change without notice. Trademarks are the property of Koninklijke Philips Electronics N.V. or their respective owners. LASER Type Semiconductor laser InGaAlP (DVD) -
Page 7: Language Code
01-43_dvp3040_37_eng2.indd 7 01-43_dvp3040_37_eng2.indd 7 Language Code 2006-07-14 3:35:23 PM 2006-07-14 3:35:23 PM... -
Page 8: Table Of Contents
Contents Care and Safety Information Setup ... 10 Cleaning discs ... 10 General Information Accessories supplied ...11 Region codes ...11 Connections Connecting to television ... 12-13 Using Composite Video sockets (CVBS) ... 12 Using Component Video sockets (YPbPr) ... 12 Using an accessory RF modulator ... - Page 9 Viewing the disc playback information ... 25 Title/Chapter/Track selection ... 25 Time Search ... 25 Angle ... 25 Special DVD Features ... 26 Playing a Title ... 26 Changing the Audio Language ... 26 Subtitle ... 26 Special VCD and SVCD Feature ... 26 Playback Control (PBC)...
-
Page 10: Care And Safety Information
Since the optical unit (laser) of the DVD player operates at a higher power than regular DVD or CD players, cleaning CDs intended for DVD or CD players may damage the optical unit (laser). -
Page 11: General Information
01-43_dvp3040_37_eng2.indd 11 01-43_dvp3040_37_eng2.indd 11 General Information Region codes This DVD player is designed to support the Region Management System. Check the regional code number on the disc package. If the number does not match the player’s region number (see table below), the player may be unable to playback the disc. -
Page 12: Connections
To hear sound of this DVD player through your TV, use the audio cables (white/red) to connect AUDIO OUT (L/ R) sockets of the DVD player to the corresponding AUDIO IN sockets on the television (cable supplied). TIPS: Before making or changing any connections, make sure that all the devices are disconnected from the power outlet. -
Page 13: Using An Accessory Rf Modulator
RF In,) you will need an RF modulator in order to view the DVD playback on the television. See your electronics retailer or contact Philips for details on RF modulator availability and operations. Using an accessory RF modulator Use the composite video cable (yellow) to connect the DVD player’s CVBS jack... -
Page 14: Optional Connections
Connect the COAXIAL jack of the DVD player to the corresponding Digital Audio In socket on your receiver (cable not supplied). Set the DVD player’s digital output to PCM-Only or ALL depending on the capabilities of your receiver (see page 33 {Digital Output}). -
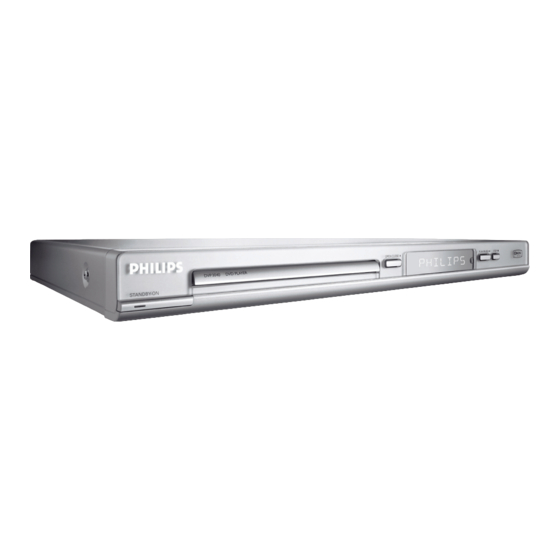
Page 15: Product Overview
OPEN/CLOSE – Opens or closes the disc tray. Display panel – Shows information about the current status of the DVD player. Mains (AC Power Cord) – Connect to a standard AC outlet Audio Out (Left/Right) – Connect to AUDIO inputs of an... -
Page 16: Remote Control
Product Overview Remote Control DISC MENU – Enters or exits the disc contents menu – Switches on or off the playback control mode (for VCD 2.0 only) – Confi rms an entry or selection RETURN/TITLE – To go back to previous menu/ show title menu PREV í... -
Page 17: Getting Started
If you are using external equipment, (such as audio system or receiver), turn it on and select the appropriate input source for the DVD player output. Refer to the equipment user’s manual for detail. 2006-07-14 3:35:28 PM 2006-07-14 3:35:28 PM... -
Page 18: Step 3: Setting Up Progressive Scan Feature
DVD VIDEO disc in the progressive scan mode. In such a case, turn off the progressive scan feature on both the DVD player and your TV. 2006-07-14 3:35:28 PM 2006-07-14 3:35:28 PM... -
Page 19: Step 4: Selecting The Matching Color System
Step 4 : Selecting the matching color system The color system of the DVD player, disc and TV should match in order for the disc to play. Before changing the TV system, determine the color system of your TV. Language... -
Page 20: Step 5: Setting The Language
On-screen display (OSD) language Select this to change the language of this DVD player screen display menu. The menu language (on-screen display) for the system will remain as you set it. Language... -
Page 21: Playback From Disc
Video CD (Formats 1.0, 1.1, 2.0) TIPS: Some discs cannot be played on this DVD player due to the confi guration and characteristics of the disc, or due to the condition of recording and authoring software that was used. 01-43_dvp3040_37_eng2.indd 21 01-43_dvp3040_37_eng2.indd 21... -
Page 22: Playback Features
Playback Features Starting disc playback Turn on the TV to the correct program number for the DVD player (e.g. ‘EXT’, ‘0’, ‘AV’). Press STANDBY-ON 2 to turn on the DVD player. Press OPEN CLOSE ç on the front of the DVD player. -
Page 23: Operations For Video Playback (Dvd/Vcd/Svcd)
Operations for video playback (DVD/VCD/SVCD) Using the Disc Menu Depending on the disc, a menu may appear on the TV screen once you load in the disc. To select a playback feature or item keys or numeric keypad (0-9) on the remote, then press OK to start playback. -
Page 24: Selecting Various Repeat/ Shuffl E Functions
Playback Features Selecting various repeat/ shuffl e functions Repeat play mode The repeat play options vary depending on the disc type. While playing a disc, press REPEAT continuously to choose a repeat options. For DVD – Repeat Chapter (currently playing chapter) –... -
Page 25: Viewing The Disc Playback Information
Viewing the disc playback information You can view the disc information (such as current title/chapter/track number, total playing time or remaining time on the disc) without interrupting the disc playback. During playback, press DISPLAY repeatedly on the remote control. The available disc information appears on the TV screen with the following sequence. -
Page 26: Special Dvd Features
Playback Features Special DVD Features Playing a Title Press DISC MENU. The disc title menu appears on the TV screen. keys or alphanumeric to select a play option. keypad 0-9 Press OK key to confi rm. Changing the Audio Language For DVD Press AUDIO repeatedly to select different audio languages. -
Page 27: Playing A Divx Disc
Playing a DivX disc This DVD player supports the DivX movie playback that you download from your computer onto a CD-R/RW or DVD±R/RW (see page 38 for more information). Load a DivX disc. Playback will start automatically. If not press PLAY/PAUSE Press SUBTITLE on the remote control will turn on or off the subtitle. -
Page 28: Playback Selection
Playback Features Playback selection During playback, you can; Press PREV í / NEXT ë to select the previous/next track/fi le in the current folder. Press on the remote to rotate/fl ip the picture fi les. Å repeatedly Press PLAY/PAUSE to pause/resume playback. For MP3, During playback, press and hold PREV í... -
Page 29: Dvd Menu Options
You can make various adjustments to items such as picture and sound using the DVD setup menu. Using the Language setup menu Press SETUP on the remote control. The system setup menu appears. Language OSD Language English Subtitle English Video DivX Subtitle Standard Audio... -
Page 30: Using The Video Setup Menu
DVD Menu Options Using the Video setup menu Press SETUP on the remote control. The system setup menu appears. Language Language Language Aspect Ratio Aspect Ratio Aspect Ratio View Mode View Mode View Mode Auto Fit Auto Fit Auto Fit Video Video Video... -
Page 31: View Mode
View Mode Use view mode to scale an image that fi ts to the TV screens’ width and height. In ‘Video’, press to select { View Mode }, then press { Fill } Select this to scale the image up or down in horizontal and vertical directions respectively to fi ll the screen height and width. -
Page 32: Smart Picture
DVD Menu Options Smart Picture This DVD player provides four predefi ned sets of picture color settings. In ‘Video’, press to select { Smart Picture }, then press { Standard } Select this for a preset standard picture setting. { Vivid } Select this to make the picture brighter. -
Page 33: Using The Audio Setup Menu
(Dolby Digital, MPEG-2). { PCM } Select this if the connected device is not capable of decoding multichannel audio. The DVD player will convert the Dolby Digital and MPEG-2 multichannel signals to PCM (Pulse Code Modulation). { Off } To deactivate the digital audio output. -
Page 34: Night Mode
DVD Menu Options Night Mode This mode optimises playback of sound at low volume. High volume outputs will be softened and low volume outputs are brought upward to an audible level. In ‘Audio’, press to select { Night Mode }, then press { On } Select this to set low volume output. -
Page 35: Using The Rating Setup Menu
Using the Rating setup menu Press SETUP on the remote control. The system setup menu appears. Language Language Language Aspect Ratio Parental control : 8.Aduit Set Password Video Video Video Audio Audio Audio Rating Rating Rating Misc Misc Misc Press to select { Rating }, then press Press... -
Page 36: Changing The Password
DVD Menu Options to select a rating level and press OK to confi rm. Select { 8 Adult } to disable parental level and allow all discs to play. DVDs that are rated higher than the level you selected will not play unless you enter your four-digit password. -
Page 37: Using The Misc (Miscellaneous) Setup Menu
Using the Misc (Miscellaneous) setup menu Press SETUP on the remote control. The system setup menu appears. Language Language Language Use Default Settings DivX Registration Video Video Video Audio Audio Audio Rating Rating Rating Misc Misc Misc Press to select { Misc }, then press Press to select an item, then press OK to access. -
Page 38: Divx Registration Code
CD-R/RW for playback on this DVD player. Tips: – All the downloaded movies from DivX Registration can only be played back on this DVD player. – Time search feature is not available during DivX movie playback. TIPS: The underlined option is the factory default setting. -
Page 39: Specifi Cations
TV STANDARD (PAL/50Hz) (NTSC/60Hz) Number of lines Playback Multistandard (PAL/NTSC) VIDEO PERFORMANCE Video DAC 12 bit, 108mHz YPbPr 0.7 Vpp ~ 75 ohm Video Output 1Vpp ~ 75 ohm VIDEO FORMAT Digital MPEG 2 for DVD,SVCD Compression MPEG 1 for VCD DivX 50Hz 60Hz... -
Page 40: Troubleshooting
(± signs). – Turn on your TV and set to the correct Video In channel for the DVD player. You may go to Channel 1 on your TV, then press the channel down button on your TV’s remote control until you see the TV program. - Page 41 – Check that the DivX movie downloaded is a complete fi le. – The audio codec may not be supported by this DVD player. – Check that fi le size of the movie does not exceed the fi le size of the disc during downloading.
-
Page 42: Glossary
Glossary Analog: Sound that has not been turned into numbers. Analog sound varies, while digital sound has specifi c numerical values. These jacks send audio through two channels, the left and right. Aspect ratio: The ratio of vertical and horizontal sizes of a displayed image. The horizontal vs. -
Page 43: Limited Warranty
Philips is not liable for any damage to or loss of any programs, data, or other information stored on any media contained with- in the product, or any non-Philips product or part not covered by this warranty.