Philips 27PC4326 User Manual
Color analog/digital tv with built-in vcr and dvd player
Hide thumbs
Also See for 27PC4326:
- Mode d'emploi (92 pages) ,
- Quick start manual (2 pages) ,
- Specification sheet (2 pages)
Table of Contents
Advertisement
Quick Links
T3221UB_EN1 4/20/06 9:32 PM Page 1
COLOR ANALOG/DIGITAL TV
WITH BUILT-IN VCR AND DVD PLAYER
User Manual
Thank you for choosing Philips.
Need help fast?
Read your Quick Start Guide and/or
Owner's Manual first for quick tips
that make using your Philips product
more enjoyable.
If you have read your instructions
and still need assistance,
you may access our online help at
www.philips.com/usasupport
or call
1-888-PHILIPS (744-5477)
while with your product
(and Model / Serial number)
27PC4326
Philips vous remercie de
votre confiance.
Besoin d'une aide
rapide?
Les Guide de mise en route rapide et Manuel de
l'utilisateur regorgent d'astuces destinées à
simplifier l'utilisation de votre produit Philips.
Toutefois, si vous ne parvenez pas à résoudre
votre probléme, vous pouvez accéder à
notre aide en ligne à l'adresse
www.philips.com/usasupport
ou formez le
1-800-661-6162 (Francophone)
1-888-PHILIPS (744-5477) (English speaking)
Veillez à avoir votre produit à
portée de main
(et model / serial nombre)
27PC4326/37
Gracias por escoger Philips.
Necesita ayuda
inmediata?
Lea primero la Guía de inicio rápido o el
Manual del usuario, en donde encontrará
consejos que le ayudarán a disfrutar
plenamente de su producto Philips.
Si después de leerlo aún necesita ayuda,
consulte nuestro servicio de
asistencia en línea en
www.philips.com/usasupport
o llame al teléfono
1-888-PHILIPS (744-5477)
y tenga a mano el producto
(y número de model / serial)
Advertisement
Table of Contents

Related Manuals for Philips 27PC4326


Summary of Contents for Philips 27PC4326
-
Page 1: User Manual
Thank you for choosing Philips. Need help fast? Read your Quick Start Guide and/or Owner’s Manual first for quick tips that make using your Philips product more enjoyable. If you have read your instructions and still need assistance, you may access our online help at www.philips.com/usasupport... - Page 2 Registering your model with PHILIPS makes you eligible for all of the valuable benefits listed below, so don't miss out. Complete and return your Product Registration Card at once, or register online at www.philips.com/usasupport to ensure:...
-
Page 3: Safety And General Information 3
T3221UB_EN1 4/20/06 9:32 PM Page 3 IMPORTANT SAFETY INSTRUCTIONS Read before operating equipment 1. Read these instructions. 2. Keep these instructions. 3. Heed all warnings. 4. Follow all instructions. 5. Do not use this apparatus near water. 6. Clean only with a dry cloth. 7. -
Page 4: Safety And General Information
1-888-PHILIPS (744-5477) Manufactured under license from Dolby Laboratories. “Dolby” and the double-D symbol are trademarks of Dolby Laboratories. Copyright 2006 Philips. All rights reserved. This Class B digital apparatus complies with Canadian This equipment has been tested and found to comply with the limits for a... -
Page 5: Table Of Contents
T3221UB_EN1 4/20/06 9:32 PM Page 5 General Information Safety and General Information ...3-4 Table of Contents ..... . .5 Introduction . -
Page 6: Introduction
While in TV/VCR mode, you can select only the MAIN MENU. In DVD mode, you can select both the MAIN MENU and the SETUP menu for the unit’s DVD player. Press SET-UP once to select the MAIN MENU. Press SET-UP twice to get to the DVD player’s SETUP menu. -
Page 7: Playable Discs And Videotapes 7
(which is used primarily in the United States and North America), PAL, and SECAM. The DVD player of this unit uses NTSC, so DVDs you play must be recorded in the NTSC color system. You cannot play DVDs recorded in other formats. The color system of the DVD may be listed on the DVD or on the disc case. -
Page 8: Before Using The Tv/Vcr/Dvd
T3221UB_EN1 4/20/06 9:32 PM Page 8 8 Before Using the TV/VCR/DVD Remote Control Battery Installation Remove the battery compartment lid on the bottom of the remote control. Slide the lid down and off. Follow the direction of the arrow on the lid. Place two AAA batteries inside the battery compartment. -
Page 9: Hooking Up The Tv/Vcr/Dvd 9
T3221UB_EN1 5/8/06 6:29 PM Page 9 Hook up your TV/VCR/DVD using one of the connections shown. Hooking Up Your TV/VCR/DVD with a Cable TV Signal or Outdoor Antenna Hooking Up Your TV/VCR/DVD with a Cable Box/Satellite Receiver To view any channel, set the TV/VCR/DVD to the output channel (channel 03 or 04) of the Cable Box/Satellite Receiver.Then, select channels at the Cable Box/Satellite Receiver. -
Page 10: Hooking Up The Tv/Vcr/Dvd
Hooking Up Your TV/VCR/DVD to Another Video Source (VCR, DVD player, Camcorder, etc.) You may need this connection if you want to play discs or tapes on other equipment but watch them on the TV/VCR/DVD. Press SELECT on the remote to select AUX at the TV/VCR/DVD. -
Page 11: Optional Connections 11
T3221UB_EN1 5/8/06 6:29 PM Page 11 Digital Stereo Hookups You can connect the TV/VCR/DVD to a Stereo that has a Digital Coaxial In jack. Use this hookup if you want to hear the TV/VCR/DVD sound through the Stereo instead. Use these connections for a Dolby Digital-compatible Stereo or for a Receiver that has a Mini-Disc or Digital Audio Tape deck. -
Page 12: Remote Control Buttons
T3221UB_EN1 4/20/06 9:32 PM Page 12 12 Remote Control Buttons STANDBY-ONy Button Press to turn on or off the TV/VCR/DVD. REC MODE Button Press to choose a tape recording speed (SP or SLP). Details are on page 29. PLAY B Button Press to start playing a disc or video cassette. - Page 13 T3221UB_EN1 4/20/06 9:32 PM Page 13 CLEAR Button Press to reset or erase a setting or wrong information. In TV mode, press once to display the tape counter. Press it twice to reset the counter to 0:00:00. Details are on page 39. Press to cancel a Timer Recording.
-
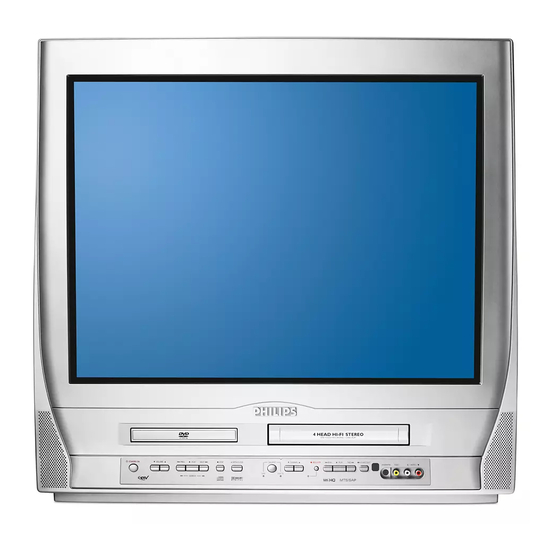
Page 14: Front Panel
T3221UB_EN1 4/20/06 9:32 PM Page 14 14 Front Panel Front design varies slightly among models. Cassette Compartment Insert a videotape here. Disc Tray Insert a disc here. CHANNEL K/L Buttons Press to select TV channels. Details are on page 16. OPEN/CLOSE A Button (DVD) Press to open or close the disc tray. -
Page 15: Rear Panel 15
T3221UB_EN1 5/8/06 6:29 PM Page 15 ANT. Jack (Antenna In) Connect an antenna or Cable TV signal here. This brings TV channels to the TV/VCR/DVD. If you do not connect an antenna or Cable TV signal to the TV/VCR/DVD (or connect to a Cable Box/Satellite Receiver through this jack), you will not receive any TV channels. -
Page 16: Watching Tv
T3221UB_EN1 4/20/06 9:32 PM Page 16 16 Watching TV The unit selects available TV channels automatically when you connect an Antenna or Cable TV signal to it. To reset TV channels, see page 20. If you are using a Cable Box or Satellite Receiver, you do not need to set channels at the TV/VCR/DVD. -
Page 17: Playing A Videotape 17
T3221UB_EN1 4/20/06 9:32 PM Page 17 Follow these steps to simply play a videotape. Videotape playback options are on pages 37-43. Insert a videotape in the cassette compartment of the TV/VCR/DVD. The power will come on. If the tape’s record tab is missing, playback should start automatically. -
Page 18: Playing A Disc
T3221UB_EN1 4/20/06 9:32 PM Page 18 18 Playing a Disc Before you begin, turn on the power of other equipment connected to the TV/VCR/DVD. Set a stereo (if applicable) to the correct sound source or channel. Details are on page 11. Press STANDBY-ONy to turn on the TV/VCR/DVD. -
Page 19: Menu Language, Auto Channel Preset 19
T3221UB_EN1 4/20/06 9:32 PM Page 19 Menu Language, Auto Channel Preset 19 Menu Language This affects the language of the TV/VCR/DVD’s Setup menus and On-Screen Display terms. This does not alter the language of TV programming, videotapes, discs or closed captioning. Press SET -UP. -
Page 20: Adding/Deleting Channels
T3221UB_EN1 4/20/06 9:32 PM Page 20 TV/VCR/DTV 20 Adding/Deleting Channels You can delete TV channels you no longer receive or seldom watch. Or, you can add more channels if the TV/VCR/DVD did not memorize all your favorite channels. ● Before you begin, press SELECT to put the TV/VCR/DVD in TV/VCR mode. -
Page 21: Setting The Clock 21
T3221UB_EN1 4/20/06 9:32 PM Page 21 Manual Clock Setting You must set the clock before you can do a timer recording. Set the clock manually. Afterward, use Auto Clock to monitor the time. Details are on pages 23-24. If you do not receive a PBS station that carries time signals, you cannot use Auto Clock. - Page 22 T3221UB_EN1 4/20/06 9:32 PM Page 22 TV/VCR/DTV 22 Setting the Clock (cont’d) Instructions continued from the previous page. Finally, set the MINUTE with ▲ or ▼.Then press SET -UP. – MANUAL CLOCK SET – MONTH DAY YEAR 05 / 05 FRI 2006 HOUR MINUTE...
-
Page 23: Auto Clock Setting
T3221UB_EN1 4/20/06 9:32 PM Page 23 Auto Clock Setting You can have the TV/VCR/DVD adjust the clock using your PBS channel. Once you set the clock manually, the TV/VCR/DVD will monitor the correct time and date broadcast by the PBS station. Before you begin ... - Page 24 T3221UB_EN1 4/20/06 9:32 PM Page 24 TV/VCR/DTV 24 Setting the Clock (cont’d) Instructions continued from the previous page. If you already know your PBS channel number, skip ahead to step 8. If you do not know the channel number of your PBS station, press ▼ to select AUTO CLOCK CH SEARCH.
-
Page 25: Daylight-Savings Time 25
T3221UB_EN1 4/20/06 9:32 PM Page 25 When Daylight-Savings Time (D.S.T.) is ON, the clock will move forward 1 hour on the first Sunday in April and move back 1 hour on the last Sunday in October. To turn Daylight-Savings Time ON or OFF, follow the steps below. -
Page 26: Time Zone
T3221UB_EN1 4/20/06 9:32 PM Page 26 TV/VCR/DTV 26 Time Zone You must select the time zone of your area to ensure the proper performance of the clock. Press SET -UP. Press ▲ or ▼ to select SETTING CLOCK. Then press ENTER. In TV/DTV/AUX Mode –... -
Page 27: Status Displays 27
T3221UB_EN1 4/20/06 9:32 PM Page 27 Status Displays To see the Videotape Counter, Clock or Channel number on the screen in TV/VCR mode, press DISPLAY repeatedly. The following will occur when Closed Captions are OFF. Press DISPLAY once to see the Videotape counter. -
Page 28: Picture Controls
T3221UB_EN1 4/20/06 9:32 PM Page 28 TV/VCR/DTV 28 Status Displays (cont’d) Instructions continued from the previous page. The following information is displayed in the INFO1 mode. (1) Channel number (2) Broadcast station (3) Program title (max. 2 lines displayed) (4) Audio language (“OTHER” is displayed when the audio language cannot be acquired, or the acquired languages are other than ENGLISH, SPANISH or FRENCH.) (5) Program air time... -
Page 29: Videotape Recording 29
T3221UB_EN1 4/20/06 9:32 PM Page 29 Place a tape with its record tab intact in the cassette compartment of the TV/VCR/DVD. The TV/VCR/DVD power will come on. If the power is already on and a videotape is in the unit, make sure the unit is in TV/VCR mode. Press SELECT so the red VCR/TV light appears on the front of the unit. -
Page 30: One-Touch Recording
T3221UB_EN1 4/20/06 9:32 PM Page 30 TV/VCR/DTV 30 One-Touch Recording A One-Touch Recording (OTR) is an immediate timed recording from 30 minutes to 8 hours long. Before you begin ... ● Turn on the TV/VCR/DVD. Press SELECT to put the unit in TV/VCR mode. ●... -
Page 31: Timer Recording 31
T3221UB_EN1 4/20/06 9:32 PM Page 31 Follow the steps below to program the TV/VCR/DVD to record TV programs while you’re away from home. The TV/VCR/DVD will record and turn itself off automatically. You can set a maximum of 8 timer recordings. Before you begin, make sure ... - Page 32 T3221UB_EN1 4/20/06 9:32 PM Page 32 TV/VCR/DTV 32 Timer Recording (cont’d) Instructions continue on the next page. While CH is selected, press ▲ or ▼ to select the channel you want to record. Then press B. – TIMER PROGRAMMING – DATE BEGIN - - -...
- Page 33 T3221UB_EN1 4/20/06 9:32 PM Page 33 Finally, set the tape speed (SP or SLP) with ▲ or ▼.Then press ENTER. – TIMER PROGRAMMING – DATE BEGIN - - - - - - - - - - - - - - - - - - - - - - - - - - -...
- Page 34 T3221UB_EN1 4/20/06 9:32 PM Page 34 TV/VCR/DTV 34 Timer Recording (cont’d) Extending a Timer Recording To make a Timer Recording start and end later than originally scheduled, follow these steps. With the unit on, press SET-UP. Press ▲ or ▼ to select TIMER PROGRAMMING.
-
Page 35: Timer Recording Auto Return 35
T3221UB_EN1 4/20/06 9:32 PM Page 35 Use this feature to rewind the tape to the beginning of a completed timer recording. Press SET -UP. Press ▲ or ▼ to select USER’S SET UP. Then, press ENTER. In TV/DTV/AUX Mode – MAIN MENU – TIMER PROGRAMMING SETTING CLOCK CHANNEL SET UP... -
Page 36: Rerecording (Tape Duplication)
T3221UB_EN1 4/20/06 9:32 PM Page 36 TV/VCR/DTV 36 Rerecording (Tape Duplication) AUDIO and VIDEO OUT Jacks on the source unit (VCR or Camcorder) AUDIO VIDEO VIDEO OUT to VIDEO IN Make the connections shown above. Use audio and video cables (not supplied). Connect the source unit (VCR or Camcorder) to a power source after connections are made. -
Page 37: Repeat Playback 37
T3221UB_EN1 4/20/06 9:32 PM Page 37 Repeat Playback allows you to play a videotape continuously. All Repeat will repeatedly play the tape from the beginning to the end. Blank Repeat will repeatedly play the tape from its beginning to the first part that is blank for more than 10 seconds. -
Page 38: Rental Playback
T3221UB_EN1 4/20/06 9:32 PM Page 38 TV/VCR/DTV 38 Rental Playback This function enables you to improve picture quality when playing worn cassettes such as rented videotapes. Press SET -UP. Press ▲ or ▼ to select USER’S SET UP. Then, press ENTER. In TV/DTV/AUX Mode –... -
Page 39: Zero Return, Sleep Timer 39
T3221UB_EN1 4/20/06 9:32 PM Page 39 Zero Return The videotape counter shows the elapsed recording or playback time in hours, minutes and seconds from the point at which the counter was set to 0. The counter time will not change on a blank tape or blank portions on a tape. The “–” before the tape counter indicates the amount of remaining recording/playing time before the counter reaches 0. -
Page 40: Time Search
T3221UB_EN1 4/20/06 9:32 PM Page 40 TV/VCR/DTV 40 Time Search Time Search lets you quickly advance the videotape to a position simply by entering the amount of playback time you want to skip. In the example below, Time Search is set to 2 hours, 50 minutes from the present position. -
Page 41: Index Search 41
T3221UB_EN1 4/20/06 9:32 PM Page 41 This feature lets you quickly rewind or fast forward to the start of recordings. ● Index Marks are made automatically at the start of all recordings. They are not made where recording pauses. The time gap between Index Marks should be greater than 1 minute for SP recording and 3 minutes for SLP recording. -
Page 42: Videotape Playback Features
T3221UB_EN1 4/20/06 9:32 PM Page 42 TV/VCR/DTV 42 Videotape Playback Features Slow Motion Press PAUSE k during playback to pause the videotape. Then press i/g to start slow motion. Sound will be mute during slow motion. Slow motion will stop automatically after 5 minutes to prevent damage to the tape. -
Page 43: Automatic Operation Features 43
T3221UB_EN1 4/20/06 9:32 PM Page 43 TV/VCR/DTV Automatic Operation Features 43 The following videotape features are available. Automatic Rewind, Eject, Off When you play, fast forward or record a videotape to its end, the TV/VCR/DVD will rewind the tape, stop, turn itself off, and eject the tape. -
Page 44: Closed Captions (Tv)
T3221UB_EN1 4/20/06 9:32 PM Page 44 TV/VCR/DTV 44 Closed Captions (TV) Follow the steps below to select closed captions for TV programming. Not all TV programs and commercials have closed captions or all types of closed captions (second language, half-screen text, etc.). If closed captioning is not broadcast, you cannot receive it. -
Page 45: Closed Captions (Dtv) 45
T3221UB_EN1 4/20/06 9:32 PM Page 45 Press SET -UP. Press ▲ or ▼ to select DTV SET UP. Then, press ENTER. – MAIN MENU – TIMER PROGRAMMING SETTING CLOCK CHANNEL SET UP USER'S SET UP V-CHIP SET UP LANGUAGE [ENGLISH] CAPTION [OFF] ZERO RETURN TIME SEARCH... - Page 46 T3221UB_EN1 4/20/06 9:32 PM Page 46 TV/VCR/DTV 46 Closed Captions (DTV) (cont’d) Instructions continued from the previous page. User Setting The USER SETTING function lets you change the caption size and font style. [OFF] [ON] When USER SETTING is set to ON, you can set the following items.
-
Page 47: Closed Captions (Dtv)
T3221UB_EN1 4/20/06 9:32 PM Page 47 [CHARACTER EDGE] Text edging of the displayed caption can be switched as below. [FORE OPACITY] Text opacity of the displayed caption can be switched as below. [FORE COLOR] Text color of the displayed caption can be switched as below. -
Page 48: Setting V-Chip
T3221UB_EN1 4/20/06 9:32 PM Page 48 TV/VCR/DTV 48 Setting V-Chip TV Rating Settings V-CHIP enables parents to prevent their children from watching inappropriate material on TV. V-CHIP reads the ratings for programming (except for news and sports programs, unedited movies on premium cable channels, and Emergency Broadcast System signals), then denies access to programming if the program’s rating meets the limitations you select. - Page 49 T3221UB_EN1 4/20/06 9:32 PM Page 49 Press ▲ or ▼ to select the TV Rating level at which you want to block viewing, then press ENTER once. If you press ENTER again, the subratings for that category will appear. Details are on pages 50-51. When you select the rating category and set it to BLOCK, the higher ratings will turn to BLOCK automatically.
- Page 50 T3221UB_EN1 4/20/06 9:32 PM Page 50 TV/VCR/DTV 50 Setting V-Chip (cont’d) TV Rating Subratings When you select TV-Y7, TV-PG, TV-14 or TV-MA, you can use the subratings to block specific elements of programming, such as language or violence. Press SET -UP. Press ▲...
- Page 51 T3221UB_EN1 4/20/06 9:33 PM Page 51 Press ▲ or L to select the rating you wish to adjust. Then, press ENTER twice to go to its subratings. TV-Y7 [BLOCK] [BLOCK] ● When you select TV-Y7: Press ▲ or ▼ to select FV (Fantasy Violence, violence that seems realistic to young children).
- Page 52 T3221UB_EN1 4/20/06 9:33 PM Page 52 TV/VCR/DTV 52 Setting V-Chip (cont’d) MPAA Rating Settings You can block TV channel viewing according to the Motion Picture of Association ratings. To do so, follow these steps. Press SET -UP. Press ▲ or ▼ to select V-CHIP SET UP. Then, press ENTER.
-
Page 53: Setting V-Chip
T3221UB_EN1 4/20/06 9:33 PM Page 53 Changing the Access Code Although the default code 0000 is supplied with the TV/VCR/DVD, you can set your own access code. Press SET -UP . Press ▲ or ▼ to select V-CHIP SET UP . Then, press ENTER. -
Page 54: Changing The Screen Display Mode (Dtv)
T3221UB_EN1 4/20/06 9:33 PM Page 54 TV/VCR/DTV 54 Changing the Screen Display Mode (DTV) 2 types of display modes can be selected in the digital mode. You can select your favorite display mode and enjoy the program. Before you begin, press SELECT to put the ●... -
Page 55: Multi-Channel Television Sound (Mts) 55
T3221UB_EN1 4/20/06 9:33 PM Page 55 Multi-Channel Television Sound (MTS) 55 You can set the TV/VCR/DVD to receive or record TV programs in Stereo, Second Audio or Monaural Sound. Also, you can set the TV/VCR/DVD to play videotapes in either High Fidelity (HIFI) or Monaural (MONO or single-channel) sound. - Page 56 T3221UB_EN1 4/20/06 9:33 PM Page 56 TV/VCR/DTV 56 Multi-Channel Television Sound (MTS) (cont’d) For TV Audio While receiving an MTS broadcast, press MODE repeatedly to select STEREO, SAP (Second Audio Program) or MONO. ● The mode changes according to the broadcast among STEREO, SAP and MONO every time you press the button.
-
Page 57: Multi-Channel Television Sound (Mts)
T3221UB_EN1 4/20/06 9:33 PM Page 57 Multi-Channel Television Sound (MTS) (cont’d) 57 For VCR Audio During playback of a videotape, press MODE to switch HIFI or MONO. ● The current mode appears on the TV screen for about 5 seconds. The initial setting is HIFI. -
Page 58: Dvd Disc Menus,Title Menus
T3221UB_EN2 4/20/06 9:31 PM Page 58 58 DVD Disc Menus,Title Menus Disc Menus Some DVDs contain menus that describe the contents of the disc or allow you to customize disc playback. For example, the menu may offer choices for subtitle languages, special features or scene selection. -
Page 59: Fast Forward/Fast Reverse 59
T3221UB_EN2 4/20/06 9:31 PM Page 59 ● Before you begin, press SELECT to put the TV/VCR/DVD in DVD mode. The green DVD light will appear on the front of the TV/VCR/DVD. During playback, press and hold j/h or i/g on the remote control to fast forward or fast reverse the picture. -
Page 60: Chapter/Title/Time Search
T3221UB_EN2 4/20/06 9:31 PM Page 60 60 Chapter/Title/Time Search ● Before you begin, press SELECT to put the TV/VCR/DVD in DVD mode. The green DVD light will appear on the front of the TV/VCR/DVD. During disc playback, press MODE repeatedly until the Search menu appears in the information bar at the top of the screen. -
Page 61: Track Search 61
T3221UB_EN2 4/20/06 9:31 PM Page 61 Track Search There are three ways to search for a track. Refer to A-C below. ● Before you begin, press SELECT to put the TV/VCR/DVD in DVD mode. The green DVD light will appear on the front of the TV/VCR/DVD. Make sure a valid disc is in the disc tray. -
Page 62: Paused And Step-By-Step Playback, Resume On
T3221UB_EN2 4/20/06 9:31 PM Page 62 62 Paused and Step-by-Step Playback, Resume On Paused Playback Step-by-Step Playback ● Before you begin, press SELECT to put the TV/VCR/DVD in DVD mode. The green DVD light will appear on the front of the TV/VCR/DVD. During disc playback, press PAUSE F. -
Page 63: Repeat, A-B Repeat 63
T3221UB_EN2 4/20/06 9:31 PM Page 63 Repeat ● Before you begin, press SELECT to put the TV/VCR/DVD in DVD mode.The green DVD light will appear on the front of the TV/VCR/DVD. During disc playback, press MODE repeatedly until the Repeat menu appears in the information bar at the top of the screen. -
Page 64: Markers
T3221UB_EN2 4/21/06 4:35 PM Page 64 64 Markers Marker Setting/Marker Search You can put marks on your favorite playback points and can easily call them back later during playback. ● Before you begin, press SELECT to put the TV/VCR/DVD in DVD mode. The green DVD light will appear on the front of the TV/VCR/DVD. -
Page 65: Subtitles, Camera Angles 65
T3221UB_EN2 4/20/06 9:31 PM Page 65 Subtitles You can select a language for DVD subtitles during playback. You may select only the subtitles that are available on the DVD. ● Before you begin, press SELECT to put the TV/VCR/DVD in DVD mode. The green DVD light will appear on the front of the TV/VCR/DVD. -
Page 66: Audio Language, Stereo Sound
T3221UB_EN2 4/20/06 9:31 PM Page 66 66 Audio Language, Stereo Sound Audio Language You can select a language for DVDs during playback if multiple languages are available. ● Before you begin, press SELECT to put the TV/VCR/DVD in DVD mode. The green DVD light will appear on the front of the TV/VCR/DVD. -
Page 67: Slow Motion, Zoom 67
T3221UB_EN2 4/20/06 9:31 PM Page 67 Slow Motion Press PAUSE F during DVD or Video CD playback. Press and hold j/h or i/g for a few seconds. Slow Motion Playback will begin. Press j/h or i/g repeatedly to play the DVD forward or backward at approximately 1/16, 1/8 or 1/2 the normal speed. -
Page 68: Random Playback, Program Playback
T3221UB_EN2 4/20/06 9:31 PM Page 68 68 Random Playback, Program Playback Random Playback You may play the tracks / files in Random order instead of the order in which they are recorded (1, 2, 3...). ● Before you begin, press SELECT to put the TV/VCR/DVD in DVD mode.The green DVD light will appear on the front of the TV/VCR/DVD. -
Page 69: Mp3/Windows Media Tm Audio/Jpeg Playback
T3221UB_EN2 4/21/06 4:26 PM Page 69 MP3/Windows Media The DVD player will play MP3,Windows Media JPEG files that you record and finalize on a CD-R (Compact Disc-Recordable) or CD-RW (Compact Disc-Rewritable). ● You cannot make or record such discs using this unit. See your computer manual for details on making or recording such discs. -
Page 70: Dual Playback, Folder Playback
T3221UB_EN2 4/20/06 9:31 PM Page 70 70 Dual Playback, Folder Playback Dual Playback This feature lets you play MP3 and JPEG files simultaneously. Available only when Dual Playback is on. See pages 82-83 on how to set the Dual Playback on or off. Press SELECT to put the DVD/VCR in DVD mode. -
Page 71: On-Screen Displays 71
T3221UB_EN2 4/20/06 9:31 PM Page 71 DVD Display ● Before you begin, press SELECT to put the TV/VCR/DVD in DVD mode. The green DVD light will appear on the front of the TV/VCR/DVD. Press DISPLAY repeatedly to show the following information on the screen during DVD playback. - Page 72 T3221UB_EN2 4/21/06 7:17 PM Page 72 72 On-Screen Displays (cont’d) MP3/Windows Media ● Before you begin, press SELECT to put the TV/VCR/DVD in DVD mode. The green DVD light will appear on the front of the TV/VCR/DVD. Press DISPLAY until the current track or file information appears.
-
Page 73: Black Level, Virtual Surround, Initializing 73
(Emphasized) or OFF. The default setting is OFF. The information bar will disappear after about 1 minute. Initializing You can return all the DVD player’s Setup menu items (except for PARENTAL) to their default settings. ● Before you begin, press SELECT to put the TV/VCR/DVD in DVD mode. -
Page 74: Language Settings
T3221UB_EN2 4/20/06 9:31 PM Page 74 74 Language Settings You can use the LANGUAGE settings to select different languages for the Audio or Subtitles of DVDs, as well as languages for DVD Disc menus. ● Before you begin, press SELECT to put the TV/VCR/DVD in DVD mode. -
Page 75: Language Settings
T3221UB_EN2 4/20/06 9:31 PM Page 75 Press K or L to select a language, then press ENTER. The language lists may continue on multiple screens. Press K or L to move to the other screens. ● If you select OTHER, press four Number buttons to enter the code for the language you desire. -
Page 76: Display Settings
T3221UB_EN2 4/20/06 9:31 PM Page 76 76 Display Settings You can change the TV Aspect ratio and still mode clarity in the Display menu. ● Before you begin, press SELECT to put the TV/VCR/DVD in DVD mode. The green DVD light will appear on the front of the TV/VCR/DVD. - Page 77 T3221UB_EN2 4/20/06 9:31 PM Page 77 Press K or L to select an item, then press ENTER. ● If you selected TV MODE, press K or L to select a setting, then press ENTER. Choose 4:3 LETTER BOX if you want to see the entire, widened picture with black bars at the top and bottom of the screen.
-
Page 78: Audio Settings
78 Audio Settings Change Audio settings based on other equipment you connected to the TV/VCR/DVD or according to your disc sound features. These settings only affect the Audio from the DVD player of the TV/VCR/DVD. ● Before you begin, press SELECT to put the TV/VCR/DVD in DVD mode. -
Page 79: Parental Settings 79
T3221UB_EN2 4/20/06 9:31 PM Page 79 The Parental feature prevents viewing of DVDs that exceed your rating limits. This feature will not limit viewing if the DVD is not rated or coded. Check your DVDs and settings before letting children access the TV/VCR/DVD. Follow these steps to set the Parental Level. - Page 80 T3221UB_EN2 4/20/06 9:31 PM Page 80 80 Parental Settings (cont’d) Instructions continued from the previous page. The display shown below will appear. PARENTAL Enter current password. ENTER Press the Number buttons to enter your current 4-digit password. Asterisks ( * ) will appear instead of your password.
- Page 81 T3221UB_EN2 4/20/06 9:31 PM Page 81 Changing the Parental Password If you like to change the password, repeat 1-4B on pages 79-80. Press K or L to select PASSWORD CHANGE, then press ENTER. PARENTAL PASSWORD ENTER Press the Number buttons to enter a 4-digit password.
-
Page 82: Others
T3221UB_EN2 4/20/06 9:31 PM Page 82 82 Others You may adjust the Angle Icon, Automatic Power Off, Dual Playback and Slide Show settings. ● Before you begin, press SELECT to put the TV/VCR/DVD in DVD mode. The green DVD light will appear on the front of the TV/VCR/DVD. - Page 83 T3221UB_EN2 4/20/06 9:31 PM Page 83 Press K or L to select an item, then press ● If you selected ANGLE ICON, press repeatedly to select ON or OFF. The default setting is ON. Choose ON to see the Angle icon when multiple camera angles are available during DVD playback.
-
Page 84: Glossary
T3221UB_EN2 4/20/06 9:31 PM Page 84 84 Glossary AUDIO In Jacks: red and white jacks on the front of the TV/VCR/DVD which are used to receive or record audio from another source (VCR, Camcorder, etc.). Automatic Channel Setup: process in which the TV/VCR/DVD memorizes all available TV channels. -
Page 85: Helpful Hints 85
T3221UB_EN2 4/20/06 9:31 PM Page 85 If you are having problems with your product, check this list of problems and possible solutions before requesting service. You may be able to solve the problem yourself. Location For safe operation and satisfactory performance of your TV/VCR/DVD, remember the following: •... -
Page 86: Helpful Hints
• Adjust the picture controls. Details are on page 28. • Select an active TV channel. Details are on pages 19-20. • Make sure the disc is compatible with the DVD player of the TV/VCR/DVD. Details are on page 7. TV/VCR/DVD has poor sound or no sound. -
Page 87: Specifications 87
T3221UB_EN2 4/20/06 9:31 PM Page 87 General TV/VCR CRT: 29 inch in-line gun 90˚ deflection tube Closed Caption system: 15.119/FCC Video Heads: Rotary four-head Tape width: 1/2 inch Tape speeds 33.40 mm/sec. 11.12 mm/sec. Tuner channels: 2-69 Cable TV: 1-125 2-69 General DVD Color System:... -
Page 88: Limited Warranty
Philips is not liable for any damage to or loss of any programs, data, or other information stored on any media contained with- in the product, or any non-Philips product or part not covered by this warranty. -
Page 89: Index 89
T3221UB_EN2 4/20/06 9:31 PM Page 89 a-b repeat ....63 ant(enna) jack ...9-10, 15 arrow buttons . - Page 90 T3221UB_EN2 4/20/06 9:31 PM Page 90 90 MEMO...
- Page 91 T3221UB_EN2 4/20/06 9:31 PM Page 91 MEMO 91...
- Page 92 T3221UB_EN2 4/20/06 9:31 PM Page 92 PHILIPS CONSUMER ELECTRONICS A Division of Philips Electronics North America Corp P. O. Box 671539 Marietta, GA 30006 0026 Meet Philips at the Internet http://www.philips.com/usasupport 27PC4326/37 CLASS 1 LASER PRODUCT 8239 300 47411 Printed In Malaysia...