Table of Contents
Advertisement
Quick Links
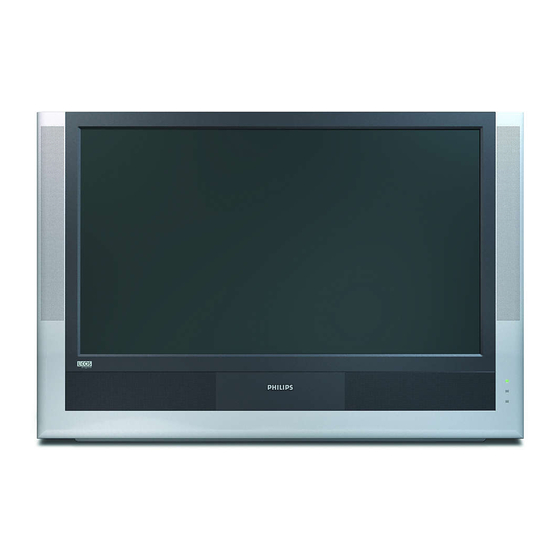
55PL9224
55PL9524
62PL9524
Highlights
• Liquid-crystal-on-silicon (LCOS) High-definition
Imaging
• High-resolution Display—1280 x 720 pixels
Features
• Digital Natural Motion™
• Active Control™—analyzes and adjusts incoming signal
• Two-tuner, Double-window PIP (Picture-in-Picture)
®
• Dolby
Virtual Surround, 30-watt RMS
• 3D Y/C Comb Filter
• HD Component and DVI Input
• Side AV Convenience Jacks
• Matching stand and swivel available
Refer to the Quick Use and Setup Guide (supplied with your TV)
for information on basic connections, remote control button
descriptions, on-screen menu language, and Autoprogram.
3135 035 22903
™
HDTV Monitor
HDTV Monitor
Advertisement
Table of Contents

Related Manuals for Philips Cineous 55PL9224


Summary of Contents for Philips Cineous 55PL9224
- Page 1 55PL9224 55PL9524 62PL9524 Highlights • Liquid-crystal-on-silicon (LCOS) High-definition Imaging • High-resolution Display—1280 x 720 pixels Features • Digital Natural Motion™ • Active Control™—analyzes and adjusts incoming signal • Two-tuner, Double-window PIP (Picture-in-Picture) ® • Dolby Virtual Surround, 30-watt RMS • 3D Y/C Comb Filter •...
-
Page 2: Introduction Welcome/Registration Of Your Tv
Return your Product Registration Card today to get the very most from your purchase. Registering your model with PHILIPS makes you eligible for all of the valuable benefits listed below, so don't miss out. Complete and return your Product Registration Card at once to ensure:... -
Page 3: Safety/Precautions
IMPORTANT SAFETY INSTRUCTIONS Read before operating equipment Read these instructions. Keep these instructions. Heed all warnings. Follow all instructions. Do not use this apparatus near water. Clean only with a dry cloth. Do not block any of the ventilation openings. Install in accordance with the manufacturers instructions. -
Page 4: Table Of Contents
NTRODUCTION ....Welcome/Registration of Your TV Safety/Precautions ....... .3 Features . -
Page 5: Features
TV’s memory. Surf Button Philips Auto Surf™ allows you to easily switch between only the channels that are of interest to you. Surf allows two-channel surfing or nine-channel surfing. -
Page 6: To Your Tv
Ways TV Signals Can Come to Your Home Over the Air Satellite TV Company Satellite Cable TV Company Cable Your High-definition-ready Set High-definition television offers a picture with unprecedented crispness and clarity. The TV broadcast industry is moving toward high definition as the signal standard. -
Page 7: Descriptions Of Jacks, Cables, And Connectors
Descriptions of Jacks, Cables, and Connectors This page contains descriptions and illustrations of jacks, cables, and connectors you might use in making connections. The cables and connectors are not supplied with your TV, but you can pur- chase at your electronics dealer. Or you can order them by calling our Customer Care Center at 1-800-531-0039. -
Page 8: Panel Jack Compatibility Information
Panel Jack Compatibility Information AV 1 Input Jacks Signals accepted: NTSC (480i). Inputs available: YPbPr, S-Video (Y/C), and CVBS, plus audio left and right. Use only one of the video signal inputs at a time. If you should forget and have more than one type of signal connected, the set will automatically show the one of better quality: CVBS—good, S-Video—bet- ter, and YPbPr—best. -
Page 9: Pre-Connection Recommendations
• Don’t stack the accessory devices. Arrange them to allow for good ventilation. The optional Philips stand provides enough room for two accessory devices, side by side. • If you connect an audio receiver or amplifier, place it on the top shelf so the heated air from it will not flow around other components. -
Page 10: Connecting A Vcr
Connect the incoming antenna or cable TV signal to the ANT IN jack on the back of the VCR. Using a coaxial cable, connect to the OUT jack on the back of the VCR and to the TUNER jack on the back of the Using A/V cables, connect from the AUDIO and VIDEO OUT jacks on the back of the VCR to the corresponding... -
Page 11: Connecting A Vcr And Cable Box
Connecting a VCR and Cable Box NOTE: A cable box with AUDIO OUT jacks such as the one used in the example on this page might pass stereo sound to the TV. Check with your cable TV company. The RF jack out- put jack on a cable box (commonly labeled “OUT TO TV,”... -
Page 12: Connecting An S-Video Device
Using an S-Video cable, connect to the S-Video output on the back of the S-Video device and to the AV2 S- VIDEO input. Using Stereo Audio cables, connect to the AUDIO OUT jacks on the back of S-Video device and to the correspon- ding AV2 audio inputs (L and R). -
Page 13: Connecting A Standard Dvd Player
Connecting a Standard DVD Player Using Audio/Video cables, connect to the YPbPr jacks on the back of the standard DVD player and to the AV1 YPbPr jacks on the back of the TV. Using Stereo Audio cables, connect to the AUDIO OUT jacks on the back of the DVD player and to the correspon- ding AV1 audio (L and R) jacks on the back of the TV. -
Page 14: Connecting A Progressive-Scan Dvd Player
Connecting a Progressive-scan DVD Player Using Audio/Video cables, connect to the YPbPr jacks on the back of the pro- gressive-scan DVD player and to the AV3 or AV4 YPbPr jacks on the back of the TV. Using Stereo Audio cables, connect to the AUDIO OUT jacks on the back of the DVD player and to the correspon- ding AV3 or AV4 audio (L and R) jacks... -
Page 15: Connecting An Hd Satellite Receiver To Ypbpr
Connecting an HD Satellite Receiver to YPbPr Using Component Video cables, con- nect to the YPbPr jacks on the back of the HD satellite receiver and to the cor- responding AV3 or AV4 YPbPr jacks on the back of the TV. Using Stereo Audio cables, connect to the AUDIO OUT jacks on the back of the HD satellite receiver and to the cor-... -
Page 16: Connecting An Hd Satellite Receiver To Dvi
• Because DVI is such new technology, the electronics industry is still working toward a decision on one standard. Philips testing has determined that com- patibility issues exist with respect to a limited number of high-definition receivers when they are connected to the DVI input on this television. -
Page 17: Connecting Surround Sound Equipment
Connecting Surround Sound Equipment Using Stereo Audio cables, connect to the MON OUT L and R jacks on the back of the TV and to the correspon- ding TV IN jacks on the back of the receiver. Using an Audio cable, connect to the SUB OUT jack on the back of the TV and to the Audio Input jack on the back of a powered subwoofer. -
Page 18: Connecting To The Side Inputs:video Game System
Connecting to the Side Inputs:Video Game System Using the Audio/Video cable supplied with your video game system, connect to the back of the game system and to the corresponding S-VIDEO and AUDIO (L and R) jacks in the Side panel of the TV. NOTE: If your game system cable does not have an S-Video plug, you can instead make a regular Video... -
Page 19: Labeling The Audio/Video Input Sources
Labeling the Audio/Video Input Sources You can label all the external Audio/Video input sources—AV1, AV2, AV3, AV4, AV5, AV6, and Side—according to the type of accessory device you have connected to each input. After labeling, you can use the Source button to cycle through and select your desired source. -
Page 20: Remote Control Buttons
Use manual.) Remote Control Buttons Active Control, AutoSurf, Incredible Surround, are trademarks of Philips Consumer Electronics. Copyright 2004 Philips Consumer Electronics. All rights reserved. *Manufactured under license from Dolby Laboratories. “Dolby” and the double-D symbol are trademarks of Dolby Laboratories. -
Page 21: Remote Control Buttons
Remote Control Buttons INFO SELECT SURR SCREEN FORMAT SURF ® ® ® ® ACTIVE SLEEP CONTROL TIMER CLOCK AUTO AUTO Standby–On (Power) Press to turn the TV on or off. NOTE: The TV is never powered off completely unless it is physically unplugged from the power source. -
Page 22: Programming The Remote Control
Your TV remote control can operate accesso- ry devices such as cable boxes, VCRs, DVD players, satellite receivers, and amplifiers. Normally, the remote is in TV mode. You must press the Select button to switch the remote to one of the accessory modes—CBL, VCR, DVD, SAT, or AMP. -
Page 23: Programming The Remote Control
Programming the Remote Control Now try to use the remote control with the accessory device to see if it is correctly pro- grammed. Press the Select button on the remote to select the type of device. When the mode you desire lights up, stop press- ing the button. -
Page 24: Programming The Remote Control: Setup Codes
Optimus .....0422, 0327 Philips ......0296 Pioneer . - Page 25 Panasonic ....0517, 0659 Philips ..... .0566, 0530 Pioneer .
-
Page 26: Operating Accessory Devices With The Tv Remote
Operating Accessory Devices with the TV Remote Once you have programmed your TV remote, refer to page 27 to see how the remote func- tions with accessory devices. Before the remote will operate an accessory device, you must select the correct mode: CBL (cable box), VCR, DVD, SAT (satellite), or AMP (amplifier). -
Page 27: Vcr Mode
Operating Accessory Devices with the TV Remote VCR Mode Mode Select Power On/Off Pause Display Play Rewind Fast-Forward INFO SELECT SURR Stop SCREEN FORMAT SURF ® Record ® ® Cursor Up, ® Down, Right, Left Channel +, – Digits Menu On/Off Volume +, –... -
Page 28: Using Active Control™ Plus
Active Control™ Plus monitors incoming video signals from the Tuner, AV1, AV2, and Side inputs and adjusts key picture settings for best picture quality. In addition to measur- ing picture noise, this feature uses an ambient light sensor (located on the front of the TV) to adjust the picture settings according to viewing conditions in the room. -
Page 29: Picture
Selecting an AutoPicture™ Option Whether you’re watching a movie or playing a video game, your TV has automatic video control settings to match your current pro- gram source or content. AutoPicture™ quick- ly resets your TV’s video controls for a num- ber of different types of programs and view- ing conditions that you may have in your home. - Page 30 Adjusting/Setting the Picture Controls To adjust your TV picture controls, select a chan- nel and follow these steps. Press the Menu button on the remote con- trol to show the on-screen menu. Press the Cursor Right button to select “Picture.” Press the Cursor Down button to select one of the picture adjustments: “Contrast,”...
-
Page 31: Selecting A Digital Processing Option
Selecting a Digital Processing Option The Digital Processing control gives you a choice of different picture scanning modes. Progressive Scan doubles the number of pic- ture lines, eliminating line flicker and provid- ing a jitter-free picture. Movie Plus provides motion compensation to increase clarity around moving images in the picture. -
Page 32: Selecting A Dnr (Dynamic Noise Reduction) Option
Selecting a Dynamic Contrast Option The Dynamic Contrast control allows you to sharpen the picture quality by making dark portions of the picture darker and light por- tions of the picture more noticeable. Normally, you will probably want to select Medium. - Page 33 Selecting a DNR (Dynamic Noise Reduction) Option For many reasons, one of which is poor cable reception, the picture can sometimes appear slightly “speckled” (an indication of signal noise in the picture). The DNR (Dynamic Noise Reduction) control can help eliminate this type of interference and improve the quality of the picture.
-
Page 34: Turning On Color Enhancement
The Color Enhancement control can improve the picture quality of pictures with a high sat- uration of color. This control works in four ways: Dynamic Blue Stretch corrects the white col- ors toward a more bluish-colored white with- out changing the other colors. Improves the sharpness of the picture. -
Page 35: Selecting A Picture Format Option
Selecting a Picture Format Option Your TV’s wide screen (16:9 aspect ratio) delivers a home-cinema experience that isn’t possible with a conventional (4:3 aspect ratio) set. The 16:9 format of high-definition (HD) programs and other widescreen-format video sources appear more lifelike, dramatic, and theatrical. - Page 36 Selecting a Picture Format Option Choose a picture format size to match the type of program you’re watching. Select the normal 4:3 aspect ratio or a variety of widescreen formats. Press the Menu button on the remote to display the on-screen menu. Press the Cursor Right button to select “Picture.”...
-
Page 37: Sound
Adjusting the TV and Headphone Volume Besides the normal volume level control, your TV also has a headphone volume control. This control can be adjusted when using headphones without having to adjust the main volume control for the TV cabinet speakers. To control the television volume: Press the Volume + button on the remote control to increase the televi-... -
Page 38: Selecting A Tv Equalizer Option
AutoSound™ allows you to select from four factory-set controls and a personal control. The personal control consists of settings you adjust through the on-screen Sound menu. The four factory-set controls—Speech, Music, Movie, or Multimedia—enable you to tailor the TV sound to enhance the particular program you are watching. - Page 39 Selecting a TV Equalizer Option The Equalizer control will change the dynam- ics of the sound being heard through the TV. You can adjust the settings for the Personal Equalizer option. The other options have been preset at the factory and cannot be changed. Press the Menu button on the remote to display the on-screen menu.
-
Page 40: Adjusting Tv Speaker Balance
You can adjust the balance of the TV speaker sound. Press the Menu button on the remote to display the on-screen menu. Press the Cursor Right button repeated- ly to select “Sound.” Press the Cursor Down button repeat- edly until the “Balance” control is selected. -
Page 41: Turning Loudness On Or Off
Turning the Loudness control on provides a volume-dependent bass-boost effect to the speakers. Follow the steps here to turn the Loudness control on. Press the Menu button on the remote to display the on-screen menu. Press the Cursor Right button repeated- ly to select “Sound.”... -
Page 42: Selecting A Sound Mode Option
*Manufactured under license from Dolby Laboratories. “Dolby” and the double-D symbol are trademarks of Dolby Laboratories. Incredible Surround is a trademark of Philips Consumer Electronics. Copyright 2004 Philips Consumer Electronics. All rights reserved. Selecting a Sound Mode Option Picture Sound Features Channels... - Page 43 Using Alternate Audio (SAP) For broadcasts that contain SAP (Secondary Audio Program) information, the Alt Audio Control can be set to SAP. Sent as a third audio channel, SAP is an additional part of the stereo broadcast system that can be heard apart from the current TV program sound.
-
Page 44: Setting The Tv For Stereo Programming
Setting the TV for Stereo Programming Your TV can output stereo sound. It has both an amplifier and twin speakers through which the stereo sound can be heard. Press the Menu button on the remote to display the on-screen menu. Press the Cursor Right button repeated- ly to select “Sound.”... -
Page 45: Turning The Avl (Audio Volume Leveler) On Or Off
Turning the AVL (Audio Volume Leveler) on or off You may have noticed the peaks and valleys of sound that occur between program changes or at commercial breaks. The volume levels often vary considerably. By turning on the AVL (Audio Volume Leveler) control, you can make your TV produce a more consistent volume level. -
Page 46: Selecting An Autosound™ Option
The volume level coming from channel to channel and broadcast to broadcast can vary widely. The Delta Volume control will allow the volume to be increased for channels with weaker audio signals while allowing other channels with stronger signals to be reduced. When the Delta Volume control is adjusted or changed, it will affect only the currently tuned channel. -
Page 47: Using Closed Captioning
Closed Captioning (CC) allows you to read the voice content of television programs on the TV screen. Designed to help the hearing impaired, this feature uses on-screen text boxes to show dialogue and conversa- tions while the TV program is in progress. Captions will appear on screen during captioned broadcasts. -
Page 48: Setting The Sleeptimer
NOTE: If you have not selected your time zone and set the Daylight Savings control, do so before making a Sleeptimer setting. Details are on page 65. If you have ever fallen asleep while watching TV, you may have wished you could have programmed your TV to turn off automatical- ly. -
Page 49: Setting The On Timer
NOTE: Before you set the On Timer, you must set the clock. See page 65. The On Timer control allows you to set a time for the TV to come on automatically at a cer- tain time of day. The on timer can be set to work once or daily at a time you specify. -
Page 50: Channels
The Channel List control shows all the avail- able channels that Auto Programming placed in the TV memory. The channels can be selected from this list. Press the Menu button on the remote control to display the on-screen menu. Press the Cursor Right button repeated- ly to select “Channels.”... -
Page 51: Removing Channels From The Channel List
Removing Channels from the Channel List You can remove specific channels from the television’s memory by using the Channel Remove control. Press the Menu button on the remote control to display the on-screen menu. Press the Cursor Right button repeated- ly to select “Channels.”... -
Page 52: Using Lock Channel
For various reasons, you may want to block the viewing of materials on a specific channel or channels or through the audio/video (AV) inputs. Lock Channel provides this capability. Before using the Lock Channel feature for the first time, you will be asked to enter the PIN number. -
Page 53: Using Lock After
You may want to block programming after a certain time of day. This feature is excellent for limiting the amount of time your children watch TV or for preventing them watching unsuitable programs that are often shown at night. NOTE: The set automatically unlocks after 3 a.m. -
Page 54: Blocking Programming Based On Tv Ratings
Blocking Programming Based on TV Ratings You can select specific TV Ratings to block broadcast signals that have unsuitable content. Press the Menu button on the remote control to display the on-screen menu. Press the Cursor Right button repeated- ly to select “Channels.” Press the Cursor Down button repeat- edly to select the “TV ratings lock”... -
Page 55: Blocking Programming Based On Movie Ratings
Blocking Programming Based on Movie Ratings You can prevent the viewing of unsuitable programming based on movie ratings. Press the Menu button on the remote control to display the on-screen menu. Press the Cursor Right button repeated- ly to select “Channels.” Press the Cursor Down button repeat- edly to select the “Movie ratings lock”... -
Page 56: Turning The Antenna Attenuator On Or Off
Turning the Antenna Attenuator on or off If you live near a television station’s transmit- ter tower, you may receive an interfering sig- nal from the station while watching other TV channels. Your television’s Antenna Attenuator control is designed to reduce the strength of such a signal in the presence of a strong main signal. -
Page 57: General
You can access a list of previously viewed channels with the Surf button on the remote control. With Surf you can easily switch between different TV channels that currently interest you. Surf allows you to set up the tele- vision to cycle through two or nine channels by pressing the Surf button on the remote con- trol. -
Page 58: Using Dual Screen And Pip
The Dual Screen feature, also referred to as Picture In Picture (PIP), will allow you to choose the size of the dual screen window to be displayed when the Dual Screen/PIP but- ton is pressed on the remote control. The win- dow can be set to Dual Screen, Large PIP, or Small. - Page 59 Changing Channels/Input Sources and Repositioning Dual Screen/PIP When using Dual Screen: A light-colored border indicates the selected screen. If the screen whose channel or input source you want to change is not selected, press the Cursor Right or Left button to select the desired screen.
-
Page 60: Selecting A Picture Freeze Option
The Freeze control provides three ways for you to stop the action of programs. The Freeze control options allow you to get a bet- ter look at exciting sports plays or copy down broadcasted addresses or phone numbers. The steps below explain how to select an option. Press the Menu button on the remote control to display the on-screen menu. -
Page 61: Resetting The Audio/Video Settings To Factory Default Values
Resetting the Audio/Video Settings to Factory Default Values You can reset the TV’s Sound and Picture set- tings to the factory default values. Press the Menu button on the remote control to display the on-screen menu. Press the Cursor Down button to select “Settings.”... -
Page 62: Selecting An On-Screen Display Option
Selecting an On-screen Display Option The television’s on-screen display (OSD) can be set to show only the current channel num- ber or the channel number with additional TV operating modes and status-screen informa- tion. Press the Menu button on the remote control to display the on-screen menu. -
Page 63: Setting Up Or Changing A Pin (Personal Identification Number)
Setting up or Changing a PIN (Personal Identification Number) In the General menu, you can set up a new PIN number or change an existing one for the Lock Channel feature. Press the Menu button on the remote control to display the on-screen menu. Press the Cursor Down button to select “Settings.”... -
Page 64: Setting The Subwoofer Control
If you connect a home-cinema surround- sound system with subwoofer to your TV (see page 15), you will need to select the Subwoofer “Yes” option in the TV’s on- screen menu. These steps explain how. Press the Menu button on the remote control to display the on-screen menu. -
Page 65: Setting The Clock-Auto Clock Mode
Setting the Clock—Auto Clock Mode There are several features which require the TV clock to be set. You can either set the clock manually or have the TV acquire the time from the appropriate TV channel. Press the Menu button on the remote control to display the on-screen menu. -
Page 66: Setting The Clock Manually
If you select Manual in the Auto Clock Mode, you need to set the time manually. Press the Menu button on the remote control to display the on-screen menu. Press the Cursor Down button to highlight “Settings.” Press the Cursor Right button repeat- edly to select the “Clock”... -
Page 67: Selecting A Time Zone And Setting The Daylight Savings Control
Selecting a Time Zone and Setting the Daylight Savings Control Your television can acquire the current time from the signal being received. It needs to know your Time Zone, however, and whether or not you use Daylight Savings. Press the Menu button on the remote control to display the on-screen menu. -
Page 68: Using Installation Features: Language And Autoprogram
Using Installation Features: Language and Autoprogram For Spanish- and French-speaking TV own- ers, an on-screen Language option is present. The Language control enables you to set the TV’s on-screen menu to be shown in either English, Spanish, or French. Press the MENU button on the remote control to show the on-screen menu. -
Page 69: Cleaning The Tv
WARNING To avoid possible shock hazard, be sure the TV is unplugged from the electrical outlet before cleaning. Cleaning the Cabinet • Regularly dust the TV cabinet with a dry, nonscratching duster. • Gently wipe the cabinet surfaces with a soft, clean cloth. -
Page 70: Cleaning Or Replacing The Filters
To order replacement filters, call the Philips Customer Care Center at 1-800-531-0039. The part number for the Philips TV inlet filter assembly is 3135 037 51810. WARNING: DO NOT operate the TV without fil- ters. -
Page 71: Replacing The Lamp
Philips Customer Care Center at 1-800-531-0039. A Philips associate will be happy to assist you. The part number for the Philips TV replacement lamp is 3122 438 71310. Here are the steps for replacing the lamp: Power off the TV. Unplug the TV. - Page 72 Continued from page 71. CAUTION: When removing the lamp, do not touch the glass envelope. It may still be hot. Grasp the handle, then pull out and slightly down to remove. WARNING: The lamp contains mer- cury. Dispose of the lamp in accor- dance with local, state, and federal regulations.
-
Page 73: Resetting The Lamp's Lifetime Counter
“Lamp rating” list in the on- screen menu and select the alphabetical code that is provided with the lamp. The recom- mended Philips replacement Lamp is rated for 6000 hours, an F rating The next step is to use the “Lamp replaced control”... -
Page 74: Troubleshooting
Review This List of Symptoms and Checks Before Requesting Service You may be able to solve the problem yourself. Charges for TV installation and adjustment of customer controls are not cov- ered under your warranty. If you need to call a customer service representative, please know the model number and serial number of your product before you call. - Page 75 TV-related Checks (continued) You have no picture. • If you have made a connection to the TV’s Tuner jack be sure to use Autoprogram. (page *Q8). • If you want to view materials from an accessory device (DVD player, VCR, or satellite receiver, for example) be sure you have selected the input source to which you have connected the device—AV1, AV2, AV3, AV4, AV5, AV6, or Side.
-
Page 76: Product Specifications
To order the parts, contact the Philips Customer Care Center at 1-800-531-0039. *Manufactured under license from Dolby Laboratories. “Dolby” and the double-D symbol are trademarks of Dolby Laboratories. AutoLock and Easy Tune are trademarks of Philips Consumer Electronics. Copyright 2004 Philips Consumer Electronics. All rights reserved. Product Specifications •... -
Page 77: Index
Active Control™ Plus, 28 Active Control™ Plus Window, *Q5 Active Standby Window, *Q5 Alternate Audio (SAP) Control, 42 Antenna Attenuator, 56 Audio/Video Input Sources, Labeling, 19 AutoPicture™ Options, 34 AutoSound™ Options, 46 AVL (Auto Volume Leveler), 44 AV5 Clock Frequency and Phase, Adjusting, 15 Blocking Programs Based on TV Ratings, 54 Based on Movie Ratings, 55... -
Page 80: Limited Warranty
Philips Consumer Electronics Company. In coun- tries where Philips Consumer Electronics Company does not distribute the product, the local Philips service organization will attempt to pro- vide service (although there may be a delay if the appropriate spare parts and technical manual(s) are not readily available).