Table of Contents
Advertisement
Quick Links
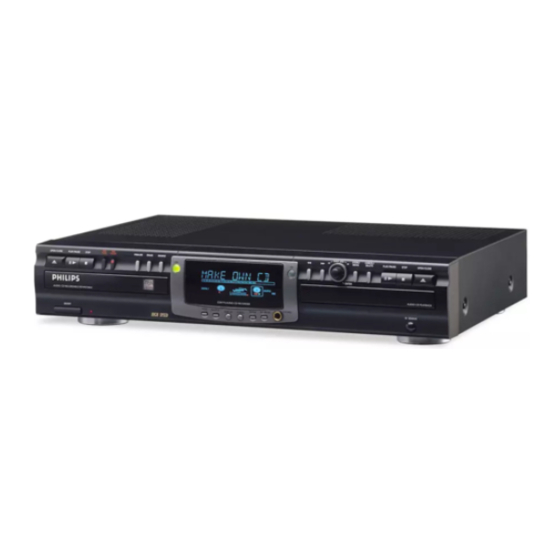
Audio CD Recorder
CDR775/777
•
•
Instructions for use
Instructions for use
•
•
Mode d'emploi
Mode d'emploi
•
•
Instrucciones de manejo
Instrucciones de manejo
•
•
Bedienungsanleitung
Bedienungsanleitung
•
•
Gebruiksaanwijzing
Gebruiksaanwijzing
•
•
Istruzioni per l'uso
Istruzioni per l'uso
•
•
Brugsanvisning
Brugsanvisning
•
•
Bruksanvisning
Bruksanvisning
•
•
Käyttöohje
Käyttöohje
•
•
Manual de utilização
Manual de utilização
•
•
O‰ËÁ›Â˜ ¯Ú‹Ûˆ˜
O‰ËÁ›Â˜ ¯Ú‹Ûˆ˜
•
Instrukcja obs¬ugi
OPEN / CLOSE
OPEN / CLOSE
OPEN / CLOSE
PLAY / PAUSE
PLAY / PAUSE
PLAY / PAUSE
REC
STOP
STOP
STOP
RECORD
TYPE
FINALIZE
FINALIZE
ERASE
ERASE
Recordab le
ON / OFF
EXT
EXT
SOURCE
SOURCE
PROG
SHUFF LE
DISPLA Y
SCROL L
DJ MODE
REPEA T
EASY JOG
EASY JOG
STORE/
STORE/
5
CANCEL /
CANCEL /
5
6
6
J
J
K
K
MENU
MENU
DELETE
DELETE
PLAY/PA USE
PLAY/PA USE
ENTER
PHON ES
STOP
STOP
OPEN/CL OSE
OPEN/CL OSE
IR SENSOR
Advertisement
Table of Contents

Related Manuals for Philips CDR775/777


Summary of Contents for Philips CDR775/777
- Page 1 Audio CD Recorder CDR775/777 • • Instructions for use Instructions for use • • Mode d'emploi Mode d'emploi • • Instrucciones de manejo Instrucciones de manejo • • Bedienungsanleitung Bedienungsanleitung • • Gebruiksaanwijzing Gebruiksaanwijzing • • Istruzioni per l'uso Istruzioni per l'uso •...
-
Page 2: General Information
PERFORMANCE OF PROCEDURES OTHER THAN THOSE SPECIFIED HEREIN MAY RESULT IN HAZARDOUS RADIATION EXPOSURE OR OTHER UNSAFE OPERATION. NEVER MAKE OR CHANGE CONNECTIONS WITH THE POWER SWITCHED ON. The CDR775/777 is in conformity with the EMC directive and low-voltage directive. LASER Type Semiconductor laser GaAlAs Wave lenght 775~795 nm (at 25°... - Page 3 CONTENTS English ...5 Français...33 Español ...61 Deutsch...89 Nederlands ...117 Italiano...145 Svenska...173 Dansk ...201 Suomi...229 Português...257 ŒÏÏËÓÈο ...285 Polski...313...
- Page 4 NOTES...
-
Page 5: Table Of Contents
DISPLAY indications...9 DISPLAY messages ...10 MENU messages...11 INSTALLATION Connections general ...11 Analog connections CD recorder & CD player ...12 Analog connections CD player deck...12 Digital coaxial connections CD recorder ...13 Digital optical connections CD recorder...13 Power supply...14 Setup recommendations ...14 Inserting batteries in the remote control ...14... -
Page 6: Welcome
Thank you for buying this Philips Compact Disc Recorder / Player Double Deck. In the eighties Philips invented a new audio system - the CD. The CD (compact disc) revealed to you the new dimensions of digital sounds and added to the pleasures of audio. -
Page 7: General Information And Discs
When finalized, they play on CDRW compatible CD players and recorders. In the course of 1999 most Philips CD players and recorders will be CDRW compatible. Important: To ensure proper working of the set we recommend the use of Philips audio CDR and audio CDRW discs only. -
Page 8: Controls And Connections
Note: Unless stated otherwise, all controls are on the front of the CD recorder. When provided on the remote control, you can also use the corresponding buttons, after selecting the CD recorder deck or CD player deck by pressing CDR or CD. ANALO G... -
Page 9: Connections At The Back
2 ANALOG OUT ...connects CD player deck to the line input of an amplifier (left and right) 3 DIGITAL OUT CD ...connects CD player deck to the digital coaxial input of e.g. amplifier or recording device 4 ANALOG IN ...connects to the line output of an amplifier (left and right) 5 ANALOG OUT CDR &... -
Page 10: Display Messages
PRESS RECORD ...to start manual recording, finalizing or erasing START SOURCE ...to start synchronised recording from a source (e.g. CD player) FINALIZED CD ...when trying to record on a finalized CDR or a prerecorded CD UNFINALIZE/ ...when trying to record on a... -
Page 11: Menu Messages
We have described the most common ways of connecting the CD recorder. If you still have difficulties with the connections you can always contact the Philips Consumer Service desk in your country. INSTALLATION... -
Page 12: Analog Connections Cd Recorder & Cd Player
(Connect the red plugs to the R sockets, and the white plugs to the L socket.) Note: - Never use the PHONO input. - Your CD recorder/player is equipped with a digital coaxial output for the CD player deck. This output can be used for digital playback. -
Page 13: Digital Coaxial Connections Cd Recorder
Digital coaxial connections CD recorder This connection is only required if you want to make recordings from an external CD player with a digital coaxial output. Use the digital coaxial cable supplied. 1 For external recording, connect the cable 4 between the DIGITAL IN-socket on the CD recorder and the DIGITAL OUT- socket of an external CD player. -
Page 14: Power Supply
INSTALLATION Power supply 1 Plug the power cord supplied into the MAINS connector on the CD recorder, then into a mains socket. 2 Press ON/OFF. The CD recorder will switch on. Note: - If the CD recorder is in Standby mode (red led on), press any key to activate the recorder. -
Page 15: Remote Control
SPACE...inserts a space character during text input SCROLL...activates scrolling of text over the display CDR ...selects CD recorder deck CD ...selects CD player deck 2 ...starts CD(RW) play O ...- previous track (Play and Program mode) - cursor control in Menu/Prog. -
Page 16: Recording
• CD text can be added to a recording in Stop mode and during recording. • CD text can not be recorded from an external CD player. (Text information is not available on the output of the CD player.) •... -
Page 17: High Speed Recording From Internal Cd Player
SHUFFLE REPEAT SCAN TRACK Important: STEP If you want to play the recorded CDR disc on any regular CD player, it must first be finalized. See finalizing discs. PROG SHUFFLE REPEAT SCAN TRACK Finalized CDRW discs play only on CDRW compatible CD players. -
Page 18: Listen Mode Recording From Internal Cd Player
Note: In this Recording mode, the Pause function is not operative. PROG SHUFFLE REPEAT Important: SCAN TRACK If you want to play the recorded CDR disc on any regular CD player, it must first be finalized. See finalizing discs. Finalized CDRW discs play only on CDRW compatible CD players. -
Page 19: Manual Recording From External Cd Player
With AUTO TRACK OFF, the auto stop mode is disabled. Important: If you want to play the recorded CDR disc on any regular CD player, it must first be finalized. See finalizing discs. Finalized CDRW discs play only on CDRW compatible CD players. -
Page 20: Autostart Recording From External Cd Player Cd-Sync
20 seconds silence. - Auto track is always active. STEP Important: If you want to play the recorded CDR disc on any PROG regular CD player, it must first be finalized. See SHUFFLE REPEAT finalizing discs. SCAN TRACK Finalized CDRW discs play only on CDRW compatible CD players. -
Page 21: Finalizing Cdr & Cdrw Discs
During finalizing the Table of Contents (TOC) is written to the disc. Finalizing is a simple procedure, necessary to: - be able to play recordings on a CD PLAYER, - avoid further unwanted recordings on a disc, - avoid erasure of tracks on a CDRW, - write CD text on a CDR(W). -
Page 22: Erasing Cdrw Discs
RECORDING Erasing CDRW discs EASY JOG STORE/ CANCEL/ MENU ENTER OPEN / CLOSE OPEN / CLOSE PLAY / PAUSE PLAY / PAUSE STOP STOP RECORD TYPE FINALIZE ERASE SOURCE For unfinalized CDRW discs only. You can erase: - Tracks can only be erased from the end. 9 10 - With the EASY JOG you can erase more tracks. -
Page 23: Playing
Playing CDs on Deck 1 and/or Deck 2 (DJ mode) With this double deck it is possible to play the CD recorder deck and/or the CD player deck individually (at the same time). In this case the extra CD output must also be connected to an amplifier. -
Page 24: Selecting A Track
PLAYING Selecting a track EASY JOG STORE/ CANCEL/ MENU DELETE ENTER OPEN / CLOSE OPEN / CLOSE PLAY / PAUSE PLAY / PAUSE STOP STOP TYPE RECORD FINALIZE ERASE SOURCE Selecting a track during play 1 Turn the EASY JOG/ENTER key until the required track number appears on the display. -
Page 25: Shuffle (Random Order) Play
Shuffle (random order) play Only in Changer mode. 1 Select Changer mode, if nessesary, using the DJ MODE key. 2 Press SHUFFLE before or during CD play to start shuffle play. The tracks on the CD (or program if set) play in random order. -
Page 26: Programming
‘Recording’). 2 Compile your programme as described in “programming for playback”. (steps 3 to 5) • Only tracks from the disc in the CD player can be stored. 3 Press RECORD to start recording. Note: - To review the program, press PROG(ram), followed by 5 or 6 with the CD player or CD recorder in stop mode. -
Page 27: Main Menu
Remarks about Menu mode • In Menu mode you will have access to a number of features which are not available via the regular keys (on the deck’s front and the remote control). • The TEXT submenus (A-B) allow you to give names to discs and tracks. -
Page 28: A.text Input
MENU MODE/CD TEXT A. Text input/text edit TEXT EDIT ALBUM ARTIST ALBUM TITLE ARTIST TR N TITLE TR N CD Text can be added to a recording or changed.This can be done in Stop mode or during recording. Text will be stored in the recorder memory and can be edited until the CDR is finalized. -
Page 29: Reviewing Cd Text Memory
C. Reviewing CD Text in memory/memory view MEMORY VIEW CD 1 CD 2 CD N CD Text is stored in the recorders memory. When a CDR(W) will be finalized the CD Text will be written on the disc and removed from the recorders memory. With the MEMORY VIEW function one can view/delete the CD Text in the recorders memory per unfinalized disc. -
Page 30: D.auto Track Increment
MENU MODE/RECORDING SETTINGS D. Auto track increment/auto track AUTO TRACK 1 Press STORE/MENU. TEXT EDIT appears on the display. 2 Rotate the EASY JOG/ENTER key to select the AUTO TRACK submenu. AUTO TRACK appears on the display. 3 Press EASY JOG/ENTER to confirm. ON appears on the display. -
Page 31: Fixing Problems
TROUBLESHOOTING If your CD recorder is defective, it is wise to check this list first. You may have forgotten a simple step. Warning! Under no circumstances should you attempt to repair the CD recorder yourself as this will invalidate the guarantee. - Page 32 The products and services described herein are not necessarily available in all contries. The specifications and design of this product are subject of change without notice. Printed in Hungary. © PHILIPS 2000 All trademarks acknowledged. http://www.philips.com 3104 125 2287.2...