Table of Contents
Advertisement
Quick Links
Advertisement
Table of Contents

Related Manuals for Pantech C3b


Summary of Contents for Pantech C3b
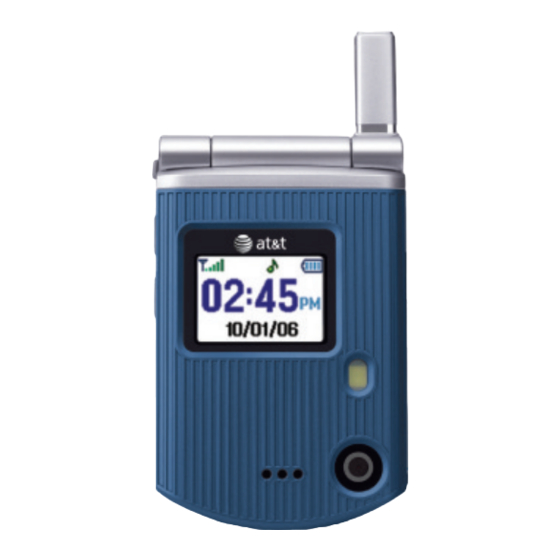
- Page 2 USER’S MANUAL Thank you for choosing the Pantech C3b, our latest GSM mobile phone. The C3b has many features that will enhance your mobile experience. From its light weight and reliability, to the built- in camera with flash, we know you will enjoy all the features the C3b has to offer.
-
Page 3: Phone Specifications
Phone Specifications Design Clamshell phone with internal and external TFT displays. Displays •1.52” internal LCD •1.0” external LCD •True TFT color display •Supports up to 262K colors within 128 x 128 pixels •6 lines for text in basic mode with 16-pixel font •Two programmable (“Soft”) selection keys [[] and []];... - Page 4 My Stuff) Left Soft key DiaI key Call accept Voicemail Alphanumeric keys Vibrate mode Microphone Pantech C3b at a glance Earpiece Internal display OK key (Menu confirm key) Right Soft key Power on/off Cancel/back/text Clear/ edit exit key...
-
Page 5: Keys Functions
Quick & Easy Keys Perform the functions shown at the bottom line of the display by using these Soft keys. Left Right Scroll through the menu options in Menu mode. In Standby mode: Left key [l]: Access My Stuff menu Up key [u]: Access Write New message menu Right key [r]: Access Instant Messaging menu Down key [d]: Access Address Book list menu... - Page 6 Quick & Easy Keys Functions Enters numbers, letters or special characters. If pressed in Standby mode, displays the dialing screen. If pressed and held in Standby mode, enters or exits from Vibrate mode. If pressed and held in Text input mode, displays the Symbol input screen. If pressed in Predictive text input mode, switches to Word search mode.
-
Page 7: Table Of Contents
Contents Getting started Package contents ...14 SIM card...15 About your SIM card...15 Installing/Removing your SIM card...15 Changeable Cover ...15 Removing cover...15 Attaching cover...15 Battery ...16 Inserting your battery...16 Removing your battery ...16 Charging your battery ...16 Internal & external displays...17 Internal display ...17 Internal display icons ...17 Automatic display off ...20... - Page 8 •To switch your phone’s microphone back on ...28 To put a call on hold, and return to a held call ...28 •To put a call on hold ...28 •To return to a held call...28 •To make a call while you are on a call ...28 •To switch between two calls...28 •To end a call...28 Transferring a call...28...
- Page 9 Contents Applications Camera ...40 Take a Photo...40 •Taking photos when your phone is open...40 Using your camera options...41 •The Preview mode ...41 Photo Album ...42 •Viewing the saved photos ...42 •Using the photo options ...42 Settings...43 Messaging ...43 Text Message ...43 Multimedia Message...43 Receiving a new message...44 Managing memory...44...
- Page 10 Bookmarks...58 Go to URL...59 Profiles...59 Cache ...60 •Cache Mode...60 •Clear Cache ...60 Security Certifications...61 Version...61 AT&T Mall ...61 Shop Tones...61 Shop Games...61 Shop Graphics...61 Shop Multimedia...61 Shop Applications ...62 MEdia Net Home ...62 Mobile Email...62 Starting Mobile Email...62 My Stuff ...63 DRM/Forward Lock...63 Games &...
- Page 11 Contents Speed Dial ...72 •To set Speed Dial...72 •To add to Speed Dial...72 •To edit Speed Dial...73 •To remove from Speed Dial ...73 •To set Speed Dial in Contact List ...73 Group...73 My Business Card ...74 Memory in Use ...74 Delete All ...74 Copy All ...74 My Phone Number...74...
- Page 12 Contents Security...83 •PIN1 Check...84 •Change PIN1 ...84 •Phone Lock ...84 •Change Password...84 •Phone Barring ...84 •Fixed Dialing (Fixed Dialing Numbers) ...85 •Change PIN2 ...85 •Network Barring ...85 •Closed User Group (CUG)...85 Software Version ...85 Reset ...86 TTY...86 Appendix Menu tree...88 Access codes...90 Troubleshooting checklist ...91 Performance and safety...92...
-
Page 14: Getting Started
Getting Started 1. Package Contents 2. SIM Card 3. Changeable Cover 4. Battery 5. Internal & External Displays 6. Selecting Functions and Options 7. Keypad Lock... -
Page 15: Package Contents
Package Contents Phone Battery Travel charger User’s Manual * The actual contents may vary depending on your region. -
Page 16: Sim Card
About your SIM card When you subscribe to your network operator, you receive a SIM (Subscriber Identity Module) card containing your registration information, PIN code, etc. Like a credit card, it should be kept secure and handled carefully. Do not bend, scratch or expose it to moisture. Avoid static electricity. -
Page 17: Battery
Battery Inserting your battery Put the contacts of the battery into the hole located at the bottom of the unit, as shown in the following picture. Press the upper side of the battery until you hear the “click”. Removing your battery Push the battery-lock key up and remove the battery. -
Page 18: Internal & External Displays
• Battery life inevitably shortens over time. • Use an authorized battery and charger only. • Since overcharging may shorten battery life, remove the phone from its charger once it is fully charged. Unplug the charger, once charging is complete. Leaving the battery in hot or cold places, especially inside a car in summer or winter, may reduce the capacity and life of the battery. - Page 19 Internal & External Displays Icon(s) A call is being made. Your phone is outside the network coverage area; you cannot make or receive calls. You have received one or more voice messages. WAP is connected. You have received one or more text, multimedia or e-mail messages. is displayed if the text message memory is full.
- Page 20 Icon(s) You have set the alert type for incoming call to ring only. You have set the alert type for incoming call to ring ascent (volume increases over the duration of the ring). You have set the alert type for incoming call to ring and vibrate. You have set the alert type for incoming call to vibrate then ring.
- Page 21 Internal & External Displays Icon(s) Description A message is being sent. Speakerphone mode is activated. You have received a new browser message. This icon is displayed until the message is loaded. Available, Away, Invisible Status of AIM Online, Away, Busy, Offline Status of Windows Live Messenger Available, Busy, Invisible Status of YAHOO You have received one or more IM messages This becomes set when Bluetooth function is activated.
-
Page 22: Automatic Display Off
Internal & External Displays & Selecting functions and options Automatic display off If you do not press any key for ten seconds (dependent on the user setting) while the internal and external displays are dimmed, the internal display turns off automatically to save power. -
Page 23: Side Key Special Functions
Selecting functions and options & Keypad Lock •Adjusts the earpiece volume. • Turns the melody off if pressed when you receive an incoming call and the flip is closed. • Rejects the incoming call if pressed and held when you receive an incoming call and the Side Up flip is closed. -
Page 24: Basic Functions
Basic functions 1. Switching your phone on or off 2. Making and ending a call 3. Answering a call 4. Options during a call 5. Using your headset 6. Selecting menu functions 7. Entering text... -
Page 25: Switching Your Phone On Or Off
Switching your phone on or off & Making and ending a call To switch your phone on ❶ Open the phone. ❷ Press and hold the power on/off key until your phone switches on. ❸ If you are asked to input your PIN (Personal Identification Number), enter your SIM card’s PIN and press the [o] key. -
Page 26: To Make A Call Using Entry
If you dial the same number more than once, only the latest occurrence is saved. ❶ Press the [s] key to display the Call Logs list of dialed, received or missed call numbers in reverse chronological order. ❷ Press the [z/x] key or the [u/d] key to select a number. ❸... -
Page 27: Answering A Call
Answering a call To speed-dial from Entry Press and hold the Speed Dial number to make a call using the number you have saved. For example, press and hold the [5] key to dial a number which you have saved as “5” in your Speed Dial list. -
Page 28: To Reject A Call
To reject a call •If your phone is open, press the [e] key or the [Reject] Soft key. •If your phone is closed, press and hold the [z/x] key during the incoming call. The caller hears a Voice mail. To answer a second call You can answer an incoming call while you have a call in progress, if your network service provider supports this service and you have activated the Call Waiting option. -
Page 29: To Switch Your Phone's Microphone Back On
Options during a call To switch your phone’s microphone back on Press the [Unmute] Soft key, or press [Options] then select [Unmute]. To put a call on hold, and return to a held call You can put a call on hold whenever you want. You can make another call while you have a call in progress if your network service provider supports this service. -
Page 30: Multi-Party Calls
Multi-party calls A multi-party call feature is a network service that allows up to six people to take part in a multi-party or conference call simultaneously. For further details, contact your service provider. To make a multi-party call ❶ Call the first participant in the normal way. ❷... -
Page 31: To Remove One Participant From A Multi-Party-Call
Options during a call that person. ❹ The other participants can continue the conversation with each other. ❺ To return to the multi-party call, press the [Options] Soft key then select the [Join All] option. ❻ Press the [o] key. All of the multi-party call participants can now hear each other. -
Page 32: Using Dtmf Tones
Using DTMF tones You can turn the DTMF key tones off or on during a call. When the [DTMF Off] option is selected, your phone does not transmit the key tones. It allows you to press keys without hearing any key tones during calls. To communicate with answering machines or computerized telephone systems, you must select the [DTMF On] option. -
Page 33: Selecting Menu Functions
Selecting menu functions Displaying your phone’s menu functions. To display your phone’s menu functions, press the [Menu] Soft key ([[]) in Standby mode. Moving within your phone’s menu and submenu functions To move within your phone’s functions and select the function or value you want, press the following keys. -
Page 34: Entering Text
Menu selected if pressed [1] key [*] key Entering text Input mode On many occasions you need to input text in your phone such as: storing the name in your Address Book, writing a new message, creating a greeting, or scheduling events on your calendar. -
Page 35: To Change Text Input Mode
Entering text To change text input mode When you are in an area where you can input text, the text input mode indicator is displayed at the bottom of your screen. Example: Typing a Text Message. ← The page number icon and the number of remaining characters that you can type ←... -
Page 36: Using T9 Mode
Function Deletes characters one by one. After Press the [c] key deleting all the characters, returns to the previous screen. Deletes all the characters and moves Press and hold the the cursor to the beginning of the input [c] key screen. -
Page 37: Using 123 Mode
Entering text •Lowercase (no indicator) •Initial capital ( ) •Capital lock ( ) [English] Characters, in displayed order 1 : @ ‘ ! ? - , . p q r s 7 w x y z 9 Using 123 mode a b c 2 d e f 3 Using Symbol mode... - Page 38 database, in the T9 alphabet editor. • To add ‘lode’ in T9 mode, press [5], [6], [3], [3] in order. • After pressing [5], [6], [3], [3] in order, you will see the [Spell] Soft key at the bottom left side of the screen. ...
- Page 39 Entering text • Press the [Options] Soft key. Select 3.Delete All, and press [o] to delete all words from the My Words list. NOTE The Delete All function activates when two or more words are stored in the My Words list. Editing a word in My Words (Edit function) •...
-
Page 40: Applications
Applications 1. Camera 2. Messaging 3. Recent Calls 4. MEdia Net 5. AT&T Mall 6. Mobile Email 7. My Stuff 8. Address Book 9. Settings See the appendix for information about the menu tree. -
Page 41: Camera
Camera This function enables you to take a photo using the built-in camera. The photo can be saved and sent with a multimedia message. Take a Photo Taking photos when your phone is open ❶ Press the [Menu] Soft key, 1. Camera, and then select 1. Take a Photo to enter your phone’s photo capture mode. -
Page 42: Using Your Camera Options
Using your camera options The Preview mode Press the [Options] Soft key ([[]) in Preview mode to select the following information which will be applied to the image. Its setting value is temporary, so if you want to save its value, press the [Menu] Soft key, select 1. Camera, and then select 3. -
Page 43: Photo Album
Camera • Print: Transmits the selected photo to the Printer via Bluetooth • Rename: Renames a photo. (For more information about renaming a photo, see 7. Entering text on page 33.) • Go to Album: Moves to the Photo Album. ❷... -
Page 44: Settings
• Rename: Renames a photo. (For further details about renaming a photo, see 7. Entering text on page 33.) • Delete: Deletes a photo. • Delete All: Deletes all photos in the album. • File Info: Views the information on a photo. •... -
Page 45: Receiving A New Message
Messaging In addition to the familiar text content of text messages, multimedia messages can contain images, graphics, and/or sound. An MMS message is a separate multimedia presentation in a single entry, not an attachment to the text file. Using the MMS feature, your phone can receive a multimedia message and/or send a picture message, depending on MMS availability from your service provider. -
Page 46: Write New
message (SMS) • Inbox: Displays the received messages in the SIM and Phone memory. You can save up to 100 messages in the phone memory and more messages are received only if the SIM capacity is available. So you can see over 100 messages in the Inbox. -
Page 47: Multimedia Message
Messaging key to send the message. If you want to send a Text Message to a new number that is not stored, press the [u] key to move to Add Entry, and then just enter the number (Add Entry is only for entering numbers that are not searched). - Page 48 • Take a Photo: Creates a new photo. • Photo Album: Already saved photo. • Downloaded: Downloaded image. (For further details, see Graphics on page 65.) • Add Sound: Adds the voice memo or the downloaded sound. Press the [o] key to select the sub-menu. •...
- Page 49 Messaging recipient’s phone sends a reply to let you know when your message has been read if your carrier>s network supports this functionality. • Priority: Set Normal, High, or Low. ❹ After writing the message, if the user wants to change the already added object, press the [u/d] key to move to the already added object and press the [Edit] or [Replace] Soft key ([]]).
-
Page 50: Inbox
NOTE If the size of the Multimedia Message exceeds the transmission limit (100 Kb), a warning information message will appear. It is automatically saved in the Sent folder if transmission is successful. Inbox Press the [Menu] Soft key, select 2. Messaging, select 2. -
Page 51: Starting Instant Messenger
Messaging ❸ Select the [Options] Soft key ([[]) on the bottom of the message view to select one of the following options. • Reply All: Replies to the message sender and the 3rd party who received the message. (Shown only on the Multimedia Message.) •... -
Page 52: Viewing The Conversation Log
select 3. IM. ❷ Highlight your established IM application and press the [Select] Soft key ([[]) or the [o] key. ❸ Type your Logon ID and your Password and then select Sign On. ❹ Select the person you want to talk to. ❺... -
Page 53: Draft
Messaging To manage messages in Outbox: ❶ Press the [Send] Soft key ([]]) at the bottom right corner to send the failed message again. ❷ Press the [Options] Soft key ([[]) at the bottom left corner to select the following functions. •... -
Page 54: Settings
text messages and multimedia messages. Press the [Menu] Soft key, select 2. Messaging, and then select 9. Templates. If no user-created template exists, only the Create New menu appears in the list. ❶ Select a text or a multimedia template menu and press the [Options] Soft key ([[]) at the left for associated options. -
Page 55: Multimedia Message
Messaging •Message Center: Stores or changes the number of your message center that is required when sending a message. •E-mail Gateway: Stores or changes the number of your e-mail gateway required when sending an e-mail. •Save to: Sets the text message storage to SIM or phone. •Message Format: Sets the message type to Normal, Fax, Voicemail, ERMES, National Paging, X.400, or Internet. -
Page 56: Memory Info
• On 1. When Press the [Accept] Soft key ([[]) on the Browser Message Alerting screen. Shows the information for the selected message ·Go to: Enters the browser. ·Delete: Deletes the received message. ·Inbox: Shows the Brower message list 2. When Press the [Exit] Soft key ([]]) on the Browser Message Alerting screen. -
Page 57: Received Calls
Recent Calls ([[]) to select from the following functions. • Call: Call the selected number. • Save Number: If the selected number is not saved on the SIM or the phone, this option appears. Saves the selected number to the SIM or the phone. •... -
Page 58: Delete Call Logs
the person if you missed the call. Delete Call Logs This function allows you to choose to delete all missed, received, or dialed call records or delete all call records. Press the [Menu] Soft key, select 3. Recent Calls, and then select 4. -
Page 59: Media Net
MEdia Net MEdia Net Home You can access the Internet with MEdia Net. This means you can connect to the Internet anywhere and anytime you have network coverage. This function contacts your network to load your Wireless Web service provider’s homepage. You can also press the [o] key in Idle mode. -
Page 60: Go To Url
Go to URL This function allows you to directly input the address of a URL and connect to it. ❶ Press the [Menu] Soft key, select 4.MEdia Net, and then select 3.Go To URL. ❷ Input the URL you want to go to, then press the [o] key. Profiles This function selects or edits WAP connection profiles on your phone. -
Page 61: Cache
MEdia Net • GPRS Settings: This menu allows you to set the GPRS network proxy by inputting the following information. • Gateway/Proxy: If you set the Connection Type to WAP, Gateway is displayed. If you set it to HTTP, Proxy is displayed. Press the [o] key to display the subfunctions such as IP Address and IP Port, then input the appropriate information for each of the following subfunctions, inputting the information provided by your... -
Page 62: Security Certifications
5.Cache, and then select 2.Clear Cache. Security Certifications Press the [Menu] Soft key, select 4.MEdia Net, and then select 6.Security Certifications. Press the [o] key to see the saved security certificate. Version This function displays the software version of your phone’s WAP browser. -
Page 63: Shop Applications
AT&T Mall & Mobile Email Press the [Menu] Soft key, select 5.AT&T Mall, and then select 4. Shop Multimedia. Shop Applications Selecting this menu launches the Web browser to AT&T’s Applications menu. Press the [Menu] Soft key, select 5. AT&T Mall, and then select 5. -
Page 64: My Stuff
DRM/ Forward Lock Your phone supports a Digital Rights Management (DRM) system to protect acquired content. A piece of content (for example, ringtones, wallpapers) can be protected by using Forward Lock, which means the protected contents cannot be forwarded to other devices including other phones and desktops. -
Page 65: Graphics
My Stuff NOTE Unless you have set your ring type to vibration or silent mode. Press the [Options] Soft key ([[]) to apply the options to the sound concerned. The [Options] Soft key is active when the downloaded sound is selected. •... -
Page 66: Photo Album
as multimedia message. This option is available only for nonforward locked graphics. •Bluetooth: Transmits the selected image via Bluetooth • Set as Wallpaper: Adds an image to ‘Wallpaper’ in the ‘Display settings’. The image is set as the background image of the main screen. •... -
Page 67: Other Files
My Stuff Entering text on page 33.) • Delete: Deletes a photo. • Delete All: Deletes all photos in the album. • File Info: Views the information on a photo. • Print: Transmits the selected photo to the Printer via Bluetooth. -
Page 68: Calendar
• Delete: Deletes an alarm from the list. • Delete All: Deletes all alarms from the list. • Wake-Up Call On/Off: If you set Wake-Up Call to On, the alarm rings regardless of any other settings (for example, vibrate settings). •... -
Page 69: Notepad
My Stuff • Memory Info: Displays the number of stored events (up to 50). Use the Scroll keys to select the date you want then press the [o] For dates containing events, switch to Daily View to check the schedule. Events recorded for a date are displayed at the bottom of the display as an icon. -
Page 70: Voice Memo
• Delete/Delete All: Delete any or all items. (For more information about using the editor, see 7. Entering text on page 33.) Voice Memo The Voice Memo function records your voice messages. You can use Record, Stop, Play, and Save for voice recording and playback. -
Page 71: Calculator
My Stuff • Daylight-saving On/Off: Specifies whether the current time of the selected place is adjusted to Daylight saving time. A [ ] icon indicates that daylight-saving is activated for that place. Daylight-saving sets the clock one hour ahead. Calculator Your phone has a Calculator function. -
Page 72: Sim Tool Kit
SIM Tool Kit SIM Tool Kit performs the function supported by SIM. Press the [Menu] Soft key, select 7.My Stuff, select 6. Tools, and then select 9. SIM Tool Kit If SIM supports this service, when the user selects the supported menu, you can see or receive the information about the selected menu. -
Page 73: Add Contact
Address Book •Copy: Copies memory to SIM or phone. NOTE When you copy memory to phone, select the “Change Type”- Mobile, Home, or Office. •Send Message: Sends a message to a selected recipient. •Add to Speed Dial: Adds the selected number to speed dial. -
Page 74: To Edit Speed Dial
•Press the [z/x] key or the [u/d] key to select a person. •Press the [Options] Soft key ([[]) to select the language and search for Spanish or French. (English is the default selection.) •Press the [o] key to save an item in the Speed Dial list. To edit Speed Dial ❶... -
Page 75: My Business Card
Address Book My Business Card Press the [Menu] Soft key, select 8. Address Book, and then select 5. My Business Card Allows you to save your business card and send it to the phone of other user Bluetooth. You can edit or delete the saved numbers. Press the [Option] Soft key [[]to: •Send via Bluetooth : Transmission via Bluetooth is possible. -
Page 76: Settings
appears. Press the [Menu] Soft key, select 8. Address Book, and then select 11. Service Numbers. If necessary, scroll to a number by pressing the [z/x] key or the [u/d] key and press the [s] key to dial the number. Settings This function enables you to personalize how your phone operates. -
Page 77: Audio
Settings displays to remain on if you do not touch any key. You can choose 5 Secs, 10 Secs, 20 Secs, 1 Min, and 10 Mins. ❸ Press the [l/r] key to change the duration value that you want and then press the [o] key. Audio You can define how sound is played on your phone. -
Page 78: Key Tone
•Ring Volume: Controls the volume in eight levels. • Sound: Specifies the Message Alert Tone. Press the [l/r] key to set Message Alert Tone to Bell 1, Bell 2, or Bell 3. Key Tone This function allows you to select the sound you hear when you press your phone’s keys. -
Page 79: Call Forward
Settings Call Forward This function allows you to divert incoming calls to another phone number. Press the [Menu] Soft key, select 9. Settings, select 3. Call, and then select 1. Call Forward. Choose Forward Always, When Busy, On No Answer, When not Found, or Cancel All, all of which divert the call as required. -
Page 80: Answer Type
• Activate: Sets up Call Forwarding When not Found. • Deactivate: Cancels the preset Call Forwarding When not Found. • Status: Informs the setup condition. • By Service: Sets up Call Forwarding When not Found for each service (All Services, Voice calls, Data and Fax) Cancel All Cancel the Call Forward options. -
Page 81: Phone
The mobile phone (C3b) supports the following profiles: - Serial port profile (SPP) with the PC connectivity software... -
Page 82: Paired Device
- Dial-up networking profile (DUN) as a gateway - Hands-free Profile (HFP) as an audio gateway - Object push profile (OPP) as a client and server - File transfer profile (FTP) as a client and server - Basic Image profile (BIP) for printing a photo Bluetooth technology enables cost-free wireless connections between electronic devices within a maximum range of 33 feet (10 meters). - Page 83 Settings the registered device type is PC/PDA.. • Set as Default/Don’t set as Default : If two or more headsets/handsfrees have been registered, choose one of them to be set as the default headset. Placing or receiving calls through headset will be done via the default headset/handsfree.
-
Page 84: Outgoing Call Device
Allows you to edit the name of your phone, which will be shown to other phones with Bluetooth technology. Address Displays the Bluetooth address of your cell phone. To send an object Then select “Bluetooth”, search starts (See: “To Search a device”... -
Page 85: Pin1 Check
Settings The security settings enable you to restrict the use of your phone to specific people and types of calls. Your phone’s security features keep your phone and SIM card safe from unauthorized use. You can either set a password for your phone or use the Call Barring service and Fixed Dialing mode to restrict which calls can be made using your phone. -
Page 86: Fixed Dialing (Fixed Dialing Numbers)
Fixed Dialing (Fixed Dialing Numbers) Fixed Dialing is a service that limits your access to specific numbers in the Address Book list recorded on the SIM. Input the PIN2 to set up or cancel this service. (PIN 2 must be correctly entered within 3 tries.) •... -
Page 87: Reset
Settings Reset This function allows you to delete all user settings and data from your phone and returns it to factory-default settings. Press the [Menu] Soft key, select 9. Settings, and then select 8. Reset. Input the phone password and press the [o] key to reset. The default password is 1234. - Page 88 Appendix 1. Menu Tree 2. Access Codes 3. Troubleshooting checklist 4. Performance and safety 5. Glossary 6. FCC & Industry Canada Regulatory Compliance 7. Safety precautions 8. Warranty...
-
Page 89: Menu Tree
Menu tree 1 Camera 2.10.1 2.10.2 Take a Photo 2.10.3 Photo Album 2.10.4 Settings 2.10.5 1.3.1 Image Size 2.11 1.3.2 Shutter Sound 1.3.3 Flash 3 Recent Calls 1.3.4 Self Timer 1.3.5 Multi-Shot 2 Messaging Write New 3.4.1 2.1.1 Text Message 3.4.2 2.1.2 Multimedia Message... - Page 90 Contact List 9.2.4 Add Contact 9.2.5 Speed Dial 9.2.6 Groups 9.2.7 My Business Card Memory in Use 9.3.1 Delete All 9.3.2 Copy All 9.3.3 My Phone Number 9.3.4 8.10 Memory Info 9.3.5 8.11 Service Numbers* 9.4.1 9 Settings 9.4.2 Display 9.4.3 9.1.1 Shop Graphics...
-
Page 91: Access Codes
Access codes The following section describes various security codes used on your phone. PIN1 code (4 to 8 digits) The PIN1 (Personal Identification Number) code protects your SIM card against unauthorized use. The PIN1 code is usually supplied with the SIM card. If you input the incorrect PIN1 code entry three times in a row, the PIN1 code will be blocked. -
Page 92: Troubleshooting Checklist
If you experience any problem while using your mobile phone, please refer to the following checklist. If the problem still persists, contact your dealer or nearest service carrier. When the “Insert SIM Card” message appears: Make sure the SIM card is correctly installed. Check to see if the SIM card is working properly. -
Page 93: Performance And Safety
Troubleshooting checklist & Performance and safety When you are unable to charge the battery: This may be the result of one of the following three cases. ❶ Your charger may be out of order. Contact your nearest dealer. ❷ You may be attempting to use the phone in an overly hot/cold temperature. -
Page 94: Glossary
•Ensure that the earthing points of the battery and battery charger do not come in contact with conductive objects. Glossary To help you understand the main technical terms and abbreviations used in this booklet and take full advantage of the features of your mobile phone, here are a few definitions. - Page 95 Glossary polyphonic ringtones. Multiparty Calling Ability to establish a conference call involving up to five additional parties. PIN (Personal Identification Number) Security code that protects the phone/SIM against unauthorized use. The PIN is supplied by the service provider with the SIM card. It may be a four to eight-digit number and can be changed, as required.
-
Page 96: Fcc & Industry Canada Regulatory Compliance
FCC & Industry Canada Regulatory Compliance FCC & Industry Canada Regulatory Compliance This device complies with Part 15 of the FCC Rules. Operation is subject to the following two conditions: (1) this device may not cause harmful interference, and (2) this device must accept any interference received, including interference that may cause undesired operation. - Page 97 FCC & Industry Canada Regulatory Compliance of 15mm (0.6 inches) to the body. Use of other accessories may violate FCC RF exposure guidelines and should be avoided. This device and its antenna must not be co-located or operating in conjunction with any other antenna or transmitter.
-
Page 98: Safety Precautions
Using a mobile phone while driving may be prohibited. Please check local laws and regulations with regard to the prohibition of mobile phone use while driving, and comply with them. Use of your phone while you are driving may disturb your concentration and so cause an accident. - Page 99 Safety precautions Mobile phones and other electronic devices Mobile phones emit electromagnetic waves that may affect nearby electronic devices. When it is switched on, do not place your phone close to delicate electronic equipment.
-
Page 100: Warranty
Many companies are making look alike accessories and in some cases, promoting that their product is equal to or better than the Pantech product. Be careful. Some of these products may not be compatible to use with your Pantech product and may damage the unit or cause it to malfunction. - Page 101 In addition, you may telephone us at (800) 962-8622, or email us at HandsetHelp@Pantech.com THE EXTENT OF THE COMPANY’S LIABILITY UNDER THIS WARRANTY IS LIMITED TO THE REPAIR OR REPLACEMENT PROVIDED ABOVE AND, IN NO EVENT, SHALL THE COMPANY’S LAIBILITY EXCEED THE...