Panasonic WJ-MP204C Operating Instructions Manual
Data multiplex unit
Hide thumbs
Also See for WJ-MP204C:
- Operating instructions manual (32 pages) ,
- Product catalog (125 pages)
Table of Contents
Advertisement
Advertisement
Table of Contents

Related Manuals for Panasonic WJ-MP204C


Summary of Contents for Panasonic WJ-MP204C
-
Page 1: Operating Instructions
Data Multiplex Unit Operating Instructions WJ-MP204C Model No. A L A R M S U S P E A L A R M - M P 2 0 4 U n it W J P O W u lt ip le x... - Page 2 ENGLISH VERSION Caution: Before attempting to connect or operate this product, please read the label on the bottom. CAUTION RISK OF ELECTRIC SHOCK DO NOT OPEN CAUTION: TO REDUCE THE RISK OF ELECTRIC SHOCK, DO NOT REMOVE COVER (OR BACK). NO USER-SERVICEABLE PARTS INSIDE.
-
Page 3: Important Safety Instructions
IMPORTANT SAFETY INSTRUCTIONS 1) Read these instructions. 2) Keep these instructions. 3) Heed all warnings. 4) Follow all instructions. 5) Do not use this apparatus near water. 6) Clean only with dry cloth. 7) Do not block any ventilation openings. Install in accordance with the manufacturer's instructions. 8) Do not use near any heat sources such as radiators, heat registers, stoves, or other apparatus (including amplifiers) that produce heat. -
Page 4: Table Of Contents
• Video Multiplexer Connection (PS Digital Disk Recorder Connection (PS Matrix Switcher Connection (Camera Communication) ... 14 DIP Switch Setting ... 15 Unit Number Setting ... 15 Alarm/Remote Terminal Setting ... 16 Internal Setting ... 17 RS-485 DATA Port Connection (PS RS-485 Terminal Connection (Camera Communication) ... -
Page 5: Preface
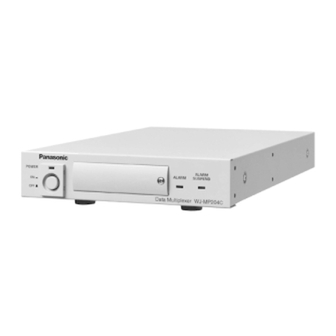
PREFACE The Data Multiplex Unit WJ-MP204C is designed for instal- lation in a surveillance system, offering system flexibility particularly when camera control functions are required. The unit multiplexes video signals with control data and VD2 sync into a coaxial cable. This makes installations between the unit and cameras easy. -
Page 6: Precautions
PRECAUTIONS • Refer all work related to the installation of this product to qualified service personnel or system installers. • Do not block the ventilation opening or slots on the cover. To prevent the appliance temperature from rising, place the appliance at least 5 cm (2 inches) away from the wall. -
Page 7: Major Operating Controls And Their Functions
Note: Use the switch protector (supplied) to avoid acci- dental power-off of the unit. w Unit number switch (UNIT 0-8) This switch specifies the WJ-MP204C unit number in a Data protocol system, or camera unit numbers in • the Camera Communication Protocol system. Refer to page 15 for more information. -
Page 8: Rear View
@4 Spot Output Connector (SPOT OUT) Supplies the composite video signal of the selected camera, alarm activated camera or WJ-MP204C setup menus to display them on the monitor. This BNC is usu- ally connected with a monitor. In a multi-unit connec- tion this is connected with SPOT IN of the next unit unless the unit is at the tail end. -
Page 9: Installation
WJ-MP204C. Mounting One WJ-MP204C with the WV-Q204/1 1. Fix the mounting brackets (large and small) on both sides of the WJ-MP204C with the eight supplied screws (M3x8) to the WV-Q204/1. Mounting two WJ-MP204Cs with the WV-Q204/2 1. -
Page 10: Connection & Setting
A L A R M / R E M OT E CAMERA SPOT VS/VD RS485 WV-CU DOWN System Controller WV-CU360C Control Site • Camera Site SIGNAL GND DATA MODE 4-Line MODE Termination ON Panasonic Security Data mode Video signal RS485 signal (Panasonic Security Data mode) Data (Panasonic... -
Page 11: Multi-Unit Connection (Ps Data)
MODE CAMERA 4-Line MODE Termination OFF Panasonic Security Data mode UNIT #2 Video signal RS485 signal (Panasonic Security Data mode) 13 ch 16 ch 14 ch 15 ch VS/VD IN VS/VD IN VS/VD OUT SPOT OUT SPOT IN SPOT SW OUT... -
Page 12: Video Multiplexer Connection
MODE VD OUT SIGNAL ALARM/REMOTE CAMERA DATA SW IN MULTI VIDEO PLAY IN REC OUT SCREEN OUT SPOT OUT Branch Connector Video signal RS485 signal (Panasonic Security Data mode) UNIT SIGNAL GND MODE 4-Line Termination OFF Panasonic Security Data mode... -
Page 13: Digital Disk Recorder Connection (Ps Data)
MP204C units at the camera site. When an optional Network Interface Board is installed in the recorder, monitoring via the Internet is available. For more information, refer to the manual included with the recorder. POWER 8 Camreras Remote Controller WV-CU50 Data) • WJ-MP204C ALARM ALARM SUSPEND Data Multiplex Unit WJ-MP204 STOP PLAY/ PAUSE GROUP... -
Page 14: Matrix Switcher Connection (Camera Communication)
Matrix Switcher Connection (Camera Communication) The WJ-SX350 and WV-CU360C are typically combined with the WJ-MP204C when using the Camera Communication Protocol. Ordinary cameras are connected directly with the Matrix Switcher, different from cameras having control functions. Camera 5 ch 6 ch... -
Page 15: Dip Switch Setting
Bit 6 RS-485 mode Unit Number Setting A rotary switch is placed on the front panel. It specifies the WJ-MP204C unit number in a PS unit numbers in a Camera Communication Protocol system. 8 Setting the unit number 1 Turn off the power switch of the unit. -
Page 16: Alarm/Remote Terminal Setting
Address Assignment Set the Unit address number in Setup given to WJ-MP204C menu 8 Camera Communication Protocol As shown in the table, the UNIT switch determines the camera unit numbers. Address Assignment Set the Connector number in Setup CAMERA IN/OUT menu Alarm/Remote Terminal Setting The rear of the unit is provided with an 11-pin terminal, ALARM/REMOTE. -
Page 17: Internal Setting
ALM IN): Pin #6 accepts the switching signal that changes the spot output image to CH 1. Pin #7 accepts the signal to switch image to CH 2. Pin #8 accepts the signal to switch image to CH 3. Pin #9 accepts the signal to switch image to CH 4. -
Page 18: Rs-485 Terminal Connection (Camera Communication)
Communication) These terminals are connected with system devices using the Camera Communication Protocol in 4-line full duplex or 2-line half duplex mode specified with the DIP switch set- ting. Notes: • Use a data grade, shielded and twisted cable suited to RS-485. -
Page 19: Setup Procedures
The following buttons are used in the setup. Operations on the following pages are explained on the assumption that the front panel buttons on the WJ-MP204C are used. Check below which WJ-MP204C front panel buttons are equivalent to the buttons on the WV-CU360C. -
Page 20: Setup Menus
There are two setup menu groups depending on the communication protocol used in the system, menus for PS the Camera Communication Protocol. MODE DIP switch # 3 on the rear of the unit is set to the position of the used protocol, and it specifies what menu group is displayed on the monitor. -
Page 21: Setup Menus For Ps Data
[–] or [+] button. The default setting is OFF for not resending. 9600 2. Press ESC to return to the WJ-MP204C SETUP MENU. System setup (PS Parameters related to alarm, sync, and remote functions are set in this menu for a PS The SYSTEM menu is displayed when you select it in the WJ-MP204C SETUP MENU. - Page 22 8 Alarm mode setup 1. Move the cursor to ALARM MODE to select ON or OFF with the [–] or [+] button, then press SET. The default setting is ON. : Opens a submenu shown below. OFF: Alarm mode is disabled. The ALARM MODE sub menu appears.
- Page 23 8 Cable compensation/VD2 sync/data setup The COMP/VD2/DATA menu is displayed when you select it in the SYSTEM menu. COMP/VD2/DATA CAMERA IN 1CH COMP DATA In this menu, each camera is set up for cable compensa- tion, VD2 sync and data communication ON/OFF. 1.
-
Page 24: Setup Menus For Camera Communication Protocol
ALARM. ALARM: Terminals are used as alarm inputs or outputs. REMOTE: Terminals are used as remote inputs or out- puts. Communication Protocol setup menu. WJ-MP204C SETUP MENUX.XX COMMUNICATION SYSTEM SET. The communication setup appears. COMMUNICATION CAM ADDRESS... -
Page 25: System Setup (Camera Communication Protocol)
[–] or [+] button. The default setting is NOT USE. USE: Data flow control is enabled during communica- NOT USE: Disabled. 2. Press ESC to return to the WJ-MP204C SETUP MENU. System setup (Camera Communication Protocol) Parameters related to alarm, sync and remote functions are set in this menu for a Camera Communication Protocol sys- tem. - Page 26 The ALARM MODE sub menu appears. ALARM MODE MONITOR SPOT ALARM DISPLAY ON SITE ALARM TERM.ALARM ALARM OUTPUT ALARM DATA 1. Move the cursor to MONITOR SPOT to select ON or OFF with the [–] or [+] button. The default setting is ON. This setting specifies whether to change the monitoring image when an alarm operates.
- Page 27 2. Move the cursor to COMP. Select a parameter with the [–] or [+] button. The default setting is S. The longer a coaxial cable is extended, the more the video signals attenuate. This setting is to compensate signal attenuation in 3 degrees. Select the best para- meter that optimizes the displayed image on the moni- tor while observing it.
-
Page 28: Operation
OPERATION Camera selection and alarm operations are made on the front panel of the unit or WV-CU360C System Controller. Camera Selection Front Panel Operation • You need to remove the front cover loosening the screw with a screw driver before starting operation. •... -
Page 29: Alarm Reset
Press the button again to release the alarm suspension. Alarm inputs will be accepted after the indicator turns off. Function Camera Selection Alarm Reset Alarm Suspend Alarm Suspend Reset WJ-MP204C Enter a camera number with numeric buttons. ALARM RESET ALARM SUSPEND... -
Page 30: Specifications
: 1 (0/5 V O.C. [16 V, 100 mA])* : 1 (No Voltage Contact) : 1 (O.C. [16 V, 100 mA]) : 1 - 8 (Set with UNIT switch) 9-99 (Set in Setup menu) : Selection Camera Alarm (Data/Display/Reset/Suspend) Setup Camera, Lens, Housing, PAN/TILT, External device control : –10°C - +50°C (14°F - 122°F ) -
Page 31: Standard Accessories
Switch Protector ... 1 pc. ALL RESET The Data Multiplex Unit WJ-MP204C can be reset to the default settings as follows: 1. Press the power switch to set it to the OFF position. 2. Press the power switch down to the ON position while pressing the camera selection buttons 2, 3, and 4. - Page 32 Panasonic Security and Digital Imaging Company A Division of Matsushita Electric Corporation of America Executive Office: One Panasonic Way 3E-7, Secaucus, New Jersey 07094 Regional Offices: Northeast: One Panasonic Way, Secaucus, NJ 07094 (201) 348-7303 Southern: 1225 Northbrook Parkway, Suite 1-160, Suwanee, GA 30024 (770) 338-6838...