Table of Contents
Advertisement
Before connecting, operating or adjusting this product,
please read these instructions completely.
Please keep this manual for future reference.
Region number
The player plays DVD-Video marked with labels containing the
region number or "ALL".
Region
The Middle East, South Africa, Saudi Arabia
and Kuwait
Southeast Asia
Australia and N.Z.
Russia
Example: [Australia[and[N.Z.[
3
4
4
ALL
5
EE
GS
GCS
GC
Number
2
3
4
5
GN
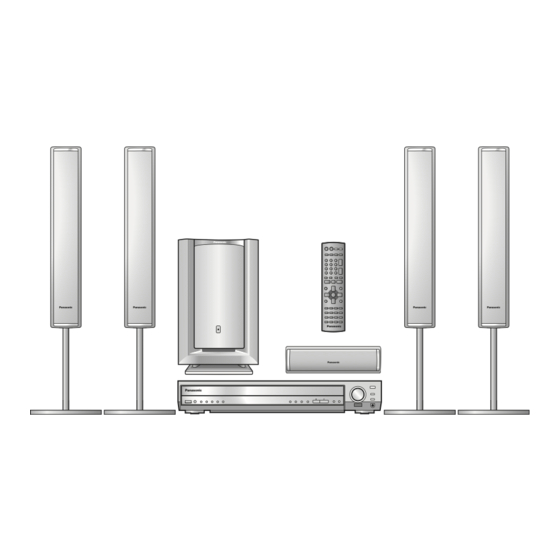
Operating Instructions
DVD Home Theater Sound System
Model No.
Table of contents
Getting started
Caution for AC Mains Lead. . . . . . . . . . . . . . . . . . 3
Accessories . . . . . . . . . . . . . . . . . . . . . . . . . . . . . . 3
STEP 1
assembly. . . . . . . . . . . . . . . . . . . . . . . 4
STEP 2
Locating . . . . . . . . . . . . . . . . . . . . . . . 6
STEP 3
Video connections . . . . . . . . . . . . . . . 8
Radio and system connection . . . . . 9
The remote control. . . . . . . . . . . . . . . 9
QUICK SETUP. . . . . . . . . . . . . . . . . . 10
Control reference guide . . . . . . . . . . . . . . . . . . . 10
Main unit and disc caution . . . . . . . . . . . . . . . 11
Disc operations
Basic play . . . . . . . . . . . . . . . . . . . . . . . . . . . . . 12
Convenient functions . . . . . . . . . . . . . . . . . . . . . 14
Position memory/Zoom/Audio/Subtitle/
Quick replay/Page skip/Repeat play/
Using navigation menus . . . . . . . . . . . . . . . . . . . 16
Playing data discs/Playing HighMAT
the programs/Playing a play list
Using on-screen menus . . . . . . . . . . . . . . . . . . . 18
Changing the player settings . . . . . . . . . . . . . . . 20
Other operations
The radio. . . . . . . . . . . . . . . . . . . . . . . . . . . . . . . . 22
Automatic presetting/Selecting the preset channels/
connections
Sound field and sound quality . . . . . . . . . . . . 24-26
Sound Field Control/Super Surround/Center Focus/
Dolby Pro Logic II/Multi Rear Surround (MRS),
Virtual Rear Surround (VRS)/Speaker level
adjustments/Down-mixing/Subwoofer level/Custom
Other functions . . . . . . . . . . . . . . . . . . . . . . . . . . 27
Sleep timer/Muting/Using headphones
Operating other equipment. . . . . . . . . . . . . . . . . 28
Other speaker setup options . . . . . . . . . . . . . . . 30
Reference
Safety precautions. . . . . . . . . . . . . . . . . . . . . . . . 30
Maintenance . . . . . . . . . . . . . . . . . . . . . . . . . . . . . 30
Glossary . . . . . . . . . . . . . . . . . . . . . . . . . . . . . . . . 31
Specifications . . . . . . . . . . . . . . . . . . . . . . . . . . . 32
Troubleshooting guide . . . . . . . . . . . . . . . . . . . . 34
SC-HT928
TM
discs/Playing
RQT7436-B
Advertisement
Table of Contents

Related Manuals for Panasonic SC-HT928


Summary of Contents for Panasonic SC-HT928
-
Page 1: Table Of Contents
Specifications ......32 Troubleshooting guide ....34 SC-HT928 Model No. -
Page 2: Dear Customer
Thank you for purchasing this product. For optimum performance and safety, please read these instructions carefully. ≥Unless otherwise indicated, illustrations in these operating instructions are of SC-HT928 for Australia and N.Z. ≥Operations in these instructions are described mainly with the remote control, but you can perform operations on the main unit if the controls are the same. -
Page 3: Caution For Ac Mains Lead
Caution for AC Mains Lead (For Saudi Arabia and Kuwait) (“GS” area code models only) For your safety, please read the following text carefully. This appliance is supplied with a moulded three pin mains plug for your safety and convenience. A 5-ampere fuse is fitted in this plug. -
Page 4: Simple Setup
Ensure the screw is securely fastened. The supplied stands are specially designed for attachment to Panasonic SB-PF921 front speakers and SB-PS921 surround speakers. Only use as indicated in this setup. Attach the stands to the front and surround speakers. - Page 5 ∫ Front and surround speaker height (Assembled diagram) Speaker You can adjust within this range. 750 mm 1,160 mm Pipe 818 mm 575 mm Base Attach to lower Attach to upper rear of speaker. rear of speaker. Adjust the speaker height. ≥Check the screws you tightened on page 4.
-
Page 6: Locating
STEP Locating Do not use a front speaker as a surround speaker or vice versa. Verify the type of speaker with the label on the rear of the speaker. Speaker labels ≥Place the front, center, and surround speakers at approximately the same distance from the seating position. -
Page 7: Connecting Speakers With The Subwoofer
STEP Connecting speakers with the subwoofer Attach the speaker-cable stickers to make connection easier. Speaker cable ≥4-m cable: For center speaker SUBWOOFER Insert the wire fully. \Note] ≥Never short-circuit positive (i) and negative (j) speaker wires. ≥Be sure to connect only positive (copper) wires to positive (i) terminals and negative (silver) wires to negative (j) terminals. Incorrect connection can damage the speakers. -
Page 8: Step 4 Video Connections
To enjoy progressive video ≥Connect to the component video input terminals on a 480P ≥When playing NTSC discs, change video output mode to All Panasonic televisions that have 480P input connectors are compatible. Consult the manufacturer if you have another brand of television. -
Page 9: Step 5 Radio And System Connection
STEP Radio and system connection AM loop System cable antenna ≥Connect the AC mains lead after all other connections are complete. ≥Optional antenna connections (‹ page 23). FM indoor antenna Adhesive tape Affix this end of the antenna where reception is best. Click! Main unit OPTICAL... -
Page 10: Step 7 Quick Setup
STEP QUICK SETUP The QUICK SETUP screen assists you to make necessary settings. Turn on the television and select the appropriate video input on the television. DVD/CD Turn the unit Select “DVD/CD”. To change these settings later Select “QUICK SETUP” in “Others” tab (‹ page 21). Control reference guide See reference pages in brackets. -
Page 11: Discs That Can Be Played
Some DVD-Audio discs contain DVD-Video content. [DVD-V] To play DVD-Video content, select “Play as DVD-Video” in Other Menu (‹ page 19) — [DVD-V] Panasonic DVD-R recorded and finalized DVD-Video cameras are played as DVD-Video on this unit. — [VCD] Conforming to IEC62107 This unit is compatible with HDCD, but does not support the Peak Extend function. -
Page 12: Basic Play
Basic play AV SYSTEM DIGITAL TV/AV TUNER/BAND DVD/CD DISC 1 DISC 2 DISC 3 Numbered buttons DISC 4 DISC 5 VOLUME -/-- CANCEL CANCEL SLOW/SEARCH SKIP TOP MENU MENU DIRECT PLAY NAVIGATOR LIST 3421 ENTER ENTER DISPLAY RETURN TV VOL TV VOL SUBWOOFER C.FOCUS... - Page 13 AV SYSTEM DIGITAL TV/AV TUNER/BAND DVD/CD DISC 1 DISC 2 DISC 3 DISC 1-5 DISC 4 DISC 5 VOLUME -/-- CANCEL SKIP SLOW/SEARCH MENU TOP MENU TOP MENU MENU DIRECT PLAY NAVIGATOR LIST ENTER DISPLAY RETURN RETURN TV VOL TV VOL SUBWOOFER C.FOCUS MIX 2CH...
-
Page 14: Convenient Functions
Convenient functions AV SYSTEM DIGITAL TV/AV TUNER/BAND DVD/CD DISC 1 DISC 2 DISC 3 DISC 4 DISC 5 VOLUME -/-- CANCEL SKIP SLOW/SEARCH TOP MENU MENU DIRECT PLAY NAVIGATOR LIST 3421 ENTER ENTER DISPLAY RETURN TV VOL TV VOL SUBWOOFER C.FOCUS MIX 2CH LEVEL... -
Page 15: Repeat Play
DISC 1 DISC 2 DISC 3 Numbered DISC 4 DISC 5 buttons VOLUME -/-- CANCEL CANCEL SKIP SLOW/SEARCH TOP MENU MENU DIRECT PLAY NAVIGATOR LIST 3421 ENTER ENTER DISPLAY RETURN TV VOL TV VOL SUBWOOFER C.FOCUS MIX 2CH LEVEL SUPER SRND SLEEP POSITION ZOOM... -
Page 16: Using Navigation Menus
Using navigation menus DIGITAL TV/AV TUNER/BAND DISC 1 DISC 2 DISC 3 Numbered buttons DISC 4 DISC 5 VOLUME -/-- CANCEL SKIP SLOW/SEARCH TOP MENU, TOP MENU DIRECT NAVIGATOR DIRECT NAVIGATOR 3421 ENTER ENTER DISPLAY RETURN DISPLAY TV VOL SUBWOOFER C.FOCUS LEVEL SUPER SRND... - Page 17 Playing HighMAT discs [WMA] [MP3] [JPEG] While stopped Press [TOP MENU]. Press [3 4 2 1] to select the item following the on-screen instructions. e.g. Menu: Takes you to the next New Playlist Item Long Name Display Te PAG E 1 / 3 menu which shows play lists or another menu M e nu 2...
-
Page 18: Using On-Screen Menus
Using on-screen menus (Refer to page 10 for remote control button positions.) DISPLAY Press once. (When pressed twice, the elapsed play time indicator appears ‹ below.) Items shown differ depending on the type of software. Main Menu Program To start from a specific item Group Title Chapter... - Page 19 ∫ Picture Menu Normal Cinema1: Mellows images and enhances detail in dark scenes. Cinema2: Sharpens images and enhances detail in dark scenes. Animation Dynamic User (Press [ENTER] to select “Picture Adjustment”) (‹ below) Picture Mode Picture Adjustment Contrast Brightness Sharpness Colour Gamma (Adjusts the brightness of dark parts.) Depth Enhancer...
-
Page 20: Changing The Player Settings
Changing the player settings (Refer to page 10 for remote control button positions.) SETUP SHIFT MUTING Shows the Setup menu. Select the tab. Item Setup Disc Audio English Video Subtitle Automatic Audio Menus English Display Others Ratings Level 8 ENTER to select and press RETURN ∫... - Page 21 ∫ “Audio” tab ≥Off Dynamic Range Compression ≥On: ≥On Audio during Search ≥Off ≥Center: Speaker Setting (‹ below) ≥Surround (L/R): 0.0/5.0/10.0/15.0 ms Set the delay time for your center and surround speakers. ∫“Display” tab Menu Language §5 ≥ English ≥ §6 ≥English ≥...
-
Page 22: The Radio
The radio AV SYSTEM DIGITAL TV/AV TUNER/BAND DISC 1 DISC 2 DISC 3 Numbered buttons DISC 4 DISC 5 -/-- CANCEL SKIP SLOW/SEARCH TOP MENU DIRECT NAVIGATOR ENTER ENTER DISPLAY TV VOL SUBWOOFER C.FOCUS LEVEL SUPER SRND SLEEP POSITION ZOOM C.S.M MEMORY AUDIO... -
Page 23: Manual Tuning
Manual tuning Main unit only Press [INPUT SELECTOR] to select “FM” or “AM”. Press [TUNE MODE] to select “MANUAL”. Press [X TUNING] or [TUNING W] to select the frequency. Press and hold [X TUNING] or [TUNING W] until the frequency starts scrolling to start automatic tuning. Tuning stops when a station is found. -
Page 24: Sound Field And Sound Quality
Sound field and sound quality AV SYSTEM DIGITAL TV/AV TUNER/BAND DISC 1 DISC 2 DISC 3 DISC 4 DISC 5 -/-- CANCEL SKIP SLOW/SEARCH TOP MENU DIRECT NAVIGATOR ENTER DISPLAY TV VOL SUBWOOFER C.FOCUS LEVEL SUPER SRND SLEEP POSITION ZOOM C.S.M MEMORY AUDIO... - Page 25 DIGITAL TV/AV TUNER/BAND DVD/CD DVD/CD DISC 1 DISC 2 DISC 3 DISC 4 DISC 5 VOLUME -/-- VOLUME CANCEL SKIP SLOW/SEARCH MENU TOP MENU DIRECT PLAY NAVIGATOR LIST 3421 ENTER DISPLAY RETURN TV VOL TV VOL SUBWOOFER C.FOCUS MIX 2CH LEVEL SUPER SRND SLEEP...
-
Page 26: Sound Memory
Sound field and sound quality AV SYSTEM DIGITAL TV/AV TUNER/BAND DISC 1 DISC 2 DISC 3 DISC 4 DISC 5 -/-- CANCEL SKIP SLOW/SEARCH TOP MENU DIRECT NAVIGATOR ENTER DISPLAY TV VOL SUBWOOFER C.FOCUS LEVEL SUPER SRND SUBWOOFER LEVEL SLEEP POSITION ZOOM C.S.M... -
Page 27: Other Functions
Other functions AV SYSTEM DIGITAL TV/AV TUNER/BAND DVD/CD DISC 1 DISC 2 DISC 3 DISC 4 DISC 5 VOLUME -/-- VOLUME CANCEL SKIP SLOW/SEARCH MENU TOP MENU DIRECT PLAY NAVIGATOR LIST ENTER DISPLAY RETURN TV VOL TV VOL SUBWOOFER C.FOCUS MIX 2CH LEVEL SUPER SRND... -
Page 28: Operating Other Equipment
Operating other equipment ∫ Connection example To play sound from the television Reduce the volume on the television to its minimum and control the volume on this unit. To play surround signals from a satellite receiver To play sound from a tape deck Tape deck (not included) -
Page 29: Operating The Television And The Video Cassette Recorder
Operating the television and the video cassette recorder You can use the remote control to operate a Panasonic television or a video cassette recorder. Connect your equipment referring to “Connection example” (‹ page 28). [Note] The remote control may not work properly with some models. -
Page 30: Other Speaker Setup Options
Other speaker setup options ∫ Attaching to a wall 1 Drive a screw (not included) into a wall. 2 Fit the speaker securely onto the screw(s) with the hole(s). ≥The wall or pillar on which the speakers are to be attached should be capable of supporting 10 kg per screw. -
Page 31: Glossary
Glossary Decoder A decoder restores the coded audio signals on DVDs to normal. This is called decoding. Dolby Digital This is a method of coding digital signals developed by Dolby Laboratories. Apart from stereo (2-channel) audio, these signals can also be multi-channel audio. A large amount of audio information can be recorded on one disc using this method. -
Page 32: Specifications
Specifications AMPLIFIER SECTION RMS Output Power: Dolby Digital Mode 65 W per channel (6 ≠), 1 kHz, 10 % THD Front Ch 70 W per channel (4 ≠), 1 kHz, 10 % THD Surround Ch 270 W per channel (4 ≠), 1 kHz, 10 % THD Center Ch 260 W per channel (4 ≠), 100 Hz, 10 % THD Subwoofer Ch... - Page 33 SUBWOOFER SECTION [Active\subwoofer\SB-WA928] Type 1 way, 1 speaker system (Bass reflex) Speaker unit(s) Woofer Output sound pressure Frequency range 34 Hz–220 Hz (j16 dB) 38 Hz–190 Hz (j10 dB) Dimensions (WtHtD) Mass SPEAKER SECTION [Front\speakers\SB-PF921] Type 2 way, 3 speaker system (Bass reflex) Speaker unit(s) 1.
-
Page 34: Troubleshooting Guide
Troubleshooting guide Before requesting service, make the following checks. If you are in doubt about some of the check points, or if the remedies indicated in the chart do not solve the problem, consult your dealer for instructions. Power No power. The unit is automatically switched to the standby mode. - Page 35 Picture abnormal or un-viewable ≥Ensure that the unit is connected directly to the television, and is not connected through a video Picture distorted. cassette recorder. ≥Change “TV Aspect” in “Video” tab. Picture size doesn’t fit the ≥Use the television to change the aspect. If your television does not have that function, change screen.
- Page 36 Matsushita Electric Industrial Co., Ltd. Web Site: http://www.panasonic.co.jp/global/ RQT7436-B F0304YM0...