Table of Contents
Advertisement
Operating Instructions
LCD Projector
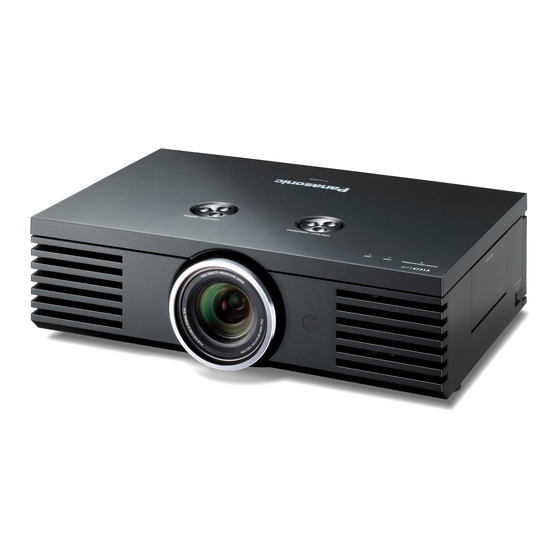
PT-AE4000U
Model No.
Thank you for purchasing this Panasonic product.
Before operating this product, please read the instructions carefully, and save this manual for future use.
Please read the functional instructions that is in the provided CD-ROM for more details.
TQBJ0309
E
NGLISH
Advertisement
Chapters
Table of Contents

Related Manuals for Panasonic PT-AE4000U


Summary of Contents for Panasonic PT-AE4000U
-
Page 1: Operating Instructions
PT-AE4000U Model No. Thank you for purchasing this Panasonic product. Before operating this product, please read the instructions carefully, and save this manual for future use. Please read the functional instructions that is in the provided CD-ROM for more details. -
Page 2: Important Information
We hope it will help you to get the most out of your new product, and that you will be pleased with your Panasonic LCD projector. The serial number of your product may be found on its bottom. You should note it in the space provided below and retain this booklet in case service is required. -
Page 3: Declaration Of Conformity
Pursuant to at the directive 2005/32/EC amended by 2008/28/EC, article 14 Panasonic Testing Center Panasonic Service Europe, a division of Panasonic Marketing Europe GmbH Winsbergring 15, 22525 Hamburg, F.R. Germany WARNING: Not for use in a computer room as defined in the Standard for the Protection of Electronic Computer/Data Processing Equipment, ANSI/NFPA 75. -
Page 4: Lens Memory
Waveform Monitor Adjust the luminance level of the input signal to display full dynamic range of the content. VIERA Link Control multiple Panasonic devices and other CEC compatible devices via HDMI cable using the projector remote. Split Adjust Mode Perform adjustments to the image by viewing the before and after image side by side. -
Page 5: Table Of Contents
Screen size and throw distance ... 14 Projection method ... 14 Lens shift and positioning ... 15 Connections ... 15 Before connecting to the projector ... 15 Basic Operation Switching the projector on/off ... 16 Power cord ... 16 Power indicator... 16 Switching on the projector ... -
Page 6: Precautions With Regard To Safety
ON USE/INSTALLATION „ Do not place liquid containers on top of the projector. If water spills onto the projector or gets inside it, fire or electric shocks will result. If any water gets inside the projector, contact an Authorized Service Center. -
Page 7: Caution
Do not look into or touch the lights emitted from the lens while the projector is being used. Doing so can cause burns or loss of sight. Strong light is emitted from the projector’s lens. Do not look or place your hands directly into this light. -
Page 8: Cautions When Transporting
Be sure to put on the lens unit cover „ after installing the projection lens. If this not done, dust will collect inside the projector and problems with the projector can result. Lens Focus „ Do not adjust the lens focus in the initial period after switching the projector on. -
Page 9: Cautions On Use
It may be necessary to replace the optical components such as liquid crystal panels and polarizing plates in less than 1 year if using the projector in a high temperature environment or in a very dusty, oily smoke or tobacco smoke environment. For more details, please contact your dealer. -
Page 10: Accessories
Precautions with regard to safety Accessories Make sure the following accessories are provided with your projector. Remote control for N2QAYB000450 * The protectors for enclosed products, such as a plug cover or foam cartons, must be treated properly. 10 -... -
Page 11: Preparation
Preparation About Your Projector Remote control Power button While MAIN POWER is on, switch between standby mode and projection mode. Display the PICTURE menu or ADVANCED MENU. Switch to cycle through the PICTURE MODE. Display the VIERA LINK menu. Display the main menu or return to the previous menu. -
Page 12: Projector Body
MENU Display the main menu. Return to the previous menu. Note: • While the projector is not in use, keep the lens cover attached to protect the lens. 12 - NGLISH Lens shift dials • Horizontal Power/LAMP/TEMP indicators... - Page 13 Connect HDMI signal cables. NOTE: • The projector should only be used with the attached power cord to ensure optimum performance and avoid damage to the projector. • Do not open the top cover other than replacing the lamp unit.
-
Page 14: Getting Started
Do not cover the air exhaust/intake ports or place anything within 50 cm (19 5/8") of them. Projection method You can use the projector with any of the following 4 projection methods. To set the projector in the desired method, see “INSTALLATION” in “OPTION menu” of the functional instructions that is in the provided CD-ROM. -
Page 15: Lens Shift And Positioning
Lens shift and positioning If the projector is not positioned right in front of the center of the screen, you can adjust the projected image position by moving the lens shift dials within the shift range of the lens. Adjusting the lens shift dials... -
Page 16: Basic Operation
Ensure all the input devices are connected and turned off before connecting the power cord. • Do not force the connector as this may damage the projector and/or the power cord. • Dirt or dust build-up around plugs may cause fire or electrical hazards. -
Page 17: Switching On The Projector
POWER” in “Option menu” of the functional instructions that is in the provided CD-ROM. • When starting up the projector, some small rattling or tinkling sound may be heard, or the display may flicker for the characteristics of the lamp. Those are normal and will not affect the performance of the projector. -
Page 18: Projecting An Image
See “Lens shift and positioning” on page 15. Adjust the angle of the projector. You can screw the front leg adjusters up/down to control the angle of the projector for adjusting the throwing angle. Screw up the front leg adjusters, and an audible click will be heard as the limit. -
Page 19: Settings
Settings Menu Navigation Navigating through the MENU J Displaying the main menu Press the MENU button to display the main menu and the operating guidance. Main menu Sub-menu PICTURE MODE PICTURE CONTRAST POSITION BRIGHTNESS COLOR LANGUAGE TINT LENS CONTROL SHARPNESS FUNCTION BUTTON COLOR TEMPERATURE VIERA LINK... -
Page 20: Menu List
Menu Navigation Menu list The menu options are structured and categorized. You can navigate through the menu with ▲ ▼ ◄ ► buttons. NOTE: • The underlined items are factory default settings. • Some default settings vary by the selected input signal. •... -
Page 21: Function Button
POSITION It is possible to adjust the image size and position. H-POSITION (Default: 0) V-POSITION (Default: 0) DOT CLOCK (Default: 0) CLOCK PHASE (Default: 0) ASPECT 16:9 s16:9 ZOOM ZOOM1 ZOOM2 AUTO H-FIT V-FIT OVER SCAN KEYSTONE (Default: 0) AUTO SETUP LANGUAGE It is possible to change the display language. -
Page 22: Lens Memory
Menu Navigation OPTION It is possible to change the option settings. INPUT GUIDE DETAILED SIMPLE OSD DESIGN TYPE1 TYPE3 OSD POSITION CENTER LOWER CENTER UPPER LEFT UPPER RIGHT BACK COLOR BLUE STARTUP LOGO AUTO SEARCH HDMI SIGNAL LEVEL NORMAL FRAME RESPONSE NORMAL INSTALLATION FRONT/DESK... -
Page 23: Viera Link
“ OTHER” means Tuner (set-top box), etc. The menu of the accessed equipment (Input mode will be changed automatically.) Operate the menu of the equipment Projector remote control can be used. ( Controllable functions depend on the connected equipment.) If you access non-VIERA Link equipment... -
Page 24: Home Theater
Other manufacturer’s equipment control You can control other manufacturer’s connected equipment by the projector remote control. Access and operate the menu of the other manufacturer’s equipment Press the VIERA Link button on the remote control. -
Page 25: Maintenance
Remedy unit” on page 27. NOTE: • If no problem is found or the problem remains, do not turn on the projector. Instead contact an Authorized Service Center. LAMP and/ The air filter is excessively The room temperature is dirty and the ventilation is too high. -
Page 26: Care And Replacement
Cleaning the outer surface of the projector Wipe off dirt and dust gently with a soft cloth. If it is difficult to remove the dirt, soak a cloth in water, wring the cloth well and then wipe the projector. Dry off the projector with dry cloth. -
Page 27: Replacing The Lamp Unit
Prepare a Phillips-head screwdriver. Contact an Authorized Service Center to purchase a replacement lamp unit (ET-LAE4000). When the projector is mounted on the ceiling, do not work directly under the projector or put your face closer to the projector. NOTE: •... -
Page 28: Attaching Top Cover
NOTE: • Be sure to install the lamp unit and the top cover of the projector securely. If they are not securely installed, it may cause the protection circuit to operate so that the power cannot be turned on. -
Page 29: Troubleshooting
The lens cover may still be attached to the lens. The lens focus may not have been set correctly. The projector may not be at the correct distance from the screen. The picture is fuzzy. The lens may be dirty. -
Page 30: Appendix
The projector and the ceiling mount bracket are designed for sufficient safety. However, make sure the safety cable provided with the projector is installed and attached to the bottom of the projector when mounting on the ceiling for safety and security. -
Page 31: List Of Compatible Signals
List of compatible signals Mode Display NTSC/NTSC 4.43/ PAL-M/PAL60 PAL/PAL-N/SECAM 525i (480i) 480i 625i (576i) 576i 525p (480p) 480p 625p (576p) 576p 1 125 (1 080)/60i 1 080/60i 1 125 (1 080)/50i 1 080/50i 1 125 (1 080)/24p 1 080/24p 1 125 (1 080)/60p 1 080/60p 1 125 (1 080)/50p... -
Page 32: Specifications
Technical Information Specifications Power supply Power consumption Amps Panel size (diagonal) Aspect ratio LCD panel Display method Drive method Pixels Lens Lamp Luminosity Operating environment Horizontal scanning frequency Scanning Vertical scanning frequency frequency (for RGB signal) Dot clock frequency COMPONENT (YP ) signals Color system Projection size... - Page 33 S-VIDEO IN VIDEO IN COMPUTER IN Terminals COMPONENT IN HDMI IN SERIAL TRIGGER Cabinet Dimensions Weight Certifications Power supply Operating range Weight Remote control Dimensions Cable cover Options Ceiling bracket Average value. Each product has an individual variability in weight. Single-line, Mini DIN 4p Y: 1.0 V [p-p], C: 0.286 V [p-p], 75 Ω...
-
Page 34: Trademark Acknowledgements
Technical Information Trademark acknowledgements HDAVI Control™ and VIERA Link™ are trademarks. VGA and XGA are trademarks of International Business Machines Corporation. S-VGA is a registered trademark of the Video Electronics Standards Association. HDMI, the HDMI logo and High-Definition Multimedia Interface are trademarks or registered trademarks of HDMI Licensing LLC. -
Page 35: Index
Index Accessories ... 10 AC IN ... 13 Air exhaust port ... 12 Air filter ... 12 Replacing ... 26 Air intake port ... 13 Batteries Accessory ... 10 Compartment ... 11 CD-ROM Accessories ... 10 Menu ... 19 Ceiling mount bracket ... 30 Cleaning ... - Page 36 P1009-1109B TQBJ0309...