Table of Contents
Advertisement
Quick Links
Advertisement
Table of Contents

Related Manuals for Panasonic TX32LX80


Summary of Contents for Panasonic TX32LX80
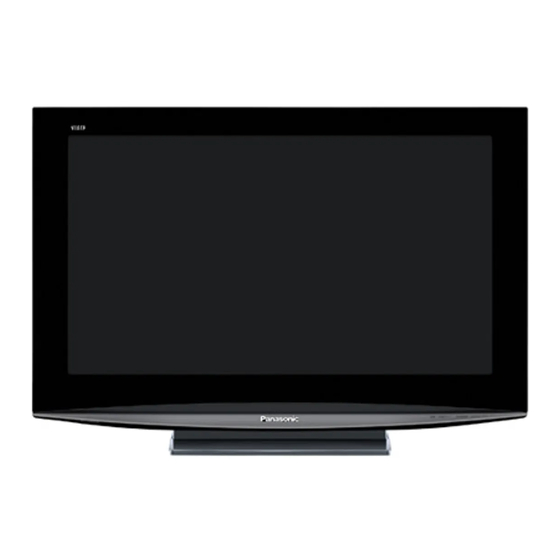
- Page 1 P anasonic Operating Instructions LCD TV TX-32LX80A M odel No. VIVA v lIrA H E3m1- W aR P lease read these instructions before operating your set and retain them for future reference. The images shown In this manual are for illustrative purposes only. T QB4G00061...
- Page 2 Dear Panasonic Customer Welcome to the Panasonic family of customers. We hope that you will have many years of enjoyment from y our new LCD TV Warnings and Cautions ...2 External Equipment ... 18 23 Accessories / Options ... Identifying Controls ...
- Page 3 " Do not use rechargable (NI-Cd) batteries. " Do not bum or breakup batteries. 0 Failure to use a Panasonic bracket or choosing to mount the unit yourself will be done at the risk of the consumer. Any damage resulting from not having a professional installer mount your unit will void your warranty.
- Page 4 Mains power Remote control On/Off switch signal receiver Power indicator (Range: 7 metres) Standby'. RED C .A.T.S. (Contrast Automatic Tracldng System) sensor Power ON: GREEN * senses brightness to adjust picture quality when Picture mode is set to Eco. Switches TV to On or Standby (Mains power must be on) Select Aspect ratio Confirm selected option...
- Page 5 External equipments and cables shown are not supplied with this TV. Please ensure that unit is disconnected from the mains socket before attaching or disconnecting any leads. C onnecting aerial M ains plug types vary between countries. The power plug shown above may, therefore, not be the type fitted to your set.
- Page 6 These steps are not necessary if the setup has been completed by your local dealer. Turn On the TV with the mains power On I Off switch Select the picture setting " `Homed is the recommeded mode for viewing at home.
- Page 7 Display the menu Select and access "Setup menu" Select and access menu" Select the item "Tuning (Sys select I Auto tuning) 0 To return to the previous screen M ENU REMBN Sys select (System selection) Select the system of your area. (China I HKIUK I Asia/M.East I NVINDONES / Australia I E.Europe I SPECL Ver I America I CATV / Japan) *Auto tuning...
- Page 8 Turn power on _ Mains power ONOff switch should be On. _ If "Shop" is displayed on the top right of the screen, select "Home" in "Vewing Environment'. (p. 6) Select a programme numher " Other Useful Functions (Operate after © ) Freeze I unfreeze picture "...
- Page 9 (For connection, see Displays the selected mode t o '16:9* Select VCR to operate Panasonic VCR or DVD V= WM Select DVD to operate Panasonic DVD or Home theatre player Standby mode / Turn on...
- Page 10 In FASTEXT mode, four differently coloured subjects are situated at the bottom of the display. To access " more infbrmafion about one of these subjects, press the corresponding coloured button. This facility enables fast access to Information on the subjects shown. "...
- Page 11 Return to the main index page INIM Watch TV and Teletext in two windows at once 0 Operations can be rnade only in Teletext screen. Store frequently viewed pages (programme position 1 to 25) in the colour bar As page is [M displayed W b change stored pages * (M...
- Page 12 Various menus allow you to make settings fbr the picture, sound, and other functions so that you can enjoy watching. TV in your own way. 0 To return to TV 0 To return to the previous screen REn= * 0 or 40 Display the menu Select and accessthe...
- Page 13 1_'_ i_° _ ,P,cc?ss rtie rr_r_u F I .i s CS',Ei?t1 r`3Bi J S etup _aunu Select (Required by some functions) " To return to TV return " To to the previous screen ii_NU " Only available Reins can be selected. '_JIERALinkmenu P ausa live T'v' feCl...
- Page 14 P ause the live TV programme and resume later (page 19) Control the connected DIGA recorder to start or stop recording current TV programme (page 19) Controls the connected Panasonic equipment Easy control only with VIERA remote control"(page 20) Speaker control"(page 21) *You can also access VIERA Link Menu directly using the VIERA Link button on the remote control.
- Page 15 Adjusts volume level of right and left speakers Adjusts the volume level of the headphones G ives a greater spatial effect by using dynamic enhancer (Off / On) *Switching is also possible by SURROUND button on the remote control. C hooses according to the signal when HDMI is connected (Auto I Digital /Analogue) 0 HDM12 terminal is for digital signal only.
- Page 16 The current channel settings can be changed according to your needs and reception conditions. To freely change settings after Auto setup 10 Select the programme number and search through the channel Programme number C __ CEOs= ------------------------------------------------------------- For Manual tuning using the buttons on the unit M anual tuning system) searching channels)
- Page 17 The screen of the PC connected to the TV can be displayed on the TV. You can also listen to PC sound with the audio cable connected. To connect PC (page 22) Select the extemal input Select ,PC" 40 To return to TV Hxrr * PC menu setting (changed as desired) To make settings * 41-low to Use Menu Functionso 0 to 0 (page 12)
- Page 18 VIERA Link "HDAVI Control" Enjoy additional HI)MI I nter-Operability with Panasonic products which have 'HDAM Control" function. HDMI connections to some Panasonic equipment (Panasonic DVD Recorder DIGA) allow you to enjoy easy playback. Connections for VIERA Link " Use fully wired HDMI compliant cable.
- Page 19 Using VIERA Link menu OThis function is available with DIGA Recorder which has HDD and "HDAVI Control"function when watching TV programme or input from DIGA Recorder. *If you cannot operate, check the VIERA Linku setting in m8etup menu" (page 18) and the equipment.
- Page 20 You can control some functions of the connected Panasonic equipment with this TV remote control (point the remote control at the TVs signal receiver). *This function Is available with equipment which has "HDAVI Controln function. 0 If you cannot operate, check the 6VIERA Link" setting in "Setup menu" (page 18) and the equipment.
- Page 21 " About HDMI cable for connecting Panasonic HD Video Camera, read the manual of the equipment. " If more than one equipment of the same type are connected to the TV by HDMI cables, for example two DIGA Recorders to HDMI1 and HDMIZ VIERA Link will only be available for the lower terminal number, in this case HDMI1.
- Page 22 These diagram show our recommendations for how to connect the TV unit to your various equipment. V IDEO 4 pin terminal Chmminenoe In Luminance in C"arance aM Urnmarne am Set IDp bmc - ---- = ---- - - - ----------- -- 4W DVD rewrder I VCR...
- Page 23 Types of connectable equipment to each connector Connect the S-VIDE0 or VIDEO terminal when using AV3 IN terminals. 0 Reoommended Connection 0 Connect the COMPONENT or VIDEO terminal when using AV2 IN terminals.
- Page 24 The optimum size and aspect can be chosen, and you can enjoy finer images. Note *The ratio varies depending on the programme, etc. If the ratio is greater than the standard ul 6:9" black bands may appear at the top and bottom of the screen. "...
- Page 25 HDMI (High-Definition Multimedia Interface) allows you to enjoy high-definition digital images and high quality sound by connecting the TV and the equipment. HDMI-compatlols equipment C11) with a HDMI or D%n output terminal, such as a set top box or a DVD player, can be connected to the HDMI terminal using a HDMI compliant (fully wired) cable.
- Page 26 HDMI connections to some Panasonic equipment allow you " Setup the equipment to enable this function. Read the manual of the equipment. " Switch the TV until on again with the equipment on when connection or setup is changed. " This function may not work normally depending on the equipment condition.
- Page 27 W hen you receive stereo / bilingual sound system, sound output modes can be selected by CDIV pressing the Stereo / Bilingual Sound Selection button. Nato " If the stereo signal Is poor or the receiving conditions are not optimum or if STEREO: MONO automatic switching occurs, it is recommended you switch from STEREO to MONO.
- Page 28 Before requesting service or assistance, please follow these simple guides to resolve the problem. If problem still persists, please contact your local Panasonic dealer or Panasonic Customer Care Centre assistance. fiDr - -------- W hite spots or shadow images (noise) C heck the position, direction, and connection of the aerial.
- Page 29 Snowy Picture 1 01 ® Multiple Image <_.P Normal Sound Interference N ormal Picture No Picture ® No Colour _11 Normal Sound Poor or Distorted Picture ® Normal Picture There may be red spots, blue spots, green spots and black spots on the screen "VIERA Link"...
- Page 30 94.0 cm (diagonal) 819.6 mm (W) x 460.8 mm (H) 1,049,088 (1,366 (W) x 768 (H Full range x 2 pcs, 8 Q 20 W (10 W + 10 W), 10% THD M3 (3.5 mm) Jack x I VGA,SVGA,XGA 1 7 Systerns:::_Fun_cflon I PALB,G H 2 [PAL 3 1 _Al- D, K...
- Page 32 Customer's Record The model number and serial number of this product may be found on its rear panel. You should note this serial number in the space provided below and retain this book, plus your purchase receipt, as a p ermanent record of your purchase to aid in identification in the event of theft or loss, and for Warranty Service purposes.