Table of Contents
Advertisement
Dear customer
Thank you for purchasing this product. For optimum performance
and safety, please read these instructions carefully.
Before connecting, operating or adjusting this product, please read
the instructions completely.
Please keep this manual for future reference.
Region number supported by this unit
Region numbers are allocated to DVD players and DVD-Video
according to where they are sold.
≥The region number of this unit is "1".
≥The unit will play DVDs marked with labels containing "1" or
"ALL".
Example:
PC
1
1
2
ALL
4
Operating Instructions
Model No.
If you have any questions contact
1-800-561-5505
The warranty can be found on page 70.
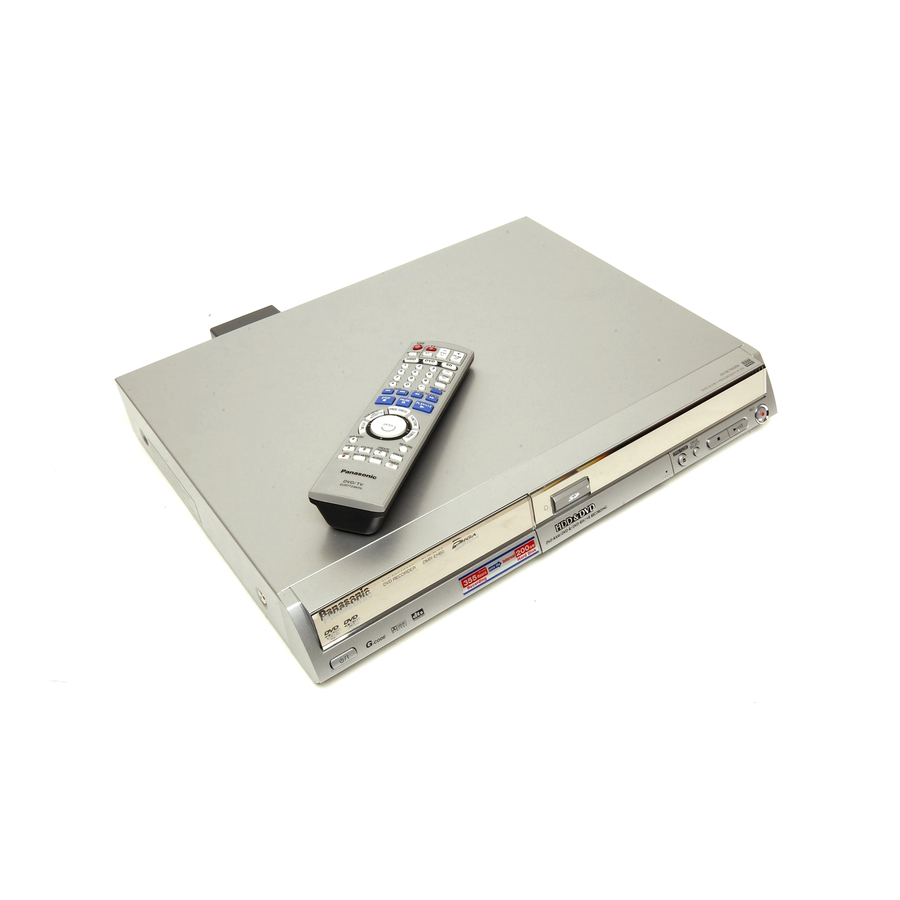
DVD Recorder
DMR-EH60
RQT8307-P
Advertisement
Table of Contents

Related Manuals for Panasonic DMR-EH60


Summary of Contents for Panasonic DMR-EH60
-
Page 1: Operating Instructions
≥The region number of this unit is “1”. ≥The unit will play DVDs marked with labels containing “1” or “ALL”. Example: Operating Instructions If you have any questions contact 1-800-561-5505 The warranty can be found on page 70. DVD Recorder DMR-EH60 Model No. RQT8307-P... -
Page 2: Important Safety Instructions
CAUTION! THIS PRODUCT UTILIZES A LASER. USE OF CONTROLS OR ADJUSTMENTS OR PERFORMANCE OF PROCEDURES OTHER THAN THOSE SPECIFIED HEREIN MAY RESULT IN HAZARDOUS RADIATION EXPOSURE. DO NOT OPEN COVERS AND DO NOT REPAIR YOURSELF. REFER SERVICING TO QUALIFIED PERSONNEL. WARNING: TO REDUCE THE RISK OF FIRE, ELECTRIC SHOCK OR PRODUCT DAMAGE, DO NOT... -
Page 3: Table Of Contents
Table of contents Getting started IMPORTANT SAFETY INSTRUCTIONS ....2 Useful features ........3 HDD (Hard disk drive) handling care . -
Page 4: Hdd (Hard Disk Drive) Handling Care
∫ Indemnity concerning recorded content Panasonic does not accept any responsibility for damages directly or indirectly due to any type of problems that result in loss of recording or edited content (data), and does not guarantee any content if recording or editing does not work properly. Likewise, the above also applies in a case where any type of repair is made to the unit (including any other non-HDD related component). -
Page 5: Disc And Card Handling
Disc and card handling ∫ How to hold a disc or card Do not touch the recorded surface or the terminal surface. ∫ Concerning non-cartridge discs Be careful about scratches and dirt. ∫ If there is dirt or condensation on the disc Wipe with a damp cloth and then wipe dry. -
Page 6: Using Dvd-R, Dvd-Rw And +R On This Unit
Using DVD-R, DVD-RW and +R on this unit Restrictions with DVD-R, etc. Playing the disc on other DVD players is not possible before finalizing (➡ 52). 16:9 aspect programs are recorded in 4:3 aspect. The Main or SAP only can be recorded for MTS broadcasts. §... -
Page 7: Accessories
Accessories Please check and identify the supplied accessories. Use numbers indicated in parentheses when asking for replacement parts. (Product numbers correct as of May 2005. These may be subject to change.) To order accessories, call the dealer from whom you have made your purchase. ∏... -
Page 8: Hdd, Disc And Card Information
This recording method is the same as commercially available DVD-Video. ≥Digital broadcasts that allow “One time only recording” cannot be recorded. ≥These can be played on a DVD player. However programs recorded on this unit must be finalized to be played on other DVD players. -
Page 9: Discs That Cannot Be Played
Yes (Available space does not the last recorded title is erased.) increase after erasing.) ≥We recommend using Panasonic discs and cards. We also recommend using DVD-RAM discs with cartridges to protect them from scratches and dirt. ≥Discs from other manufacturers may not be recorded or played due to the condition of the recording. -
Page 10: Control Reference Guide
Control reference guide Remote control Instructions for operations are generally described using the remote control. DVD POWER POWER Í TV/VIDEO INPUT SELECT CANCEL VCR Plus+ CM SKIP SKIP STOP STOP PAUSE PAUSE ENTER ENTER SUB MENU SUB MENU CREATE CREATE DUBBING DUBBING CHAPTER... -
Page 11: Main Unit
Main unit POWER Opening the front panel Press down on the 1 POWER button (POWER Í/I) (➡ 16) Press to switch the unit from on to standby mode or vice versa. In standby mode, the unit is still consuming a small amount of power. -
Page 12: Step 1 Connection
STEP Connection ≥The equipment connections described are examples. Visit Panasonic’s homepage for more information about connection methods. (This is in English only.) http://www.panasonic.com/consumer_electronics/dvd_recorder/dvd_connection.asp ≥Before connection, turn off all equipment and read the appropriate operating instructions. ≥Peripheral equipment and optional cables sold separately unless otherwise indicated. - Page 13 Connection with a cable TV box and video cassette recorder ≥You need to subscribe to a cable TV service to enjoy viewing their programming. ≥Consult your service provider regarding appropriate cable TV box. ≥If you receive your programming solely from a satellite service, the program guide in this unit will not receive program listings or channel information.
- Page 14 STEP Connection Connection for transferring (dubbing) from video tape Red White Yellow R-AUDIO-L R-AUDIO-L VIDEO VIDEO ≥To reduce video tape noise while transferring (dubbing) ➡ 37, On-screen menu, Video, Line-in NR To enjoy even higher picture quality Connecting to the S VIDEO IN terminal AUDIO IN Red White Audio/Video cable...
-
Page 15: Connecting An Amplifier Or System Component
Connecting an amplifier or system component ∫ Connection to a stereo amplifier Amplifier’s rear panel AUDIO IN Red White Audio cable This unit To OUT 1 or OUT 2 VHF / UHF Red White R-AUDIO-L R-AUDIO-L VIDEO VIDEO S VIDEO VIDEO If the antenna connector doesn’t match Other antenna connections to the unit... -
Page 16: Step 2 Setting Up The Tv Guide On Screen
STEP Setting up the TV Guide On Screen POWER POWER Í/ l DVD POWER Í DVD POWER INPUT SELECT Numbered buttons CANCEL SKIP STOP STOP SUB MENU SUB MENU DUBBING DUBBING CHAPTER CHAPTER After plugging the unit into your household AC outlet and pressing [Í... - Page 17 Is your cable box now tuned to channel 09? Test this code again –If the cable TV box has changed to channel 09, select “Yes” and press [ENTER]. –If the cable TV box is still set to the same channel, select “No” and press [ENTER].
-
Page 18: Step 3 Set Up To Match Your Television And The Unit's Remote Control/Power Saving Function
STEP Set up to match your television and the unit’s remote control/Power saving function DVD POWER POWER Í INPUT SELECT TV/VIDEO Numbered buttons CANCEL SKIP STOP STOP SUB MENU SUB MENU CREATE CREATE DUBBING DUBBING CHAPTER CHAPTER REC MODE REC MODE ERASE DVD/TV DVD/TV RQT8307... -
Page 19: When Other Panasonic Products Respond To This Remote Control
When other Panasonic products respond to this remote control Change the remote control code on the main unit and the remote control (the two must match) if you place other Panasonic products close together. Use “1”, the factory set code, under normal circumstances. -
Page 20: Recording Television Programs
Recording television programs HDD, DVD indicator POWER S VIDEO S VIDEO DV DV I N I N DVD POWER POWER Í TV/VIDEO INPUT SELECT Numbered buttons CANCEL SKIP STOP STOP PAUSE PAUSE ∫ ENTER ENTER SUB MENU SUB MENU CREATE CREATE DUBBING DUBBING... - Page 21 Recording modes and approximate recording times Depending on the content being recorded, the recording times may become shorter than indicated. DVD-RAM Mode Single- (200 GB) sided (4.7 GB) XP (High quality) SP (Normal) LP (Long play) §2 §2 EP (Extra long 355 (266 8 (6 play)
-
Page 22: Selecting Audio To Record
Recording television programs HDD, DVD Numbered buttons CANCEL SKIP ∫ STOP STOP PAUSE PAUSE DIRECT NAVIGATOR ENTER ENTER TIME SLIP SUB MENU SUB MENU CREATE CREATE DUBBING DUBBING CHAPTER CHAPTER REC MODE REC MODE ERASE Selecting audio to record [HDD] [RAM] DVD/TV Press [AUDIO]. -
Page 23: Playing While You Are Recording
Preparation ≥Select the channel or the external input (IN1, IN2, IN3 or DV) to record. ≥Press [HDD] or [DVD] to select the recording drive. While stopped Press [F Rec]. FLEXIBLE RECORDING Record in FR mode. Maximum recording time Maximum rec. time 8 Hour 00 Min. -
Page 24: Scheduled Recording
Scheduled recording DVD POWER POWER Í DVD POWER Í TV/VIDEO INPUT SELECT Numbered buttons CANCEL SKIP ∫ STOP STOP PAUSE PAUSE ENTER ENTER SUB MENU SUB MENU SUB MENU CREATE CREATE DUBBING DUBBING CHAPTER CHAPTER “Blue” “Green” REC MODE REC MODE ERASE [HDD] [RAM] [-R] [-RW‹V›] [+R] For successful scheduled recordings DVD/TV... -
Page 25: Recordings
∫ To cancel recording when it has already begun Press [∫], then [ENTER] within 5 seconds. ≥You can also press and hold [∫] on the main unit for more than 3 seconds to stop recording. ≥There may be some channels that are not displayed in the television program list even if they are receivable. -
Page 26: Using Vcr Plusi System To Make Scheduled Recordings
Scheduled recording DVD POWER POWER Í DVD POWER Í INPUT SELECT TV/VIDEO Numbered buttons CANCEL SKIP STOP STOP PAUSE PAUSE ∫ ENTER ENTER SUB MENU SUB MENU SUB MENU CREATE CREATE DUBBING DUBBING DUBBING CHAPTER CHAPTER “Blue” REC MODE REC MODE ERASE CREATE CHAPTER “Green”... -
Page 27: Check, Change Or Delete A Program
Check, change or delete a program You can check, change or delete a program set for scheduled recording on the television screen. Press [SCHEDULE]. MESSAGES SCHEDULE LISTINGS FAVORITES RECORD SET TIMER Sat 1:00pm NWBG Once Sat 2:00pm Dodzilla Once Sat 3:00pm Bull house Weekly Sat 3:30pm Be switched Weekly 4:00pm Baseball... -
Page 28: Utilizing The Tv Guide On Screen
Utilizing the TV Guide On Screen Refer to the control reference on page 26. Press [TV GUIDE]. Video window (The channel you were previously watching is displayed.) SCHEDULE TODAY TODAY 8:00PM Last Channel Panel Ads NWGB 8:00 8:30 FAVORITES NWBG ducation ANiMe Network... - Page 29 SETUP screen The SETUP screen allows you to redo the channel settings, customize the channel line-up and set the TV Guide On Screen system’s start-up pattern. ∫ “Change system settings” menu–Access to the TV Guide On Screen system setup screen You can also verify any information entered during setup, or completely redo the setup, for the TV Guide On Screen 1 Press [3, 4] to select “Change system settings”...
-
Page 30: Playing Recorded Video Contents/Playing Play-Only Discs
Playing recorded video contents/Playing play-only discs HDD, DVD indicator POWER S VIDEO S VIDEO DV DV I N I N DVD POWER POWER Í INPUT SELECT TV/VIDEO Numbered buttons CANCEL SKIP ∫ STOP STOP PAUSE PAUSE TOP MENU, DIRECT NAVIGATOR ENTER ENTER TIME SLIP... -
Page 31: Operations During Play
∫ When a menu screen appears on the television [DVD-V] [DVD-A] Press [3, 4, 2, 1] to select the item and press [ENTER]. Some items can also be selected using the numbered buttons. [VCD] Press the numbered buttons to select the item. [0] ➡... -
Page 32: Simple Editing Operations During Play
Playing recorded video contents/Playing play-only discs Refer to the control reference on page 30. Displaying the television image as a picture-in-picture [HDD] [RAM] [-R] [-RW‹V›] [+R] [-RW‹VR›] Skipping the specified time (Time Slip) [HDD] [RAM] [-R] [-RW‹V›] [+R] [-RW‹VR›] CM Skip [HDD] [RAM] [-R] [-RW‹V›] [+R] [-RW‹VR›] Simple editing operations during play... -
Page 33: Using Menus To Play Mp3
Using menus to play MP3 INPUT SELECT TV/VIDEO AUDIO F Rec Numbered buttons SETUP CANCEL VCR Plus+ CM SKIP SKIP SLOW/SEARCH PLAY/x1.3 STOP STOP PAUSE PAUSE TOP MENU ENTER ENTER SUB MENU SUB MENU RETURN RETURN CREATE CREATE DUBBING DUBBING Info STATUS STATUS... -
Page 34: Playing Still Pictures (Jpeg/Tiff)
Playing still pictures (JPEG/TIFF) SD card slot POWER S VIDEO S VIDEO DV DV I N I N DVD POWER POWER Í INPUT SELECT TV/VIDEO HDD, DVD, SD Numbered buttons CANCEL SKIP STOP STOP PAUSE PAUSE ∫ DIRECT NAVIGATOR ENTER ENTER SUB MENU SUB MENU... -
Page 35: Useful Functions During Still Picture Play
Useful functions during still picture play Start Slide You can display still pictures one by one with constant interval. Show While the Picture (JPEG) View screen is Slide Interval displayed 1 Press [HDD] [RAM] [SD] [CD] [3, 4, 2, 1] to select “Folder”... -
Page 36: Using On-Screen Menus/Functions Window And Status
Using on-screen menus/FUNCTIONS window and Status message DVD POWER POWER Í INPUT SELECT TV/VIDEO CANCEL VCR Plus+ CM SKIP SKIP SLOW/SEARCH STOP STOP PAUSE PAUSE ENTER ENTER SUB MENU SUB MENU CREATE CREATE DUBBING DUBBING Info CHAPTER CHAPTER REC MODE ERASE REC MODE ERASE DISPLAY Using on-screen menus... -
Page 37: Functions Window
Video menu–Change the picture quality Picture [HDD] [RAM] [-R] [-RW‹V›] [+R] [DVD-V] [DVD-A] [-RW‹VR›] To select the picture quality mode during play. ≥Normal: Default setting ≥Soft: Soft picture with fewer video artifacts ≥Fine: Details are sharper ≥Cinema: Mellows movies, enhances detail in dark scenes. ≥User: You can make further adjustments. -
Page 38: Editing Titles/Chapters
Editing titles/chapters HDD, DVD CANCEL SKIP STOP STOP PAUSE PAUSE DIRECT NAVIGATOR ENTER ENTER SUB MENU SUB MENU SUB MENU CREATE CREATE DUBBING DUBBING CHAPTER CHAPTER “Blue” REC MODE REC MODE ERASE [HDD] [RAM] [-R] [-RW‹V›] [+R] Title/Chapter DVD/TV Programs are recorded as a single title consisting of one chapter. Title Chapter Start... -
Page 39: Title Operations
Title operations After performing steps 1–5 (➡ 38) Press [2, 1] to select “Erase” and press [ENTER]. § Erase Title ≥Once erased, the recorded contents are lost and cannot be restored. Make certain before proceeding. [HDD] [RAM] [-R] [-RW‹V›] [+R] ≥The available recording space on DVD-R or +R does not increase when you erase titles. -
Page 40: Creating, Editing And Playing Playlists
Creating, editing and playing playlists HDD, DVD CANCEL VCR Plus+ CM SKIP SKIP SLOW/SEARCH STOP STOP PAUSE PAUSE ENTER ENTER SUB MENU SUB MENU SUB MENU CREATE CREATE DUBBING DUBBING Info CHAPTER CHAPTER REC MODE ERASE DISPLAY You can arrange the chapters (➡ 38) to create a playlist. Title Chapter Chapter Chapter... -
Page 41: Editing And Playing Playlists/Chapters
Editing and playing playlists/chapters [HDD] [RAM] [-RW‹VR›] (Play only) While stopped Press [FUNCTIONS]. Press [3, 4] to select “Other Functions” and press [ENTER]. Press [3, 4] to select “PLAYLISTS” and press [ENTER]. Press [3, 4, 2, 1] to select the playlist. -
Page 42: Editing Still Pictures
Editing still pictures POWER Í INPUT SELECT TV/VIDEO CANCEL VCR Plus+ CM SKIP SKIP : , 9 STOP STOP PAUSE PAUSE DIRECT NAVIGATOR ENTER ENTER SUB MENU SUB MENU SUB MENU CREATE CREATE DUBBING DUBBING CHAPTER CHAPTER “Green” REC MODE ERASE REC MODE ERASE DISPLAY [HDD] [RAM] [SD]... -
Page 43: Transferring (Dubbing)
Transferring (dubbing) titles or playlists [HDD] [RAM] [-R] [-RW‹V›] [+R] You can select from a variety of methods to transfer (dub) on this unit. You cannot transfer (dub) titles which have been treated to prevent copying. ∫ Transferring (dubbing) direction You can transfer (dub) your favorite titles and playlists to an archive disc. -
Page 44: One Touch Transfer (Dubbing)
Transferring (dubbing) titles or playlists Numbered buttons CANCEL VCR Plus+ CM SKIP SKIP SLOW/SEARCH :, 9 STOP STOP PAUSE PAUSE ∫ ENTER ENTER SUB MENU SUB MENU SUB MENU CREATE CREATE DUBBING DUBBING Info CHAPTER CHAPTER DUBBING “Blue” REC MODE REC MODE ERASE ERASE DISPLAY “Green”... - Page 45 4 Press [3, 4, 2, 1] to select the titles or playlists and press [ENTER]. ≥When transferring (dubbing) to DVD-R, DVD-RW (DVD- Video format) or +R using high speed mode, only items indicated with “ ” can be registered. ≥To select a multiple number of items together, press [;] to add the check mark and press [ENTER] (➡...
-
Page 46: Transferring (Dubbing) A Finalized Dvd-R, Dvd-Rw (Dvd-Video Format) And +R
Transferring (dubbing) titles or playlists Refer to the control reference on page 44. Transferring (dubbing) a finalized DVD-R, DVD-RW (DVD-Video format) and +R [DVD-V] > [HDD] You can transfer (dub) the content of finalized DVD-R, DVD-RW (DVD-Video format) and +R etc to the HDD and re-edit. While playing a disc, the content being played is transferred (dubbed) to the HDD according to the set time. -
Page 47: Recording From A Video Cassette Recorder
Recording from a video cassette recorder VOLUME TV/VIDEO INPUT SELECT INPUT SELECT HDD, DVD AUDIO F Rec SETUP VCR Plus+ CM SKIP CANCEL SKIP SLOW/SEARCH PLAY/x1.3 STOP STOP PAUSE PAUSE ∫ ENTER ENTER SUB MENU SUB MENU RETURN RETURN CREATE CREATE DUBBING DUBBING... -
Page 48: Transferring (Dubbing) Still Pictures
Transferring (dubbing) still pictures Numbered buttons CANCEL VCR Plus+ CM SKIP SKIP SLOW/SEARCH STOP STOP PAUSE PAUSE ENTER ENTER SUB MENU SUB MENU SUB MENU CREATE CREATE DUBBING DUBBING Info CHAPTER CHAPTER REC MODE REC MODE ERASE ERASE DISPLAY [HDD] [RAM] [SD] ≥You can use SD Memory Cards with capacities from 8 MB to 1 GB (➡... -
Page 49: Transferring (Dubbing) All The Still Pictures On A Card-Copy All Pictures
To show other pages Press [3, 4, 2, 1] to select “Previous” or “Next” and press [ENTER]. ≥You can also press [:, 9] to show other pages. Multiple editing Select with [3, 4, 2, 1] and press [;]. (Repeat.) Press [ENTER] to register to the list. ≥A check mark appears. -
Page 50: Hdd, Disc And Card Management
HDD, disc and card management Í TV/VIDEO INPUT SELECT HDD, DVD, SD CANCEL SKIP STOP STOP PAUSE PAUSE ENTER ENTER SUB MENU SUB MENU CREATE CREATE DUBBING DUBBING CHAPTER CHAPTER REC MODE REC MODE ERASE [HDD] [RAM] [-R] [-RW‹V›] [+R] [-RW‹VR›] [SD] ≥You can use SD Memory Cards with capacities from 8 MB to 1 GB (➡... -
Page 51: Erasing All Titles And Playlists-Erase All Titles
Erasing all titles and playlists—Erase All Titles [HDD] [RAM] Preparation ≥Press [HDD] or [DVD] to select the drive. ≥Release protection (➡ 50). After performing steps 1–3 (➡ 50) Press [3, 4] to select “Erase All Titles” and press [ENTER]. Press [2, 1] to select “Yes” and press [ENTER]. -
Page 52: Enabling Discs To Be Played On Other Equipment
Play on other players ≥You cannot finalize discs recorded on other manufacturer’s equipment. ≥If you finalize discs recorded on Panasonic equipment other than this unit, the background selected as “Top Menu Style” may not be displayed. ≥Discs finalized on this unit may not be playable on other players due to the condition of the recording. -
Page 53: Entering Text
Entering text S S D AUDIO F Rec Numbered buttons SETUP CANCEL VCR Plus+ CM SKIP ¢ CANCEL SKIP SLOW/SEARCH STOP STOP PLAY/x1.3 ∫ PAUSE PAUSE ENTER ENTER SUB MENU SUB MENU RETURN RETURN SUB MENU CREATE CREATE DUBBING DUBBING Info CHAPTER CHAPTER... -
Page 54: Changing The Unit's Settings
Changing the unit’s settings DVD POWER POWER Í DVD POWER Í INPUT SELECT TV/VIDEO Numbered buttons CANCEL ¢ CANCEL SKIP STOP STOP PAUSE PAUSE ENTER ENTER SUB MENU SUB MENU CREATE CREATE DUBBING DUBBING CHAPTER CHAPTER REC MODE REC MODE ERASE DVD/TV Summary of settings The settings remain intact even if you switch the unit to standby. - Page 55 Tabs Menus Disc Settings for Playback Press [ENTER] to show the following settings. Ratings Set a ratings level to limit DVD-Video play. Follow the on-screen instructions. Enter a 4-digit password with the numbered buttons when the password screen is shown. ≥Do not forget your password.
- Page 56 Changing the unit’s settings Tabs Dynamic Range Compression [DVD-V] (Dolby Digital only) Audio Change the dynamic range for late night viewing. Select MTS Select whether to record the main or secondary (SAP) audio type when: –Recording or transferring (dubbing) to a DVD-R, DVD-RW (DVD-Video format) and +R.
-
Page 57: Channel/Clock Settings When Tv Guide On Screen
Channel/Clock settings when TV Guide On Screen Refer to the control reference on page 54. Preparation: If the television program list has already been downloaded, return the unit to the factory preset condition using the steps indicated below. When the unit is on and stopped 1 Press and hold [X CH] and [W CH] on the main unit for about five seconds. -
Page 58: Channel Captions
Channel/Clock settings when TV Guide On Screen Refer to the control reference on page 54. Channel captions You can use the preset captions, or manually enter new ones yourself. The captions you enter are displayed when the channel is displayed and in the Direct Navigator screen. ≥You can set channel captions only after “Set Channels Automatically”... -
Page 59: Messages
Messages On the television ≥The program was copy-protected. Cannot finish recording ≥The HDD or disc may be full. completely. ≥The maximum number of times you can record the program is exceeded. ≥You inserted an incompatible disc (Discs recorded in PAL video, etc.). Cannot play. -
Page 60: Frequently Asked Questions
This unit plays DVD-Audio in 2 channels. You cannot play multi channel surround sound. ≥You cannot directly connect them to the unit. Connect through the amplifier, etc. ≥All Panasonic televisions that have 480p input terminals are compatible. Consult the manufacturer if you have another brand of television. - Page 61 TV Guide On Screen system ≥Yes. The TV Guide On Screen Does the TV Guide On Screen system work with analog and digital boxes. cable TV boxes? ≥Select “Change system settings” in “SETUP” in the Navigation menu of the TV Guide I have relocated, changed my television reception system or cable On Screen...
-
Page 62: Troubleshooting Guide
RQT8307 ≥Operations do not work due to a poor-quality disc. (Try again using a Panasonic disc.) ≥The unit freezes due to one of its safety devices being activated. (Press and hold [POWER Í/I] on the main unit for 10 seconds.) ≥When the HDD has been automatically placed in the SLEEP mode... - Page 63 TV screen and video (Continued) ≥The effect is less perceivable with some types of video. There is no apparent change in picture quality when adjusted with the Video menu in the on- screen menus. ≥Make sure that the television is connected to the VIDEO OUT terminal, S VIDEO OUT The images from this unit do not appear on the television.
- Page 64 ≥It takes longer than normal to transfer (dub) many titles. ≥You cannot high speed transfer (dub) to DVD-R, DVD-RW (DVD-Video format) and +R, titles longer than 6 hours when using other Panasonic DVD Recorders that are not compatible with EP (8 hour) mode recording.
- Page 65 TV Guide On Screen system (Continued) ≥Even if you do not want to use the TV Guide On Screen As soon as the unit is turned on, and when you try to start TV Guide On Screen scheduled recording, the TV message screen is displayed).
- Page 66 ≥You tried to play a +RW that needs to be finalized on the equipment used for recording. ≥You may be able to transfer (dub) a “One time only recording” title that was recorded to DVD- RAM using a different Panasonic DVD Recorder to this unit’s HDD, but play is not possible due to copyright protection.
-
Page 67: Specifications
The model number and serial number of this product can be found on either the back or the bottom of the unit. Please note them in the space provided below and keep for future reference. MODEL NUMBER DMR-EH60 SERIAL NUMBER Video system Recording system: MPEG2 (Hybrid VBR) LINE (pin jack) a3, 1.0 Vp-p;... -
Page 68: Glossary
Glossary Bitstream This is the digital form of multi-channel audio data (e.g., 5.1 channel) before it is decoded into its various channels. CPRM (Content Protection for Recordable Media) CPRM is technology used to protect broadcasts that are allowed to be recorded only once. Such broadcasts can be recorded only with CPRM compatible recorders and discs. -
Page 69: Product Service
4. Safety check—After repairs or service, ask the servicer to perform safety checks to confirm that the unit is in proper working condition. Product information For product information or assistance with product operation: Contact the Panasonic Canada Inc. Customer Care Centre at 1-800-561-5505, or visit the website (www.panasonic.ca), or an authorized Servicentre closest to you. Gujarati:... -
Page 70: Limited Warranty
Limited Warranty PANASONIC/TECHNICS PRODUCT—LIMITED WARRANTY Panasonic Canada Inc. warrants this product to be free from defects in material and workmanship and agrees to remedy any such defect for a period as stated below from the date of original purchase. Technics Audio Product Panasonic Audio &... - Page 71 Memo RQT8307...
-
Page 72: Index
Systems, Inc. U.S. patent Nos. 4,631,603, 4,577,216, 4,819,098, and 4,907,093. MPEG Layer-3 audio decoding technology licensed from Fraunhofer IIS and Thomson multimedia. Panasonic Canada Inc. 5770 Ambler Drive, Mississauga, Ontario L4W 2T3 www.panasonic.ca C 2005 Matsushita Electric Industrial Co., Ltd.