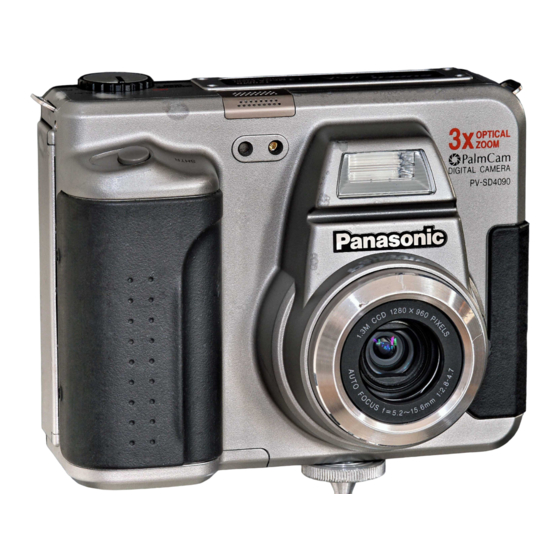
Panasonic PV-SD4090 Operating Instructions Manual
Panasonic digital camera operating instructions pv-sd4090
Hide thumbs
Also See for PV-SD4090:
- Operating instructions manual (76 pages) ,
- Operating instructions manual (76 pages)
Table of Contents
Advertisement
Advertisement
Table of Contents

Related Manuals for Panasonic PV-SD4090

Summary of Contents for Panasonic PV-SD4090
-
Page 1: Digital Camera
Digital Camera Operating Instructions PV-SD4090 Model No. ® For assistance, call 1-800-272-7033. Before attempting to connect, operate or adjust this product, please read these instructions thoroughly, and keep them for future reference. LSQT0179A SD4090.p1-21.p65 99/11/11, 16:38... -
Page 2: Things You Should Know
Save this operating instruction manual as an operating and information guide. Unpack your Digital Camera Please confirm that the following items are packed in the Digital Camera box. They are provided to help you use or set up your Digital Camera. 1pc. Digital Camera 1 pc. -
Page 3: Safety Precautions
To assure continued FCC compliance, use only the provided shielded interface cable with ferrite core when connecting digital camera to computer in accordance with instruction herein. Also, any unauthorized changes or modifications to this equipment could void the user’s authority to operate. -
Page 4: Important Safeguards
Important Safeguards 1. Read Instructions — All the safety and operating instructions should be read before the unit is operated. 2. Retain Instructions — The safety and operating instructions should be retained for future reference. 3. Heed Warnings — All warnings on the unit and in the operating instructions should be adhered to. -
Page 5: Precautions
• TO AVOID SHOCK HAZARD ... Your Digital Camera and power supply should not be exposed to rain or moisture. Do not connect the power supply or operate your Digital Camera if it gets wet. Your Digital Camera has been designed for outdoor use, however it is not designed to sustain direct exposure to water, rain, sleet, snow, sand, dust, or a direct splashing from a pool or even a cup of coffee. -
Page 6: Table Of Contents
Using the SuperDisk Drive ... 65 Print Mark ... 66 For Your Information Digital Camera Accessory ... 67 Digital Camera Accessory Order Form ... 68 Before Requesting Service ... 69 Warning Indications ... 70 Specifications ... 72 Warranty ... 73 Service Center Directory ... -
Page 7: Special Digital Camera Features
Special Digital Camera Features Our PV-SD4090 enables you to capture and save a large amount of image data using the memory storage of the SuperDisk Drive. Image data can be easily transferred to your Personal Computer using the USB interface. -
Page 8: Index Of Controls
Index of Controls Front View Self-Timer Indicator See page 37. FLASH Emitter See page 34. Lens Rear View LCD Viewfinder See pages 22~25, 28, 29. REC MODE See pages 22, 23, 25, 26. VOL+ See pages 29, 30. VOL+ See pages 19, 20. - Page 9 Top View POWER Switch (PC•PLAY•OFF•REC•MANUAL REC) See pages 19, 20. Bottom View Battery Compartment See page 14. SD4090.p1-21.p65 Index of Controls SHTR (SHUTTER) See pages 22, 25, 30, 31, 40, 41, 66 PLAY MANUAL Tripod Receptacle Used when securing the camera to a tripod. 99/11/11, 16:38...
-
Page 10: On Screen Display (Osd)
On Screen Display (OSD) The indication displayed on the LCD screen will tell you the operation status of the Digital Camera. REC OSD White Balance Mode (See page 35.) AUTO : No Indication INDOOR OUTDOOR : WHITE SET: WS Flash Mode (See page 34.) -
Page 11: Lcd Monitor Indication
Recording Menu < REC Mode> <REC MENU 1/2> AUDIO SELF TIMER BRIGHTNESS CLOCK SET EXIT : MENU <REC MENU 2/2> BEEP EXIT : MENU < MANUAL REC Mode> <MANUAL REC MENU 1/3> AUDIO SELF TIMER BRIGHTNESS IRIS EXIT : MENU <MANUAL REC MENU 2/3>... - Page 12 LCD Monitor Indication Playback Menu <PLAY MENU 1/2> NORMAL DISPLAY MODE DELETE COPY AUDIO PRINT MARK EXIT : MENU <PLAY MENU 2/2> SLIDE SHOW BRIGHTNESS CLOCK SET BEEP EXIT : MENU On Screen Display Order SEP. 10 2000 100-0010 F 10 : 00 AM Note •...
-
Page 13: Power Supply
Charge the Battery Pack on the AC Adaptor AC Adaptor AC Cable POWER Lamp Charge Lamp POWER About the Charge Lamps • The four Charge Lamps “25%”, “50%”, “75%” and “100%” flash and then remain lit one after another to indicate how much the Battery has been charged. When all four lamps are lit, charging is finished. - Page 14 • Keep the Battery terminals clean. Operation Time When using the supplied Panasonic Lithium Ion Batteries, you will have a maximum of about 200 images (at an ambient temperature of 25 ° C). • Capturing an image every 30 seconds.
- Page 15 Note • While not in use, unplug the AC Adaptor from the AC outlet. • Use the supplied Panasonic AC Adaptor. • Do not connect AC Adaptor after turning POWER on. • When the DC Cable is connected during charging, the power supply is given priority and charging will not be possible.
-
Page 16: Attaching The Camera Strap
Attaching the Camera Strap Min. 1 inch (25.4 mm) Adjust the Length SD4090.p1-21.p65 Thread the strap ends through the Strap Attachment Rings. Reinsert the strap ends through their buckles. • Make sure the straps are not twisted. Loosen the strap from the Buckle and create a loop. -
Page 17: Inserting The Superdisk Tm Diskette Or Floppy Disk
When using a new Floppy Disk, it is recommended that the Disk be inserted into the Digital Camera and formatted (Quick Format). If a read error occurs in the PC Floppy Disk Drive, use the Digital Camera to read the data. - Page 18 Disk Media in the wrong direction. Caution • The ACCESS LED lamp will flash when the Digital Camera is accessing the Disk Media. Please never expose this unit to large vibrations or impacts while ACCESS LED lamp is flashing. And, do not turn off the Power, take out a Disk Media, or remove the battery when ACCESS LED lamp is flashing.
-
Page 19: Operating The Menu Screen
Operating the MENU Screen How to operate the MENU screen Please refer to pages 11~12 for explanation of each menu item. MANUAL POWER MENU Button When selecting REC mode PLAY MANUAL Open the Lens Cover. Set POWER Switch to REC. •... - Page 20 Operating the MENU Screen When selecting MANUAL REC mode PLAY MANUAL Open the Lens Cover. Set POWER Switch to MANUAL REC. • Turn the dial so that it clicks into position. • The POWER LED lamp lights up. When selecting PLAY mode PLAY MANUAL Set POWER Switch to PLAY.
-
Page 21: Setting The Clock
Before you begin Open the Lens Cover. Set the POWER Switch to REC, MANUAL REC or PLAY. (See pages 19~20.) Press MENU to display the MENU screen. POWER 1, 2, Note • To make corrections, repeat steps 1~3. • The clock will continue to operate about 8 hours after the battery has been removed. -
Page 22: Capturing Images
• Beep sounds twice. (See page 27.) Press SHTR down the rest of the way to actually capture the image. • Shutter sounds once. (See page 27.) • While the Digital Camera processes the image, REC will blink on the LCD PLAY MANUAL... - Page 23 Capturing images (AUDIO ON) You can record audio with a still image. The still image and audio can then be played back in the PLAY mode. (See page 20.) Please follow the instructions below. Before you begin Open the Lens Cover. Set the POWER Switch to REC or MANUAL REC.
- Page 24 • You can record the audio for 5 seconds by pressing the SHTR button. • While the Digital Camera processes the image, REC OSD will appear on the LCD. The captured image will be displayed on the LCD Viewfinder for a few seconds.
- Page 25 • A Burst Image every 0.5 seconds/frame up to 16 frames while SHTR pressed. PLAY • While the Digital Camera processes the image, REC will blink on the LCD Viewfinder and the captured image will be displayed on the LCD Viewfinder for a few seconds.
- Page 26 Capturing Images Recording Mode Recording Mode : Super Fine Mode (with audio) Select this mode when you want the highest quality resolution with the lowest compression (i.e. for printing). : Fine Mode (with audio) Select this mode when you want a high resolution (i.e.
- Page 27 Beep Set Digital Camera to beep (low or high volume), when an image is captured, or set to OFF. Before you begin Set the POWER Switch to REC, MANUAL REC or PLAY. (See pages 19~20.) Press MENU to display the MENU screen.
-
Page 28: Adjusting Lcd Viewfinder Brightness
LCD Viewfinder; (+) for brighter, (-) for darker. Press MENU twice to exit. Note • The original BRIGHTNESS will be restored when the Digital Camera is turned off. For assistance, call 1-800-272-7033. 99/11/11, 16:39 <MANUAL REC MENU 1/3>... -
Page 29: Playing Back Captured Images
Playing Back Captured Images Manual Playback You can playback recorded images on the LCD Viewfinder. Before you begin Set the POWER Switch to PLAY. (See pages 19~20.) MANUAL 2, 3, Note • When selecting AUDIO ON, a still image with audio will be played. The volume of audio can be adjusted by pressing VOL +/-. - Page 30 Playing Back Captured Images Motion Image Playback When a captured image in (Motion Image Rec) mode is displayed. (See page 25.) Multi Playback If you select in the PLAY MENU, you will be able to see Thumbnail images on the LCD Viewfinder (each Thumbnail page will contain 9 images).
- Page 31 Playing Back Captured Images MANUAL 4, 5 SD4090.p22-33.p65 Press (-) to move back through the PLAY images on the page until the number of the image you want to select is highlighted. Press 0002 0003 0004 0005 0006 0007 0008 0009 0010 SEL :...
- Page 32 Playing Back Captured Images Zoom Playback Before you begin Set the POWER Switch to PLAY. (See pages 19~20.) 1, 3 1, 2 SD4090.p22-33.p65 Press MENU to display PLAY MENU and press to set display mode to ZOOM. PLAY MANUAL Press MENU to zoom(x2) in on the center portion of the image.
-
Page 33: Viewing Images On A Tv Screen And Transferring Images To A Vcr
AUDIO IN AUDIO IN A/V Cable (supplied) SD4090.p22-33.p65 Connect the Digital Camera to your TV or VCR using the A/V Cable (supplied) as shown. Turn on your TV and select its video input mode. Then, select its line input mode. (Refer to your TV manual.) Set the Digital Camera POWER to PLAY. -
Page 34: Using The Built-In Flash
Using the Built-in Flash This camera features a Built-in Flash which can be used to capture images in dimly lit conditions. Before you begin Set the POWER Switch to REC or MANUAL REC. (See pages 19~20.) MANUAL LCD Viewfinder Light Sensor FLASH Emitter SD4090.p34-44.p65 Press... -
Page 35: White Balance
Auto White Balance automatically maintains optimum color balance in most lighting conditions. Before you begin Set the POWER Switch to MANUAL REC. (See pages 19~20.) SD4090.p34-44.p65 White Balance Press BALANCE and press one of the four settings shown below. • Default setting is AUTO. PLAY MANUAL AUTO (No indication) :... -
Page 36: Light Metering
Light Metering According to the recording condition and purpose, set light metering to measure exposure time. Before you begin Set the POWER Switch to MANUAL REC. (See pages 19~20.) SD4090.p34-44.p65 Press and press two settings shown below. • Default setting is AUTO. PLAY MANUAL AUTO (No indication) :... -
Page 37: Self Timer Recording
The Self-Timer allows you to capture an image about 10 seconds after pressing the shutter. Before you begin Set the POWER Switch to REC or MANUAL REC. (See pages 19~20.) SD4090.p34-44.p65 Self Timer Recording Press and press This puts the camera in self-timer mode. -
Page 38: Adjusting The Iris Manually
Adjusting the Iris Manually Normally, the camera adjusts the exposure automatically. However, when the background is extremely bright, or when the subject is backlit, you can compensate by adjusting the Iris manually. Before you begin Set the POWER to MANUAL REC. (See pages 19~20.) 1, 2, 3 SD4090.p34-44.p65... -
Page 39: Time Lapse Recording
Time Lapse enables you to set the camera to automatically capture an image from once every minute to once every 24 hours. Before you begin Set the POWER Switch to MANUAL REC. (See pages 19~20.) 2, 3 SD4090.p34-44.p65 Time Lapse Recording Press and press to select time interval. -
Page 40: To Delete Specific Images
• To delete all image data, refer to "Formatting the Disk Media" on page 41. Important: • While deleting image, do not turn off the Digital Camera or unplug the AC Adaptor (supplied) because this will cause irreversible damage to the memory, resulting in reduced image storage capacity. -
Page 41: Formatting The Disk Media
Deletion is complete when “NO IMAGE” is displayed. Important: • While “PLEASE WAIT” is displayed, do not turn off the Digital Camera or unplug the AC Adaptor (supplied) because this will cause irreversible damage to the memory, resulting in reduced image storage capacity. -
Page 42: To Copy Image Pages
19~20.) MANUAL 1, 2, 3, Important: • While “PLEASE WAIT” is displayed, do not turn off the Digital Camera or unplug the AC Adaptor (supplied) because this will cause irreversible damage to the memory, resulting in reduced image storage capacity. -
Page 43: To Copy All Images
When copying is complete, the screen below will be displayed. • Press MENU twice to exit. Important: • While “PLEASE WAIT” is displayed, do not turn off the Digital Camera or CONTINUE : SHTR EXIT : MENU unplug the AC Adaptor (supplied) -
Page 44: Slide Show
• SLIDE SHOW automatically stops after approx. 20minutes. Important: • SLIDE SHOW during execution, do not turn off the Digital Camera or unplug the AC Adaptor (supplied) because this will cause irreversible damage to the memory, resulting in reduced image storage capacity. -
Page 45: Transferring Your Images (Windows 98)
Turn on the PC (Personal Computer) and start up Windows 98. Insert supplied Software CD-ROM into the CD-ROM Drive. Click the “Start” button and then click “Run”. Type in “D:\Panasonic\Driver\Setup.exe” and then click “OK”. Note “D” Denotes the CD-ROM drive designation. - Page 46 • When transferring non-Design rule for Camera File system format images from your PC to the Digital Camera, you will need to convert the images data to Design rule for Camera File system format so that the Camera can read it.
- Page 47 Transferring Your Images (Windows 98) QuickTime Driver Installation • The QuickTime Driver, when installed, allows your Digital Camera to transfer Motion Image Recording files to your PC. Note • For information on Apple QuickTime, visit their website at :http://www.info.apple.com/info.apple.com/support/ Turn on the PC (Personal Computer) and start up Windows 98.
- Page 48 • LCD Viewfinder is off in PC mode. Connect the Digital Camera to your PC (Windows) using the USB Cable (supplied). • You can use this Digital Camera as a SuperDisk Drive. (See pages 61, 62, 63, 65.) Note • For extended periods of use, it is recommended to use the AC Adaptor (supplied) as a power source.
- Page 49 USB Cable, refer to page 48 for additional details. Reading the Disk Media Insert the Disk Media into the Digital Camera slot. Click “Start”, “Programs” and “Image Viewing Software (for Example : PHOTODELUXE)”. Click “Adobe”, “PhotoDeluxe Home Edition 3.1”and “Adobe PhotoDeluxe Home Edition 3.1”.
- Page 50 Click on the “File” Menu and “Open File”. The File Open MENU is displayed. Select the 3.5" FD Drive for the Digital Camera and find the image data file in the Digital Camera. • When the Digital Camera POWER Switch is set to PC, the Digital Camera Drive is recognized as the 3.5"...
- Page 51 You can write to the Disk Media by simply dragging and dropping a file or folder from the Digital Camera Drive to another Drive. You can also drag and drop a file or folder from another Drive to the Drive of the Digital Camera.
- Page 52 PalmCam File Conversion When the Digital Camera can not playback the image data which is transferred from another Drive to the Drive of the Digital Camera, even if the data is JPEG, PalmCam File Conversion is necessary. Before you begin Set the POWER Switch to PC.
- Page 53 Disconnection End all applications and close all windows. (i.e. QuickTime, PhotoDeluxe, etc.) Eject the Disk Media from the Digital Camera. (See page 17.) • You can also remove the Disk Media by right clicking on the SuperDisk Drive icon in "Windows Explorer" and "My Computer"...
-
Page 54: Transferring Your Images (Macintosh)
Turn on the Macintosh. Insert the supplied Software CD-ROM into the CD-ROM Drive. Double click the “PHOTODELUXE”. Double click on “Panasonic”, “PalmCam” and “DSC&SuperDisk Driver”. Follow the instructions as they appear on your PC screen. When the USB Driver is installed, the following changes will occur. - Page 55 Follow the instructions as they appear on your PC screen. PalmCam File Converter Installation • The Mac software is currently not available, but will be available in the future on our website at www.panasonic.com/ palmcam or by calling 1-800-272-7033. SD4090.p45-66.p65 99/11/11, 16:40...
- Page 56 • LCD Viewfinder is off in PC mode. Connect the Digital Camera to your PC using the USB Cable (supplied). • You can use this Digital Camera as a SuperDisk Drive. (See pages 61, 64, 65.) Note • For extended periods of use, it is recommended to use the AC Adaptor (supplied) as a power source.
- Page 57 Connect the Digital Camera to the PC using the supplied USB Cable, refer to page 56 for additional details. Reading the Disk Media Insert the Disk Media into the Digital Camera slot. Click “Apple Menu”, “Macintosh HD”, “Adobe PhotoDeluxe “Adobe PhotoDeluxe ”.
- Page 58 Click on the “File” Menu and “Open File”. The File Open MENU is displayed. Select the 3.5" FD Drive for the Digital Camera and find the image data file in the Digital Camera. • When the Digital Camera POWER Switch is set to PC, the Digital Camera Drive is recognized as the 3.5"...
- Page 59 Transferring Your Images (Macintosh) Writing to the Disk Media Insert the Disk Media into the Digital Camera slot. Click the icon displayed on the desktop. You can write to the Disk Media by simply dragging and dropping a file or folder from Digital Camera Drive to another Drive.
- Page 60 Disconnect the USB Cable (supplied) from your PC and change the POWER Switch on the Digital Camera setting from PC mode to another selection. Make sure that all of the applications and all of the windows are closed. Then press the SHTR button.
-
Page 61: Superdisk Drive
You can use this Digital Camera as an external SuperDisk storage drive. You can only use SuperDisk Diskette media or 2HD Floppy Disks in this camera. Note • When a DOS formatted Floppy Disk is read by a Macintosh, the PC/File Exchange function will be necessary. -
Page 62: Using The Superdisk Drive (Windows 98)
Disk Media while any of the disk's files are open, an error may occur on the display. Formatting the Disk Media Insert the Disk Media into the Digital Camera slot. Click “My Computer”. Click right mouse button on the Digital Camera icon. Click “FormatUtility for SuperDisk”. Follow the instructions as they appear on your PC screen. - Page 63 Floppy Disk Drive When using Windows Explorer, etc. and you attempt to copy a previously used 2HD Floppy Disk from the Floppy Disk Drive to the Digital Camera with the CopyDisk utility, please note the following. After PC start up, when CopyDisk is attempted the first time, a Windows error message box may be displayed and CopyDisk may fail.
-
Page 64: Using The Superdisk Drive (Macintosh)
Formatting the Disk Media Note • Do not format the Disk Media under DOS format with Macintosh. Insert the SuperDisk Diskette or Floppy Disk into the Digital Camera slot. Click the SuperDisk Diskette or Floppy Disk icon displayed on the desktop. -
Page 65: Using The Superdisk Drive
Important Operating Notes • FORMAT command cannot be used. The FORMAT command at the DOS prompt cannot be used for the Digital Camera. • DISKCOPY command cannot be used. The DISKCOPY command at the DOS prompt cannot be used for the Digital Camera. -
Page 66: Print Mark
Print Mark Use this feature when a laboratory service that supports DPOF (Digital Print Order Format) is used. Before you begin Set the POWER Switch to PLAY. (See pages 19~20.) This print mark is based on DPOF (Digital Print Order Format). SD4090.p45-66.p65 Stamp Print Marker Press... -
Page 67: Digital Camera Accessory
Digital Camera Accessory For ordering instructions, see the Accessory Order Form page. Accessory # Figure Description Price CGR-B/ Lithum Ion Battery $100.00 202A1B SD4090.p67-76.p65 99/11/11, 16:41... -
Page 68: Digital Camera Accessory Order Form
TO OBTAIN ANY OF OUR DIGITAL CAMERA ACCESSORIES YOU CAN DO ANY OF THE VISIT YOUR LOCAL PANASONIC DEALER CALL PANASONIC’S ACCESSORY ORDER LINE AT 1-800-272-7033 [8:30 AM-8 PM M-F, EST] MAIL THIS ORDER TO: PANASONIC SERVICES COMPANY ACCESSORY ORDER OFFICE 20421 84th Avenue South Kent, WA. -
Page 69: Before Requesting Service
If you have a problem with your Digital Camera, it may be something you can correct yourself. Check the list below for symptoms and corrections. Symptom Cannot charge the Battery Pack. No power. Power shuts off automatically. Cannot capture the image. -
Page 70: Warning Indications
Warning Indications These displays will alert you of a missed operation or provide further instructions. Indication SYSTEM ERROR Failed USB handshake. Failed to initialize the DRIVE ERROR drive. Failed to write. WRITE ERROR Failed to read. READ ERROR DISK ERROR Unsuitable disk. - Page 71 Indication THIS DISK IS PROTECTED The disk is protected. NOT ENOUGH MEMORY Insufficient disk memory. (1.44MB) PUSH MENU TO EXIT Copy capacity was exceeded. NOT ENOUGH DISK SPACE Insufficient space on CONTINUE : SHTR target disk compared to EXIT : MENU source disk.
-
Page 72: Specifications
NTSC Composite Power Supply Lithium Ion Battery (1250 mAh, 7.2 V)/AC Adaptor (input 110- 240 V AC) Power Consumption Digital Camera AC Adaptor (supplied) Operating Temperature 32 – 104 °F/0 – 40 °C Operating Humidity 10 % – 75 %... -
Page 73: Warranty
In-home, carry-in or mail-in service, as applicable, in the USA can be obtained during the warranty period by contacting a Panasonic Services Company (PASC) Factory Servicenter listed in the Service Directory. Or call toll free 1-800-272-7033, to locate an authorized PASC Servicenter. Carry- in or mail-in service in Puerto Rico can be obtained during the warranty period by calling the Panasonic Sales Company telephone number listed in the Servicenter Directory. -
Page 74: Service Center Directory
3700 North 29th Avenue Suite 102 Hollywood, FL 33020 Matsushita Electric of Puerto Rico, Inc. Panasonic Sales Company/ Factory Servicenter: Ave. 65 de Infantería. Km. 9.5 San Gabriel Industrial Park Carolina, Puerto Rico 00985 Phone (787) 750-4300 Fax (787) 768-2910... -
Page 75: Index
Print Mark (DPOF) Recording Menu Self Timer 2, 16 Setting the Clock Service Center Directory 42, 43 Slide Show Slow Shutter Special Digital Camera Features 2, 15 Specifications SuperDisk SuperDisk Drive Transferring Images Time Lapse 8, 9 Warranty White Balance... - Page 76 Panasonic Consumer Electronics Company, Division of Matsushita Electric Corporation of America One Panasonic Way Secaucus, New Jersey 07094 SD4090.p67-76.p65 Panasonic Sales Company, Division of Matsushita Electric of Puerto Rico, Inc. (“PSC”) Ave. 65 de Infantería, Km. 9.5 San Gabriel Industrial Park...