
Related Manuals for Panasonic KX-TG2551ALS, KX-TG2551NZS


Summary of Contents for Panasonic KX-TG2551ALS, KX-TG2551NZS
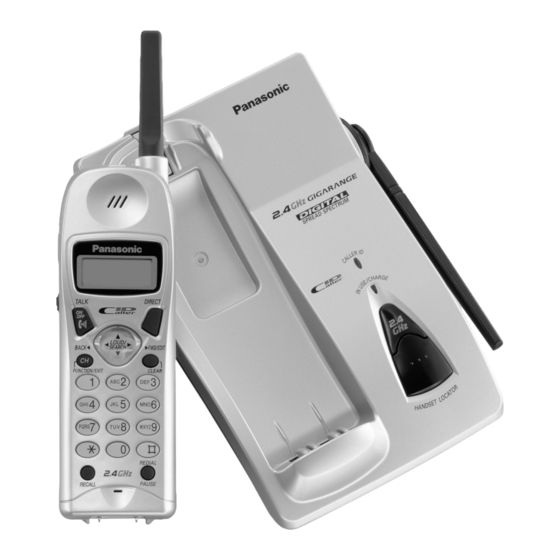
- Page 1 2.4GHz Digital Cordless Phone Operating Instructions KX-TG2551ALS Model No. KX-TG2551NZS Caller ID Compatible PLEASE READ BEFORE USE AND SAVE. Charge the battery for about 6 hours before initial use.
-
Page 2: Before Initial Use
Before Initial Use Thank you for purchasing your new Panasonic cordless telephone. For Australia When you subscribe to Caller ID services from your telephone operator, this telephone will display the caller’s phone number. When available from your telephone operator, this telephone will also display the number of the second call or call waiting. -
Page 3: For Best Performance
For Best Performance Battery Charge A rechargeable Nickel Cadmium (Ni-Cd) battery powers the handset. Charge the battery for about 6 hours before initial use (p. 11). •As preventative maintenance, clean the handset and the base unit charge contacts with a soft, dry cloth once a month. Clean more often if the unit is subject to grease, dust or high humidity. -
Page 4: Table Of Contents
Contents Preparation Location of Controls ... 6 Display... 8 Settings ...10 Connections ...10 Battery Charge...11 Selecting the Line Mode ...13 Programmable Functions ...14 Setting the Auto Talk Feature ...15 Selecting the Ringer Volume ...16 Selecting the LCD Contrast ...17 Basic Operation Making Calls ...18 Answering Calls ...20 Caller ID Service...21... - Page 5 Special Features...40 How to Use the PAUSE Button (For PBX Line/ Long Distance Calls)...40 Automatic Security Code Setting ...40 Handset Locator...40 Call Waiting and Caller ID Compatible (For Australia only)...41 RECALL Button...42 Useful Information Adding Another Phone ...43 Wall Mounting...44 Using Belt Clip...46 Using an Optional Headset ...46 Battery Replacement ...47...
-
Page 6: Location Of Controls
Location of Controls Handset Button (p. 18, 20) (TALK) Headset Jack (p. 46) (FUNCTION/EXIT/CH) (Channel) Button (p. 14, 18, 23, 32, 36) Button (p. 41, 42) (RECALL) How to use the Navigator key This key has four active areas that are indicated by arrows. LOUD SE SEARC RCH Throughout these Operating Instructions, the navigator key is indicated... -
Page 7: Base Unit
Base unit Charge Contacts (p. 12) Hook (p. 44) Antenna (p. 3, 10) CALLER ID Indicator (p. 21, 22) IN USE/CHARGE Indicator (p. 11) (HANDSET!LOCATOR) Button (p. 40) -
Page 8: Display
Display The handset shows you instructions and information on the display. These display prompts are shown below. No items stored Recharge 12 new calls 12 new calls =Directory Ringer off 0266667777 Talk 01-06-35 No link to base Place on cradle and try again. - Page 9 0355566677 11:20A JAN10 0267543210 Paging 0266667777 ----Waiting---- Please lift up and try again. Not available Directory full Save error This is an information from the Caller List. The display shows: — the caller’s phone number, — the time and date of the last call (ex.
-
Page 10: Settings
Hook Raise the antenna. •USE ONLY WITH Panasonic AC ADAPTOR PQLV1AL. •The AC adaptor must remain connected at all times. (It is normal for the adaptor to feel warm during use.) •To connect a standard telephone on the same line, see page 43. -
Page 11: Battery Charge
Battery Charge Place the handset on the base unit and charge for about 6 hours before initial use. •The IN USE/CHARGE indicator lights and a beep sounds. IN USE/CHARGE Indicator Battery strength You can check the battery strength on the handset display while the handset is on the base unit, while it is in use (making/answering a call etc.), or after viewing the Caller List or directory items, programming etc. -
Page 12: Battery Information
•If you DO NOT recharge the handset battery for more than 15 minutes, the display will keep indicating “Recharge” and/or “ •To fully recharge the battery, the handset should be left on the base unit. Battery information After your Panasonic battery is fully charged (p. 11): Operation While in use (TALK) -
Page 13: Selecting The Line Mode
Selecting the Line Mode If the line is connected to a low voltage system such as a PBX, set to “B”. Otherwise the Call Waiting Caller ID Feature may not function (p. 41). Your phone comes from the factory set to “A”. Use the handset near the base unit. -
Page 14: Programmable Functions
Programmable Functions You can program the following functions by using the handset near the base unit. The display shows the programming instructions. See the corresponding pages for function details. Make sure the handset is in the standby mode initially. Lift the handset, and press <Function menu>* Save directory Ringer volume... -
Page 15: Setting The Auto Talk Feature
Setting the Auto Talk Feature The Auto Talk feature allows you to answer a call by lifting the handset off the base unit without pressing the feature ON by programming. Your phone comes from the factory set to OFF. Make sure the handset is in the standby mode initially. Press (FUNCTION/EXIT/CH) Press... -
Page 16: Selecting The Ringer Volume
Programmable Functions Selecting the Ringer Volume You can program the ringer volume to HIGH, LOW or OFF. If set to OFF, the unit will not ring. Your phone comes from the factory set to HIGH. Make sure the handset is in the standby mode initially. Press (FUNCTION/EXIT/CH) Press... -
Page 17: Selecting The Lcd Contrast
Selecting the LCD Contrast You can program the handset LCD contrast (5 levels). To make the handset display clearer, set to high level. Your phone comes from the factory set to level 3. Make sure the handset is in the standby mode initially. Press (FUNCTION/EXIT/CH) Press... -
Page 18: Making Calls
Making Calls To have a hands-free phone conversation, connect the optional headset to the handset (p. 46). (TALK) (FUNCTION/EXIT/CH) Press (TALK) Dial a phone number. •The dialled number is displayed. •After a few seconds, the display will show the length of the call and the battery strength. To hang up, press handset on the base unit. - Page 19 To dial after confirming the entered number Dial a phone number. •If you misdial, press (CLEAR) and dial again. Press (TALK) •After a few seconds, the display will show the length of the call and the battery strength. To hang up, press handset on the base unit.
-
Page 20: Answering Calls
Answering Calls When a call is received, the unit rings, “Incoming call” is displayed and the CALLER ID indicator on the base unit flashes quickly. If you subscribe to a Caller ID service, the calling party information will be displayed after the first ring (p. 21). In order to view the Caller ID information, please wait until the second ring to answer a call. -
Page 21: Caller Id Service
Caller ID Service This unit is compatible with a Caller ID service offered by your telephone company. If you subscribe to a Caller ID service, the calling party’s information will be shown on the handset display after the first ring. The unit can record information of up to 50 different callers in the Caller List. -
Page 22: To Check The Number Of New Calls
Caller ID Service •Caller information cannot be displayed in the following cases: •—If the caller dialled from an area which does not provide a Caller ID service, the display will show “Out of area”. •—If the caller has requested not to display his/her information, the display will show “Private caller”. -
Page 23: Using The Caller List
Using the Caller List Viewing the Caller List To check who has called, follow the steps below. Make sure the handset is in the standby mode initially. Lift the handset off the base unit and press Ö Ñ Caller List. •The display will show, for example, the following. - Page 24 Using the Caller List Ex. When you search from the most recent call: Lift the handset off the base unit and press 2 new calls =Directory Press Ö 02223334444 3:10P JUN10 Press Ö NANCY BROWN 0244448888 1:54P JUN 9 Press Ö...
-
Page 25: Calling Back From The Caller List
Calling Back from the Caller List (TALK) Lift the handset off the base unit and press to enter the Caller List. Ö Ñ Press repeatedly to find the Ö Ñ desired caller. Press (TALK) •The displayed phone number is dialled automatically. -
Page 26: Editing The Caller's Phone Number
Using the Caller List Editing the Caller’s Phone Number You can edit a phone number in the Caller List. Make sure the handset is in the standby mode initially. Lift the handset off the base unit and press to enter the Caller List. Ö... -
Page 27: Storing Caller List Information In The Directory
Storing Caller List Information in the Directory You can store names and phone numbers that are in the Caller List into the directory. Make sure the handset is in the standby mode initially. Lift the handset off the base unit and press to enter the Caller List. -
Page 28: Erasing Caller List Information
Using the Caller List •You cannot store caller information in the directory if a phone number is not displayed. •If 3 beeps sound and the display shows “Save error” in step 5, move closer to the base unit and start again from step 2. For New Zealand Users: Your telephone company may charge you for a local call if the number dialled has the area code prefix included. - Page 29 To erase all entries in the Caller List Before erasing all entries, make sure that “0 new call” is displayed. Lift the handset off the base unit and press to enter the Caller List. Ö Ñ Press (CLEAR) Press to select “All clear”. Ö...
-
Page 30: One-Touch Dialler
One-Touch Dialler You can store one phone number in the The stored number is dialled with a one-touch operation. Storing a Phone Number in the DIRECT Button Make sure the handset is in the standby mode initially. Press (FUNCTION/EXIT/CH) Press Ö... -
Page 31: Dialling The Stored Number In The Direct Button
Dialling the Stored Number in the DIRECT Button Press (DIRECT) The stored number is displayed. Press (TALK) The number is dialled. You can also dial the stored number by pressing (TALK) then pressing (DIRECT). 123456789012345 6789012 Talk 123456789012345 6789012... -
Page 32: Using The Directory
Using the Directory You can store up to 50 names and phone numbers in the directory using the handset. All directory items are sorted by the first word in alphabetical order. Using the directory, you can make a call by selecting a name on the handset display. - Page 33 Enter a name, up to 15 characters using the dialling buttons (p. 34). To move the cursor, press BACK Ü or FWD/EDIT á. If a name is not required, press Ö (Next key) and go to step 5. Press (Next key). Ö...
-
Page 34: Selecting Characters To Enter Names
Using the Directory Selecting Characters to Enter Names The handset dialling buttons ( can be used to enter letters FWD/EDIT á and symbols. The letters are printed on the dialling buttons. Pressing each button selects a character as shown below. Keys Space BACK... - Page 35 For example, to enter “Tom Jones”: Press (FUNCTION/EXIT/CH) While the arrow points to “Save directory”, press (Yes key). Press Press six times, then press to move the cursor to the right. á Press four times. Press FWD/EDIT á Press Press six times, then press to move the cursor to the right.
-
Page 36: Finding Items In The Directory
Using the Directory Finding Items in the Directory You can search the directory using the handset. Make sure the handset is in the standby mode initially. Press BACK Ü enter the directory list. Directory list Press Ö Ñ The first item is displayed. 0312345678 Press Ö... -
Page 37: Dialling From The Directory
Index table Keys Index Other symbols, 1 A, B, C, 2 D, E, F, 3 G, H, I, 4 J, K, L, 5 Dialling from the Directory Make sure the handset is in the standby mode initially. Press BACK Ü the directory list. -
Page 38: Editing An Item In The Directory
Using the Directory Editing an Item in the Directory Make sure the handset is in the standby mode initially. Press BACK Ü the directory list. Press Ö Ñ The first item is displayed. Press Ö Ñ directory item you want to change, and press FWD/EDIT á... -
Page 39: Erasing An Item From The Directory
Erasing an Item from the Directory Make sure the handset is in the standby mode initially. Press BACK Ü the directory list. Press Ö Ñ The first item is displayed. Press repeatedly to find the Ö Ñ directory item you want to erase. To search for the item by initial, see page 36. -
Page 40: Special Features
Special Features How to Use the PAUSE Button (For PBX Line/Long Distance Calls) We recommend you press dialling with a PBX or to make a long distance call. Ex. Line access number (REDIAL/PAUSE) Pressing (REDIAL/PAUSE) once creates a 3.5 second pause. This prevents misdialling when you redial or dial a stored number. -
Page 41: Call Waiting And Caller Id Compatible (For Australia Only)
Call Waiting and Caller ID Compatible (For Australia only) If you subscribe to Caller ID services, your handset displays a second caller’s information while talking. After you hear a call-waiting tone, the caller’s phone number and “----Waiting----” will be displayed. You can answer the second call, keeping the first call on hold. -
Page 42: Recall Button
Special Features RECALL Button Pressing (RECALL) such as transferring an extension call or accessing special telephone services (optional) such as call waiting. Selecting the recall time The recall time depends on your telephone exchange or host PBX. You can select the following recall times: “700, 600, 400, 300, 250, 110, 100 or 90 msec (milliseconds)”. -
Page 43: Adding Another Phone
Adding Another Phone This unit will not function during a power failure. To connect a standard telephone on the same line, use a telephone double adaptor (for Australia) or a T-adaptor (for New Zealand). For Australia Standard Telephone (Optional) Telephone To Socket Double Adaptor For New Zealand... -
Page 44: Wall Mounting
Wall Mounting This unit can be mounted on a wall. Push the hook and turn it around. Turn the hook until a click is heard. Connect the AC adaptor. Tuck the telephone line cord inside the wall mounting adaptor, then push it in the direction of the arrow. - Page 45 Install screws using the wall template below. Connect the telephone line cord. Mount the unit, then slide down. •Raise the antenna. •Fasten the telephone line cord to prevent it from being disconnected. To charge the handset battery: Fix the charge contacts (#) and insert the hook to the handset hole ($).
-
Page 46: Using Belt Clip
To attach the belt clip Using an Optional Headset Plugging an optional headset into the handset allows a hands-free phone conversation. Please use only the Panasonic KX-TCA88AL headset. Only telecommunications compliance labelled headsets should be plugged into the headset jack on the handset. -
Page 47: Battery Replacement
Battery Replacement If “Recharge” is displayed and/or “ calls even if the battery was fully charged, replace the battery with a new Panasonic N4HKGMB00001 (P-P510) battery. Press the notch on the battery cover firmly and slide it as indicated by the arrow. -
Page 48: Troubleshooting
Troubleshooting Problem The unit does not work. “No link to base Place on cradle and try again.” is displayed and an alarm tone sounds. Static, sound cuts in/out, fades. Interference from other electrical units. The handset does not ring. The handset display is blank. - Page 49 Problem You cannot program items, such as the LCD contrast. Previously programmed information is erased. You cannot store a name and phone number in the directory. While programming or searching, the unit starts to ring and stops the program/search. The unit does not display the caller’s name and/or phone number.
- Page 50 •When the headset is connected (p. 46), you must use the headset to talk with the caller. To have a normal cordless phone conversation, disconnect the headset. •Make sure that the headset is connected properly (p. 46). •Please use only the Panasonic KX-TCA88AL headset.
- Page 51 For Australian Customers Panasonic Australia operates a toll free Customer Support Centre. Please phone Panasonic on 132600 for assistance. For New Zealand Customers Panasonic New Zealand operates a toll free Customer Support Centre. Please phone 0800 Panasonic (0800 726276) for assistance.
-
Page 52: Safety Instructions
Safety Instructions Take special care to follow the safety suggestions listed below. Safety 1) The unit should be connected to a power supply only of the type described in the operating instructions or as marked on the unit. 2) When left unused for a long period of time, the base unit should be unplugged from the household AC outlet. - Page 53 WARNING: TO PREVENT FIRE OR SHOCK HAZARD, DO NOT EXPOSE THIS PRODUCT TO LIQUID OR ANY TYPE OF MOISTURE. When a failure occurs which results in the internal parts becoming accessible, disconnect AC adaptor immediately and return this unit to the place of purchase or service centre.
-
Page 54: Specifications
Safety Instructions For New Zealand Users Only The grant of a Telepermit for any item of terminal equipment indicates only that Telecom has accepted that the item complies with minimum conditions for connection to its network. It indicates no endorsement of the product by Telecom, nor does it provide any sort of warranty. -
Page 55: Important Information (For Australia Only)
Important Information Instructions to customer Installation Attached to this apparatus is an approval label. This label is evidence that it is a “Permitted Attachment” which has been authorised to be connected to your telephone service. Conditions relating to connection and operation of this Permitted Attachment are contained in Telecommunications General By-Law 220 (5). - Page 56 This cordless telephone system does not incorporate provision for secrecy of conversations. Appropriately tuned radio equipment and other cordless telephone systems in close proximity may be used by a third party to monitor and possibly interrupt conversations in progress when this system is on radio operation.