Panasonic Palmcorder MultiCam PV-GS9 Operating Instructions Manual
Digital video camcorder
Hide thumbs
Also See for Palmcorder MultiCam PV-GS9:
- Operating instructions manual (60 pages) ,
- Operating instructions manual (152 pages)
Table of Contents
Advertisement
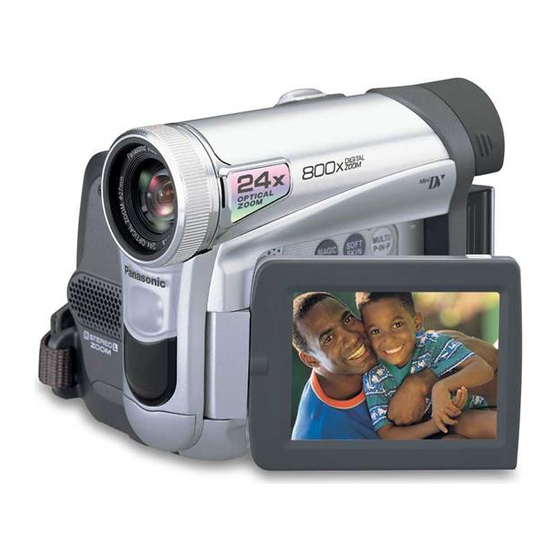
(PV-GS15 Shown)
Before attempting to connect, operate or adjust this product, please
read these instructions thoroughly.
Spanish Quick Use Guide is included.
Guía para rápida consulta en español está incluida.
[For PV-GS12/PV-GS14/
PV-GS15]
For assistance, please call : 1-800-211-PANA(7262) or, contact us via the web at: http://www.panasonic.com/contactinfo
Operating Instructions
[For PV-GS12/PV-GS14/
PV-GS15]
Digital Video Camcorder
PV-GS9
Models No.
PV-GS12
PV-GS14
PV-GS15
LSQT0802 A
Advertisement
Table of Contents

Related Manuals for Panasonic Palmcorder MultiCam PV-GS9


Summary of Contents for Panasonic Palmcorder MultiCam PV-GS9
-
Page 1: Operating Instructions
Spanish Quick Use Guide is included. Guía para rápida consulta en español está incluida. [For PV-GS12/PV-GS14/ [For PV-GS12/PV-GS14/ PV-GS15] PV-GS15] For assistance, please call : 1-800-211-PANA(7262) or, contact us via the web at: http://www.panasonic.com/contactinfo Digital Video Camcorder Operating Instructions PV-GS9 Models No. PV-GS12... -
Page 2: Things You Should Know
It is recommended that only cassette tapes that have been tested and inspected for use in VCR machines with the mark be used. The above markings are located on the appliance bottom cover. For assistance, please call : 1-800-211-PANA(7262) or, contact us via the web at: http://www.panasonic.com/contactinfo Date of Purchase Dealer Purchased From Dealer Address Dealer Phone No. - Page 3 PV-GS9/PV-GS12/PV-GS14/PV-GS15 Responsibility Party : Matsushita Electric Corporation of America Address : One Panasonic Way Secaucus New Jersey 07094 Telephone Number : 1-800-211-PANA(7262) This device complies with Part 15 of the FCC Rules. Operation is subject to the following two conditions: (1) This device may not cause harmful interference, and (2) this device must accept any interference received, including interference that may cause undesired operation.
-
Page 4: Important Safeguards
For assistance, please call : 1-800-211-PANA(7262) or, contact us via the web at: http://www.panasonic.com/contactinfo 11. Grounding or Polarization — This video unit may be equipped with either a polarized 2-wire AC (Alternating... -
Page 5: Precautions
15. Power Lines — An outside antenna system should not be located in the vicinity of overhead power lines or other electric light or power circuits, or where it can fall into such power lines or circuits. When installing an outside antenna system, extreme care should be taken to keep from touching such power lines or circuits as contact with them might be fatal. -
Page 6: End User License Agreement
Agreement. Upon such automatic termination, Licensee must destroy the Software and related documentation together with all the copies thereof at Licensee’s own expense. For assistance, please call : 1-800-211-PANA(7262) or, contact us via the web at: http://www.panasonic.com/contactinfo... -
Page 7: Differences Between Models
This operating instruction book is designed for use with models PV-GS9, PV-GS12, PV-GS14, and PV-GS15. The PV-GS15 is the model used for illustrative purposes. Features may vary, so please read carefully. Differences between models Model PV-GS9 Number Battery Pack CGR-D08R (Supplied) (800 mAh) Memory... -
Page 8: Table Of Contents
Setting Date and Time ...23 Internal Lithium Battery Recharge ...23 LP Mode ...23 Audio Recording Mode ...23 For assistance, please call : 1-800-211-PANA(7262) or, contact us via the web at: http://www.panasonic.com/contactinfo Recording Mode About Recording...24 Recording on a Tape ...24 Recording a Still Picture on a Tape (PV-GS9 Only)...25... - Page 9 Playback Mode Playing Back a Tape ...35 Finding a Scene You Want to Play Back ...35 Slow Motion Playback (Remote Control Only) ..36 Still Playback/Still Advance Playback ...36 Index Search Functions (Remote Control Only) ...37 Playback Zoom Function (Remote Control Only) ...37 Playback Digital Effect Functions ...38 Playing Back a Memory Card (For PV-GS12/PV-GS14/PV-GS15)...38...
-
Page 10: Quick Guide
3 Close the Cassette Holder by pressing the [PUSH] mark 4 Close the Cassette Compartment Cover by pressing the mark For assistance, please call : 1-800-211-PANA(7262) or, contact us via the web at: http://www.panasonic.com/contactinfo Before Use Inserting a Card (For PV-GS12/PV-GS14/PV-GS15) 1 Place your Thumb on the [OPEN▼]... - Page 11 Recording a Still Picture on Tape (PV-GS9 Only) 1 Set the Mode Dial to Tape Recording Mode. 2 Press the [PHOTO SHOT] Button in the Recording Pause Mode. Recording a Still Picture on Card (Photoshot) (For PV-GS12/PV-GS14/PV-GS15) 1 Set the Mode Dial to Card Recording Mode. 2 Press the [PHOTO SHOT] Button.
-
Page 12: Standard Accessories
6) SD Memory Card (PV-GS15 Only) (p. 18) 7) USB Connection Kit (USB Cable and CD-ROM) (PV-GS15 Only) (pp. 47-49, 51, 54) For assistance, please call : 1-800-211-PANA(7262) or, contact us via the web at: http://www.panasonic.com/contactinfo Before Use Controls and Components... - Page 13 Lens Hood (p. 69) Lens Microphone (built-in, stereo) (pp. 27, 29) Built-in LED Light (For PV-GS12/PV-GS14/PV-GS15) (p. 26) Zoom Lever [W/T] (pp. 27-28, 35) Cassette Holder Cassette Compartment Cover (p. 17) USB Jack [ ] (pp. 48-49, 51, 54) DV Input/Output Terminal (pp. 45-46) •...
-
Page 14: The Remote Control (Pv-Gs15 Only)
Variable Speed Search Button [VAR.SEARCH] (p. 36) Menu Button [MENU] (p. 19) For assistance, please call : 1-800-211-PANA(7262) or, contact us via the web at: http://www.panasonic.com/contactinfo Before Use The following buttons function in the same manner as the corresponding buttons on the Camcorder. -
Page 15: Power Supply
• Make sure to match the poles correctly when inserting the button-type battery. WARNING ● Replace Battery with Panasonic or Lixing type CR2025 only. Use of another battery may present a risk of fi re or explosion. ● Battery may explode if mistreated. -
Page 16: Charging Time And Available Recording Time
LCD Monitor is used. In actual use, the available recording time may be shorter. For assistance, please call : 1-800-211-PANA(7262) or, contact us via the web at: http://www.panasonic.com/contactinfo Before Use • The times shown in the table are for continuous recording at a temperature of 68 °F (25 °C) and... -
Page 17: Re-Attaching The Lens Cap
Re-attaching the Lens Cap To protect the Lens surface, attach the Lens Cap. • The Lens Cap and Lens Cap Cord come preattached to the Grip Belt. 1 Pass one end of the Lens Cap Cord through the attached eye on the Lens Cap. Then pass the Lens Cap through the loop made by itself and pull tight. -
Page 18: Using A Memory Card (For Pv-Gs12/Pv-Gs14/Pv-Gs15)
Camcorder, or to turn the Mode Dial. Such actions will damage the Card, and recorded data, and cause the Camcorder to malfunction. For assistance, please call : 1-800-211-PANA(7262) or, contact us via the web at: http://www.panasonic.com/contactinfo Before Use Turning on the Camcorder Turn on the power fi... -
Page 19: Using The Viewfi Nder/Lcd Monitor
Using the Viewfi nder/ LCD Monitor Using the Viewfi nder Before using the Viewfi nder, adjust the fi eld of view so that the displays inside the Viewfi nder become clear and easy to read. 1 Pull the Viewfi nder. 2 Adjust by turning the Eyepiece Corrector Knob To Use the Viewfi... -
Page 20: List Of Menus
1 Press the [ a fi le. • The selected fi le is marked by a frame. For assistance, please call : 1-800-211-PANA(7262) or, contact us via the web at: http://www.panasonic.com/contactinfo Before Use 2 Press the [ENTER] Button selection of the fi le. - Page 21 [SCENE INDEX] Scene Index Mode (p. 37) [WIND CUT] Wind Noise Reduction (p. 29) [ZOOM MIC] Zoom Microphone (p. 27) [CINEMA] Cinema-like Format Recording (p. 29) 5) [DISPLAY] Display Setup Sub-Menu [DISPLAY] Display Mode (p. 60) [DATE/TIME] Date and Time Indication (p. 60) [C.DISPLAY] Counter Display Mode (p.
- Page 22 LCD and Viewfi nder Adjustment (p. 19) [SELF REC] Recording Yourself (p. 26) [EVF ON/AUTO] Using the Viewfi nder (p. 19) For assistance, please call : 1-800-211-PANA(7262) or, contact us via the web at: http://www.panasonic.com/contactinfo Before Use 6) [INITIAL] Initial Setup Sub-Menu [AV JACK] AV Jack (pp.
-
Page 23: Setting Date And Time
5) [LCD/EVF] LCD/EVF Setup Sub-Menu [LCD/EVF SET] LCD and Viewfi nder Adjustment (p. 19) [EVF ON/AUTO] Using the Viewfi nder (p. 19) 6) [INITIAL] Initial Setup Sub-Menu [AV JACK] AV Jack (pp. 13, 65) [REMOTE] Remote Control Mode (p. 15) Setting Date and Time Since the internal clock of the Camcorder has a slight imprecision make sure to check the time before... -
Page 24: Recording Mode
Mode. (PV-GS9) (PV-GS12/ PV-GS14/ PV-GS15) For assistance, please call : 1-800-211-PANA(7262) or, contact us via the web at: http://www.panasonic.com/contactinfo Recording Mode 3 Press the Recording Start/Stop Button • Recording starts. • After [RECORD] is displayed, it changes to [REC]. ] (For 4 Press the Recording Start/Stop Button again to pause the recording. -
Page 25: Recording A Still Picture On A Tape (Pv-Gs9 Only)
To Cancel Blank Search Before Completion Press the [ ] Button. Digital Still Picture When the [STILL] Button is pressed, images become still pictures. When the button is pressed again, the Digital Still Picture Mode is canceled. • We recommend that you press the [STILL] Button fi... -
Page 26: Recording Yourself
[LCD/EVF] Sub-Menu to [MIRROR]. Images are recorded normally and no left and right reversal occurs. For assistance, please call : 1-800-211-PANA(7262) or, contact us via the web at: http://www.panasonic.com/contactinfo Recording Mode Recording with the Built-in LED Video Light (For PV-GS12/PV-GS14/PV-GS15) To brighten the natural colors in a scene. -
Page 27: Self-Timer Recording
3 Set the [OFF/ON] Switch • The Camcorder will be ready for recording in approximately 1.3 seconds. To Cancel the Quick Start Keep the [QUICK START] Button pressed for approximately 2 seconds and make sure the Quick Start Recording Lamp is not lit. •... -
Page 28: Image Stabilizer Function
Set [TAPE RECORDING MENU] >> [CAMERA] >> [EIS] >> [OFF]. • For other notes concerning this item, see page 62. For assistance, please call : 1-800-211-PANA(7262) or, contact us via the web at: http://www.panasonic.com/contactinfo Recording Mode towards [W] or Fade In/Out Functions... -
Page 29: Backlight Compensation Function
2 When the image is completely gone, press the Recording Start/Stop Button recording. 3 Release the [FADE] Button • The still picture cannot fade in or fade out. Backlight Compensation Function This prevents the subject from being recorded too darkly when backlit. (Backlight is the light that shines from behind the subject being recorded.) 1 Press the [BACK LIGHT] Button •... -
Page 30: Recording In Special Situations
], [ 14 15 16 17 • The Indication of the selected Mode appears. For assistance, please call : 1-800-211-PANA(7262) or, contact us via the web at: http://www.panasonic.com/contactinfo Recording Mode 1) [ • For recording scenes involving quick movements, such as sports scenes. -
Page 31: Adjusting White Balance Manually
1) Automatic White Balance Adjustment [AWB] 2) The white balance setting that was previously set manually [ 3) Outdoor Mode [ 4) Indoor Mode (recording under incandescent lamp) [ To Resume Automatic Adjustment Press the [ ] Button or [ until the [AWB] Indication appears. -
Page 32: Manual Shutter Speed Adjustment
• The [MNL] Indication appears. 2 Press the [ENTER] Button Indication appears. 14 15 17 For assistance, please call : 1-800-211-PANA(7262) or, contact us via the web at: http://www.panasonic.com/contactinfo Recording Mode 3 Press the [ Range of Iris Adjustment CLOSE (Closed), F16, ..., F2.0, OP (Opened) + 0dB, ..., OP + 18dB... -
Page 33: Digital Effect Functions
Digital Effect Functions This Camcorder is equipped with Digital Effect Functions that add special effects to the scene. Digital Effects 1 [EFFECT1] 1) MULTI 2) P-IN-P 4) MIX 5) STROBE 7) MOSAIC 8) MIRROR 10) SLIM Multi Mode [MULTI] Picture-In-Picture Mode [P-IN-P] Wipe Mode [WIPE] Mix Mode [MIX] Strobe Mode [STROBE]... - Page 34 • If the [P-IN-P] Button is pressed again, the small still picture is cleared. • For other notes concerning this item, see page 64. For assistance, please call : 1-800-211-PANA(7262) or, contact us via the web at: http://www.panasonic.com/contactinfo Recording Mode Wipe Mode and Mix Mode...
-
Page 35: Playback Mode
Playback Mode Playing Back a Tape The recorded scene can be played back immediately after the recording. 1 Set the [OFF/ON] Switch • The [POWER] Lamp lights up. 2 Set the Mode Dial to Tape Playback Mode. (PV-GS9) (PV-GS12/ PV-GS14/ PV-GS15) 3 Press the [ ] Button... -
Page 36: Slow Motion Playback (Remote Control Only)
When the [ ] Button is pressed, Slow Motion Playback proceeds in the forward direction. For assistance, please call : 1-800-211-PANA(7262) or, contact us via the web at: http://www.panasonic.com/contactinfo Playback Mode Scenes recorded in the SP Mode are played back at approximately 1/5th of the normal speed. -
Page 37: Index Search Functions (Remote Control Only)
Index Search Functions (Remote Control Only) • This feature is only available with Remote Control. However it is not supplied for models PV-GS9/ PV-GS12/PV-GS14. If you would like to order, the parts number is LSSQ0411 as a replacement parts. Please refer to page 74. To facilitate searching for desired scenes, this Camcorder automatically records index signals during recording, as explained in the following. -
Page 38: Playback Digital Effect Functions
To Cancel the Digital Effect Press the [SELECT] Button Remote Control and clear the digital effect indication. For assistance, please call : 1-800-211-PANA(7262) or, contact us via the web at: http://www.panasonic.com/contactinfo Playback Mode Wipe Mode and Mix Mode (Remote Control Only) •... -
Page 39: Slide Show
Folder File Number Picture Size (p. 60) File Number To Select a Desired File and Playing Back 1 Set the Mode Dial to Picture Playback Mode. 2 Press the [MULTI] Button • The fi les recorded on the Card are displayed in Multi-Picture Mode. -
Page 40: Creating A Title
] Button to adjust the color and press the [ENTER] Button For assistance, please call : 1-800-211-PANA(7262) or, contact us via the web at: http://www.panasonic.com/contactinfo Playback Mode • The dark portion of the image is missing the colors of the bright portion change in order of... -
Page 41: Writing Printing Data On A Card (For Pv-Gs12/Pv-Gs14/Pv-Gs15)
4 Press the [ 13 14 16 17 Button to select a desired title. 16 17 • The selected title is marked with a frame. 5 Press the [MULTI] Button • The selected title is displayed. • Recording and Photoshot Recording can be made with pictures that have titles. -
Page 42: Deleting The Files Recorded On A Card (For Pv-Gs12/Pv-Gs14/Pv-Gs15)
• A locked fi le cannot be erased. • If there are many fi les on a card, it may take longer to delete fi les. For assistance, please call : 1-800-211-PANA(7262) or, contact us via the web at: http://www.panasonic.com/contactinfo Playback Mode Formatting a Card (For PV-GS12/... -
Page 43: Playing Back On Your Tv
Playing Back on Your TV By connecting your Camcorder with your TV, the recorded scenes can be viewed on your TV screen. • Before connecting them, turn off the power of both the Camcorder and TV. 1 Connect the [AV OUT] Jack of the Camcorder and the Video and Audio Input Jacks of the [S-VIDEO IN] (For PV-GS14/... -
Page 44: Editing Mode
• It takes a few seconds to record a picture to the Tape. For assistance, please call : 1-800-211-PANA(7262) or, contact us via the web at: http://www.panasonic.com/contactinfo Editing Mode • When recording to tape, select the tape position before recording. The picture will be recorded to the tape position when the [PHOTO SHOT] Button is pressed at Step 3. -
Page 45: Copying On An S-Vhs (Or A Vhs) Cassette
To Dub Audio While Listening to a Pre-recorded Sound When pausing the audio dubbing, set the [12bit AUDIO] on the [PLAYBACK] Sub-Menu to [ST2] and you can check the pre-recorded sound. When a microphone (For PV-GS14/PV-GS15) is used for audio dubbing, use headphones to listen to the pre-recorded sound while dubbing the audio. -
Page 46: Pc Connection With Dv Interface Cable
PC hang-up error. • 1394 (i.LINK) Interface must conform to OHCI (Open Host Controller Interface Specifi cation). For assistance, please call : 1-800-211-PANA(7262) or, contact us via the web at: http://www.panasonic.com/contactinfo Editing Mode , press , press... -
Page 47: With A Pc
With a PC Using the Software with a Personal Computer An image stored on the DV Cassette or Memory Card can be transferred to your personal computer. Software Installation (For Windows) 1 Turn on the personal computer and start up Windows. -
Page 48: For Windows
• Enter “C:\Windows\SYSTEM32\DRIVERS”. • You may click [Browse] to look for and assign the path. For assistance, please call : 1-800-211-PANA(7262) or, contact us via the web at: http://www.panasonic.com/contactinfo With a PC Connecting the Personal Computer and Camcorder Please install the USB Driver fi rst before connecting the Camcorder to your Personal Computer with the USB Cable. -
Page 49: To Disconnect Usb Cable Safely
OS. The numeral after “COM” will differ depending on the operating environment of your personal computer.) • When the Camcorder is in PC Mode: [USB Mass Storage Device] or [Panasonic DV DISK Port Driver] Windows Me: • When the Camcorder is in PC Mode: [USB Disk] •... -
Page 50: Using As A Web Camera
98SE/Me/2000 Windows Windows <--OK--> 98SE/Me/2000 98SE/Me/2000 For assistance, please call : 1-800-211-PANA(7262) or, contact us via the web at: http://www.panasonic.com/contactinfo With a PC Operating environment IBM PC/AT compatible personal computer with preinstalled; Microsoft Windows XP Home Edition/Professional (In this case of Windows XP, SP1 or later is needed.) - Page 51 Installing WebCam Driver 1 Turn on the personal computer and start up Windows. 2 Insert the CD-ROM into the personal computer’s CD-ROM drive. • Quit all applications. • The [Setup Menu] Screen appears. [PV-GS15: Supplied] [PV-GS9/PV-GS12/PV-GS14: Optional Software] 3 Click the [WebCam Driver]. •...
- Page 52 5 After the setup is completed, sign in and start the Windows Messenger. For assistance, please call : 1-800-211-PANA(7262) or, contact us via the web at: http://www.panasonic.com/contactinfo With a PC 6 Click on [Audio Tuning Wizard...] in the [Tools] menu to confi...
-
Page 53: Using The Dv Studio 3.1E-Se (Optional Software)
6 Select [USB Audio Device] in the [Microphone] menu. 7 Click [Web Camera Settings...] in the [Tools] menu. With a PC 8 Confi rm the [Panasonic DVC Web Camera Device] is selected. • For other information about MSN Messenger, please refer to Help. - Page 54 • After reading the displayed contents, please carry out the installation according to instructions. For assistance, please call : 1-800-211-PANA(7262) or, contact us via the web at: http://www.panasonic.com/contactinfo With a PC 5 After the completion of setup, click on [Finish].
-
Page 55: Using The Arcsoft Software (Pv-Gs15: Supplied)
4 Select [Start] >> [All Programs (Programs)] >> [Panasonic] >> [DV Studio3] >> [DV Studio3]. • If a short-cut icon has been created on the desktop during installation, it is also possible to start by double-clicking on the icon. • For other information about DV STUDIO 3.1E-SE Software, please refer to Help. -
Page 56: If You No Longer Need Software Or Driver (Uninstall)
2 Insert the CD-ROM into the CD-ROM drive. 3 Double click the Panasonic icon. 4 Double click [ArcSoft] folder. For assistance, please call : 1-800-211-PANA(7262) or, contact us via the web at: http://www.panasonic.com/contactinfo With a PC 5 Double click [PhotoBase] or [PhotoImpression] folder. -
Page 57: Notes
English for the sake of example, other languages are supported as well. • In this Manual, the Panasonic make digital video camera with USB Jack is referred to as Camcorder. • These instructions do not cover the basic operations of the personal computer or defi... - Page 58 Depending on the software in use, the date and the time may not be displayed correctly. For assistance, please call : 1-800-211-PANA(7262) or, contact us via the web at: http://www.panasonic.com/contactinfo With a PC • The memory capacity indicated on the SD Card label corresponds to the total card capacity.
-
Page 59: Others
Others Indications Various functions and the Camcorder status are shown on the screen. : Remaining Battery Power • When the battery power becomes low, the Indication changes. When the battery is discharged completely, ) Indication fl ashes. R0:45: Remaining Tape Time •... -
Page 60: Initializing The Modes
When using Card Recording Mode • When brightness is insuffi cient • When the MagicPix Function is ON For assistance, please call : 1-800-211-PANA(7262) or, contact us via the web at: http://www.panasonic.com/contactinfo Others Initializing the Modes You can change the Menu settings back to the shipping condition. -
Page 61: Notes And Hints
NO CARD: Card is not inserted. NO DATA: There are no recorded fi les in the card. UNPLAYABLE CARD: You are attempting to play back data which is not compatible with this Camcorder. CARD ERROR: The Card is not compatible with this Camcorder. COPY INHIBITED: Because the medium is protected by a copy guard, images cannot be recorded correctly. - Page 62 • The zoom magnifi cation differs from when it is in the Quick Start Standby Mode and when the recording starts. For assistance, please call : 1-800-211-PANA(7262) or, contact us via the web at: http://www.panasonic.com/contactinfo Others Self-timer Recording • When [BEEP SOUND] on the [INITIAL] Sub-Menu is set to [ON], the beep sound will be emitted along with the Recording Lamp fl...
-
Page 63: White Balance
• The MagicPix Function makes the signal charging time of CCD longer up to 30 times longer than usual, so that dark scenes that are invisible to the naked eyes can be recorded brightly. For this reason, a bright dots may be seen, but this is not a malfunction. •... -
Page 64: Playing Back A Card
[AUDIO REC] on the [RECORDING] Sub-Menu, playback sound becomes stereo sound regardless of the [AUDIO OUT] setting if [12bit AUDIO] is set to [MIX]. For assistance, please call : 1-800-211-PANA(7262) or, contact us via the web at: http://www.panasonic.com/contactinfo Others Index Search Functions •... -
Page 65: Cautions For Use
Creating a Title • Even if the contrast of the Title is adjusted, the portions where there is little difference between light and dark and where the boundary between light and dark is unclear may not appear. • The Title may not be clear if something small is used for it. - Page 66 • Do not keep rubber or plastic products in contact with the Camcorder for a long period of time. For assistance, please call : 1-800-211-PANA(7262) or, contact us via the web at: http://www.panasonic.com/contactinfo Others Do not use benzine, thinner or alcohol for cleaning the Camcorder.
-
Page 67: Optimal Use Of The Battery
• High-temperature and high-humidity environment • Damaged tape • Long operating hours Using Panasonic cleanig cassette (AY-DVMCLA) 1 Insert the Head Cleaner into the Camcorder in the same manner as a Video Cassette. 2 Press the [►] Button, and approximately 20 seconds later, press the [ ] Button. -
Page 68: Cautions For Storage
For assistance, please call : 1-800-211-PANA(7262) or, contact us via the web at: http://www.panasonic.com/contactinfo Others Card •... -
Page 69: Before Requesting Service (Problems And Solutions)
Lens Hood • Do not attach other conversion lenses in front of the Lens Hood; there is no mount to be used for the attachment. • When you wish to attach the Tele Conversion Lens (not supplied), Wide Conversion Lens (not supplied), MC Protector (not supplied), or ND Filter (not supplied), fi... -
Page 70: Using The Reset Button
• Is the Variable Speed Search Function working? Press the [►] Button to cancel the Variable Speed Search Function. (p. 36) For assistance, please call : 1-800-211-PANA(7262) or, contact us via the web at: http://www.panasonic.com/contactinfo Others Recorded pictures are not clear. -
Page 71: Explanation Of Terms
Explanation of Terms Digital Video System In a digital video system, images and sounds are converted into digital signals and recorded on a tape. This complete digital recording is capable of recording and playback with minimal image and sound deterioration. In addition, it automatically records data, such as Time Code and Date/Time, as digital signals. -
Page 72: Specifi Cations
C Output: 0.286 Vp-p, 75 ohm Audio Output Level (Line): 316 mV, 600 ohm For assistance, please call : 1-800-211-PANA(7262) or, contact us via the web at: http://www.panasonic.com/contactinfo Others Mic Input: (For PV-GS14/PV-GS15) Mic sensitivity –50 dB (0 dB=1 V/Pa, 1 kHz) -
Page 73: Camcorder Accessory System
Camcorder Accessory System Accessory # Figure PV-DAC11A CGR-D08A/1B CGR-D16A/1B CGP-D28A/1B CGR-D53A/1K PV-DDC9 LSSQ0411 RP-SD64BPPA RP-SD32BPPA RP-SD16BPPA BN-SDCAPE/1B BN-SDABPE/1B LSFT0577 K1HA05CD0005 PV-H150 PV-HB002 • Please refer to page 74, when placing an order. Others Description AC Adaptor with AC Cable and DC Cable 800 mAh/1 h 30 min, Battery Pack 1 600 mAh/3 h, Battery Pack 2 800 mAh/5 h, Battery Pack... -
Page 74: Camcorder Accessory Order Form
CALL PANASONIC’ S ACCESSORY ORDER LINE AT 1-800-332-5368 [6 AM-5 PM M-F, 6 AM-10:30 AM SAT, PACIFIC TIME] MAIL THIS ORDER TO: PANASONIC SERVICES COMPANY ACCESSORY ORDER OFFICE For assistance, please call : 1-800-211-PANA(7262) or, contact us via the web at: http://www.panasonic.com/contactinfo Others Price Each Your State &... -
Page 75: Request For Service Notice
(Failure to do so will delay your repair.) • To further speed your repair, please provide an explanation of what is wrong with the unit and any symptom it is exhibiting. Panasonic Services Company 1705 N. Randall Road Elgin, IL. 60123-7847 Attn: Camcorder Repair... -
Page 76: Limited Warranty
Panasonic/Quasar Video Products Limited Warranty Coverage If your product does not work properly because of a defect in materials or workmanship, Panasonic Consumer Electronics Company or Panasonic Sales Company (collectively referred to as “the warrantor”) will, for the length of the period indicated on the chart below, which starts with the date of original purchase (“warranty period”), at its option either (a) repair your product with new or refurbished parts, or (b) replace... - Page 77 Others Limited Warranty Limits And Exclusions This warranty ONLY COVERS failures due to defects in materials or workmanship, and DOES NOT COVER normal wear and tear or cosmetic damage, nor does it cover markings or retained images on the picture tube resulting from viewing fi...
-
Page 78: Customer Services Directory
Customer’s in Puerto Rico, please ship or carry in to location below (“Service in Puerto Rico”). Matsushita Electric of Puerto Rico, Inc. Panasonic Sales Company Ave. 65 de Infantería, Km. 9.5, San Gabriel Industrial Park, For assistance, please call : 1-800-211-PANA(7262) or, contact us via the web at: http://www.panasonic.com/contactinfo Others Accessory Purchases... -
Page 79: Spanish Quick Use Guide/Guía Para Uso Rápido
Spanish Quick Use Guide/Guía Para Uso Rápido Precauciones para su seguridad ADVERTENCIA: Para evitar incendios y descargas eléctricas, no exponga este equipo a la lluvia ni a la humedad. Camcorder está diseñada para grabar y reproducir en el modo de Reproducción Estándar (SP) y modo Largo (LP). -
Page 80: Guía Rápida
3 Cierre el soporte del cassette presionando la marca [PUSH] 4 Cierre la cubierta del compartimiento del cassette presionando la marca For assistance, please call : 1-800-211-PANA(7262) or, contact us via the web at: http://www.panasonic.com/contactinfo Others Inserción de una tarjeta de memoria (Sólo para el modelo PV-GS12/PV-GS14/PV-GS15) 1 Usando su pulgar presione la perilla [OPEN▼]... - Page 81 Grabación de una imagen fi ja en cinta (Sólo para el modelo PV-GS9) 1 Gire el dial de modo a modo de grabación de cinta. 2 Presione el botón [PHOTO SHOT] en el modo de pausa de grabación. Grabación de una imagen fi ja en tarjeta (Photoshot) (Sólo para el modelo PV-GS12/PV-GS14/PV-GS15)
-
Page 82: Index
Erasure Prevention Slider ... 17 Fade ... 28 Formatting a Card ... 42 F Number... 32 For assistance, please call : 1-800-211-PANA(7262) or, contact us via the web at: http://www.panasonic.com/contactinfo Others Headphones ... 64 Iris... 32 LCD Monitor ... 19, 68 Limited Warranty ... - Page 83 RapidFire Consecutive Photoshot ... 26 Recording Check ... 24 Recording Speed... 23 Remaining Battery Power... 59 Remaining Tape Time... 59 Remote Control ... 14 Repeat Playback ... 64 Request for Service Notice... 75 Review Playback ... 35 SD Memory Card... 57 Self-timer Recording...
- Page 84 Panasonic Consumer Electronics Company, Division of Matsushita Electric Corporation of America One Panasonic Way Secaucus, New Jersey 07094 Panasonic Sales Company (“PSC”), Printed in Indonesia Division of Matsushita Electric of Puerto Rico, Inc. LSQT0802 A Ave. 65 de Infanteria, Km. 9.5 San Gabriel Industrial Park Carolina,...