Panasonic CS-E12CKP Operating Instructions Manual
Room air conditioner
Hide thumbs
Also See for CS-E12CKP:
- Service manual (94 pages) ,
- Brochure (28 pages) ,
- Operating instructions manual (11 pages)
Table of Contents
Advertisement
Available languages
Available languages
BZ02
Before using your air-conditioner, please read
this operating instructions carefully and keep it
for future reference.
OPERATING INSTRUCTIONS
Before using your air-conditioner, please read this operating instructions
carefully and keep it for future reference.
I
NVERTER
(Refrigerant : R410A)
Room Air Conditioner
M
:-
ODEL
Indoor
Outdoor
CS-E9CKP
CU-E9CKP5
CS-E12CKP
CU-E12CKP5
CS-E15CKP
CU-E15CKP5
ENGLISH ...................... P.
1 – P. 10
PORTUGUÊS ............... P. 11 – P. 20
DEUTSCH ..................... P. 21 – P. 30
FRANÇAIS .................... P. 31 – P. 40
NEDERLAND ................ P. 41 – P. 50
ITALIANO ..................... P. 51 – P. 60
GREEK ......................... P. 61 – P. 70
ESPAÑOL ..................... P. 71 – P. 81
RUSSIAN ...................... P. 82 – P. 93
MATSUSHITA INDUSTRIAL CORP. SDN. BHD.
LOT 2, PERSIARAN TENGKU AMPUAN, SECTION 21,
SHAH ALAM INDUSTRIAL SITE, SELANGOR, MALAYSIA
F563844
Advertisement
Chapters
Table of Contents

Related Manuals for Panasonic CS-E12CKP


Summary of Contents for Panasonic CS-E12CKP
-
Page 1: Room Air Conditioner
NVERTER ODEL (Refrigerant : R410A) Indoor CS-E9CKP CS-E12CKP CS-E15CKP ENGLISH ... P. PORTUGUÊS ... P. 11 – P. 20 DEUTSCH ... P. 21 – P. 30 FRANÇAIS ... P. 31 – P. 40 NEDERLAND ... -
Page 2: Table Of Contents
Thank you for purchasing our Panasonic Room Air Conditioner. CONTENTS :Features ... 1 :Safety Precautions ... 2 I Installation Precautions I Operation Precautions :Name of Each Part ... 3~4 I Indoor Unit I Outdoor Unit I Accessories I Remote Control :Preparation Before Operation ... -
Page 3: Safety Precautions
Improper installation will cause leakage, electric shock or fire. Please engage an authorized dealer or specialist for the installation work. Caution G This room air conditioner must be earthed. Improper grounding could cause electric shock. G Ensure that the drainage piping is connected properly. -
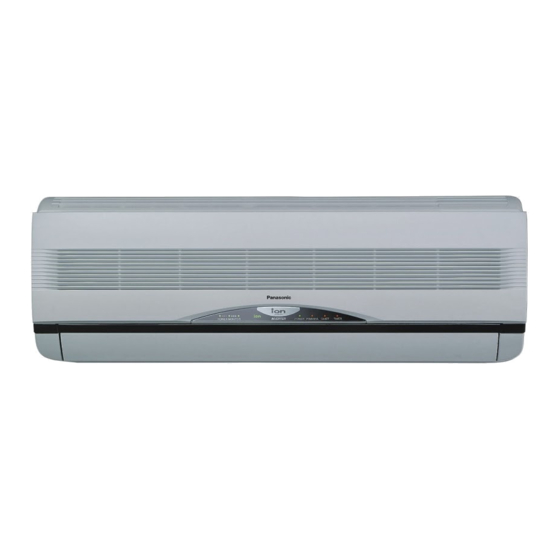
Page 4: Name Of Each Part
NAME OF EACH PART I Indoor Unit 1 Front Panel 2 Air Intake Vent 3 Power Supply Cord 4 Ionizer 5 Vertical Airflow Direction Louver 6 Horizontal Airflow Direction Louver 7 Indicator Panel 8 Air Outlet Vent 1 Auto Operation Button (when the front panel is opened) 2 Power Monitor Lamps –... -
Page 5: Name Of Each Part
NAME OF EACH PART I Remote Control AUTOHEA HEAT COOL COOL DRY FAN AUTO AUTO AUTO TEMP OFF/ON MODE QUIET POWERFUL AIR SWING FAN SPEED & CANCEL TIMER CHECK RESET CLOCK G Remote Control Signal. • Make sure it is not obstructed. •... -
Page 6: Preparation Before Operation
PREPARATION BEFORE OPERATION I Indoor Unit Connect the power supply cord to an independent power supply Open the front panel Remove the air filters AUTO HEAT COOL DRY FAN AUTO Fit the air purifying filters in place Insert the air filters AUTO Close the front panel I Remote Control... - Page 7 For HEAT operation AUTO When air temperature is low, air is sent . When temperature goes up, louver swing horizontally at a fixed speed. G Use this air conditioner under the following conditions: Unit in °C Outdoor Indoor DBT: Dry Bulb Temp...
-
Page 8: Setting The Timer
The timer cannot be set if the time display is flashing. I ON-TIMER Operation To start the air conditioner operation automatically. • Press 1 to set the operation. • Press 2 to increase or decrease the time. • Then press 3. -
Page 9: Care And Maintenance
Catechin Air Purifying Filter No.: CZ-SF70P Triple Deodorizing Filter No.: CZ-SFD72P • If you operate the air conditioner with dirty filters:- – Air is not purified – Cooling capacity decreases – Foul odour is emitted I Pre-season Inspection... -
Page 10: Helpful Information
• When power failure occurs, the timer setting will be cancelled. Once power is resumed, reset the timer. I Thunder and Lightning • This air conditioner is equipped with a built-in surge protective device. However, in order to further protect your air conditioner from being damaged by... -
Page 11: Troubleshooting
(Please wait as defrosting may take up to 10 minutes.) • This occurs when the airflow from the air conditioner cools the room. • A ‘passt’ sound is heard during defrosting or when the air conditioner operation has been stopped. - Page 12 Antes de usar o seu aparelho de ar condicionado, leia estas instruções de uso com muita atenção e tenha-as à mão para futuras consultas. CARACTERÍSTICAS Ar condicionado Panasonic Inverter: cómodo, silencioso e confortável G Botão Auto-lluminãvel Para facilitar a sua manipulação na escuridão.
- Page 13 RECOMENDAÇÕES DE SEGURANÇA Antes de pôr em funcionamento este aparelho, leia atentamente as seguintes Recomendações de Segurança. G Para evitar danos pessoais, de terceiros ou danos materiais, deve seguir as seguintes instruções. G A operação incorrecta, devido ao incumprimento destas instruções, poderá causar danos ou avarias. A gravidade das mesmas é...
- Page 14 DESCRÍÇÃO DAS PEÇAS I Unidade Interior 1 Painel Frontal 2 Entrada de Ar 3 Cabo de Alimentação 4 Ionizador 5 Deflector para Fluxo de Ar Vertical 6 Deflector para Fluxo de Ar Horizontal 7 Painel indicador 8 Saída de Ar 1 Botão de Operação Automática (quando o painel frontal está...
-
Page 15: Controlo Remoto
DESCRÍÇÃO DAS PEÇAS I Controlo Remoto AUTOHEA HEAT COOL COOL DRY FAN AUTO AUTO AUTO TEMP OFF/ON MODE QUIET POWERFUL AIR SWING FAN SPEED & CANCEL TIMER CHECK RESET CLOCK G Sinal do comando à distância. • Certifique-se de que não existe nenhum obstáculo entre o comando e o receptor de infravermelhos. -
Page 16: Unidade Interior
PREPARAÇÃO ANTES DE UTÍLIZAR I Unidade Interior Ligue o cabo de alimentaçáo a uma fonte de alimentaçáo independente. Abra o painel frontal Remova os filtros de ar AUTO HEAT COOL DRY FAN AUTO Coloque no seu lugar os filtros purificadores de ars Introduza os filtros de ar AUTO Feche o painel frontal... - Page 17 I Ajuste da velocidade do ventilador • Prima 4 para seleccionar:- Existem 5 velocidades diferentes para além da velocidade automática do ventilador. AUTO – Aquecimento Quando aumenta a temperatura de ar de descarga, aumenta a velocidade do ventilador Arrefecimento G Seco Mude a velocidade do ventilador para provocar uma corrente de ar frio.
- Page 18 OFF/ON POWERFUL MODE QUIET AIR SWING FAN SPEED CANCEL TIMER CHECK RESET CLOCK PROGRAMAR O TEMPORIZADOR Certifique-se de que a hora actual está certa antes de programar o temporizador. O temporizador não poderá ser programado se o visor estiver a piscar. I Funcionamento ON-TIMER (Temporizador de ligação) Para arrancar automaticamente o aparelho de ar condicionado.
- Page 19 CUIDADOS E MANUTENÇÃO I Limpeza da Unidade Interior e do Controlo Remoto • Limpe cuidadosamente, com um pano macio e seco. • Não use água acima de 40°C nem líquidos para dar brilho para limpar a unidade. I Limpeza do Filtro de Ar (Recomendação:- Se a unidade funciona num ambiente com pó, limpe os filtros de duas em duas semanas, o uso contínuo destes filtros sujos reduz a...
- Page 20 INFORMAÇÕES ÚTEIS I Botão de funcionamento automático • Levante o painel frontal e prima. G Funcionamento automático • Se o comando à distância deixa de funcionar ou ficou mal colocado, prima o botão de funcionamento automático para arrancar o aparelho. •...
-
Page 21: Temporary Operation
DETECÇÃO DE AVARIAS ANTES de chamar o seu agente, consulte a lista de verificações Problema ? • A unidade não funciona • A unidade não faz frio nem calor • A unidade não recebe os sinais do Controlo Remoto ou o visor do Controlo Remoto está fraco ou não afixa qualquer indicação Problema ? •... -
Page 22: Besondere Merkmale
Wir danken Ihnen für den Kauf unseres Panasonic- Raumklimageräts. INHALT :Besondere Merkmale ... 21 :Sicherheitshinweise ... 22 I Montagehinweise I Wichtige Betriebshinweise :Bezeichnung Der Geräteteile ... 23~24 I Innengerät I Außengerät I Zubehör I Fernbedienung :Betriebsvorbereitungen ... 25 I Innengerät I Fernbedienung :Bedienung ... -
Page 23: Sicherheitshinweise
SICHERHEITSHINWEISE Bitte lesen Sie die folgenden Sicherheitshinweise vor der Inbetriebnahme sorgfältig durch! G Eine unsachgemäße Bedienung infolge Mißachtung der Bedienungsanleitung kann zu Verletzungen und Beschädigungen führen. Um dies zu vermeiden, sind die folgenden Hinweise unbedingt zu beachten. G Die Warnhinweise untergliedern sich entsprechend ihrer Wichtigkeit wie folgt: Vorsicht Dieser Hinweis deutet darauf hin, daß... -
Page 24: Bezeichnung Der Geräteteile
BEZEICHNUNG DER GERÄTETEILE I Innengerät 1 Frontgitter 2 Lufteinlaß 3 Netzkabel 4 Ionisier 5 Luftlenklamelle für vertikale Zuluftrichtung 6 Luftlenklamelle für horizontale Zuluftrichtung 7 Anzeigetafel 8 Luftauslaß 1 Funktionstaste für Betrieb ohne Fernbedienung (Innengerät bei geöffnetem Frontgitter) 2 Leistungskontrollanzeige – ORANGE •... -
Page 25: I Fernbedienung
BEZEICHNUNG DER GERÄTETEILE I Fernbedienung AUTOHEA HEAT COOL COOL DRY FAN AUTO AUTO AUTO TEMP OFF/ON MODE QUIET POWERFUL AIR SWING FAN SPEED & CANCEL TIMER CHECK RESET CLOCK G Fernbedienungssignal. • Zwischen der Fernbedienung und dem Klimagerät dürfen sich keine Hindernisse befinden. •... -
Page 26: Betriebsvorbereitungen
BETRIEBSVORBEREITUNGEN I Innengerät Netzstecker an eine getrennt abgesicherte Spannungsversorgung anschließen Öffnen Sie das Frontgitter Entnehmen Sie den Grobstaubfilter AUTO HEAT COOL DRY FAN Luftreinigungsfilter einsetzen AUTO Setzen Sie den Grobstaubfilter ein AUTO Schließen Sie das Frontgitter I Fernbedienung – Zur Einstellung der aktuellen Uhrzeit AIR SWING FAN SPEED CANCEL... - Page 27 I Einstellung der Ventilatordrehzahl • Taste 4 drücken, um die Auswahl vorzunehmen: Über die Ventilatorautomatik hinaus können fünf verschiedene Ventilatordrehzahlen eingestellt werden. AUTO – Heizen Die Ventilatordrehzahl erhöht sich mit der temperature der ausgeblasenen Luft. Kühlen G Entfeuchtung Die Ventilatordrehzahl wird so verändert, daß...
-
Page 28: Einstellen Des Timers
OFF/ON POWERFUL MODE QUIET AIR SWING FAN SPEED CANCEL TIMER CHECK RESET CLOCK EINSTELLEN DES TIMERS Vor dem Programmieren des Timers muß die aktuelle Uhrzeit korrekt eingestellt werden. Der Timer kann nicht programmiert werden, wenn die Zeitanzeige blinkt. I Funktion des Einschalt-Timers (ON-TIMER) Zur automatischen Inbetriebnahme des Klimageräts. -
Page 29: Pflege Und Wartung
PFLEGE UND WARTUNG I Reinigen des Innengeräts und der Fernbedienung • Wischen Sie das Klimagerät mit einem weichen, trockenen Tuch ab. • Gerät nur mit handwarmem Wasser (max. 40°C) reinigen. Keine flüssigen Reinigungsmittel verwenden. I Reinigen der Grobstaubfilter (Hinweis: Bei stark staubhaltiger Umgebungsluft sind die Filter in zweiwöchentlichen Abständen zu reinigen. -
Page 30: Nützliche Hinweise
NÜTZLICHE HINWEISE I Funktionstaste für den Betrieb ohne Fernbedienung • Frontplatte anheben und drücken. G Automatikbetrieb • Wenn die Fernbedienung defekt oder nicht zur Hand ist, drücken Sie die Taste AUTO OPERATION, um das Gerät in Automatikbetrieb zu schalten. • Beim Drücken der Taste für den Betrieb ohne Fernbedienung begibt sich das Gerät sofort in den Automatikbetrieb, allerdings kann in dieser Betriebsart nicht die Temperatur eingestellt werden. -
Page 31: Störungssuche
STÖRUNGSSUCHE Bevor Sie den Kundendienst rufen, sollten Sie die Checklisten auf den folgenden Seiten durchgehen. Problem? • Das Klimagerät läuft nicht • Das Klimagerät kühlt bzw. heizt nicht richtig • Das Klimagerät enthält keine Signale von der Fernbedienung, oder die Anzeige der Fernbedienung ist zu schwach bzw. -
Page 32: Caracteristiques
Sie diese Betriebsanleitung aufmerksam durchlesen und für den späteren Bedarf aufbewahren. CARACTERISTIQUES Fraîcheur, silence et confort grâce au climatiseur Panasonic à air pulsé à inverseur. G Touche Illumineen Pour faciliter l’utilisation dans la pènombre. (Voir page 34) G Fonctionnement Automatique Détecte la température intérieure pour sélectionner le... -
Page 33: Mode D'emploi
MODE D’EMPLOI Avant la mise en marche, veuillez lire attentivement le Mode d’emploi qui suit. G Pour éviter toute blessure et endommagement de votre habitation, les instructions ci-dessous sont à suivre. G Une utilisation incorrecte résultant du non respect des instructions qui suivent peut entraîner des blessures ou des dégâts dont la gravité... -
Page 34: Nom De Chaque Piéce
NOM DE CHAQUE PIÈCE I Appareil D’intérieur 1 Panneau avant 2 Volet de prise d’air 3 Câble électrique d’arrivée du courant 4 Ioniseur 5 Volet de direction verticale de l’air 6 Volet de direction horizontale de l’air 7 Témoin lumineux 8 Volet de sortie d’air 1 Bouton de fonctionnement automatique (lorsque le panneau avant est ouvert) -
Page 35: I Télécommande
NOM DE CHAQUE PIÈCE I Télécommande AUTOHEA HEAT COOL COOL DRY FAN AUTO AUTO AUTO TEMP OFF/ON MODE QUIET POWERFUL AIR SWING FAN SPEED & CANCEL TIMER CHECK RESET CLOCK G Signal de télécommande. • Veilez à éviter toute obstruction du signal de la télécommande. -
Page 36: Préparation Avant Fonctionnement
PRÉPARATION AVANT FONCTIONNEMENT I Appareil D’intérieur Raccordez le cordon d'alimentation à une source d'alimentation indépendante Ouvrir le panneau avant Retirez les filtres à air AUTO HEAT COOL DRY FAN AUTO Placez les filtres d’épuration d’air Installez les filtres à air AUTO Refermez le panneau avant I Télécommande... - Page 37 I Réglage de la vitesse du ventilateur • Appuyez sur 4 pour sélectionner:- Il y a cinq niveaux de vitesse du ventilateur en plus de la vitesse automatique du ventilateur. AUTO – Chauffage Lorsque la témperature de la sortie d’air augmente, la vitesse du ventilateur augmente aussi.
-
Page 38: Réglage De La Minuterie
AUTO OFF/ON QUIET POWERFUL MODE AIR SWING FAN SPEED CANCEL TIMER CHECK RESET CLOCK RÉGLAGE DE LA MINUTERIE Vous assurer que l’heure est correcte avant de régler les minuteries. Les minuteries ne peuvent pas être réglées si l’affichage de l’heure clignote. I Utilisation de la minuterie de mise en marche (ON-TIMER) Pour démarrer le climatiseur automatiquement. -
Page 39: Soin Et Entretien
SOIN ET ENTRETIEN I Nettoyer L’appareil d’interieur et la Télécommande • Essuyer doucement avec un chiffon doux et sec. • Ne nettoyez pas l’appareil avec de l’eau dont la température est supérieure à 40°C ou avec un produit lustrant. I Nettoyer les Filtres À Air (Recommandation : Si l’appareil est utilisé... -
Page 40: Information Utile
INFORMATION UTILE I Touche Fonctionnement automatique • Soulevez le panneau avant et appuyez. G Fonctionnement automatique • Si la télécommande ne fonctionne pas correctement ou a été égarée, appuyez sur la touche de fonctionnement automatique pour démarrer le mode automatique. •... -
Page 41: Résolution De Problèmes
RÉSOLUTION DE PROBLÈMES Avant d’appeler votre vendeur, vous reporter à la liste. Problème? • L’appareil ne fonctionne pas • L’appareil ne refroidit pas ou ne chauffe pas efficacement • L’appareil ne reçoit pas les signaux de la télécommande, ou l’affichage de la télécommande est faible ou non existant Problème? •... - Page 42 Dank u voor uw aankoop van deze Panasonic Room Air Conditioner. INHOUD : Kenmerken ... 41 : Veiligheidsmaatregelen ... 42 I Installatie-aanwijzingen I Gebruiksaanwijzingen : Benaming van de onderdelen ... 43~44 I Binnen-unit I Buiten-unit I Accessories I Afstandsbediening : Voorbereiding Voor Gebruik ... 45...
- Page 43 VEILIGHEIDSMAATREGELEN Alvorens het gebruik dient u de onderstaande “Veiligheidsmaatregelen” zorgvuldig te lezen. G Ter voorkoming van letsel of schade aan uw eigendom of dat van anderen, dient u onderstaande aanwijzingen te volgen. G Onjuiste bediening als gevolg van het niet naleven van de instructies veroorzaakt beschadiging of gevaar;...
- Page 44 BENAMING VAN DE ONDERDELEN I Binnen-unit 1 Voorpaneel 2 Aanzuigopening 3 Netsnoer 4 Ionenvormer 5 Uitblaasrooster voor vertikale richting 6 Uitblaasrooster voor horizontale richting 7 Verklikkerpaneel 8 Uitblaasopening 1 Handmatige bedieningstoets (Met geopend voorpaneel) 2 Energie aanduiding – ORANJE • Verlicht van LOW (laag) tot HIGH (hoog) om werking van de compressor aan te geven.
- Page 45 BENAMING VAN DE ONDERDELEN I Afstandsbediening AUTOHEA HEAT COOL COOL DRY FAN AUTO AUTO AUTO TEMP OFF/ON MODE QUIET POWERFUL AIR SWING FAN SPEED & CANCEL TIMER CHECK RESET CLOCK G Signaal afstandsbediening. • Zorg ervoor dat het signaal niet wordt belemmerd. •...
- Page 46 VOORBEREIDING VOOR GEBRUIK I Binnen-unit Sluit het netsnoer aan op een onafhankelijk stopcontact Open het voorpaneel Verwijder de luchtfilters AUTO HEAT COOL DRY FAN AUTO Breng de luchtzuiveringsfilters aan Plaats de luchtfilters AUTO Sluit het frontpaneel I Afstandsbediening – Om de juiste tijd in te stellen AIR SWING FAN SPEED CANCEL...
- Page 47 I Instelling van de ventilatorsnelheid • Druk op 4 om te selecteren: Naast de 5 instelbare ventilatorsnelheden is er tevens een automatische stand. AUTO – Verwarming Wanneer de temperatuur van de uitgeblazen lucht stijgt, neemt de snelheid van de ventilator toe. Koeling G Drogen De ventilatorsnelheid varieert om zo een koel briesje te creëren.
- Page 48 * Verklikker ionstand gaat branden op binnentoestel. • Druk nogmaals om deze functie te annuleren. G Informatie over het gebruik • Air conditioner AAN: Produceert negatieve ionen tijdens de werking. • Air conditioner UIT: Produceert negatieve ionen wanneer de ventilator werkt.
- Page 49 VERZORGING EN ONDERHOUD I Het reinigen van binnen-unit en afstandsbediening • Voorzichtig schoonvegen met een zachte droge doek. • Gebruik geen water van meer dan 40°C of polijstvloeistof om het toestel schoon te maken. I Het reinigen van de luchtfilters (Aanbeveling:- als het apparaat in een stoffige omgeving werkt, reinigt u de filters om de twee weken, aangezien voortdurend gebruik van vuile filters het afkoelend of...
- Page 50 HULPZAME INFORMATIE I Toets Auto Operation • Til het voorpaneel op en druk. G Automatische werking • Als de afstandsbediening niet werkt of tijdelijk niet te vinden is, drukt u op de Auto Operation knop om de automatische werking te starten. •...
- Page 51 HET OPLOSSEN VAN PROBLEMEN Vóór u de dealer of technicus belt, raadpleeg eerst deze lijst. Probleem • Het apparaat werkt niet • Het apparaat koelt en verwarmt niet goed • Het apparaat ontvangt geen afstandsbedieningsignaal, het display is zwak of niet zichtbaar Probleem •...
-
Page 52: Caratteristiche
CARATTERISTICHE Un dolce e fresco benessere con i climatizzatori con inverter della Panasonic. G Pulsante Autoilluminate Consente un facile utilizzo al buio. (Vedere a pagina 54) G Funzionamento Automatico Rileva la temperatura interna per selezionare la modalità... -
Page 53: Precauzioni Per La Sicurezza
PRECAUZIONI PER LA SICUREZZA Si prega di leggere attentamente le seguenti “Precauzioni di Sicurezza” prima di utilizzare il climatizzatore. G Eseguire le seguenti istruzioni per evitare di causare lesioni alla propria persona, lesioni ad altri e danni ai beni. G Un’operazione impropria dovuta al non rispetto delle istruzioni potrebbe provocare danni fisici e materiali, la gravità... -
Page 54: Identificazione Parti
IDENTIFICAZIONE PARTI I Unita’ interna 1 Pannello Anteriore 2 Bocca di entrata dell’aria 3 Punto per apertura del pannello 4 Ionizzatore 5 Alette di direzione del flusso d’aria verticale 6 Alett di direzione del flusso d’aria orizzontale 7 Pannello indicatori 8 Bocca di uscita dell’aria 1 Tasto di funzionamento automatico (Apertura del pannello frontale) -
Page 55: I Telecomando
IDENTIFICAZIONE PARTI I Telecomando AUTOHEA HEAT COOL COOL DRY FAN AUTO AUTO AUTO TEMP OFF/ON MODE QUIET POWERFUL AIR SWING FAN SPEED & CANCEL TIMER CHECK RESET CLOCK G Segnale telecomando. • Accertarsi che non vi siano ostacoli. • Distanza massima: 10 m •... -
Page 56: Preparazione Prima Dell'uso
PREPARAZIONE PRIMA DELL’USO I Unita’ interna Collegare il cavo di alimentazione ad una fonte di alimentazione indipendente Aprire il pannello frontale Rimuovere i filtri dell’aria AUTO HEAT COOL DRY FAN AUTO Montare i filtri purificatori dell’aria in posizione Inserire i filtri dell’aria AUTO Chiudere il pannello frontale I Telecomando... - Page 57 I Impostazione della velocità della ventola • Premere 4 per selezionare:- Ci sono 5 fasi di velocità del ventilatore oltre alla velocità del ventilatore automatica. AUTO – Riscaldamento Quando la temperatura dell’aria emessa si alza, la velocità del ventilatore aumenta. Raffreddamento G Deumidificazione Cambia la velocità...
-
Page 58: Impostazione Del Timer (Temporizzatore)
OFF/ON MODE QUIET POWERFUL AIR SWING FAN SPEED CANCEL TIMER CHECK RESET CLOCK IMPOSTAZIONE DEL TIMER (TEMPORIZZATORE) Accertarsi che l’ora in corso sia esatta prima di impostare Il timer. Il timer non può esse impostato se il Time Display (indicatore dell’ora) lampeggia. I Programmazione del TIMER di accensione Consente di avviare il climatizzatore automaticamente. -
Page 59: Cura E Manutenzione
CURA E MANUTENZIONE I Pulitura dell’unità interna e del telecomando • Pulire delicatamente con un panno asciutto e morbido. • Non usare acqua a temperatura superiore a 40°C o liquidi lucidanti per pulire l’unità. I Pulitura dei filtri dell’aria (Se l’unità è installata in un ambiente polveroso, si raccomanda di pulire i filtri ogni due settimane. -
Page 60: Informazioni Utili
INFORMAZIONI UTILI I Tasto “Auto Operation” • Sollevare il pannello frontale e premere. G Funzionamento automatico • Se il telecomando non funziona o è posizionato in modo errato, premere il tasto Auto per attivare la modalità di funzionamento automatica. • Il funzionamento automatico verrà attivato immediatamente dopo la pressione del tasto Auto Operation. -
Page 61: Localizzazione Dei Guasti
LOCALIZZAZIONE DEI GUASTI Prima di rivolgersi al rivenditore autorizzato, consultare le indicazioni. Il tipo di problema • L’apparecchio non funziona • L’unità non raffredda e non riscalda in modo efficace • L’unità non riceve i segnali del comando a distanza oppure l’intensità... - Page 62 63~64 65~66...
- Page 64 – • • – – – – –...
- Page 65 AUTOHEA HEAT COOL COOL DRY FAN AUTO AUTO AUTO TEMP OFF/ON MODE QUIET POWERFUL AIR SWING FAN SPEED & CANCEL TIMER CHECK RESET CLOCK • • • • • • & – – • • • • •...
- Page 66 AUTO HEAT COOL DRY FAN AUTO AUTO – AIR SWING FAN SPEED CANCEL TIMER CHECK RESET CLOCK • • • • AUTO – HEAT – COOL – – – • • ° ° • HEAT 20°C ~ 24°C COOL 26°C ~ 28°C •...
- Page 67 • • AUTO • AUTO • AUTO • • ° • ° • ° • • • AUTO • AUTO • AUTO DBT: WBT: (30) (24) (18) (-5) (-6) • • COOL – • AUTO – • • DRY – •...
- Page 68 AUTO OFF/ON MODE QUIET POWERFUL AIR SWING FAN SPEED CANCEL TIMER CHECK RESET CLOCK • • • • • • • • • • • • • • • • • ˚ ˚ ˚ • • • • • • •...
- Page 69 • • ° • • • • • • • • • • • – – – COOL – 8°C HEAT – 14°C •...
- Page 70 • • • • • • • • • • • • • • • : 1°C : 2°C • • • • • • • °...
- Page 71 • • • • • • • • • • • • • • • ° ° • • • • • • • • • • • • • • • • • • • • • MODE...
-
Page 72: Caracteristicas
CARACTERÍSTICAS Confort fresco y silencioso mediante el acondicionador de aire con inversor Panasonic. G Botón Autoiluminable Para facilitar su manipulaciÛn en la oscuridad. (Página 74) G Funcionamiento Automático Tome la temperatura interior para seleccionar el modo más apropiado. -
Page 73: Medidas De Seguridad
MEDIDAS DE SEGURIDAD Antes de operar el equipo, por favor lea cuidadosamente las siguientes “Medidas de Seguridad” G Para prevenir heridas personales, heridas a otras personas y daños de la propiedad, se deben seguir las siguientes instrucciones. G El uso incorrecto por no seguir las instrucciones puede causar daños o averías;... -
Page 74: Nombre De Cada Pieza
NOMBRE DE CADA PIEZA I Unidad Interior 1 Panel Frontal 2 Entrada De Aire 3 Cable De Alimentación 4 Ionizador 5 Persiana Vertical Para El Flujo De Aire 6 Persiana Horizontal Para El Flujo Del Aire 7 Panel indicador 8 Salida De Aire 1 Botón de funcionamiento automático (Al abrir el panel frontal) 2 Lámparas monitoras de la alimentación –... -
Page 75: I Control Remoto
NOMBRE DE CADA PIEZA I Control Remoto AUTOHEA HEAT COOL COOL DRY FAN AUTO AUTO AUTO TEMP OFF/ON MODE QUIET POWERFUL AIR SWING FAN SPEED & CANCEL TIMER CHECK RESET CLOCK G Señal del mando a distancia. • Asegúrese de que el paso de la señal no está obstruido. -
Page 76: Prepación Antes Del Funcionamiento
PREPARACIÓN ANTES DEL FUNCIONAMIENTO I Unidad Interior Conecte el cable de alimentación a una fuente de alimentación independente. Abra la parrilla delantera Retire los filtros de aire AUTO HEAT COOL DRY FAN AUTO Coloque en su lugar los flitros purificadores de aire. Inserte los filtros de aire AUTO Cierre el panel frontal... - Page 77 I Ajuste de la velocidad del ventilador • Presione 4 para seleccionar:- Hay cinco fases de velocidad del ventilador además de velocidad del ventilador automática. AUTO – Calentamiento Cuando la temperatura del aire descargado sube, la velocidad del ventilador se incrementa. Enfriamiento G Dry Cambia la velocidad del ventilador para generar una brisa fría.
-
Page 78: Ajuste Del Temporizador
OFF/ON MODE QUIET POWERFUL AIR SWING FAN SPEED CANCEL TIMER CHECK RESET CLOCK AJUSTE DEL TEMPORIZADOR Asegúrese de que la hora actual es la correcta antes de ajustar los temporizadores. Los temporizadores no pueden ser ajustados si el visualizador de la hora emite destellos. -
Page 79: Cuidado Y Mantenimiento
CUIDADO Y MANTENIMIENTO I Limpieza de la Unidad Interior y el Control Remoto • Limpie suavemente con un trapo suave y seco. • No use agua por encima de los 40°C ni abrillantadores para limpiar la unidad. I Limpieza de los Filtros de Aire (Recomendación: - Si la unidad funciona en un ambiente con polvo, limpie los filtros cada dos semanas, el uso continuado de estos filtros sucios... -
Page 80: Información Útil
INFORMACIÓN ÚTIL I Botón de funcionamiento automático • Levante el panel frontal y presione. G Funcionamiento automático • Si el mando a distancia deja de funcionar o ha quedado mal colocado, pulse el botón de funcionamiento automático para poner en marcha el aparato. -
Page 81: Localización De Averías
LOCALIZACIÓN DE AVERÍAS Antes de llamar a su distribuidor, refierase a las listas ¿Problema? • La unidad no funciona • La unidad no enfría correctamente • La unidad no recibe las señales del control remoto, o la visualización del control remoto es débil o no existe ¿Problema? •... - Page 82 NIVEL DE RUIDO DE ACUERDO CON EL REAL DECRETO 213/1992 RUIDO DE FUNCIONAMIENTO DEL MODELO: CS-E9CKP/CU-E9CKP5 CS-E12CKP/CU-E12CKP5 CS-E15CKP/CU-E15CKP5 dB(A) MODELO CS-E9CKP (UNIDAD REFRIGERACION INTERIOR) CALEFACCION CU-E9CKP5 (UNIDAD REFRIGERACION EXTERIOR) CALEFACCION CS-E12CKP (UNIDAD REFRIGERACION INTERIOR) CALEFACCION CU-E12CKP5 (UNIDAD REFRIGERACION EXTERIOR) CALEFACCION...
- Page 83 84~85 86~87...
- Page 86 AUTOHEA HEAT COOL COOL DRY FAN AUTO AUTO AUTO TEMP OFF/ON MODE QUIET POWERFUL AIR SWING FAN SPEED & CANCEL TIMER CHECK RESET CLOCK &...
- Page 87 AUTO HEAT COOL DRY FAN AUTO AUTO AIR SWING FAN SPEED CANCEL TIMER CHECK RESET CLOCK AUTO – HEAT – COOL – – – 25°C 36°C 32°C 31°C 18°C 16°C 13°C 19°C 21°C 23°C 25°C...
- Page 88 AUTO AUTO AUTO • • 30° • 30° • 60° AUTO AUTO AUTO DBT: WBT: (24) (30) (18) (-5) (-6) COOL – AUTO – – HEAT –...
- Page 89 AUTO OFF/ON QUIET POWERFUL MODE AIR SWING FAN SPEED CANCEL TIMER CHECK RESET CLOCK • HEAT COOL...
- Page 90 °...
- Page 91 I Ryjgrf Fdnjvfnbxtcrbq ht;bv G Fdnjvfnbxtcrbq ht;bv hf,jns Fdnjvfnbxtcrbq ht;bv hf,jns drk/xftncz ytvtlktyyj> rfr njkmrj yf;bvftncz ryjgrf Fdnjvfnbxtcrbq ht;bv. Jlyfrj> ntvgthfnehf yt vj;tn htuekbhjdfnmcz d 'njv ht;bv hf,jns. Lkz jnvtys 'njnj ht;bv cktletu to= hfp yf;fnm yf ryjgre.
- Page 93 × × × × × × × × × × × × × ×...
- Page 94 Co., Ltd. Web Site : http://www.panasonic.co.jp/global/...
- Page 95 Nota Ricordare di trascrivere i seguenti dati: Codice modello Numero di serie Codice rivenditore Data di acquisto Matsushita Electric Industrial Co., Ltd. Web Site : http://www.panasonic.co.jp/global/ Óçìåßùóç Ðáñáêáëåßóèå íá êáôáãñÜøåôå ôá åîÞò: Áñéèìüò ÌïíôÝëïõ Áýîùí Áñéèìüò Ïíïìá Áíôéðñïóþðïõ Çìåñïìçíßá ÁãïñÜò...