Extron electronics in1606 User Manual
Scaling presentation switcher
Hide thumbs
Also See for in1606:
- Setup manual (4 pages) ,
- User manual (132 pages) ,
- User manual (95 pages)
Table of Contents
Advertisement
Quick Links
Advertisement
Table of Contents

Related Manuals for Extron electronics in1606


Summary of Contents for Extron electronics in1606
- Page 1 User Guide Scaler IN1606 Scaling Presentation Switcher 68-2290-01 Rev. A 03 13...
-
Page 2: Chinese Simplified
Safety Instructions • English Chinese Simplified (简体中文) 警告: 产品上的这个标志意在警告用户该产品机壳内有暴露的危险 WARNING: This symbol, when used on the product, is intended to alert the user of the presence of uninsulated dangerous voltage within 电压, 有触电危险。 the product’s enclosure that may present a risk of electric shock. 注... - Page 3 Compliance Guide” on the Extron website. Copyright © 2013 Extron Electronics. All rights reserved. Trademarks All trademarks mentioned in this guide are the properties of their respective owners. The following registered trademarks , registered service marks...
-
Page 4: Conventions Used In This Guide
Conventions Used in this Guide Notifications The following notifications are used in this guide: Attention indicates a situation that may damage or destroy the product or ATTENTION: associated equipment. NOTE: A note draws attention to important information. TIP: A tip provides a suggestion to make working with the application easier. Software Commands Commands are written in the fonts shown here: ^AR Merge Scene,,Op1 scene 1,1 ^B 51 ^W^C... -
Page 5: Table Of Contents
Device Info Submenu ........23 Size and Position Page ......... 57 Front Panel Lockout (Executive Modes) .... 23 Audio Config Page ........58 Reset Modes ............ 24 Preset Management Page ......64 Device Settings Page ........65 IN1606 Scaling Presentation Switcher • Contents... - Page 6 Included Parts ..........74 Optional Accessories ........74 Mounting ............75 Tabletop Mounting ........75 UL Guidelines for Rack Mounted Devices ..75 Under the Table Mounting ......75 Downloading Updated Firmware ....... 76 IN1606 Scaling Presentation Switcher • Contents...
- Page 7 IN1606 Scaling Presentation Switcher • Contents...
- Page 8 IN1606 Scaling Presentation Switcher • Contents...
-
Page 9: Introduction
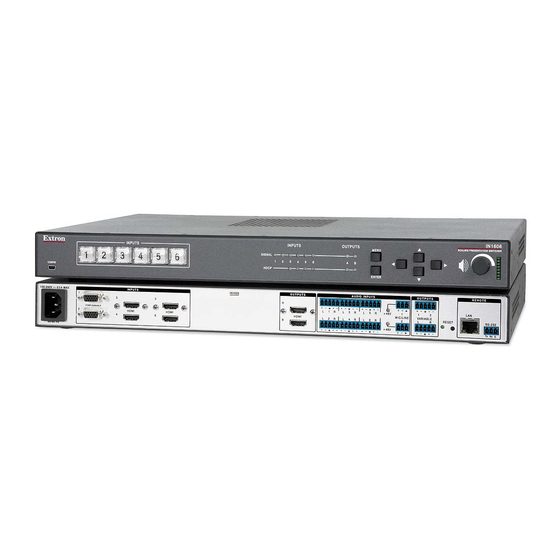
In this guide, the terms “IN1606” and “scaler” are used interchangeably to refer to the IN1606 Scaling Presentation Switcher. IN1606 Description The Extron IN1606 is a six input, HDCP-compliant video scaler in a 1U, full rack width enclosure. The IN1606 includes four HDMI inputs, two configurable analog video inputs, and two simultaneous HDMI outputs. - Page 10 Remote configuration and control are available via USB, RS-232, and Ethernet. Housed in a 1U, full rack width metal enclosure, the IN1606 can easily be integrated into many environments. The IN1606 is ideal in boardrooms where superior performance is essential and instructional environments for complete integration of digital and analog AV sources and displays.
-
Page 11: Licensed Third-Party Software Used In The In1606
License column for the relevant package. This opens in a separate window a copy of the package license. The table below lists the licensed third-party software used by the IN1606. NOTE: Licensed third-party software used by the IN1606 is subject to change without notice. Licensed Third-party Software Used in the IN1606... -
Page 12: Key Features
Automatic integrated audio delay — Compensates for latency introduced by the video processing. HDMI audio embedding and de-embedding — Embeds analog audio signals • onto the HDMI output signals or extracts embedded HDMI LPCM audio to the analog outputs, or passes bitstream formats. IN1606 Scaling Presentation Switcher • Introduction... -
Page 13: General
NTSC, PAL, and HDTV 1080i sources that originated from film. Quad standard, 3D composite video decoding — Provides advanced decoding • of composite NTSC 3.58, NTSC 4.43, PAL, and SECAM for integration into systems worldwide using a temporal, 3D adaptive comb filter. IN1606 Scaling Presentation Switcher • Introduction... -
Page 14: Controlling The In1606
Internal universal power supply — The 100-240 VAC, 50/60 Hz, international power supply provides worldwide power compatibility. Controlling the IN1606 The IN1606 can be controlled using one or more of the following methods: The front panel controls and the On-screen Display (OSD) menu. •... -
Page 15: Installation
Installation This section describes how to connect cables to the IN1606. Rear Panel Connections INPUTS IN1606 OUTPUTS AUDIO INPUTS OUTPUTS REMOTE 100-240V ~ 50/60 Hz 0.5 A MAX CONFIGURABLE MIC/LINE +48V VARIABLE HDMI HDMI HDMI RS-232 RESET +48V Tx Rx Figure 2. - Page 16 OSD menu (see Operation on page 10). TIP: Use Extron HDMI LockIt Lacing Brackets to secure HDMI cables to the device (see HDMI input connectors above). IN1606 Scaling Presentation Switcher • Installation...
- Page 17 Activity LED indicator — Blinks to indicate LAN activity. Link LED indicator — Lights to indicate a good LAN connection. RS-232 connector — Connect a host device to this 3-pole captive screw connector for RS-232 serial control. IN1606 Scaling Presentation Switcher • Installation...
-
Page 18: Operation
Operation This section of the guide discusses the operation of the IN1606 device. Topics in this section include: Front Panel Overview • • Powering Up Input Selection • • On-Screen Display (OSD) Menu System • Front Panel Lockout (Executive Modes) Reset Modes •... -
Page 19: Powering Up
Powering Up When power is applied to the IN1606, the Input buttons light amber, green, and then red before illuminating just the selected input. Input Selection Select any of the Input Selection buttons on the front panel to select an input. The current... -
Page 20: Menu Overview
Press the Enter button to accept the new value. Press the Menu button to cancel any pending changes. To exit the OSD menu: Hold the Menu button for 3 seconds to exit the OSD menu. IN1606 Scaling Presentation Switcher • Operation... -
Page 21: Quick Setup Submenu
The default setting is Off. DHCP — Press the Navigation buttons to enable or disable DHCP mode. IP Address — Press the Navigation buttons to select a value for each octet in the IP address. IN1606 Scaling Presentation Switcher • Operation... -
Page 22: User Presets Submenu
Image size and position • • Preset name NOTE: To save and recall input presets, use SIS commands (see Preset Commands on page 38) or the internal Web pages (see Preset Management Page on page 64). IN1606 Scaling Presentation Switcher • Operation... -
Page 23: Picture Controls Submenu
Color and Tint — Press the Navigation buttons to adjust the color and tint of the image. These settings are only applicable to analog NTSC, PAL, and SECAM signals. Detail — Press the Navigation buttons to adjust the detail of the image. IN1606 Scaling Presentation Switcher • Operation... -
Page 24: Input Submenu
Input 1 Input 2 Input 3 Input 4 Input 5 Input 6 RGB (default) RGB (default) HDMI (default) HDMI (default) HDMI (default) HDMI (default) RGBcvS RGBcvS S-Video S-Video Composite Composite IN1606 Scaling Presentation Switcher • Operation... -
Page 25: Output Submenu
HDCP Authorized — Press the Navigation buttons to enable or disable HDCP Authorized. This setting only applies to digital inputs 3 through 6. When HDCP Authorized is set to Disabled, the IN1606 outputs a black screen or a warning message generated by the source if the source attempts to display HDCP-encrypted content. - Page 26 HDCP Notification — Press the Navigation buttons to enable or disable HDCP notification. When HDCP notification is enabled or On and an HDCP-encrypted input is sent to a display that is non-compliant, a green background is displayed. Otherwise, a black or muted output is displayed. IN1606 Scaling Presentation Switcher • Operation...
-
Page 27: Audio Submenu
Program Volume — Press the Navigation buttons to set the Program mix volume (in dB). Output 1/2 Format — Press the Navigation buttons to set the audio output format to Stereo or L + R Program (Mono). IN1606 Scaling Presentation Switcher • Operation... -
Page 28: Advanced Submenu
Available Test Patterns NOTES: • The audio test outputs pink noise on the embedded digital audio output (2-channel, 48 kHz, 16 bit). • All test patterns include a single pixel crop pattern line (except Blue mode). IN1606 Scaling Presentation Switcher • Operation... - Page 29 When there is no active video on the selected input, the device can mute the video output to black or blue for a set duration before disabling output sync. By default, the IN1606 outputs black video and continually output sync (no sync time-out) with no active input applied.
-
Page 30: Communication Submenu
1080i, 1080p, or 2K [2048x1080]) and is global for each video format. Factory Reset — Press and hold the Enter button to reset the device to factory defaults. The IN1606 retains the current firmware version, as well as communication and IP settings. Communication Submenu Figure 15. -
Page 31: Device Info Submenu
Front Panel Lockout (Executive Modes) The IN1606 has three modes of front panel security lock that limit the operation of the device from the front panel. Executive mode 0 (disabled) — Unlocks front panel functions. This is the default setting. -
Page 32: Reset Modes
SIS Resets all user modifiable configuration command ZQQQ. to default values including IP settings and real-time adjustments. Deletes all user loaded files. The Reset LED blinks 4 times in quick succession during the reset. IN1606 Scaling Presentation Switcher • Operation... -
Page 33: Sis Communication And Control
), indicating the end of the response character string (one or more characters). Scaler-Initiated Messages When a local event such as a front panel selection or adjustment takes place, the IN1606 scaler responds by sending a message to the host. No response is required from the host. -
Page 34: Password Information
Error Responses When the IN1606 receives a valid command, it executes the command and sends a response to the host device. If the unit is unable to execute the command, it returns an error response to the host. -
Page 35: Sis Overview
The Command and Response tables for SIS commands later in this section lists the commands that the IN1606 recognizes as valid, the responses that are returned to the host, a description of the command’s function or the results of executing the command, and select examples of commands in ASCII (Telnet) and URL encoded (web). - Page 36 Video mute 0 = disabled 1 = enabled (mute to black) 2 = mute all output sync Auto-Image threshold value 0-100 (where 0 = black and 100 = white; 25 = default) IN1606 Scaling Presentation Switcher • SIS Communication and Control...
- Page 37 -240-+120, where -240 = -24 dB and 120 = 12 dB = Increment value dB value multiplied by ten, in 0.1 dB increments, to raise or lower a group fader (for example, 100 = 10 dB) IN1606 Scaling Presentation Switcher • SIS Communication and Control...
- Page 38 640x480 800x600 852x480 1024x768 1024x852 1024x1024 1280x768 1280x800 1280x1024 1360x765 1360x768 1365x768 1366x768 1365x1024 1440x900 1400x1050 1600x900 1680x1050 1600x1200 1920x1200 480p 576p 720p 1080i 1080p 2048x1080 * = Default output resolution IN1606 Scaling Presentation Switcher • SIS Communication and Control...
-
Page 39: Command And Response Tables
= HDMI A (top) = HDMI B (bottom) = Input video format = RGB = YUV = RGBcvS = S-video = composite = HDMI = EDID emulation See the EDID table on page 30. IN1606 Scaling Presentation Switcher • SIS Communication and Control... - Page 40 = Enable or disable = off or disabled = on or enabled = Text label Up to 16 characters = Auto-Image threshold value (where = black and = white; = default) 0-100 IN1606 Scaling Presentation Switcher • SIS Communication and Control...
- Page 41 ± of the default value X& = Active pixels ± of the default value = Active lines ± of the default value = Film detect mode = disable = auto (default) IN1606 Scaling Presentation Switcher • SIS Communication and Control...
-
Page 42: Picture Adjustment Commands
View the detail filter setting. HDET NOTES: = Input selection = Picture adjustment = default) 0-127 = Video mute = disabled = enabled (mute to black) = mute all output sync IN1606 Scaling Presentation Switcher • SIS Communication and Control... - Page 43 View X1& X1(] View all position and size XIMG settings. NOTES: = Horizontal position ±2048 X1& = Vertical position ±1200 = Horizontal size 0-4096 = Vertical size 0-2400 IN1606 Scaling Presentation Switcher • SIS Communication and Control...
-
Page 44: Output Configuration Commands
= active input detected; timer not running = no active input; timer running; output sync disabled = no active input; timer expired; output sync disabled = Output rate See the Output Rate table on page 30. IN1606 Scaling Presentation Switcher • SIS Communication and Control... -
Page 45: Audio Configuration Commands
= Input selection = Audio input format = none (input muted) = analog (default for inputs 1 and 2) = LPCM-2Ch (default for inputs 3-6) = Multi-Ch = LPCM-2Ch auto = Multi-Ch auto IN1606 Scaling Presentation Switcher • SIS Communication and Control... -
Page 46: Preset Commands
Preset Name Preset Name Brightness H Active Image H/V Size Contrast Image H/V Position Audio Gain/Attenuation Detail V Active Brightness Image H/V Size Color Total Pixels Phase Tint H Start Film Mode IN1606 Scaling Presentation Switcher • SIS Communication and Control... -
Page 47: Group Masters Commands
= -24 dB and = 12 dB -240-+120 -240 = Increment value dB value multiplied by ten, in 0.1 dB increments, to raise or lower a group fader (for example, = 10 dB) IN1606 Scaling Presentation Switcher • SIS Communication and Control... -
Page 48: Advanced Configuration Commands
= mode 1 (complete front panel lockout) = mode 2 (input selection and volume control only) = Aspect ratio setting = fill (default) = follow = Video switching effect = cut = fade through black (default) IN1606 Scaling Presentation Switcher • SIS Communication and Control... - Page 49 = sink or source detected but no HDCP is present = Video signal status = video/TMDS signal not detected = video/TMDS signal detected = HDMI input HDCP authorization status = block HDCP encryption = allow HDCP encryption (default) IN1606 Scaling Presentation Switcher • SIS Communication and Control...
-
Page 50: Device Commands
This reset is recommended after a firmware update. NOTES: = On-screen display bug time-out = OSD bug is never displayed (in 1 second increments) 1-500 = OSD never times out IN1606 Scaling Presentation Switcher • SIS Communication and Control... - Page 51 = off or disabled = on or enabled (mute to black) = mute all output sync = Default name A combination of model name and the last 3 pairs of the MAC address IN1606 Scaling Presentation Switcher • SIS Communication and Control...
-
Page 52: Ip Control Port
= Enable or disable = off or disabled = on or enabled = IP address = default) xxx.xxx.xxx.xxx 192.168-254.254 = Subnet mask = default) xxx.xxx.xxx.xxx 255.255.0.0 = Gateway address = default) xxx.xxx.xxx.xxx 0.0.0.0 IN1606 Scaling Presentation Switcher • SIS Communication and Control... -
Page 53: Internal Web Pages
Display all websites in Compatibility View and that the IP address of the IN1606 is not in the list of websites that have been added to Compatibility view. IN1606 Scaling Presentation Switcher • Internal Web Pages... -
Page 54: Navigating The Internal Web Pages
Navigating the Internal Web Pages The IN1606 internal Web pages open with two main tabs: Configuration and Hardware. Below the tabs for each page is a global navigation bar with icons for ease of navigation through the various options. The two pages have specific groups of options. - Page 55 To unmute any signal, click the appropriate button. The button reverts to the default color, indicating the signal has been unmuted. Freeze button Click the button to freeze the current video frame. The button turns blue. Freeze IN1606 Scaling Presentation Switcher • Internal Web Pages...
-
Page 56: Configuration Pages
1 and 2 from Signal Type RGB (default), YUV, RGBcvS, S-video, and composite. For inputs 3 through 6, HDMI/DVI is the only available signal type. IN1606 Scaling Presentation Switcher • Internal Web Pages... -
Page 57: Aspect Ratio
Auto Memory. Auto Auto Memory Memory recalls input and image settings for signals that have previously been applied. When Auto Memory is disabled, the IN1606 treats every newly applied input as a new source. HDCP Authorized Select the... -
Page 58: Test Patterns
To aid display device setup and optimization, select a test pattern from the drop-down menu under the preview window. Figure 23. Available Test Patterns NOTE: No input signal is needed when using a test pattern for display device setup. IN1606 Scaling Presentation Switcher • Internal Web Pages... -
Page 59: Edid Minder Page
EDID displayed in the Available EDIDs Filter section. From the drop-down menu, select a specific resolution or Resolution From the drop-down menu, select a specific refresh rate or Refresh Rate IN1606 Scaling Presentation Switcher • Internal Web Pages... - Page 60 Select Save EDID to PC Click the radio button. Save File Click the button to save the file. NOTE: Saving a factory IN1606 EDID exports an HDMI, LPCM-2Ch EDID to the PC. IN1606 Scaling Presentation Switcher • Internal Web Pages...
-
Page 61: Image Settings Page
Auto-Image & Fill entire video output (ignores aspect ratio settings). • Click the button to perform a one-time Auto-Image and to Auto-Image & Follow maintain the aspect ratio of the input signal. IN1606 Scaling Presentation Switcher • Internal Web Pages... - Page 62 Phase routine (YUV and RGB only) and centers and sizes the input according to table values. Figure 28. Overscan Section For each input signal type, select a value from the corresponding drop-down menu. NOTE: Setting a value of disables overscan for the corresponding input format. IN1606 Scaling Presentation Switcher • Internal Web Pages...
- Page 63 NOTE: User presets can be saved on one input resolution and recalled on a different one. Input presets can only be recalled on the same input resolution that was present when the preset was saved. Figure 29. Input and User Presets IN1606 Scaling Presentation Switcher • Internal Web Pages...
-
Page 64: User Presets
Recall Preset To clear a preset: From the User Presets list, select the desired preset. Click the button. Clear Click the button to erase the preset. IN1606 Scaling Presentation Switcher • Internal Web Pages... -
Page 65: Size And Position Page
Auto-Image & Fill entire video output (ignores aspect ratio settings). • Click the button to perform a one-time Auto-Image and to Auto-Image & Follow maintain the aspect ratio of the input signal. IN1606 Scaling Presentation Switcher • Internal Web Pages... -
Page 66: Audio Config Page
Audio Format The L and R meters display audio levels for analog or LPCM-2Ch inputs. Select the check box to display input meters. Enable Meters IN1606 Scaling Presentation Switcher • Internal Web Pages... - Page 67 Up or Down arrow button Release Time to set the time the ducking targets take to restore signal levels after the ducking source level is below the threshold and the hold time is met. IN1606 Scaling Presentation Switcher • Internal Web Pages...
- Page 68 Click and drag the handle of the slider, or enter a value in the field Bass Treble below the sliders or click the Up or Down arrow button. IN1606 Scaling Presentation Switcher • Internal Web Pages...
- Page 69 Output tab Each output panel contains adjustable features for each audio output on the IN1606. Features include mix options, output limiter, and volume control. Output 1/2 panel Figure 34. Output 1/2 Panel Click the tab. Output For each output in the Output 1/2 panel, click the...
- Page 70 Up or Down arrow button to adjust the output level. Click the button for either slider to mute the output. Mute Click the button to control both sliders simultaneously. Gang Select the check box to display output meters. Enable Meters IN1606 Scaling Presentation Switcher • Internal Web Pages...
- Page 71 Up or Down arrow button to adjust the output level. Click the button for either slider to mute the output. Mute Click the button to control both sliders simultaneously. Gang Select the check box to display output meters. Enable Meters IN1606 Scaling Presentation Switcher • Internal Web Pages...
-
Page 72: Preset Management Page
A confirmation dialog Clear box opens. To rename a preset: Double-click a Preset Name. Enter a new preset name and press the <Enter> key. IN1606 Scaling Presentation Switcher • Internal Web Pages... -
Page 73: Device Settings Page
(default). — Displays a blue background with a moving • Blue with On Screen Display OSD bug that indicates “IN1606: Input <#> No Signal” for a set duration before disabling the output sync. Select a Disable Sync duration. Select the check box to •... -
Page 74: Hardware Pages
The following information is displayed: Part number Device name • • • Model name • DHCP • Model description • IP address • Firmware version • Subnet mask Temperature Default gateway • • • MAC address IN1606 Scaling Presentation Switcher • Internal Web Pages... -
Page 75: Device Name Page
Figure 41. Device Name Page NOTE: The device name is used as the hostname of the IN1606. To assign or change the hostname: Enter a name for the device in the name field. This may be up to 63 alphanumeric characters in length with no spaces between characters. -
Page 76: Connection Settings Page
In the field, enter a DNS server name. DNS Sever Click the button. Save To reset to default settings: To reset the device to default connection values, click the button. Reset to Default IN1606 Scaling Presentation Switcher • Internal Web Pages... -
Page 77: Firmware Loader Page
Navigate to the firmware file location and select the firmware file to upload to the device. Valid firmware files have an .eff extension. Click the button. The window closes Open Click the button. Upload NOTE: The connection to the IN1606 may have to be re-established. IN1606 Scaling Presentation Switcher • Internal Web Pages... -
Page 78: Executive/Power Mode Page
Exec/Power Mode page. Figure 44. Executive/Power Mode Page Executive mode Executive mode locks the front panel functions of the IN1606. Select one of the following radio buttons to set the Executive mode (see Front Panel Lockout (Executive Modes) on page 23). -
Page 79: Date And Time Page
Up or Down Time arrow button to specify hours, minutes, and seconds. From the drop-down menu to the right of the field, select Seconds Click the button. Save IN1606 Scaling Presentation Switcher • Internal Web Pages... -
Page 80: Password Page
Confirm Password NOTE: Select the check box to display the password characters. Show Password Click the button. Save NOTE: When passwords are set, a notification to close and restart the browser appears. IN1606 Scaling Presentation Switcher • Internal Web Pages... -
Page 81: Reset Device Page
Click the radio button of the desired reset option. Click the button. A confirmation dialog box opens. Apply In the dialog box, click the button to continue with the reset, or the button to abort the reset. IN1606 Scaling Presentation Switcher • Internal Web Pages... -
Page 82: Reference Information
HDMI LockIts with zip ties (3) 101-020-01 5-pin captive screw connectors (8) 100-457-01 3-pin captive screw connectors (1) 100-456-01 Extron Tweeker Optional Accessories Description Part Number MBU 149 mount kit 70-222-01 USB Configuration Cable 26-654-06 IN1606 Scaling Presentation Switcher • Reference Information... -
Page 83: Mounting
Pay particular attention to supply connections other than direct connections to the branch circuit (e.g. use of power strips). Under the Table Mounting Use the optional MBU 149 mount kit to mount the IN1606 under a desk or table. Follow the instructions included with the MBU 149. Mounting Screws... -
Page 84: Downloading Updated Firmware
Use Extron Firmware Loader, the internal Web pages (see Firmware Loader Page page 69), or the Extron Product Configuration Software to upload firmware from the PC to the IN1606. IN1606 Scaling Presentation Switcher • Reference Information... -
Page 85: Extron Warranty
Extron Electronics makes no further warranties either expressed or implied with respect to the product and its quality, performance, merchantability, or fitness for any particular use. In no event will Extron Electronics be liable for direct, indirect, or consequential damages resulting from any defect in this product even if Extron Electronics has been advised of such damage.