Electrolux EMS26415 User Manual
Hide thumbs
Also See for EMS26415:
- User manual (36 pages) ,
- User manual (40 pages) ,
- User manual (40 pages)
Table of Contents
Advertisement
Advertisement
Table of Contents

Related Manuals for Electrolux EMS26415


Summary of Contents for Electrolux EMS26415
- Page 1 User Manual Microwave oven Downloaded From Microwave-Manual.com Manuals EMS26415...
- Page 2 We were thinking of you when we made this product Downloaded From Microwave-Manual.com Manuals...
- Page 3 You’ve chosen a first class product from Electrolux, which hopefully will provide you with lots of pleasure in the future. Electrolux ambition is to offer a wide variety of quality products that would make your life even more comfortable. You can look at some examples on the cover in this manual.
-
Page 4: Table Of Contents
Contents Safety information Product description Before first use Operation Programme charts Recipes Care & cleaning What to do if . . . Specifications Installation Environmental information Guarantee Downloaded From Microwave-Manual.com Manuals... -
Page 5: Safety Information
Important safety instructions: Read carefully & keep for future reference To avoid the danger of fire Do not use the microwave oven to heat oil for deep frying. The temperature cannot The microwave oven should not be controlled and the oil may catch fire. - Page 6 ELECTROLUX to do so. If the explode. Shell and slice hard boiled oven lamp fails, please consult your dealer...
- Page 7 Always open containers, popcorn Children should be supervised to ensure makers, oven cooking bags, etc., away from that they do not play with the appliance. the face and hands to avoid steam burns. Do not lean or swing on the oven door.
- Page 8 Do not put cold foods or cold utensils on a hot turntable. Do not place anything on the outer cabinet during operation. Do not use plastic containers for microwaving if the oven is still hot from...
-
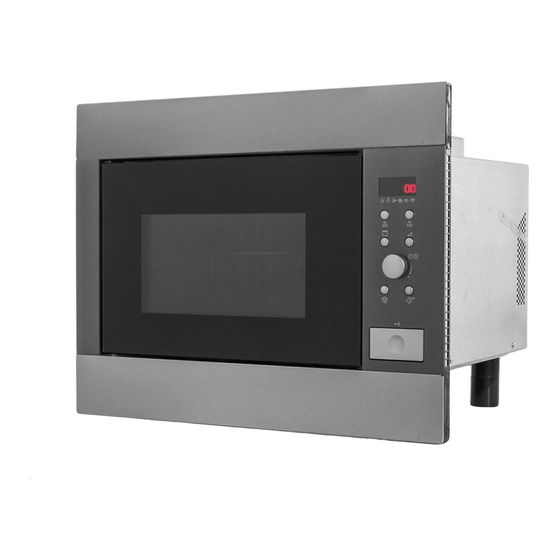
Page 9: Product Description
Important: When you order accessories, please mention two items: part name and model name to your dealer or an authorised ELECTROLUX service agent. Downloaded From Microwave-Manual.com Manuals... -
Page 10: Control Panel
Control panel 1 Digital display indicators Grill Microwave Dual Clock Cooking stages Plus/Minus Auto Defrost bread Auto Defrost Weight 2 AUTO COOK indicators 3 AUTO COOK button 4 AUTO DEFROST button 5 POWER LEVEL button 6 GRILL button... -
Page 11: Before First Use
Before first use Econ mode Adjusting the time when the clock is set or oven is in ‘Econ’ mode The oven is set in ‘ENERGY SAVE’ mode (‘Econ’). Example: To set the clock to 12:45. 1. Plug in the oven. -
Page 12: Operation
Microwave cooking advice To cook/defrost food in a microwave It is important to turn, rearrange or stir oven, the microwave energy must be able food to ensure even heating. to pass through the container to penetrate Standing time is necessary after the food. -
Page 13: Microwave Safe Cookware
Microwave safe cookware Cookware Microwave Comments safe Aluminium foil/ Small pieces of aluminium foil can be used to shield food from foil containers overheating. Keep foil at least 2 cm from the oven walls, as arcing may occur. Foil containers are not recommended unless specified by the manufacturer, e.g. -
Page 14: Microwave Cooking
Microwave cooking Manual defrosting Your oven can be programmed for For manual defrosting (without up to 90 minutes.The input unit of operating the Auto Defrost feature), use cooking time varies from 10 seconds to 270 W. The defrost symbol appears in five minutes. -
Page 15: Add 30 Seconds
Add 30 seconds Note: When the door is opened during the • cooking process, the cooking time The START/+30 button allows you to on the digital display stops operate the two following functions: automatically. The cooking time starts to count down again when the 1. -
Page 16: Grill Only Cooking
Grill only cooking 2. Turn the TIMER/WEIGHT knob until 0.3 kg is displayed. This mode can be used to Grill/Brown food. Example: To make toast for 4 minutes. 3. Touch the power button once to select the PLUS adjustment. -
Page 17: Multiple Sequence Cooking
Example: To cook grill skewers for 7 Stage 2 minutes on DUAL GRILL (450 W). 1. Press the grill button once. 1. Press the grill button 3 times. 2. Enter the desired cooking time by rotating the TIMER/WEIGHT knob 2. - Page 18 Auto cook & auto When action is required (e.g. to turn defrost operation food over) the oven stops and the audible bell sounds, remaining cooking time and the indicator will flash on the AUTO COOK and AUTO DEFROST display.
-
Page 19: Programme Charts
Programme charts Auto cook & auto defrost charts Auto Weight (increasing Button Procedure cook unit) / Utensils Beverage 1-6 cups • Place cup towards edge of turntable. (Tea/Coffee) 1 cup = 200 ml Boiled and 0,2 - 1,0 kg (100 g) - Page 20 Auto Weight (increasing Button Procedure defrost unit) / Utensils Meat, fish 0,2 - 1,0 kg (100 g) • Place the food in a flan dish in the centre of poultry Flan dish the turntable. • When the audible bell sounds, turn the food over, rearrange and separate.
-
Page 21: Recipes For Auto Cook
Recipes for auto cook 1. Thread meat and vegetables Grill skewers alternately on 4 wooden skewers. 4 pieces 2. Mix the oil with the spices and brush 400 g pork cutlets, cubed over the kebabs. 100 g streaky bacon 3. - Page 22 Spinach gratin 1. Mix together the leaf spinach with the onion and season with salt, pepper and 0,5 kg 1,0 kg 1,5 kg nutmeg. 150 g 300 g 450 g leaf spinach (cooked) 2. Grease the gratin dish. Place alternate...
-
Page 23: Cooking Charts
Cooking charts Abbreviations used tbsp = tablespoon Cup = cupful g = gram ml = millilitre min = minutes tsp = teaspoon kg = kilogram l = litre cm = centimetre Heating food & drink Food / Drink... - Page 24 Cooking, grilling & browning Food Quantity Setting Power Time Method Standing -Level- -Min- time -Min- Broccoli Micro 900 W add 4 - 5 tbsps water, cover, stir halfway through cooking Peas Micro 900 W cover, add 4 - 5 tbsps water, stir...
-
Page 25: Recipes
Recipes All the recipes in this book are Foods which have little moisture, such calculated on the basis of 4 servings as platters of food, should have the surface unless otherwise stated. moistened prior to heating or cooking. - Page 26 Aubergines stuffed with minced 1. Cut the aubergines in half lengthways. Scoop out the flesh with a teaspoon meat to leave a shell about 1 cm thick. Dice Utensils: Bowl with lid (1 l capacity) the scooped-out flesh.
- Page 27 Sole fillets 1. Wash the fish and pat dry. Remove Utensils: Shallow oval oven dish with any bones. microwave cling film 2. Cut the lemon and the tomatoes into (approx. 26 cm long) thin slices. Ingredients 3. Grease the oven dish with butter.
- Page 28 Zürich veal stew 1. Cut the veal into strips. Utensils: Dish with lid (2 l capacity) 2. Grease the dish with the butter. Put Ingredients the meat and onion into the dish, 600 g veal fillet cover and cook. Stir once during...
- Page 29 Lasagne 1. Chop the tomatoes, mix with the ham Utensils: Bowl with lid (2 I capacity) and onion, garlic, minced beef and Shallow square dish with lid tomato puree. Season, cover and cook. (approx. 20 x 20 x 6 cm) 5-8 min.
- Page 30 Semolina pudding with raspberry 1. Put the milk, sugar and almonds in the bowl, cover and cook. sauce 3-5 min. 900 W Utensils: Bowl with lid (2 I capacity) 2. Add the semolina, stir, cover and cook. 4 Ramekin dishes 10-12 min.
-
Page 31: Care & Cleaning
& cleaning Care & cleaning Oven interior 1. For cleaning, wipe any spatters or spills with a soft damp cloth or sponge after CAUTION: DO NOT USE each use while the oven is still warm. COMMERCIAL OVEN CLEANERS,... -
Page 32: What To Do If
- Call an authorised ELECTROLUX service agent. The interior light is not - Call your local ELECTROLUX service agent. The interior light bulb working? can be exchanged only by a trained ELECTROLUX service agent. The food is taking longer... -
Page 33: Installation
Installation Fixing Option 1: The microwave can be fitted in Fix the oven in position with the screws position A or B: provided. The fixing points are located on the top and bottom corners of the oven. Position... -
Page 34: Connecting The Appliance To The Power Supply
Connecting the appliance to Electrical connections the power supply • The electrical outlet should be readily accessible so that the unit WARNING: THIS APPLIANCE can be unplugged easily in an MUST BE EARTHED. emergency. Or it should be... -
Page 35: Environmental Information
Environmental information Ecologically responsible disposal The symbol on the product or of packaging materials and old on its packaging indicates that this appliances product may not be treated as household waste. Instead it should be Packaging materials... -
Page 36: Guarantee
(d) 'you' means the purchaser of the Appliance not having purchased the (b) Electrolux shall not be liable for any loss or damage whether direct or appliance for re-sale, and 'your' has a corresponding meaning. indirect or consequential arising from your purchase, use or non-use 2. - Page 37 SK, Seberíniho 1, 821 03 Bratislava ˘ Suomi www.electrolux.fi Sverige +46 (0)771 76 76 76 Electrolux Service, S:t Göransgatan 143, S-105 45 Stockholm Türkiye +90 21 22 93 10 25 Tarlabaşı addesi No: 35 Taksim İstanbul Pоссия +7 095 937 7837 129090 Mосква, Oлимпийский...
- Page 38 Downloaded From Microwave-Manual.com Manuals...
- Page 39 Downloaded From Microwave-Manual.com Manuals...
- Page 40 Downloaded From Microwave-Manual.com Manuals TINS-A591URR0...