
Related Manuals for Sony LBT-GV10AV


Summary of Contents for Sony LBT-GV10AV
- Page 1 4-234-772-11 (1) Compact Hi-Fi Stereo System Operating Instructions LBT-GV10AV © 2001 Sony Corporation...
- Page 2 WARNING This system can play the To prevent fire or shock hazard, do not following discs expose the unit to rain or moisture. To avoid electrical shock, do not open the cabinet. Refer servicing to qualified personnel only. VIDEO CDs Audio CDs Do not install the appliance in a confined space, Disc logo...
-
Page 3: Table Of Contents
Table of Contents Listening to the radio Parts Identification –– Preset Tuning ......24 Main unit ..........4 Tape Remote control ........5 Loading a tape ........25 Getting Started Playing a tape ........25 Recording to a tape Hooking up the system ......6 ––... -
Page 4: Main Unit
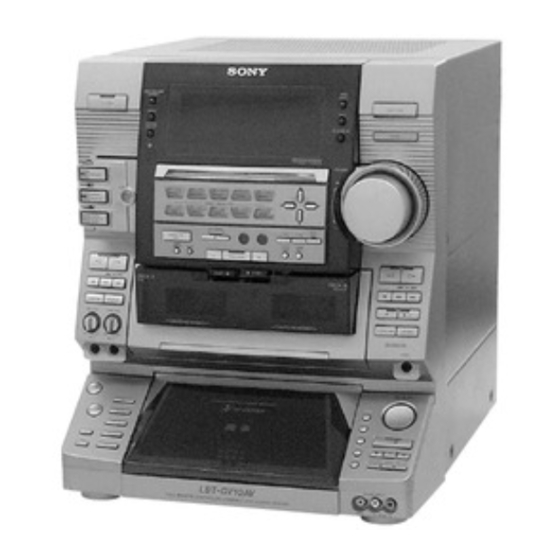
Parts Identification The items are arranged in alphabetical order. Refer to the pages indicated in parentheses ( ) for details. Main unit 2 3456789 q; ACTIVE wa (22) FUNCTION qa SLEEP 8 (32) (8,15,16,26,27,32,34) A EJECT Z /Z B EJECT wk (25) SPECTRUM ANALYZER 5 (31) GAME qs (32,34) AUDIO L jack wd (34) -
Page 5: Remote Control
Remote control 2345 ACTIVE wd (22) REAR LEVEL +/– qd (10) CENTER LEVEL +/– qf (10) REPEAT wg (13,15) CHECK wk (16) SELECT CD N qs (12,13,15,19,20,21) CLEAR wh (16,20) SLEEP wl (32) DECK A nN qs (25) SPECIAL MENU 9 (19~21) DECK B nN qs (25) T.TONE ON/OFF qk (10) DISPLAY 2 (11,17) -
Page 6: Getting Started
Getting Started Hooking up the system Do the following procedure 1 to 6 to hook up your system using the supplied cords and accessories. AM loop antenna FM antenna Center speaker Right front Left front speaker speaker Right rear speaker Left rear speaker... - Page 7 1 Connect the speakers. 2 Connect the FM/AM antennas. Set up the AM loop antenna, then connect 1 Connecting the front speakers Connect the speaker cords to the FRONT SPEAKER jacks as below. Insert only the stripped portion. Jack type A Extend the FM lead antenna horizontally.
- Page 8 Hooking up the system (continued) Notes • Keep the speaker cords away from the antennas to prevent noise. 4 Set SYSTEM SELECT (color system) to • When you play back a VIDEO CD recorded in a the appropriate position (PAL or different color system from the one you set on the NTSC), according to your TV.
-
Page 9: Inserting Two Size Aa (R6) Batteries Into The Remote
If you do not use the remote for a long period of time, remove the batteries to avoid possible damage from battery leakage. Using the remote Rear Rear You can control Sony TVs using the buttons speaker speaker below. TV ?/1 VIDEO TV VOL +/–... - Page 10 Setting up the speakers for Dolby Adjusting the speaker volume Pro Logic (continued) of each speaker (Test Tone) Place the center speaker so it is placed To enjoy Dolby Pro Logic Surround sound, at about the same height as the front adjust the volume of each speaker using the test speakers.
-
Page 11: Setting The Time
Setting the time Saving the power in standby mode Turn on the system. Press c/CLOCK SET. Press POWER SAVE/DEMO (STANDBY) When you set the time for the first time, when the power is off. Every time you skip to step 5. press the button, the system switches as follows: Press v/V repeatedly to select “SET... -
Page 12: Video Cd/Cd
VIDEO CD/CD Press PLAY MODE repeatedly until the mode you want appears. Loading a disc Select To play ALL DISCS All VIDEO CDs in the disc tray Press PUSH OPEN. continuously. The front cover opens. 1 DISC The VIDEO CD you selected in the original order. -
Page 13: Other Operations
There may be some disturbance in the paused video Other Operations image. Only for VIDEO CDs without PBC functions (Ver. Do this 1.1). Press x. Stop playback Press HX (or X on the Pause remote)* . Press again to Tips resume play (or SELECT •... -
Page 14: Pbc Play
Tips Playing a VIDEO CD with • When appears on the TV screen, you have pressed an invalid button. Press a button indicated the PBC functions (Ver. by the instructions on the menu screen. • When you press NEXT while playing moving 2.0) pictures, the next scene on the disc appears. -
Page 15: Playing A Cd
Other Operations Playing a CD Do this –– Normal Play/Shuffle Play/Repeat Stop playback Press x. Play Pause Press HX (or X on the remote). Press again to This unit lets you play CDs in different play resume play. modes. Select a track During play or pause, turn the jog dial clockwise (to Disc number in the playing position... -
Page 16: Playing Video Cd/Cds Without Interruption
Playing VIDEO CD/CDs Press Cancel Program Play PLAY MODE repeatedly without interruption until “PROGRAM,” “ALL DISCS SHUFFLE,” or “1 DISC SHUFFLE” –– Non-Stop Play disappears. Check the program CHECK on the remote You can play VIDEO CD/CDs without pausing repeatedly. After the last between tracks. -
Page 17: Dj Effects
DJ Effects Using the VIDEO CD/CD display Looping and flashing part of a You can check the remaining time of the current track or that of the VIDEO CD/CD. With the loop function, you can repeat part of a CD during playback. With the flash function, Press DISPLAY. -
Page 18: Using The On-Screen Display
Using the on-screen When The display shows: During playback Music calendar* display or in stop mode (ON SCREEN1 only) You can check the current operating status and In Program Play Programmed disc and track disc information of VIDEO CDs or audio CDs mode number during playback or in stop mode. -
Page 19: Locating A Specific Part Of A Disc
Locating by Scene Number Locating a specific part –– Scene Search of a disc On VIDEO CDs with PBC functions (Ver. 2.0), –– Scene Search/Time Search/Disc the menu screens, moving pictures, and still Digest/Track Digest pictures are divided into “scenes” and each scene has an assigned scene number. -
Page 20: Time Search
Locating a specific part of a disc Locating the desired track (continued) –– Disc Digest Locating by elapsed time You can select the desired track by viewing the –– Time Search first frame of each track. Either 9 or 12 different tracks can be displayed on the TV screen at one time. -
Page 21: Track Digest
Locating a section within a Resuming playback from track the point you stopped a –– Track Digest VIDEO CD You can have the CD player divide a VIDEO CD track into either 9 or 12 different sections –– Resume Play and display the first scene of each section on the TV screen. -
Page 22: Setting The Sharpness
Setting the sharpness –– Active Picture This function emphasizes the outline of the picture to create a sharper image. Press ACTIVE so “ACTIVE PICTURE” appears. To cancel Press ACTIVE again to display “ACTIVE OFF.” Notes • The active picture function is not available when playing audio CDs. -
Page 23: Tuner
Tuner To set another station to the Presetting radio stations existing preset number Start over from step 1. After step 4, press +/– to select the preset number you want to store for You can preset 20 stations for FM and 10 another station. -
Page 24: Listening To The Radio
Listening to the radio –– Preset Tuning Preset radio stations in the tuner's memory first (see “Presetting radio stations” on page 23). Press TUNER/BAND repeatedly until the band you want appears. Press TUNING MODE repeatedly until “PRESET” appears. Each time you press this button, the tuning mode changes cyclically as follows: MANUAL t AUTO t PRESET Press +/–... -
Page 25: Tape
Tape Tips • The deck stops automatically after repeating the Loading a tape sequence five times. • You can fast-forward or rewind the tape, regardless of the selected source. Press A EJECT Z or Z B EJECT. • When you want to reduce the hiss noise in low-level high-frequency signals, press DOLBY NR so that Insert a tape in deck A or B with the “DOLBY NR B”... -
Page 26: Recording To A Tape
Recording to a tape –– CD Synchro Recording/High Speed Dubbing/Recording Manually/ Program Edit You can record from a VIDEO CD/CD, tape, or radio. You can use TYPE I (normal) or TYPE II (CrO ) tapes. The recording level is adjusted automatically. Recording from a tape Recording from a VIDEO CD/CD Steps... -
Page 27: Program Edit
Recording a VIDEO CD/CD by specifying track order To check the required tape length for recording a VIDEO CD/CD, press EDIT so that “EDIT” flashes — Program Edit after you have loaded a VIDEO CD/CD and switched the function to CD. The required tape length for the When programming, make sure the playing currently selected VIDEO CD/CD appears, followed by the total playing time for side A and side B... -
Page 28: Timer-Recording Radio Programs
Do this Timer-recording radio Check the setting Press TIMER SELECT, then programs press v/V to select “SEL REC,” then press ENTER/ NEXT. To change the setting, To timer-record, you must preset the radio start over from step 1. station (see “Presetting radio stations” on page Cancel timer Press TIMER SELECT, then 23) and set the clock (see “Setting the time”... -
Page 29: Sound Adjustment
Sound Adjustment Music menu options Adjusting the sound “SUR ” appears if you select an effect with surround effects. Effect To reinforce lower bass sound SALSA standard music sources (SUPER WOOFER) REGGAE Press SUPER WOOFER. SAMBA Each time you press this button, the super TANGO MOVIE woofer level display changes cyclically as... -
Page 30: Making A Personal Audio Emphasis File
Making a personal audio Enjoying Dolby Pro Logic emphasis file Surround sound –– Personal File You can enjoy the Dolby Pro Logic Surround sound of Dolby Surround-encoded You can create personal files of audio patterns ) videos and TV programs. (surround effect and graphic equalizer) and Complete the setup and speaker adjustments store them in the system’s memory. -
Page 31: Other Features
Other features Do this Changing the spectrum Use VIDEO CDs Turn on your TV and switch it to the appropriate analyzer display video input. Cancel karaoke Turn MIC LEVEL to MIN mode and disconnect the Press SPECTRUM ANALYZER. microphone from MIC1 or Each time you press the button, the display MIC2, then press changes cyclically as follows:... -
Page 32: Enhancing Video Game Sound
Singing along: Karaoke (continued) Enhancing video game sound Mixing and recording sound –– Game Sync Do the procedure for “Singing along” (steps 1 through 5). Then, load a You can enjoy the sound effects of video recordable tape in deck B. games. -
Page 33: Waking Up To Music
Waking up to music Do this Check the setting Press TIMER SELECT and then press v/V to select — Daily Timer “DAILY,” then press ENTER/NEXT. You can wake up to music at a preset time Change the setting Start from step 1. every day. -
Page 34: Hooking Up Optional Components
MD deck, connect an optional audio cable to input of the audio output. the VCR • When you connect a Sony MD deck, you can use the MD N, X, and x buttons on this system’s To the digital To the video To the video remote to perform play, pause and stop operation. -
Page 35: Connecting A Dvd Player
Note Do This Using a turntable at high volume may cause distortion Listen to the When your DVD player has or howling. This is often caused by the bass sound connected DVD 5.1CH analog outputs: from the speakers. The bass sound may produce the player Press DVD5.1CH so the distortion or howling. -
Page 36: Additional Information
Remove the VIDEO CD/CD and leave the unit turned on for about an hour until the moisture evaporates. • When you move the unit, take out any discs. If you have any questions or problems concerning your unit, please consult your nearest Sony dealer. -
Page 37: Troubleshooting
The tape is very elastic. Do not change the tape operations such as play, stop, and fast-winding, etc. Should any problem persist, consult your frequently. The tape may get entangled in the tape nearest Sony dealer. deck. Cleaning the tape heads General Clean the tape heads after every 10 hours of use. -
Page 38: Tape Deck
Troubleshooting (continued) VIDEO CD/CD Player There is no picture. “0:00” (or “12:00 AM”) flashes in the display. • Check that the player is connected correctly and • A power interruption occurred. Set the clock and securely. timer settings again. • Make sure you operate the TV correctly. The timer does not function. -
Page 39: Specifications
Specifications There is excessive wow or flutter, or the sound drops out. • The capstans or pinch rollers are dirty (see “Cleaning the tape heads” on page 37). Amplifier section Noise increases or the high frequencies are erased. Front speaker: The following measured at AC 120/220/240V, •... - Page 40 Recording system 4-track 2-channel stereo Frequency response 40 – 13,000 Hz (±3 dB), (DOLBY NR OFF) using Sony TYPE I cassette 40 – 14,000 Hz (±3 dB), using Sony TYPE II cassette Wow and flutter ±0.15% W.Peak (IEC) 0.1% W.RMS (NAB)
- Page 41 Rear speaker: Speaker system Full-range, bass-reflex type Speaker units Full range: 10 cm dia., cone type Rated impedance 8 ohms Approx. 180 × 130 × 170 Dimensions (w/h/d) Mass Approx. 1.5 kg net per speaker General Power requirements 120 V, 220 V or 230 – 240 V AC, 50/60 Hz Adjustable with voltage selector...
-
Page 42: Glossary
VIDEO CD Glossary A compact disc which contains moving pictures. VIDEO CDs contain compact picture Auto Pause information using the MPEG 1 format, one of the world wide standards of digital compact An automatic pause function which is activated technology. The picture information is according to the signal encoded on the disc compressed about 120 times. - Page 44 Sony Corporation Printed in Indonesia...