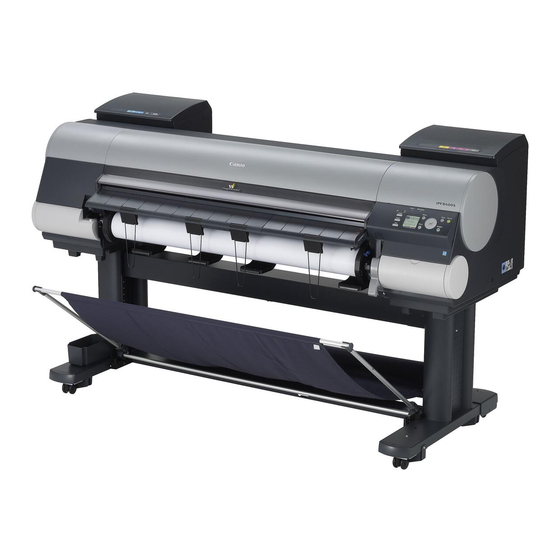
Canon IPF8400S Basic Manual
Large format printer
Hide thumbs
Also See for IPF8400S:
- User manual (926 pages) ,
- Service manual (312 pages) ,
- Setup manual (16 pages)
Table of Contents
Advertisement
Quick Links
Large Format Printer
Basic Guide
Manuals for this printer
Setup Guide
▶ Basic Guide
User's Guide (Electronic manual)
Paper Reference Guide (Electronic manual )
Read this manual before attempting to operate the printer.
Keep this manual in a handy location for future referencing.
Safety Precautions ...................................................... 2
Manuals for this printer ................................................... 7
Handling rolls ................................................................ 12
Handling sheets ............................................................ 21
Ink Tanks ...................................................................... 26
Printheads .................................................................... 37
Cutter Unit .................................................................... 45
Maintenance Cartridge ................................................. 49
Cleaning the Printer ...................................................... 56
Operations and Display Screen .................................... 60
Printer parts .................................................................. 70
Preparing to Transfer the Printer .................................. 76
Installing the Printer Driver (Windows) ......................... 86
Installing the Printer Driver (Mac OS) ........................... 88
Convenient Printer Driver Features .............................. 90
Adjusting the Printhead ................................................ 97
Adjusting the feed amount ............................................ 99
Problems Regarding Paper ........................................ 102
Printing does not start ................................................. 111
The printer stops during a print job ............................. 112
Problems with the printing quality ............................... 113
Cannot print over a network........................................ 125
Installation problems ................................................... 127
Other problems ........................................................... 129
Messages regarding paper ......................................... 133
Messages regarding ink ............................................. 144
Messages regarding printing or adjustment ................ 146
Messages regarding printheads ................................. 149
Messages regarding the maintenance cartridge ......... 151
Messages regarding the hard disk .............................. 152
Other Messages ......................................................... 154
Error Messages .......................................................... 156
Ver1.00 2013-05-31
Advertisement
Chapters
Table of Contents

Related Manuals for Canon IPF8400S


Summary of Contents for Canon IPF8400S
-
Page 1: Table Of Contents
Large Format Printer Basic Guide Preface Safety Precautions ............2 Manuals for this printer ........... 7 Handling Paper Handling rolls ..............12 Handling sheets ............21 Consumables and Maintenance Ink Tanks ..............26 Printheads ..............37 Cutter Unit ..............45 Maintenance Cartridge .......... -
Page 2: Preface
Basic Guide Preface Safety Precautions Safety Precautions ............................2 Legal Notices..............................5 Safety Precautions Follow the warnings and precautions below to use the printer safely. Do not perform any operations or procedures other than as described in this manual. Doing so may result in unexpected accidents and can cause a fire or electrical shocks. -
Page 3: Power Supply
Basic Guide Power Supply • Never handle the power cable with wet hands. Doing so may cause electrical shock. • Insert the power cable securely and completely into the power source. If the power cable is not Warning inserted completely, this could cause a fire or electrical shock. -
Page 4: Moving The Printer
Basic Guide Moving the Printer • Moving the printer requires at least six people, holding it on both sides. Be careful to avoid back strain and other injuries. Caution • When moving the printer, firmly grasp the Carrying Handles under each side. The printer may be unsteady if you hold it at other positions, which poses a risk of injury from dropping the printer. - Page 5 For CA, USA Only Included battery contains Perchlorate Material - special handling may apply. See http://www.dtsc.ca.gov/hazardouswaste/perchlorate/ for detail. Trademarks • Canon, the Canon logo, and imagePROGRAF are trademarks or registered trademarks of CANON INC. • Microsoft is a registered trademark of Microsoft Corporation.
- Page 6 Basic Guide • Windows is a trademark or registered trademark of Microsoft Corporation in the U.S. and/or other countries. • Mac, Mac OS, Bonjour, and OS X are trademarks of Apple Inc., registered in the U.S. and other countries.
-
Page 7: Manuals For This Printer
Basic Guide Manuals for this printer Manuals for this printer ............................. 7 Viewing the Electronic manuals ........................7 About This User Manual ..........................10 Manuals for this printer This printer has the following manuals. Name Contents Medium Setup Guide... - Page 8 Basic Guide Right-click the printer, and then click Properties (or Printer Properties). Click Main (or Printing Preferences) to display the Printing Preferences dialog box with the printer name added to the title. Select the Support sheet and click the User Manual button.
- Page 9 Basic Guide Click the Dock icon in System Preferences. Click Print & Scan (or Print & Fax). Select the printer in the Printer list and click Options & Supplies. Click Utility. Click Open Printer Utility.
- Page 10 Basic Guide Click Support. Click the User Manual button. To display User's Guide, click User's Guide. Alternately, to display Paper Reference Guide, click Paper Reference Guide. About This User Manual • Symbols The following symbols are used in this user manual to indicate safety information and explanations on restrictions or precautions in use.
- Page 11 Basic Guide Software interface items Example: Click OK. (menus and buttons) Keyboard keys Example: Press the Tab key. • Cross-reference Other pages or manuals that provide related information are indicated as follows in this user manual. Cross-reference in the same user manual Example: (See "Installing the Software (Windows).")➔P.86...
-
Page 12: Handling Paper
Basic Guide Handling Paper Handling rolls Attaching the Roll Holder to Rolls ........................12 Loading Rolls in the Printer ..........................14 Removing the Roll from the Printer ........................ 18 Attaching the Roll Holder to Rolls When printing on rolls, attach the Roll Holder to the roll. - Page 13 Basic Guide Lift the Holder Stopper lever (a) from the shaft side to unlock it. Holding the Holder Stopper at the position indicated (b), remove it from the Roll Holder. Insert the respective attachments for the roll paper core on the Roll Holder and Holder Stopper.
- Page 14 Basic Guide With the edge of the roll paper facing forward as shown, insert the Roll Holder from the right of the roll. Insert it firmly until the roll touches the flange (a) of the Roll Holder, leaving no gap.
- Page 15 Basic Guide • If any paper has been advanced that will not be used, a message is shown requesting you to remove it. Press ▲ or ▼ to select Yes, and then press the OK button. Remove the paper and go Note to the next step.
- Page 16 Basic Guide Pull out the roll evenly on both ends and insert it in the Paper Feed Slot (a). Advance the roll until it touches the Paper Retainer (b). Once the roll reaches the Paper Retainer, it is automatically advanced over the Platen.
- Page 17 Basic Guide Holding the edge of the roll paper, lift the Release Lever. Hold the edge of the roll paper as you gently pull it evenly with both hands to the position of the Ejection Guide (a). Align the right side of the roll...
- Page 18 Basic Guide Once paper feeding starts, you will need to do the following, based on the ManageRemainRoll setting and the barcode printed on rolls. (See "Keeping Track of the Amount of Roll Paper Left.") ➔User's Guide ManageRemainRoll Barcodes Printer Operation After the Paper is Fed...
- Page 19 Basic Guide • If the Tab Selection screen is not displayed, press the Menu button. Note Press the OK button. The Paper Menu is displayed. Press ▲ or ▼ to select Eject Paper, and then press the OK button.
- Page 20 Basic Guide Holding the Roll Holder flange (a), remove the holder from the Roll Holder Slot. • For instructions on removing the Roll Holder from rolls, see "Removing Rolls From the Roll Holder."➔User's Guide Note Lower the Ejection Guide and close the Top Cover.
-
Page 21: Handling Sheets
Basic Guide Handling sheets Loading Sheets in the Printer ......................... 21 Removing Sheets ............................24 Loading Sheets in the Printer Follow these steps to load sheets in the printer. • Paper that is wrinkled or warped may jam. If necessary, straighten the paper and reload it. - Page 22 Basic Guide • If any paper has been advanced that will not be used, a message is shown requesting you to remove it. Press ▲ or ▼ to select Yes, and then press the OK button. Remove the paper and go Note to the next step.
- Page 23 Basic Guide 2. Align the inserted edge of the sheet with the leading edge of the Paper Alignment Line (d), as shown. When inserted, sheets are automatically held by suction against the Platen. • Load a sheet so that it is parallel to the Paper Alignment Line at right (c). Loading paper askew will cause an error.(See "Paper loaded askew..")➔P.140...
- Page 24 Basic Guide • If no print job was received A menu for selection of the type of paper is shown on the Display Screen. Press ▲ or ▼ to select the type of paper, and then press the OK button.
- Page 25 Basic Guide Lower the Release Lever and close the Top Cover.
-
Page 26: Consumables And Maintenance
Basic Guide Consumables and Maintenance Ink Tanks Ink Tanks ................................ 26 Replacing Ink Tanks ............................26 Ink Tanks When purchasing, check the Model number. Shape Colors Model number Ink Type Capacity Matte black PFI-306 MBK Black PFI-306 BK Cyan... - Page 27 Basic Guide Precautions when handling ink tanks Take the following precautions when handling ink tanks. • For safety, keep ink tanks out of the reach of children. • If ink is accidentally ingested, contact a physician immediately. Caution • There may be ink around the ink supply section of ink tanks you removed. Handle ink tanks carefully during replacement.
- Page 28 Basic Guide • Do not remove an Ink Tank during initialization immediately after turning on the printer, or during printhead cleaning. Ink may leak out. Important • Ink Tank replacement is possible even during printing, when print jobs are being canceled, or when paper is being advanced.
- Page 29 Basic Guide • Avoid hitting the printer when replacing an Ink Tank. Handle the printer gently when replacing tanks. Jolting the printer during printing may deteriorate print quality. Important Lift the stopper (a) of the Ink Tank Lock Lever for the color to replace.
- Page 30 Basic Guide Remove the Ink Tank (700 ml) Open the Ink Tank Cover of the tank for replacement and check the Ink Lamp. The Ink Lamp flashes quickly if there is no ink left. • Avoid hitting the printer when replacing an Ink Tank. Handle the printer gently when replacing tanks.
- Page 31 Basic Guide • If there is still ink in the Ink Tank you removed, store it in the box with the ink Important holes (a) facing up. Otherwise, ink may leak and cause stains. • Dispose of used ink tanks according to local regulations.
- Page 32 Basic Guide Open the pouch and remove the Ink Tank. • Never touch the ink holes or electrical contacts. This may cause stains, damage the Ink Tank, and affect printing quality. Important Press the OK button and insert the Ink Tank into the holder facing as shown, with the ink holes down.
- Page 33 Basic Guide Make sure the Ink Lamp is lit in red. • If the Ink Lamp is not lit in red, reload the tank. Note Close the Ink Tank Cover. • After Ink Tank replacement, always close the Ink Tank Cover. If the Ink Tank Cover cannot close, some Ink Tank Lock Lever may not be closed completely.
- Page 34 Basic Guide • Do not remove and agitate ink tanks that have already been installed in the printer. Ink may leak out. Important • If you do not agitate the Ink Tank, the ink may settle, which may affect printing quality.
- Page 35 Basic Guide Lift the Ink Tank Lock Lever until it stops, and then push it down until it clicks into place. Make sure the Ink Lamp is lit in red. • If the Ink Lamp is not lit in red, reload the tank.
- Page 36 Basic Guide • After Ink Tank replacement, always close the Ink Tank Cover. If the Ink Tank Cover cannot close, some Ink Tank Lock Lever may not be closed completely. Make sure all Important ink tank lock levers are fully closed.
-
Page 37: Printheads
• If the Display Screen indicates Open top cover and replace the printhead. Replace both printheads. • If your Canon dealer has advised Printhead replacement Replace the Printhead as directed. Compatible printheads For information on compatible printheads, see "Printhead."➔P.37 Precautions when handling the Printhead... - Page 38 Basic Guide • For safety, keep the Printhead out of the reach of children. • If ink is accidentally ingested, contact a physician immediately. Caution • Do not touch the Printhead immediately after printing. The Printhead becomes extremely hot, and there is a risk of burns.
- Page 39 Basic Guide Press the OK button. The Set./Adj. Menu is displayed. Press ▲ or ▼ to select Maintenance, and then press the OK button. Press ▲ or ▼ to select Replace P.head, and then press the OK button. Press ▲ or ▼ to select the Printhead for replacement.
- Page 40 Basic Guide • Do not touch the Linear Scale (a), Carriage Shaft (b), or Fixed Blade (c). Important This may stain your hands and damage the printer. • Never touch the metal contacts of the Carriage. This may damage the printer.
- Page 41 Basic Guide Pull the Printhead Fixer Lever forward all the way to open it completely. Pull up the Printhead Fixer Cover to open it completely. Remove the Printhead and press the OK button. • Dispose of the used Printhead in accordance with local regulations.
- Page 42 Basic Guide • When handling the Printhead, always hold it by the grips (a). Never touch the nozzles (b) or metal contacts (c). This may damage the Printhead and affect printing quality. Important • Never touch the ink supply section (d).
- Page 43 Basic Guide Pull the Printhead Fixer Cover down toward the front to lock the Printhead in place. Push the Printhead Fixer Lever toward the back of the printer until it clicks. Push the Carriage Cover down toward the front.
- Page 44 Basic Guide • The procedure is now finished if you have set Rep.P.head Print to Off in the Control Panel menu. Note In this case, execute Initial adjustmt in Head Posi. Adj. in the Control Panel menu. (See "Adjustment When Installing the Printhead.")➔User's Guide Feed paper by following the instructions on the Display Screen.
-
Page 45: Cutter Unit
Basic Guide Cutter Unit Cutter Unit ..............................45 Replacing the Cutter Unit ..........................45 Cutter Unit When purchasing, check the Model number. Shape Model number CT-06 • For instructions on Cutter Unit replacement, see "Replacing the Cutter Unit."➔P.45 Note... - Page 46 Basic Guide • If you do not respond within two minutes, cutter cleaner replacement is canceled. In this case, repeat the procedure. Note Replacing the Cutter Unit Open the Top Cover. If the Cutter Unit or Carriage Cover is dirty, use a damp cloth that you have wrung out completely to wipe it clean.
- Page 47 Basic Guide Holding the Cutter Unit by the Lock Lever (a) and grip (b), remove it from the Carriage. • Never touch any part of the Cutter Unit except the Lock Lever (a) and grip (b). This may stain your hands or cause injury. Additionally, this may damage the printer.
- Page 48 Basic Guide Lift the Cutter Unit Detachment Lever to lock it. Close the Top Cover. A confirmation message is displayed about the Cutter Unit lock. Press ▲ or ▼ to select Yes, and then press the OK button. The Carriage is moved, and a confirmation message is displayed about resetting the cut count.
-
Page 49: Maintenance Cartridge
Basic Guide Maintenance Cartridge Maintenance Cartridge ........................... 49 Replacing the Maintenance Cartridge ......................49 Maintenance Cartridge When purchasing, check the Model number. This Maintenance Cartridge comes with a Shaft Cleaner. Shape Model number MC-08 • For instructions on replacing the Maintenance Cartridge and Shaft Cleaner, see "Replacing the Maintenance Cartridge."➔P.49... - Page 50 Basic Guide If a message is displayed requesting Maintenance Cartridge replacement, you can skip the step Access the menu for Maintenance Cartridge replacement. Follow the instructions in Replace the Maintenance Cartridge. Access the menu for Maintenance Cartridge replacement On the Tab Selection screen of the Control Panel, press ◀...
-
Page 51: Replace The Maintenance Cartridge
Basic Guide Replace the Maintenance Cartridge Open the box, remove the plastic bag, packaging material, and Shaft Cleaner, and then take out the Maintenance Cartridge. • Never touch the metal contacts (a). This may damage the Maintenance Cartridge. Important At this point, open the Maintenance Cartridge Cover. - Page 52 • Always put the used Maintenance Cartridge back in the box and store the box on a flat surface. Otherwise, ink may leak and cause stains. Important • In accordance with active and ongoing environmental programs, Canon supports recycling of used maintenance cartridges. Follow the instructions provided with the new Note Maintenance Cartridge that describe how to process the used Maintenance Cartridge.
- Page 53 Basic Guide Keeping the new Maintenance Cartridge level, insert it all the way in. The printer now initializes the Maintenance Cartridge. • Do not remove the Maintenance Cartridge during initialization immediately after replacing the Maintenance Cartridge. The Maintenance Cartridge may become Important damaged.
- Page 54 Basic Guide On the Tab Selection screen of the Control Panel, press ◀ or ▶ to select the Settings/Adj. tab ( • If the Tab Selection screen is not displayed, press the Menu button. Note Press the OK button.
- Page 55 Basic Guide • Do not touch the Linear Scale (a), Carriage Shaft (b), or Fixed Blade (c). Important This may stain your hands and damage the printer. Holding the new Shaft Cleaner by the grips (a), attach it to the Carriage.
-
Page 56: Cleaning The Printer
Basic Guide Cleaning the Printer Cleaning Inside the Top Cover ........................56 Cleaning the Printhead ........................... 58 Cleaning Inside the Top Cover Clean inside the Top Cover to maintain better printing quality and help prevent problems. Also clean inside the Top Cover in the following situations to ensure optimal operation. - Page 57 Basic Guide If paper dust has accumulated in the Vacuum holes (a) on the Platen, in the Borderless Printing Ink Grooves (b), or on the cutter guide (c), use the Cleaning Brush (d, provided with the printer) to wipe it away.
- Page 58 • If printing does not improve even if you execute Head Cleaning B, try repeating Head Cleaning B once or twice. If this still does not improve printing, the Printhead may have reached the end of its useful life. Contact your Canon dealer for assistance.
- Page 59 Basic Guide • By default, nozzles are checked at fixed intervals. Configure the settings on the Control Panel menu in Nozzle Check. Note (See "Menu Settings.")➔User's Guide Perform cleaning as follows. On the Tab Selection screen of the Control Panel, press ◀...
-
Page 60: Printer Parts
Basic Guide Printer Parts Operations and Display Screen Control Panel..............................60 Menu Operations ............................61 Menu Structure ............................... 64 Control Panel a Display Screen Shows printer menus, as well as the printer status and messages. b Data Lamp (green) •... - Page 61 Basic Guide • ▶ button Press this button on the Tab Selection screen to move to another tab. In menu items requiring numerical input, press this button to move to another digit. • ▼ button Press this button when viewing menus to display the next menu item or setting value.
- Page 62 Basic Guide • If the Tab Selection screen is not displayed, press the Menu button. Note Simply press buttons on the Control Panel to access menus on various tabs from the Tab Selection screen and set or execute Menu items.
- Page 63 Basic Guide The scroll bar at right indicates the current position in the overall menu. • Lower menus are available if is displayed at left next to the second and subsequent rows. To access the lower menus, select the menu and press the OK button.
-
Page 64: Executing Menu Commands
Basic Guide Press the ▲ or ▼ button to enter the value. • Hold down ▲ or ▼ to increase or decrease the value continuously. Note Repeat steps 1 and 2 to complete the settings, and then press the OK button. -
Page 65: Ink Menu
Basic Guide First Level Second Level Third Level Fourth Level Fifth Level ▶ Roll Length (*3) ▶ (Set the length) ▶ Roll Width (*4) ▶ (Set the width) ▶ Off* ┋ On ManageRemainRoll ▶ (The paper type is ▶ Head Height ▶... - Page 66 Basic Guide First Level Second Level Third Level Fourth Level Fifth Level ▶ Print Start Time ▶ yyyy/mm/dd hh:mm:ss ▶ Print End Time ▶ yyyy/mm/dd hh:mm:ss ▶ Print Time ▶ xxxsec. ▶ Output Img. Size ▶ (The image size is displayed) ▶...
- Page 67 Basic Guide First Level Second Level Third Level Fourth Level Fifth Level Sixth Level Seventh Level (*8) ▶ RARP ▶ On ┋ Off* (*8) ▶ IPv4 Settings ▶ IP ▶ xxx.xxx.xxx.xxx Address (*9) ▶ Subnet ▶ xxx.xxx.xxx.xxx Mask (*9) ▶...
- Page 68 Basic Guide First Level Second Level Third Level Fourth Level Fifth Level Sixth Level Seventh Level -9:Alaska(AKST) ┋ -8:Oregon (PST) ┋ -7:Arizona(MST) ┋ -6:Texas (CST) ┋ -5:NewYork(EST) ┋ -4:Santiago ┋ -3:Buenos Aires ┋ -2: ┋ -1:Cape Verde ▶ Length Unit ▶...
- Page 69 Basic Guide *14:Available when Use Take-up Reel is Enable. *15:Displayed as the menu during printing while printing is in progress. *16:Not displayed in the regular menu.
-
Page 70: Printer Parts
Basic Guide Printer parts Front ................................70 Back ................................71 Top Cover (Inside) ............................72 Carriage ................................. 73 Ink Tank Cover (Inside) ..........................74 Front a Top Cover Open this cover to install the Printhead, load paper, and remove any jammed paper from inside the printer as needed. -
Page 71: Back
Basic Guide Holder Stopper Secure rolls on the Roll Holder with this part. Ink Tank Cover Open this cover to replace an Ink Tank. (See "Ink Tank Cover (Inside).")➔P.74 k Control Panel Use this panel to operate the printer and check the printer status. (See "Control Panel.")➔P.60 Release Lever Releases the Paper Retainer. -
Page 72: Top Cover (Inside)
Basic Guide a Carrying Handles When carrying the printer, have six people hold it by these handles under both sides. b Media Take-up Unit Power Inlet Connect the power cord of the optional Media Take-up Unit here. c Ethernet Port Connect an Ethernet cable to this port. -
Page 73: Carriage
Basic Guide c Carriage Moves the Printhead. The carriage serves a key role in printing. (See "Carriage.")➔P.73 d Carriage Shaft The Carriage slides along this shaft. e Paper Retainer Important in supplying the paper. This retainer holds paper as it is fed. -
Page 74: Ink Tank Cover (Inside)
Basic Guide c Printhead L The printhead is equipped with ink nozzles. The carriage serves a key role in printing. d Printhead R The printhead is equipped with ink nozzles. The carriage serves a key role in printing. e Printhead Fixer Lever Locks the Printhead Fixer Cover. - Page 75 Basic Guide a Ink Color Label Load an Ink Tank that matches the color and name on this label. b Ink Lamp (Red) Indicates the state of the Ink Tank as follows when the Ink Tank Cover is opened.
-
Page 76: Printer Relocation Preparing To Transfer The Printer
Refer to the Setup Guide for details on packing the printer and installing it after transfer. • Be sure to contact your Canon dealer before transferring the printer to a new location. Ink may leak and damage the printer if you do not prepare the printer correctly and it is tipped or stood Important on end in transit. - Page 77 Basic Guide • Sheets (See "Removing Sheets.")➔P.24 Access the Prep.MovePrinter menu If a message instructing you to replace the Maintenance Cartridge is displayed on the Display Screen, replace the Maintenance Cartridge. (See "Replacing the Maintenance Cartridge.")➔P.49 On the Tab Selection screen of the Control Panel, press ◀...
- Page 78 • If consumables must be replaced, the message Consumables must be replaced. Call for service. is shown on the Display Screen and preparation is not possible. If this Important message is displayed, press the OK button and contact your Canon dealer for assistance. Removing Ink Tanks Open the left and right ink tank covers.
- Page 79 Basic Guide • Store the Ink Tank you removed in the box with the ink holes (a) facing up. Important Otherwise, ink may leak and cause stains. Repeat steps 2 and 3 to remove all ink tanks. Push down the release lever (a) as shown as you gently return all ink tank lock levers to the original position.
- Page 80 Basic Guide When the process is finished, Preparations for moving the printer finished. Turn the power off is displayed. When this happens, replace the Maintenance Cartridge currently being used with a new Maintenance Cartridge. Press the Power button and turn off the printer.
- Page 81 Basic Guide Grasp the Belt, insert it between the Belt Stopper, and affix the Belt Stopper with a hex screw at the position indicated. • Here, the Belt Stopper is the one that was removed and stored after initial installation.
- Page 82 Basic Guide Remove the Stand by reversing the installation procedure, when it was attached to the printer. Disassemble and repackage the Stand by following the installation procedure in reverse. Repack the Roll Holder, Holder Stopper, and printer in shipping materials, and then package them in a shipping box.
- Page 83 Basic Guide • Moving the printer requires at least six people, holding it on both sides. Be careful to avoid back strain and other injuries. Caution • When moving the printer, firmly grasp the Carrying Handles (a) under each side.
- Page 84 Basic Guide Connect the power cord to the Power Supply Connector on the back of the printer. Plug the power cord into the outlet. Press the power button to turn the printer on. Open the Ink Tank Cover and install the ink tanks.
- Page 85 Basic Guide Attach the Roll Holder to the Roll Media. (See "Attaching the Roll Holder to Rolls.")➔P.12 Load the Roll Media in the printer. (See "Loading Rolls in the Printer.")➔P.14...
-
Page 86: Software Installation Installing The Printer Driver (Windows)
Basic Guide Software Installation Installing the Printer Driver (Windows) Installing the Software (Windows) The basic instructions for installing the software are as follows. For detailed instructions, see the Setup Guide. Supported connection methods The printer driver works over USB or network (TCP/IP) connections. - Page 87 Basic Guide • For USB connections, when the dialog box at right is displayed, make sure the Important printer is on and connect the printer and computer with the USB cable. On the Finish window, select Restart my computer now and click User's Guide.
-
Page 88: Installing The Printer Driver (Mac Os)
Basic Guide Installing the Printer Driver (Mac OS) Installing the Software (Mac OS) The basic instructions for installing the software are as follows. For detailed instructions, see the Setup Guide. Supported connection methods The printer driver works over USB or network (Bonjour or IP) connections. - Page 89 Basic Guide After installation, click Exit.
-
Page 90: Convenient Printer Driver Features
Basic Guide Convenient Printer Driver Features Print Preview ..............................90 Rotate Page 90 degrees (Converse Paper) ....................91 Borderless Printing ............................92 Large-Format Printing ............................ 93 Enlarged/Reduced Printing ..........................94 Other Methods of Printing: Printing from Print Plug-Ins .................. 95 Print Preview Using the print preview function enables the following. - Page 91 Print dialog box. 2. Access the Main pane. 3. Select the Print Preview check box. 4. After you click Print, the Canon imagePROGRAF Preview window will be displayed. Rotate Page 90 degrees (Converse Paper) You can conserve roll paper by specifying particular settings as suitable for your original.
- Page 92 Basic Guide Configuring Settings in Mac OS 1. Access the Page Setup pane. 2. Select the Rotate Page 90 degrees check box. Borderless Printing In regular printing, a margin required by the printer is added around the original. With borderless printing, you can print documents without the margin, so that the printed image covers the entire surface of the paper.
- Page 93 Basic Guide Configuring Settings in Mac OS 1. Access the Page Setup pane. 2. Click the width of the loaded roll in the Roll Width list. 3. Make sure the size of the original you have prepared is displayed in Page Size.
- Page 94 Basic Guide Configuring Settings in Mac OS 1. Access the Page Setup pane. 2. Click the width of the loaded roll in the Roll Width list. 3. Make sure the size of the original you have prepared is displayed in Page Size.
- Page 95 Basic Guide Configuring Settings in Mac OS 1. Access the Page Setup pane. 2. Click the width of the loaded roll in the Roll Width list. 3. Make sure the size of the original you have prepared is displayed in Page Size.
-
Page 96: Starting From Digital Photo Professional
Basic Guide Starting from Digital Photo Professional 1. Start Digital Photo Professional. 2. Open the RGB color image that you want to print. 3. If required, select the print range. 4. Select Plug-in printing from the File menu and then select the output plug-in that matches your printer. -
Page 97: Adjustments For Better Print Quality Adjusting The Printhead
Basic Guide Adjustments for Better Print Quality Adjusting the Printhead Automatic Adjustment to Straighten Lines and Colors If vertical lines in printed documents are warped or colors are out of alignment, execute Head Posi. Adj.. The printer will print and read a test pattern, and the Printhead position will be adjusted automatically. - Page 98 Basic Guide Load paper. • "Attaching the Roll Holder to Rolls"➔P.12 • "Loading Rolls in the Printer"➔P.14 • "Loading Sheets in the Printer"➔P.21 • Always make sure the loaded paper matches the type of paper specified on the printer.
-
Page 99: Adjusting The Feed Amount
Basic Guide Adjusting the feed amount Selecting a Feed Amount Adjustment Method ....................99 Automatic Banding Adjustment ........................100 Selecting a Feed Amount Adjustment Method There are two methods of adjusting the paper feed amount, Print Quality and Print Length, either of which will be applied during printing. - Page 100 Basic Guide Press ▲ or ▼ to select Feed Priority,. and then press the OK button. Press ▲ or ▼ to select Adj. Priority, and then press the OK button. Press ▲ or ▼ to select Automatic, Print Quality, or Print Length, and then press the OK button.
- Page 101 Basic Guide • "Loading Rolls in the Printer"➔P.14 • "Loading Sheets in the Printer"➔P.21 • Always make sure the loaded paper matches the type of paper specified in the settings. Adjustment cannot be completed correctly unless the loaded paper matches the Important settings.
-
Page 102: Troubleshooting Problems Regarding Paper
Basic Guide Troubleshooting Problems Regarding Paper Clearing Jammed Roll Paper ........................102 Clearing a Jammed Sheet ..........................105 Roll paper cannot be inserted into the paper feed slot ................. 107 Cannot load sheets ............................107 Paper is not cut straight ..........................107 Paper is not cut ............................ - Page 103 Basic Guide • Do not touch the Linear Scale (a), Carriage Shaft (b), or Fixed Blade (c), Important This may stain your hands and damage the printer. Lift the Release Lever. Holding the paper on both sides, pull the jammed portion out toward the front.
- Page 104 Basic Guide If the Carriage is on the left, move the Carriage to the right until it stops. • Always move the Carriage to the right side. If the Carriage is on the left, a Carriage error may occur when you turn on the printer.
-
Page 105: Clearing A Jammed Sheet
Basic Guide • For a neater edge, press the Cut button, select Yes, and cut the edge. (See "Specifying the Cutting Method for Rolls.")➔User's Guide Note Clearing a Jammed Sheet If a sheet jams, follow the steps below to remove it. - Page 106 Basic Guide • Do not touch the Linear Scale (a), Carriage Shaft (b), or Fixed Blade (c). Important This may stain your hands and damage the printer. Lift the Release Lever. If the paper is visible, hold the paper and pull it out toward the front.
-
Page 107: Roll Paper Cannot Be Inserted Into The Paper Feed Slot
Basic Guide If the Carriage is on the left, move the Carriage to the right until it stops. • Always move the Carriage to the right side. If the Carriage is on the left, a Carriage error may occur when you turn on the printer. -
Page 108: Paper Is Not Cut
Basic Guide Cause Corrective Action position. Paper rises by the ends of the cut Reload the paper correctly. position before it is cut. You are using paper that cannot be cut Specify Manual in Cutting Mode in the Control Panel menu and use scissors with the Cutter Unit. -
Page 109: The Size Of Clear Film Cannot Be Detected
Basic Guide Cause Corrective Action The Media Take-up Sensor cord is not connected to the Reconnect the Media Take-up Sensor cord as follows. Right Media Take-up Unit correctly. 1. Turn the printer off. 2. Disconnect the Media Take-up Sensor cord from the Right Media Take-up Unit and reconnect it firmly, all the way in. -
Page 110: When Printing On Thin Roll Paper, The Printed Surface Becomes Scratched
Basic Guide Cause Corrective Action Guide When printing on thin roll paper, the printed surface becomes scratched Cause Corrective Action The roll paper has sagged during printing, scratching the Set Roll Tension to High in the Control Panel menu. -
Page 111: Printing Does Not Start
Basic Guide Printing does not start The Data lamp on the Control Panel does not light up ................. 111 The printer does not respond even if print jobs are sent ................111 Ink Filling.. is displayed ..........................111 The display screen indicates Agitating......................111... -
Page 112: The Printer Stops During A Print Job
(See "Checking for Nozzle Clogging.")➔User's Guide A print job was received from an Use the correct imagePROGRAF printer driver for the printer and try printing again. incompatible printer driver. The printer is damaged. Contact your Canon dealer for assistance. -
Page 113: Problems With The Printing Quality
Basic Guide Problems with the printing quality Printing is faint .............................. 113 Paper rubs against the printhead ......................... 114 The edges of the paper are dirty ........................115 The surface of the paper is dirty ........................115 The back side of the paper is dirty ........................ 116 Immediately after borderless printing, the trailing edge margin is soiled during regular printing .... -
Page 114: Paper Rubs Against The Printhead
(See "Troubleshooting Paper Abrasion and Blurry Images.")➔User's Guide You are printing on heavyweight When printing on Canon Heavyweight Coated Paper or other paper-based media, paper or paper that curls or choose a VacuumStrngth setting of Strong or Strongest in the Control Panel menu. -
Page 115: The Edges Of The Paper Are Dirty
(See "Troubleshooting Paper Abrasion and Blurry Images.")➔User's Guide You are printing on heavyweight When printing on Canon Heavyweight Coated Paper or other paper-based media, choose a VacuumStrngth setting of Strong or Strongest in the Control Panel paper or paper that curls or menu. -
Page 116: The Back Side Of The Paper Is Dirty
Basic Guide Cause Corrective Action touch the Output Tray. In this case, in the Control Panel menu, complete the settings for Dry time and Area in Scan Wait Time. However, note that printing will now take longer. (See "Menu Settings.")➔User's Guide... -
Page 117: Banding In Different Colors Occurs
Basic Guide Cause Corrective Action computer or monitor. Adjust the settings of the color management software, referring to the software documentation as needed. The Printhead nozzles are clogged. Print a test pattern to check the nozzles and see if they are clogged. -
Page 118: Colors In Printed Images Are Uneven
In Advanced Settings of the printer driver, choose Highest quality or Density may be uneven if you use Glossy Paper or Canon Coated Paper. High in Print Quality. The type of paper specified in the printer driver Load paper of the same type as you have specified in the printer driver. -
Page 119: Image Edges Are Blurred Or White Banding Occurs
Basic Guide Cause Corrective Action Scan Wait Time > Area in the Control Panel When Scan Wait Time > Area is set to Leading edge, colors may be menu is set to Leading edge. uneven 110–160 mm from the leading edge. (The position varies depending on the Print Quality setting.) - Page 120 Basic Guide Open the Top Cover. Remove the Cleaning Brush (a). Using the back of the Cleaning Brush, move the first Switch to the side opposite ● .
- Page 121 Basic Guide Refer to the following table to confirm the number on the Platen (a) that corresponds to the size of paper for printing. Number Dimensions 254.0 mm (10.00 in) 355.6 mm (14.00 in) 431.8 mm (17.00 in) 515.0 mm (JIS B2 or B3) 594.0 mm (ISO A1 or A2) or 609.6 mm (24.00 in)
-
Page 122: The Contrast Becomes Uneven During Printing
Basic Guide • The Switch only moves number 1 and the number that matches the paper size. Set Note all of the switches where the number does not match the paper size in switches number 2 and higher to the ● side. -
Page 123: Images Are Printed Crooked
Basic Guide Images are printed crooked Cause Corrective Action In the Control Panel menu, Skew Check Lv. is In the Control Panel menu, set Skew Check Lv. to Standard. set to Loose or Off. (See "Menu Settings.")➔User's Guide In the Control Panel menu, Width Detection is Set Width Detection to On in the Control Panel menu. -
Page 124: Lines Or Colors Are Misaligned
Basic Guide Lines or colors are misaligned Cause Corrective Action The Printhead is not being Adjust the Printhead alignment. aligned correctly. (See "Automatic Adjustment to Straighten Lines and Colors.")➔P.97 (See "Manual Adjustment to Straighten Lines and Colors.")➔User's Guide When printing fine lines or text at high precision on glossy or semi-glossy photo or proofing paper, set the optimal Printhead height before aligning the printhead. -
Page 125: Cannot Print Over A Network
Basic Guide Cannot print over a network Cannot connect the printer to the network ....................125 Cannot print over a TCP/IP network ......................125 Cannot print over a NetWare network ......................126 Cannot print over AppleTalk or Bonjour networks ..................126... - Page 126 Basic Guide Cannot print over a NetWare network Cause Corrective Action The printer's NetWare settings are Make sure the printer's NetWare settings are configured correctly. In particular, make not configured correctly. sure a valid frame type is selected. (See "Configuring the Printer's NetWare Network Settings With RemoteUI.")➔User's...
-
Page 127: Installation Problems
• The following instructions are for Windows XP. The method of removing printer drivers varies depending on the version of Windows. Note From the Windows start menu, select Programs > Canon Printer Uninstaller > imagePROGRAF Printer Driver Uninstaller to display the Delete Printer window. Select the printer in the list and click Delete. - Page 128 Basic Guide In the wizard window, click Delete, and then click Next. Follow the instructions on the screen to remove imagePROGRAF Device Setup Utility.
-
Page 129: Other Problems
After the printer is turned on • After data transmission • After ink tank replacement In other cases, contact your Canon dealer. Messages advising to check the maintenance cartridge are not cleared Cause Corrective Action The printer has not detected the new... - Page 130 Printing with the ink level detection canceled may lead to printer damage and printing problems. Canon Inc. is not liable for any damage that may occur as a result of refilling ink. • After ink level detection has been released, this function cannot be reactivated for currently loaded Ink Tank.
- Page 131 Basic Guide Press ▲ or ▼ to select Information, and then press the OK button. A confirmation message is shown on the Display Screen about releasing ink level detection. After checking the message, press the ▶ button. After checking the message, press the ▶...
- Page 132 Basic Guide Check the message and press the ▶ button. Press ▲ or ▼ to select Yes, and then press the OK button. A confirmation message about updating ink information is shown on the Display Screen. After checking the message, press the ▶...
-
Page 133: Error Message Messages Regarding Paper
Basic Guide Error Message Messages regarding paper Paper mismatch ............................133 MediaType Mismatch ........................... 133 The paper is too small..........................134 The paper is too small..........................135 PaprWidth Mismatch ............................ 135 Paper size not detected..........................136 Insufficient paper for job .......................... -
Page 134: The Paper Is Too Small
Basic Guide Cause Corrective Action in the printer driver. 1. Press ▲ or ▼ to select Change Paper, and then press the OK button. 2. Replace the loaded paper with paper of the type and size you have specified in the printer driver. -
Page 135: The Paper Is Too Small
Basic Guide The paper is too small. Replace paper with A4/LTR (vertical) or larger Cause Corrective Action The loaded paper is too small. Replace the paper with paper of A4/Letter (vertical) size or larger as follows. (When you have attempted to print 1. -
Page 136: Paper Size Not Detected
Basic Guide Cause Corrective Action (See "Loading Rolls in the Printer.")➔P.14 The printer now starts printing the print job. Make sure the roll width selected in the dialog box displayed when you select Fit Roll Paper Width in the printer driver matches the width of the roll loaded in the printer, and then try printing again. -
Page 137: This Paper Cannot Be Used As Size Is Not Supported
Basic Guide Cause Corrective Action paper for the print job, and then printt. When using the Media Take-up Unit, press ▲ or ▼ to select Stop Printing, and then press the OK button to stop printing. Remove the printed document from the Media... -
Page 138: The Roll Is Empty
Basic Guide Cause Corrective Action The printer now starts printing the print job. Press ▲ or ▼ to select Stop Printing, and then press the OK button. The roll is empty. Cause Corrective Action The roll is Follow these steps to replace the used roll with a new roll of the same type and size. -
Page 139: No Sheets
Basic Guide No sheets. Cause Corrective Action A sheet has come out of the printer during printing. 1. Lift the Release Lever and remove the paper. 2. Reload the paper. (See "Loading Sheets in the Printer.")➔P.21 Sheet printing is selected. -
Page 140: Paper Loaded Askew
Basic Guide Cause Corrective Action (See "Loading Sheets in the Printer.")➔P.21 3. If Not finished printing. Finish printing remaining jobs? is shown on the Display Screen, press the OK button. Printing will resume, starting from the page on which the error occurred. -
Page 141: Cannot Cut This Paper
For information about paper that is compatible with automatic cutting, see the Paper Reference Guide. (See "Paper Reference Guide.") 2. Lift the Release Lever and remove the paper. In other cases, the Cutter Unit Contact your Canon dealer for assistance. may be damaged. End of paper feed. Cause Corrective Action Although an attempt was made to advance the paper manually, it Canceling manual advancing. -
Page 142: Rewinding Error
Press the OK button to clear the error. The Media Take-up Unit sensor is damaged. Contact your Canon dealer for assistance. *1: Printing will stop momentarily if an error involving the Media Take-up Unit occurs. If you prefer printing not to stop, set Skip Take-Up Err to On. -
Page 143: Paper Position Not Suitable For Borderless Printing
Basic Guide Cause Corrective Action The loaded paper is a size not Press ▲ or ▼ to select Stop Printing, and then press the OK button. compatible with borderless Replace the paper with paper compatible for borderless printing as follows. -
Page 144: Messages Regarding Ink
Basic Guide Messages regarding ink Ink insufficient............................... 144 No ink left..............................144 Remaining level of the ink cannot be correctly detected................144 Close Ink Tank Cover ........................... 144 Ink tank is empty............................145 Not much ink is left............................145 No ink tank loaded. - Page 145 Basic Guide Ink tank is empty. Cause Corrective Action There is no ink left in an ink tank. Open the Ink Tank Cover, and replace the Ink Tank for the color that is out of ink. There are no ink colors with × displayed above the remaining ink (See "Replacing Ink Tanks.")➔P.26...
-
Page 146: Messages Regarding Printing Or Adjustment
Basic Guide Messages regarding printing or adjustment Cannot execute this command. Use other paper..................146 Cannot calibrate............................146 Excessive temperature or humidity......................146 Please execute common calibration......................146 Please commn calibrt using above paper..................... 147 Please calibrate using above paper. - Page 147 Basic Guide Cause Corrective Action Note that this is displayed when all of the following are satisfied. (See "Color Calibration Using the Printer Sensor.")➔User's Guide • If Set Exec. Guide is On in the Control Panel menu. • If the printer is loaded with a type of paper on which color calibration Set Set Exec.
- Page 148 Basic Guide Cause Corrective Action the supported width for borderless printing. environmental conditions are met. For details on environmental conditions for various paper, see the Paper Reference Guide. (See "Paper Reference Guide.") Before borderless printing, move the blue platen switch.
-
Page 149: Messages Regarding Printheads
Basic Guide Messages regarding printheads Cannot adjust printhead..........................149 PHeads: wrong pos............................149 Wrong x printhead. (x is L, R, or not displayed).................... 149 x printhead error (x is L, R, or not displayed) ....................149 Cannot recognize print head x. (x is L, R, or not displayed) ................. 150 Execute printhead cleaning. - Page 150 Basic Guide Cause Corrective Action 3. Replace the left printhead with a new one if Printhead L is displayed and the right one if Printhead R is displayed. If neither left or right is indicated, replace both printheads. (See "Replacing the Printhead.")➔P.37 Cannot recognize print head x.
-
Page 151: Messages Regarding The Maintenance Cartridge
Basic Guide Messages regarding the maintenance cartridge No maintenance cartridge..........................151 Wrong maintenance cartridge........................151 Maint. cart. The level is low .......................... 151 No Maintenance Cartridge capacity......................151 Maintenance cartridge full..........................151 Maintenance cartridge problem........................151 No maintenance cartridge. -
Page 152: Messages Regarding The Hard Disk
Basic Guide Messages regarding the hard disk Hard disk error.............................. 152 File read error............................... 152 The mail box is full............................152 Mail box full. Now printing without saving data..................... 152 Mail box nearly full............................152 Maximum jobs stored. - Page 153 Basic Guide Cause Corrective Action (See "Deleting Saved Jobs.")➔User's Guide Mail box full. Delete unwanted data Cause Corrective Action 100 jobs are stored in the Personal Box. Press the Stop button and stop printing. Delete print jobs from the queue.
-
Page 154: Other Messages
Cause Corrective Action An error requiring service may have occurred. Write down the error code and message, turn off the printer, and contact your Canon dealer for assistance. Hardware error. xxxxxxxx-xxxx (x represents a letter or number) Cause Corrective Action The last portion of roll paper was used during a print job. - Page 155 Check the firmware version. Turn off the printer and wait a while before restoring power, and then resend the firmware. If the message is displayed again, contact your Canon dealer for assistance. Calibration There is a problem with the multi-sensor.
-
Page 156: Error Messages
Basic Guide Error Messages Before borderless printing, move the blue platen switch................148 Blue platen switch is dirty..........................148 Borderless printng not possible. Paper stretched or shrank................. 147 Borderless printng not possible........................142 Calibration There is a problem with the multi-sensor..................155 Cannot adjust paper feed. - Page 157 Basic Guide Please commn calibrt using above paper..................... 147 Please execute common calibration......................146 Prepare for parts replacement........................155 Regular printing is selected, but a roll is loaded................... 139 Rel lever is in wrong position........................141 Remaining level of the ink cannot be correctly detected.
- Page 158 Index A M Adjust Length ................. 99 Maintenance Cartridge ........4, 49, 71, 151 Adobe RGB ................95 Media Take-up Unit ............72, 83 Menu Operations ..............61 C Menu Structure ..............64 CAD ................97, 100 N Cleaning ............3, 56, 58, 73, 120 Clearing a Jammed Sheet ...........
- Page 159 Memo...
- Page 160 Basic Guide Canon Inc. 30-2, Shimomaruko 3-chome, Ohta-ku, Tokyo 146-8501, Japan Canon U.S.A., Inc. One Canon Park Melville, NY 11747 , U.S.A. Canon Europe Ltd. 3 The Square, Stockley Park, Uxbridge, Middlesex, UB11 1ET United Kingdom Canon (China) Co., Ltd.