Table of Contents
Advertisement
Advertisement
Table of Contents

Related Manuals for Acer X233H


Summary of Contents for Acer X233H
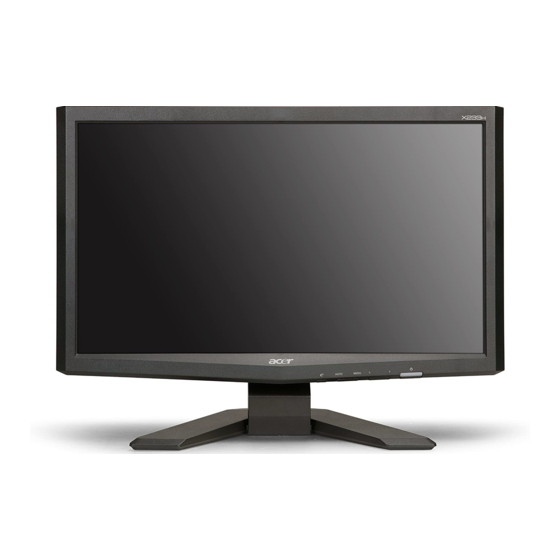
- Page 1 Acer X233H Service Guide...
- Page 2 Service Guide Version and Revision Version Release Date Revision History Customer model TPV model Dec.-02-2008 Initial Release X233H TDRSNDD8Y2ABPN...
- Page 3 Any Acer Incorporated software described in this manual is sold or licensed "as is". Should the programs prove defective following their purchase, the buyer (and not Acer Incorporated, its distributor, or its dealer) assumes the entire cost of all necessary servicing, repair, and any incidental or consequential damages resulting from any defect in the software.
- Page 4 DIFFERENT part number code to those given in the FRU list of this printed Service Guide. You MUST use the list provided by your regional Acer office to order FRU parts for repair and service of customer machines. Warning: (For FCC Certified Models) Note: This equipment has been tested and found to comply with the limits for a Class B digital device, pursuant to Part 15 of the FCC Rules.
- Page 5 Precautions Do not use the monitor near water, e.g. near a bathtub, washbowl, kitchen sink, laundry tub, swimming pool or in a wet basement. Do not place the monitor on an unstable trolley, stand, or table. If the monitor falls, it can injure a person and cause serious damage to the appliance.
-
Page 6: Table Of Contents
Chapter 1 Monitor Features Introduction Electrical Requirements LCD Monitor General Specification LCD Panel Specification Factory Preset Timing Monitor Block Diagram Main Board Diagram Software Flow chart Main Board Layout Installation Chapter 2 Operating Instructions External Controls Front Panel Controls eColor Management (OSD) How to Adjust a Setting How To Optimize The DOS-Mode Enter into the factory mode... -
Page 7: Chapter 1 Monitor Features
50k hours or more. Panel Signal Interface Sync Type Color Temp User Adjust Speaker Headphone Jack Microphone Jack USB Hub Tilt / Swivel Chart of X233H LTM230HT01 A03(003) SZ SEC D-Sub 15pin;DVI 24pin Separate / Compatible Support DDC2B support Yes /No Chapter 1... -
Page 8: Electrical Requirements
Electrical Requirements of X233H Standard Test Conditions All tests shall be performed under the following conditions, unless otherwise specified. Ambient light Viewing distance Warm up time Analog Input signal Control temperature User brightness control User contrast control Picture position and size... -
Page 9: Lcd Monitor General Specification
LCD Monitor General Specification Model name X233H Driving system Active Display Area Pixel pitch LCD Panel Contrast Ratio Response time Luminance of White Separate Sync. Input H-Frequency V-Frequency Viewing angle (H)90 (V) 90(Type) Display Colors 16.7M Display mode 1920 x 1080 @60Hz ON Mode EPA ENERGY STAR®... -
Page 10: Lcd Panel Specification
LCD Panel Specification of X233H General Specifications Block Diagram TFT LCD Module... - Page 11 Back light Unit Electrical Characteristics...
- Page 12 Optical Specifications...
-
Page 13: Factory Preset Timing
Factory Preset Timing of X233H Mode Resolution 640x480@60Hz 640x480@72Hz 800x600@56Hz SVGA 800x600@60Hz 800x600@72Hz 1024x768@60Hz 1024x768@70Hz 1152x864@60Hz VESA 1280x960@60Hz 1280x720@60Hz SXGA 1280x1024@60Hz 1280x800@60Hz WXGA 1360x768@60Hz WXGA+ 1440x900@60Hz WSXGA+ 1680x1050@60Hz 1600x1200@60Hz 1920x1080@60Hz UXGA 1920x1080@60Hz 1920x1080@60Hz 720x400@70Hz 640x480@67Hz 648x500@57.67 Hz 1024x600@60Hz VESA MODES... -
Page 14: Monitor Block Diagram
Monitor Block Diagram The LCD MONITOR will contain a main board, a power board, a usb board and a key board which house the flat panel control logic, brightness control logic and DDC. The power board will provide AC to DC Inverter voltage to drive the backlight of panel and the main board chips each voltage. -
Page 15: Main Board Diagram
Main Board Diagram Keypad Interface (CN402) Flash Memory SST25VF010A-33-4C-SAE (U402) Panel Interface (CN301) Scalar IC NT68667UFG/C QFP-128L (Include MCU, ADC, OSD) (U401) D-Data D-Clock Crystal 12MHz Connector (X401) (CN102) H sync V sync D-Sub Connector (CN101) -
Page 16: Software Flow Chart
Software Flow Chart... - Page 17 Remark: 1) MCU initializes. 2) Is the EEPROM blank? 3) Program the EEPROM by default values. 4) Get the PWM value of brightness from EEPROM. 5) Is the power key pressed? 6) Clear all global flags. 7) Are the AUTO and SELECT keys pressed? 8) Enter factory mode.
-
Page 18: Main Board Layout
Main Board Layout Symbol Description U401 IC NT68667UFG/C QFP-128L U703 IC AP1117D33L-13 TO252-3L DIODES U103 IC AZC099-04S SOT23-6L U104 IC AZC099-04S SOT23-6L U402 SST25VF010A-33-4C-SAE U702 IC AZ1117D-1.8-E1 Symbol Description CN402 WAFER CN701 WAFER 9P RIGHT ANELE PITCH CN301 CONNECTOR X401 CRYSTAL 12MHz HC-49US ARG6-120 D-SUB 15PIN VERTICAL CONN WITH CN101... -
Page 19: Installation
Installation... -
Page 21: Chapter 2 Operating Instructions
Chapter 2 Operating Instructions Press the power button to turn the monitor on or off. The other control buttons are located at front panel of the monitor. By changing these settings, the picture can be adjusted to your personal preferences. •... -
Page 22: Ecolor Management (Osd)
Operation instructions Step 1: Press “ Key” to open the Acer e-Color Management OSD and access the scenario modes Step 2: Press “<” or “>” to select the mode Step 3: Press “Auto Key ” to confirm the mode and run Auto Adjust... -
Page 23: How To Adjust A Setting
How to Adjust a Setting... - Page 24 Adjusting the picture...
-
Page 26: How To Optimize The Dos-Mode
How To Optimize The DOS-Mode Plug And Play Plug & Play DDC2B Feature This monitor is equipped with VESA DDC2B capabilities according to the VESA DDC STANDARD. It allows the monitor to inform the host system of its identity and, depending on the level of DDC used, communicate additional information about its display capabilities. -
Page 27: Chapter 3 Machine Disassembly
Machine Disassembly This chapter contains step-by-step procedures on how to disassemble the X233H monitor for maintenance. The tool for disassembly is as follows: Screwdriver, hexagonal screwdriver, Putty knife. Disassembly Procedure 1. Remove the hinge assembly. Remove the rear cover and bezel. - Page 28 3. Remove the lamp connectors and remove the screws to remove the panel. Put attention to the LVDS cable. 4. Remove the screws to remove the main board and power board.
- Page 29 5. The panel...
-
Page 30: Chapter 4 Troubleshooting
Troubleshooting This chapter provides troubleshooting information for the X233H: 1. No Power Press power key and look if the picture is normal Please reinsert and make sure the AC of 100-240 is normal Measure U703 Pin2=3.3V, Check if X401 oscillate waveforms are... - Page 31 2. No Picture (LED is orange) No picture The button if under control Measure U703 Pin2=3.3V, X401 oscillate waveform is normal Check HS/VS from CN101 is normal Replace U401 X401 oscillate waveform is normal Check reset circuit of U401 is normal Replace U401 Check U703, C706 and C707 Replace X401...
- Page 32 3. Panel Power Circuit White screen Measure Q302 base is low level? Check CN301is solder and Q302,Q301 is OK? Check Correspondent component. Replace PANEL X401 oscillate waveform is normal Check reset circuit of U401 is normal Replace U401 Replace X401 Check Correspondent component.
- Page 33 4. Key Board OSD is unstable or not working Connect Key Board Is Key Pad Board connecting normally? Replace Button Switch Is Button Switch normally? Replace Key Board Is Key Pad Board normally? Check Main Board...
- Page 34 5. Power Board 1) No power Check CN902 PIN3, 4 = 5V Check AC line volt 110V or 220V Check the voltage of C905 (+) Check start voltage for the pin3 of IC901 Check the auxiliary voltage is bigger than 11V and smaller than 25V Check IC901 pin8 PWM wave Check D906/D907/D908/IC903/Q903/ZD902...
- Page 35 2.) No Backlight Check if the input voltage of inverter part is 16V Check ON/OFF signal Check IC801 PIN12=14.5V Check IC801 PIN5 have triangle wave Check IC801 PIN9/PIN10 PWM wave Check the output of PT801 Check connecter & lamp Check adapter part Check Interface board Check ON/OFF circuit Change IC801...
-
Page 36: Chapter 5 Connector Information
Chapter 5 Connector Information... -
Page 37: Chapter 6 Fru (Field Replacement Unit) List
NOTE: To scrap or to return the defective parts, you should follow the local government ordinance or regulations on how to dispose it properly, or follow the rules set by your regional Acer office on how to return it. Exploded Diagram (Model: X233H) - Page 38 ITEM PART NO. BEZEL L23WA-8ACER3-S4 KEY BUTTON LED LENS KEY BOARD PANEL LTM230HT01 A03(003) SZ SEC POWER BOARD MAIN BOARD MAIN_FRAME_SAM MAIN_FRAME_SHIELD REAR COVER L23WA-8ACER3-S4 HINGE COVER L HINGE COVER R SPK 8OHM 2W 40X20X18 350 320MM KUAIDA USB BOARD SCREW SCREW SCREW...
- Page 39 Part List Above picture show the description of the following component. Picture Description Part No. Main_frame_Sam A15G0563101102 Bezel A34G1084 RXA1B0130 Panel 750GLS230HT132N000 Power Board PWPC8E41MQHU...
- Page 40 Main Board Key Board Stand Front A34G0473 RX 1B0100 Base A34G0475 RX 1B0130 Stand Rear A34G0474 RX 1B0100 CBPCRNDAEQ1 KEPC7QK1...
- Page 41 Hinge A37G0050 4 USB BOARD USB7QK4...
-
Page 42: Schematic Diagram
5V_ESD FB105 120 OHM T P V ( Top Victory Electronics Co . , Ltd. ) OEM MODEL Acer G3108-1-X-X-17-081119 TPV MODEL 絬 隔 瓜 絪 腹 K ey Component 2.0.Input PCB NAME Date Wednesday , Nov ember 19, 2008... - Page 43 Ltd. ) OEM MODEL G3108-1-X-X-17-081119 TPV MODEL 3.0.OUTPUT PCB NAME Wednesday , Nov ember 19, 2008 Sheet Date CN301 TCLK1M TCLK1P TCLK2M TCLK2P PANEL_VCC R301 C301 CONN 330 OHM 1/4W 0.1uF/16V Size Acer Acer X203H Analog only <称爹> 称 爹...
- Page 44 0.1uF/16V 0.1uF/16V U703 AP1117D33LA T P V ( Top Victory Electronics Co . , Ltd. ) OEM MODEL Acer G3108-1-X-X-17-081119 TPV MODEL 絬 隔 瓜 絪 腹 Key Component 4.0.POWER PCB NAME Date Wednesday , Nov ember 19, 2008 Sheet VCC1.8...
- Page 45 10K 1/16W 5% 0.1uF/16V 10K 1/16W 5% T P V ( Top Victory Electronics Co . , Ltd. ) OEM MODEL Acer 絬 隔 瓜 絪 腹 TPV MODEL G3108-1-X-X-5-080818 Key Component 5.0.SCALER PCB NAME Wednesday , Nov ember 19, 2008...
-
Page 46: Power Board
Sheet +16V ZD902 T ZX18B R943 470R 1/8W 5% C932 R939 1K 1/8W 5% 0.001uF F903 FUSE R940 R927 10K 1/10W 1% R930 9K1 1/10W 1% L906 2.2uH F902 +5V1 FUSE C930 0.1uF Size Custom ACER ODM MODEL 称 爹... - Page 47 R839 1M 1/10W 5% R840 1M 1/10W 5% R841 1M 1/10W 5% R844 10K 1/10W 5% R843 R845 10K 1/10W 5% Electronics Co . , Ltd. ) OEM MODEL ACER TPV MODEL PWPC8E41MQHU PCB NAME 715G2824-H-5 Sheet CN801 CN802 CONN CONN CN803 CN804...
- Page 48 絬 隔 瓜 絪 腹 Key Component 04.AUDIO PCB NAME Date Wednesday , Nov ember 05, 2008 Sheet +5V1 C604 100uF/25V CN602 LOUT+ LOUT- LOUT- LOUT+ ROUT- ROUT+ ROUT+ ROUT- CONN C608 1uF/25V ACER Size PWPC8E41MQHU 715G2824-H-5 ODM MODEL 称 爹 Custom...
-
Page 49: Key Board
T P V ( Top Victory Electronics Co . , Ltd. ) OEM MODEL X173/X173W/X193W/P193W/X223W G2731-B-AC-X-1-070617 TPV MODEL 絬 隔 瓜 絪 腹 ACER Key Component 02.Key Board PCB NAME 715G2731-B-AC Date Sunday , June 17, 2007 Sheet 2007/5/18 2007/5/18... -
Page 50: Usb Board
Usb board U708 USB2514-AEZG Upstream R719 USBUP_DM VBUS0 100K 1/10W 5% VBUS_DET USBUP_DP C769 1uF/16V Dow nstream 1 USBDN1_DM OCS1 USBDN1_DP PRTPWR1 /OC1 Dow nstream 2 USBDN2_DM /OC2 OCS2 USBDN2_DP PRTPWR2 Dow nstream 3 USBDN3_DM /OC3 OCS3 USBDN3_DP PRTPWR3 Dow nstream 4 USBDN4_DM /OC4 OCS4...