Napoleon BGD40-N Installation And Operation Instructions Manual
Gas fired - direct vent millivolt system, multi-view decorative fireplace, natural and propane gas model
Hide thumbs
Also See for BGD40-N:
- Installation and operating instructions manual (104 pages) ,
- Installation and operation instruction manual (36 pages) ,
- Brochure & specs (11 pages)
Table of Contents
Advertisement
INSTALLER: THESE INSTRUCTIONS MUST BE CONVEYED TO AND REMAIN WITH THE HOMEOWNER.
CERTIFIED UNDER CANADIAN AND AMERICAN NATIONAL STANDARDS, CSA 2.33, ANSI Z21.88 FOR VENTED GAS FIREPLACE HEATERS
GAS FIRED - DIRECT VENT MILLIVOLT SYSTEM
INSTALLATION AND OPERATION INSTRUCTIONS FOR
WARNING: If the information in these instructions is not followed exactly, a fire or
explosion may result causing property damage, personal injury or death.
Do not store or use gasoline or other flammable vapours and liquids in the vicinity
• Do not try to light any appliance.
• Do not touch any electrical switch.
• Do not use any phone in your building.
Installation and service must be performed by a qualified installer, service
R-2000
Wolf Steel Ltd., 24 Napoleon Rd., Barrie, ON L4M 4Y8 Canada • (705)721-1212 • fax(705)722-6031
MULTI-VIEW DECORATIVE FIREPLACE
NATURAL GAS MODEL
PROPANE GAS MODEL
CERTIFIED FOR CANADA AND UNITED STATES USING ANSI / CSA METHODS
FOR YOUR SAFETY
of this or any other appliance.
WHAT TO DO IF YOU SMELL GAS:
agency or the gas supplier.
www.napoleonfireplaces.com • ask@napoleon.on.ca
BGD40-N
BGD40-P
• Immediately call your gas supplier from
a neighbor's phone. Follow the gas sup-
plier's instructions.
• If you cannot reach your gas supplier,
call the fire department.
1
W415-0299 / C / 03.12.03
Advertisement
Table of Contents

Related Manuals for Napoleon BGD40-N

Summary of Contents for Napoleon BGD40-N
- Page 1 Installation and service must be performed by a qualified installer, service R-2000 Wolf Steel Ltd., 24 Napoleon Rd., Barrie, ON L4M 4Y8 Canada • (705)721-1212 • fax(705)722-6031 www.napoleonfireplaces.com • ask@napoleon.on.ca BGD40-N NATURAL GAS MODEL BGD40-P PROPANE GAS MODEL CERTIFIED FOR CANADA AND UNITED STATES USING ANSI / CSA METHODS FOR YOUR SAFETY of this or any other appliance.
-
Page 2: Table Of Contents
TABLE of CONTENTS Pg 3-5 INTRODUCTION Warranty General Instructions General Information Care of Glass & Plated Parts Dimensions 6 -13 VENTING Vent Lengths Air Terminal Installation Venting Application Flow Chart Typical / Special Vent Installations Venting Options 14-15 PENINSULA INSTALLATION PROCEDURE Framing Bar / Countertop Installation Brick Panel Installation... - Page 3 NAPOLEON gas fireplaces are manufactured under the strict Standard of the world recognized ISO 9001 : 2000 Quality Assurance Certificate. NAPOLEON products are designed with superior components and materials, assembled by trained craftsmen who take great pride in their work. The burner and valve assembly are leak and test-fired at a quality test station.
-
Page 4: Introduction
GENERAL INSTRUCTIONS THIS GAS FIREPLACE SHOULD BE INSTALLED AND SERVICED BY A QUALIFIED INSTALLER to conform with local codes. Installation practices vary from region to re- gion and it is important to know the specifics that apply to your area, for example: in Massachusetts State: •... -
Page 5: Dimensions
Vent lengths that pass through unheated spaces (at- tics, garages, crawl spaces) should be insulated with the insulation wrapped in a protective sleeve to minimize condensation. FIGURE 1a FIGURE 1b FIGURE 1c Objects placed in front of the fireplace must be kept a minimum of 48"... -
Page 6: Venting
VENTING LENGTHS Use only Wolf Steel or Simpson Dura-Vent Model DV-GS venting components. Minimum and maximum vent lengths, for both horizontal and vertical installations, and air termi- nal locations for either system are set out in this manual and must be adhered to. For Simpson Dura-Vent, follow the installation procedure provided with the venting com- ponents. -
Page 7: Air Terminal Installation
AIR TERMINAL INSTALLATIONS FIGURE 2 INSTALLATIONS CANADIAN U.S.A. 12 INCHES 12 INCHES 12 INCHES 9 INCHES 12 INCHES* 12 INCHES* 18 INCHES** 18 INCHES** 12 INCHES** 12 INCHES** 0 INCHES 0 INCHES 0 INCHES*** 0 INCHES*** 2 INCHES*** 2 INCHES*** 3 FEET 3 FEET**** 3 FEET... -
Page 8: Venting Application Flowchart
VENTING APPLICATION FLOWCHART HORIZONT HORIZONTAL HORIZONT HORIZONT HORIZONT TERMIN TERMIN TERMINA A A A A TION TERMIN TERMIN vertical rise vertical rise vertical rise vertical rise vertical rise is equal to is equal to is equal to is equal to is equal to or greater or greater... -
Page 9: Typical / Special Vent Installations
TYPICAL VENT INSTALLATIONS FIGURE 3a When venting, the horizontal run must be kept to a mini- mum of 10 inches or a maximum of 20 feet. If a 20 foot horizontal run is required, the fireplace must have a mini- mum vertical rise immediately off the fireplace of 57 inches. - Page 10 DEFINITIONS for the following symbols used in the venting calcula- tions and examples are: > - greater than > - equal to or greater than < - less than < - equal to or less than - total of both horizontal vent lengths (H sets (H ) in feet - combined horizontal vent lengths in feet...
- Page 11 HORIZONTAL TERMINATION when (H ) > (V Simple venting configuration (only one 45º and 90° elbow) FIGURE 7 See graph to determine the re- quired vertical rise V for the required horizontal run H REQUIRED VERTICAL RISE IN INCHES (V HORIZONTAL VENT RUN PLUS OFFSETS IN FEET (HT) The shaded area within the lines represents acceptable values for H...
- Page 12 VERTICAL TERMINATION when (H ) < (V Simple venting configurations FIGURE 9 See graph to determine the required vertical rise V required horizontal run H REQUIRED VERTICAL RISE IN FEET (V HORIZONTAL VENT RUN PLUS OFFSETS IN FEET (H The shaded area within the lines represents acceptable values for H and V For vent configurations requiring more than one 45º...
- Page 13 VERTICAL TERMINATION when (H ) > (V Simple venting configurations FIGURE 11 See graph to determine the required vertical rise V required horizontal run H REQUIRED VERTICAL RISE FEET (V HORIZONTAL VENT RUN PLUS OFFSET IN FEET (H The shaded area within the lines represents acceptable values for H and V For vent configurations requiring more than one 45º...
-
Page 14: Peninsula Installation Procedure
PENINSULA INSTALLATION PROCEDURE VENTING fer to pages 6-13. All venting must have a minimum clear- ance of 1" to combustible. FRAMING See Page 18 for additional framing dimensions. Note: In order to avoid the possibility of exposed insulation or vapour barrier coming in contact with the fireplace body, it is recommended that the walls of the fireplace enclosure be “finished”... -
Page 15: Brick Panel Installation
BRICK PANEL INSTALLATION Install the base panels as illustrated in steps 1-4 . The side panel sits under the bracket tab panel in position, bend down the tab to secure. DETAIL 5. RETAINER DETAIL 5 Combustible materials may be installed flush with the front of the fireplace but must not cover any of the black face- Holding the side areas of the fireplace. -
Page 16: Open End Installation Procedure
OPEN-END INSTALLATION PROCEDURE VENTING Refer to pages 6-13. All venting must have a minimum clearance of 1" to combustible. FRAMING See Page 18 for additional framing dimensions. Note: In order to avoid the possibility of exposed insulation or vapour barrier coming in contact with the fireplace body, it is recommended that the walls of the fireplace enclosure be “finished”... -
Page 17: Facing
SEE-THROUGH INSTALLATION PROCEDURE VENTING Refer to pages 6-13. All venting must have a minimum clearance of 1" to combustible. FRAMING See Page 18 for additional framing dimensions. Note: In order to avoid the possibility of exposed insulation or vapour barrier coming in contact with the fireplace body, it is recommended that the walls of the fireplace enclosure be “finished”... -
Page 18: Vent Framing Dimensions
VENT FRAMING DIMENSIONS There must be a minimum of 1" clearance to combustibles when framing around all venting options. See pages 14-17. FIGURE 26 Horizontal Vent Off Fireplace A = 42" using flexible vent components. A = 38½" using Wolf Steel rigid vent components. W415-0299 / C / 03.12.03 FIGURE 27 Vertical Vent Off Fireplace... -
Page 19: Wall And Ceiling Protection
WALL AND CEILING PROTECTION For optimum performance it is recommended that all horizontal runs have a minimum 1 inch rise per foot us- ing flexible venting. For safe and proper operation of the fireplace, follow the venting instructions exactly. HORIZONTAL INSTALLATION This application occurs when venting through an exterior wall. - Page 20 USING FLEXIBLE VENT COMPONENTS Use only approved aluminum flexible liner kits marked: FIGURE 33 "Wolf Steel Approved Venting" as identified by the stamp only on the 8” outer liner. For safe and proper operation of the fireplace, follow the venting instructions exactly. HORIZONTAL AIR TERMINAL INSTALLATION 1.
-
Page 21: Fireplace Vent Connection
5. Remove nails from the shingles, above and to the sides of the chimney. Place the flashing over the air terminal and slide it underneath the sides and upper edge of the shingles. Ensure that the air terminal is properly centered within the flashing, giving a 3/5"... -
Page 22: Finishing
8. Apply a heavy bead of waterproof caulking 2 inches above the flashing. Slide the storm collar around the air terminal and down to the caulking. Tighten to ensure that a weather- tight seal between the air terminal and the collar is achieved. -
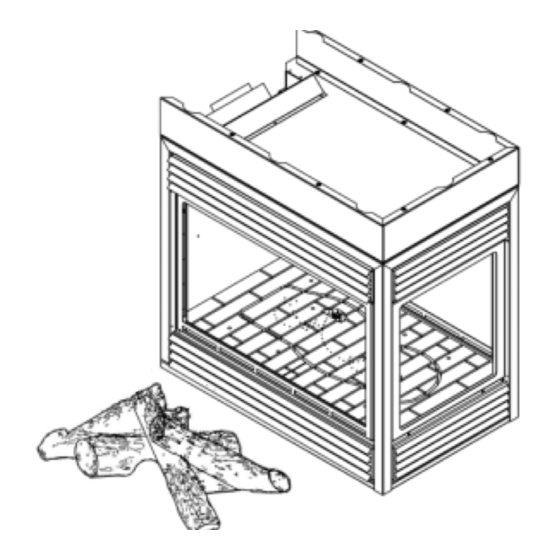
Page 23: Log Placement
LOG PLACEMENT PHAZER logs, glowing and charcoal embers, exclusive to Napoleon fireplaces, provide a unique and realistic glow- ing effect that is different in every installation. Take the time to carefully position the embers for a maximum glowing effect. Figures 46 A - H. -
Page 24: Logo Placement
GLOWING EMBERS Tear the embers into small pieces and place on the ported area of the burner. Care should be taken to shred the embers into thin, small irregular pieces as only the ex- posed edges of the fibre hairs will glow. The ember mate- rial will only glow when exposed to direct flame;... -
Page 25: End Door Installation
L36 LOUVRE INSTALLATION FIGURE 54 a-c CLIPS HOOD Attach the hood by pressing the top flange into the clips along the top of the louvre opening. Secure using a screw through FLANGE the centre slot. CENTRE SLOT UPPER LOUVRES Insert the louvre tabs into the slots located at the top left and SLOT right corners of the unit. -
Page 26: Optional Blower Installation
OPTIONAL BLOWER INSTALLATION INSTALLATION TO BE DONE BY A QUALIFIED IN- STALLER and must be electrically connected and grounded in accordance with local codes. In the absence of local codes, use the current CSA C22.1 C ANADIAN ELECTRICAL CODE in Canada or the ANSI/NFPA 70 NATIONAL ELECTRICAL CODE United States. -
Page 27: Operation / Maintenance
OPERATION / MAINTENANCE When lit for the first time, the fireplace will emit a slight odour for a few hours. This is a normal temporary condi- tion caused by the curing of the logs and the "burn-in" of internal paints and lubricants used in the manufacturing process and will not occur again. -
Page 28: Adjustments
PILOT BURNER ADJUSTMENT Adjust the pilot screw to provide properly sized flame. Turn in a clockwise direction to reduce the gas flow. FIGURE 64 FIGURE 65 WARNING: This is a fast act- ing thermocouple. It is an in- tegral safety component. Replace only with a fast act- ing thermocouple supplied by Wolf Steel Ltd. -
Page 29: Replacements
Contact your dealer or the factory for questions concerning prices and policies on replacement parts. Normally all parts can be ordered through your Napoleon dealer or distribu- tor. WARNING: This is a fast acting thermocouple. It is an integral safety component. Replace only with a fast acting thermocouple supplied by Wolf Steel Ltd. - Page 30 W415-0299 / C / 03.12.03 WARNING: This is a fast acting thermocouple. It is an integral safety component. Replace only with a fast acting thermocouple supplied by Wolf Steel Ltd.
-
Page 31: Accessories
PART No. DESCRIPTION W690-0001 MILLIVOLT THERMOSTAT GD501 HEAT GUARD W573-0008 HI-TEMP SEALANT W010-0370 WALL SUPPORT ASSEMBLY GZ-550-1KT BLOWER KIT W175-0170 DURA-VENT ZERO CLEARANCE ADAPTOR W500-0033 VARIABLE SPEED SWITCH WALL MOUNTING PLATE W660-0010 REMOTE CONTROL - ADVANTAGE W660-0011 REMOTE CONTROL - ADVANTAGE PLUS W660-0013 MODULATING REMOTE -... -
Page 32: Trouble Shooting Guide
TROUBLE SHOOTING GUIDE EFORE ATTEMPTING TO TROUBLESHOOT PURGE YOUR UNIT AND INITIALLY LIGHT THE PILOT AND THE MAIN BURNER WITH THE GLASS DOOR OPEN SYMPTOM PROBLEM Main burner flame Blockage in vent. is a blue, lazy, t r a n s p a r e n t Incorrect installation. - Page 33 SYMPTOM PROBLEM Pilot burning; no Themostat or switch is de- main fective. burner; gas knob Wall switch wiring is defec- is on 'HI'; wall tive. switch / thermo- stat is on. Main burner plugged. Faulty valve. Pilot goes out Gas piping is undersized. while standing;...
- Page 34 Wolf Steel Fireplace Service History This fireplace must be serviced annually depending on usage. Service Technician Date Dealer Name Service Performed Special Concerns Name...
- Page 35 W415-0299 / C / 03.12.03...
- Page 36 W415-0299 / C / 03.12.03...