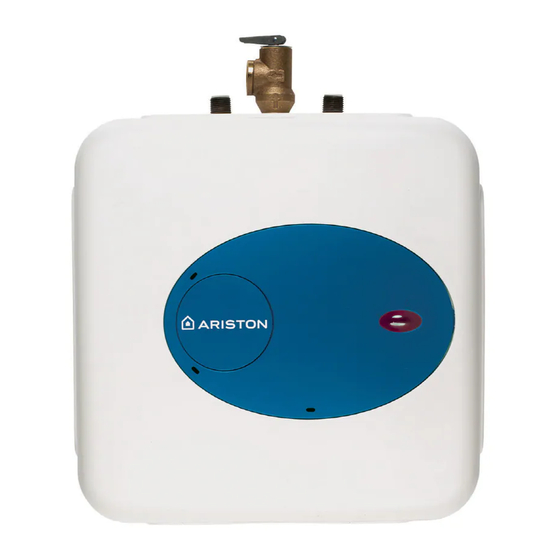
Ariston GL 2.5 S Instructions Manual
Electric mini tank water heaters
Hide thumbs
Also See for GL 2.5 S:
- User manual (14 pages) ,
- Replacing thermostat (3 pages) ,
- Installation manual (14 pages)
Table of Contents
Advertisement
Available languages
Available languages
WE MAKE USE OF
RECYCLED PAPER
Ariston Thermo SpA
Viale Aristide Merloni, 45
60044 Fabriano (AN)
Tel. 0732.6011
Telefax. 0732.602331
http://www.aristonthermo.com
E-mail: marketing@aristonthermo.com
Bosch Thermotechnology Corp.
50 Wentworth Ave Londonderry,
NH03053
Tel. 866 330 2729
www.boschhotwater.com
Made in China
Electric Mini Tank Water heaters
Chauffe-eau électriques à miniréservoir
Calentadores de Agua Eléctricos de Minitanque
GL 2.5 S - GL 4 S - GL 4 CA S - GL 6+ S
Advertisement
Table of Contents

Related Manuals for Ariston GL 2.5 S


Summary of Contents for Ariston GL 2.5 S
- Page 1 Calentadores de Agua Eléctricos de Minitanque 60044 Fabriano (AN) 50 Wentworth Ave Londonderry, Tel. 0732.6011 NH03053 Telefax. 0732.602331 http://www.aristonthermo.com Tel. 866 330 2729 GL 2.5 S - GL 4 S - GL 4 CA S - GL 6+ S E-mail: marketing@aristonthermo.com www.boschhotwater.com Made in China...
-
Page 2: Important Safety Instructions
UPC 2000 (Uniform Plumbing Code) Section 510 - Protection from Damage or IPC 200 (International Plumbing Code) Section 504- Safety Devices. SAVE THESE INSTRUCTIONS Technical data MODEL GL 2.5 S GL 4 S GL 6+ S GL 4 CA S Capacity gallons 7.0 (Hor)/5.1 (Vert) - Page 3 3/4 NPT female line to drain tapping for relief valve GL 2.5 S - GL 4 S GL 4 CA S FIG. 1/2 GL 6+ S Horizontal installation Temperature & pressure relief valve, 3/4 NPT male...
- Page 4 DIMENSIONS FOR GL 2.5 S - GL 4 S - GL 4 CA S FIG. 2/1 13 3/4” 13 1/2” 10 3/4” 3 3/4” 12 1/4” 6 1/4” 9” GL 2.5 S 1/2 NPT MALE 3 1/2” 3 1/2” 2 1/2”...
- Page 5 The thermostat has been pre-set at the factory at a temperature: CAUTION - Equal or below 51.7°C (125° F) for GL 2.5 S, GL 4 S and GL 6+ S for USA with UL certification (See fig. 2/4). - Equal to 60°C (140° F) for GL 4 S for Canada with CSA certification. Check local codes to see if the installation of a tempering valve is required (See fig.
-
Page 6: Starting And Testing
Floor Heater can sit on floor. Mounting Pipe Connect the cold water inlet pipe to the inlet tapping (marked with a blue ring) and the hot connections water outlet pipe to the outlet tapping (marked with a red ring). The model GL 6+ S can be piped horizontally from the side or vertically from the top. If you wish to install the unit horizontally, with the piping connections on the right side, you will have to be certain the tap between the two water tappings is plugged, the supplied Temperature and Pressure Relief Valve will need to be installed on top. - Page 7 FIG. 3/1 FIG. 3/2 FIG. 4...
-
Page 8: Maintenance Instructions
Maintenance instructions Note: Do not attempt to repair this water heater yourself. Call a service person for assistance. Always turn off the power supply to the heater prior to servicing or draining the heater. Periodic maintenance Removing Note: For most of these operations, the water will have to be drained from the heater. For all of these operations the cord should be disconnected and the front the cover cover removed. -
Page 9: Replacement Of Parts
Rapid degradation of the anode rod (less than 1 year) may indicate the presence of galvanic corrosion due to “stray” direct current. In this case, it may be necessary to add a “grounding strap” from the Ariston tank to the copper plumbing. -
Page 10: Troubleshooting
Troubleshooting Water does 1. Make sure the power supply is on and working. 2. If light does not come on, check that the reset button is pushed in; follow steps from not get hot previous section. 3. If the indicator light works properly but temperature does not get hot a tap, test for a plumbing crossover;... - Page 11 GL 4 S, GL 4 CA S COMPONENTS DIAGRAM 570241 ANODE (MAGNESIUM) GL 6+ S 574305 ANODE (MAGNESIUM) GL 2.5 S, 4 S, 4 CA S, 6+ S 994147 GASKET WITH 4 BOLTS 994140 LOCK NUT M6 HEATING ELEMENT (1500/120) HEATING ELEMENT (1500/120)
-
Page 12: Warranty Period
ARISTON GL • LIMITED 6 YEARS WARRANTY COVERAGE b) The water heater has not been installed in ARISTON, THROUGH ITS U.S. DISTRIBUTOR accordance with the applicable local Bosch Thermotechnology Corp., (hereinafter plumbing and/or building code(s) and/or Bosch) guarantees this water heater to the regulation(s), or Owner (hereinafter “Owner”) of the water heater... -
Page 13: Importantes Consignes De Sécurité
(Code de plomberie normalisé), article 510 – Protection contre les dommages ou IPC 200 (Code de plomberie international), article 504 – Dispositifs de sécurité. IL FAUT CONSERVER CES DIRECTIVES. Données techniques MODÈLE GL 2.5 S GL 4 S GL 6+ S GL 4 CA S Capacité... - Page 14 NPT de 19 mm vers le drain (3/4 de po) pour la soupape de décharge GL 2.5 S - GL 4 S GL 4 CA S FIG. 1/2 GL 6+ S installation horizontale Raccord mâle NPT de 19 mm (3/4 de po) de la soupape de décharge et...
- Page 15 DIMENSIONS DES MODÈLES GL2.5 S - GL 4 S - GL 4 CA S 13 3/4” 13 1/2” 10 3/4” 3 3/4” 12 1/4” 6 1/4” 9” GL 2.5 S 1/2 NPT MÂLE 3 1/2” 3 1/2” 2 1/2” GL 4 S GL 4 CA S FIG. 2/2 DIMENSIONS DU MODÈLE GL 6+ S (INSTALLATION HORIZONTALE)
- Page 16 MISE EN Le thermostat a été pré-réglé en usine à une température: - Egale ou inférieure à 51,7°C (125°F) pour les modèles GL 2.5 S, GL 4 S et GL 6+ S pour GARDE USA avec certification UL (Voir fig. 2/4).
-
Page 17: Installation Murale
Installation Fixez le support de montage fourni au mur. Utilisez des vis convenant au matériau du mur et au poids du chauffe-eau. Suspendez le chauffe-eau au support. Tirez le murale chauffe-eau vers le bas pour vous assurer que les deux " langues " du support sont bien insérées dans les fentes de fixation. -
Page 18: Directives D'utilisation
fournisseur d’eau local ou à un inspecteur de plomberie pour obtenir de l’information sur la façon de contrôler cette situation. Ne bouchez pas la soupape de décharge et de sécurité thermique. Directives d’utilisation Le remplissage de la chaudière avec l’eau de réseau est la dernière opération à Mise en effectuer, avant de le mettre sus tension. -
Page 19: Entretien Périodique
FIG. 4 Directives d’entretien Remarque: N’essayez pas de réparer ce chauffe-eau vous-même. Faites appel à un réparateur pour obtenir de l’aide. Débranchez toujours l’alimentation électrique du chauffe-eau avant de procéder à l’entretien ou à la purge du chauffe-eau. Entretien périodique Enlever Remarque: Pour effectuer la plupart de ces opérations, il faut purger l’eau du chauffe-eau. -
Page 20: Détartrage De L'élément Chauffant
" errant ". Dans ce cas, il pourrait s’avérer nécessaire d’ajouter un " bracelet de mise à la terre " reliant le réservoir du chauffe-eau Ariston à la tuyauterie en cuivre. 1. Coupez l’alimentation électrique et purgez le chauffe-eau (voir la section intitulée "... -
Page 21: Résolution De Problèmes
Remplacement 1. Coupez l’alimentation électrique et purgez le chauffe-eau (voir la section intitulée " Purge du chauffe-eau "). de l’élément 2. Enlevez l’élément chauffant (voir la section intitulée " Enlèvement de l’élément chauffant chauffant "). 3. Installez le nouvel élément et son joint d’étanchéité, en veillant à ce qu’ils soient bien placés. - Page 22 L’eau a une 1. La mauvaise odeur de l’eau peut être attribuable à une réaction inusitée entre l’eau de la localité et la tige d’anode du chauffe-eau. Vérifiez la tige d’anode (voir la odeur section traitant du changement de la tige d’anode). Il y a des 1.
- Page 23 570241 ANODE (MAGNÉSIUM) GL 6+ S 574305 ANODE (MAGNÉSIUM) DES CHAUFFE-EAU ARISTON 994147 JOINT AVEC 4 BOULONS 994140 ÉCROU M6 GL 2.5 S, 4 S, 4C A S, 6+ S RESISTANCE (1500/120) RESISTANCE (1500/120) THERMOSTAT CABLE THERMOSTAT CABLE 570341 ETRIER DE FIXATION...
-
Page 24: Période De Garantie
GARANTIE LIMITÉE DE SIX ANS D’ARISTON COUVERTURE du bâtiment et(ou) au(x) règlement(s) local(aux) ARISTON, L’ENTREMISE applicable(s); ou DISTRIBUTEUR NORD-AMÉRICAIN Bosch chauffe-eau n’a été installé Thermotechnology Corp. (ci-après appelé " Bosch ") conformément aux directives écrites du fabricant; garantit à son propriétaire (ci-après appelé le "... -
Page 25: Instrucciones De Seguridad Importantes
Sección 510 - Protección contra Daños (Protection from Damage)o el documento IPC 200 -Reglamento Internacional de Fontanería- (International Plumbing Code) Sección 504 - Dispositivos de Seguridad (Safety Devices). SALVE ESTAS INSTRUCCIONES Datos técnicos MODELO GL 2.5 S GL 4 S GL 6+ S GL 4 CA S Capacidad galones 7.0 (Hor)/5.1 (Vert) - Page 26 Rosca hembra temperatura y NPT de 3/4 para presión al drenaje la válvula de alivio GL 2.5 S - GL 4 S GL 4 CA S FIG. 1/2 GL 6+ S Instalación horizontal Válvula de alivio de temperatura y presión,...
- Page 27 DIMENSIONES DEL GL 2.5 S - GL 4 S - GL 4 CA S FIG. 2/1 13 3/4” 13 1/2” 10 3/4” 3 3/4” 12 1/4” ROSCA MACHO 6 1/4” 9” GL 2.5 S NPT DE 1/2 3 1/2” 3 1/2”...
- Page 28 PRECAUCIÓN El termostato ha sido pre-configurado de fábrica a una temperatura: - Igual o inferior a 51,7°C (125°F) para GL 2.5 S, GL 4 S, GL 6+ S para EE.UU con UL certification (Vea fig. 2/4). - Equivalente al 60°C (140°F) para GL 4 CA S para Canada con CSA certification.
-
Page 29: Montaje En La Pared
Montaje en Fije el soporte de montaje suministrado en la pared. Utilice tornillos apropiados para el material de la pared y para el peso del calentador. Coloque el calentador de agua la pared en el soporte. Jale el calentador hacia abajo para asegurarse de que ambos “dedos” del soporte queden asentados en las ranuras de montaje. -
Page 30: Ajuste De La Temperatura
controlar esta situación, comuníquese con la compañía de suministro de agua o con un inspector de fontanería de la localidad. No tape la válvula de alivio de temperatura y presión. Instrucciones para el uso de la unidad Inicio y El llenar la caledra con el agua de la red hídrica es la última operación que se ha de pruebas efectuar antes de dar tension. -
Page 31: Instrucciones De Mantenimiento
FIG. 4 Instrucciones de mantenimiento Nota: No intente reparar usted mismo este calentador de agua. Llame a un técnico de servicio si necesita asistencia. Siempre apague la corriente suministrada al calentador antes de darle servicio o drenarlo. Mantenimiento periódico Nota: Para la mayoría de estas operaciones debe drenarse el agua del calentador. Quitar Para todas estas operaciones debe apagarse el suministro de corriente y debe la cubierta... -
Page 32: Cambio De La Barra Del Ánodo
ánodo (menos de un año) puede indicar la presencia de corrosión galvánica debida a una corriente directa “parásita”. En este caso, puede ser necesario agregar una “tira de conexión a tierra” del tanque Ariston a la tubería de cobre. 1. Apague el suministro de corriente y drene el calentador (consulte la sección “Drenado del calentador”). -
Page 33: Corrección De Problemas
Cambio del 1. Apague el suministro de corriente y drene el calentador (consulte la sección Drenado del calentador). elemento de 2. Retire el elemento de calentamiento (consulte la sección “Desmontaje del elemento calentamiento de calentamiento”). 3. Instale un nuevo elemento con el empaque, asegurándose de que ambos estén colocados correctamente. - Page 34 Hay olor en 1. El agua con olor puede deberse a una reacción inusual entre el agua de la localidad y la barra del ánodo del calentador. Revise la barra del ánodo (consulte la sección el agua previa sobre cambio de la barra del ánodo). Goteo 1.
- Page 35 GL 4 S - GL 4 CA S INTERNOS ARISTON 570241 ÁNODO (MAGNESIO) GL 6+ S 574305 ÁNODO (MAGNESIO) GL 2.5 S, 4 S, 4 CA S, 6+ S 994147 JUNTA CON 4 PERNO 994140 TUERCA M6 RESISTENCIA (1500/120) RESISTENCIA (1500/120)
-
Page 36: Período De Garantía
ARISTON • GARANTÍA LIMITADA DE 6 AÑOS COBERTURA b) El calentador de agua no se instaló de ARISTON, A TRAVÉS DE SU DISTRUBUIDOR conformidad reglamentos EN EE.UU., CONTROLLED ENERGY CORP., (en regulaciones de fontanería y/o de construcción lo sucesivo denominado Bosch) garantiza al...