
Related Manuals for Technics SL-PD7


Summary of Contents for Technics SL-PD7
- Page 1 Navigator Table Of Contents file:///E|/_MANUALS/TECHNICS/technics_sl-pd7nasvc_[ET]/NA/SL-PD7/SVC/navigator.html[30/09/2009 12:13:01]...
-
Page 2: Table Of Contents
13 Schematic Diagram 14 Printed Circuit Board 15 Troubleshooting Guide 16 Wiring Connection Diagram 17 Parts Location and Replacement Parts List 17.1 CD Loading Mechanism 17.1.1 CD Loading Mechanism Part Location 17.1.2 CD Loading Mechanism Part List 17.2 Cabinet file:///E|/_MANUALS/TECHNICS/technics_sl-pd7nasvc_[ET]/NA/SL-PD7/SVC/slpd7p.html[30/09/2009 12:13:32]... - Page 3 17.2.1 Cabinet Parts Location 17.2.2 Cabinet Parts List 17.3 Electrical Parts List 17.4 Packing Materials& Accessories Parts List 17.5 Packaging file:///E|/_MANUALS/TECHNICS/technics_sl-pd7nasvc_[ET]/NA/SL-PD7/SVC/slpd7p.html[30/09/2009 12:13:32]...
- Page 4 Dynamic range 92 dB 100 dB Total harmonic distortion 0.007% (1kHz, 0 dB) Wow and flutter Below measurable limit DA converter MASH (1 bit) Output impedance Approx. 1kO Load impedance More than 10 kO PICKUP Wavelength 780 nm GENERAL file:///E|/_MANUALS/TECHNICS/technics_sl-pd7nasvc_[ET]/NA/SL-PD7/SVC/s0000000000.html[30/09/2009 12:14:24]...
- Page 5 Power consumption in standby mode: Notes: 1. Specifications are subject to change without notice./Mass and dimensions are approximate. © 2001 Matsushita Electronics (S) Pte. Ltd. All rights reserved. Unauthorized copying and distribution is a violation of law. TOP NEXT file:///E|/_MANUALS/TECHNICS/technics_sl-pd7nasvc_[ET]/NA/SL-PD7/SVC/s0000000000.html[30/09/2009 12:14:24]...
-
Page 6: Safety Precaution
*Note: Some exposed parts may be isolated from the chassis by design. These will read infinity. 4. If the measurement is outside the specified limits, there is a possibility of a shock hazard. The equipment should be repaired and rechecked before it is returned to the customer. file:///E|/_MANUALS/TECHNICS/technics_sl-pd7nasvc_[ET]/NA/SL-PD7/SVC/s0100000000x.html[30/09/2009 12:14:25]... - Page 7 TOP PREVIOUS NEXT file:///E|/_MANUALS/TECHNICS/technics_sl-pd7nasvc_[ET]/NA/SL-PD7/SVC/s0100000000x.html[30/09/2009 12:14:25]...
-
Page 8: Before Repair And Adjustment
After repairs are completed, restore power gradually using a variac, to avoid over current. Current consumption at AC 120 V, 50 Hz and 60 Hz in NO SIGNAL mode should be 50~130 mA and 40~80 mA respectively. TOP PREVIOUS NEXT file:///E|/_MANUALS/TECHNICS/technics_sl-pd7nasvc_[ET]/NA/SL-PD7/SVC/s0200000000x.html[30/09/2009 12:14:25]... -
Page 9: Handling Precautions For Traverse Deck
(optical pickup). Caution when Replacing the Traverse Deck: The traverse deck has a short point shorted with solder to protect the laser diode against electrostatics breakdown. Be sure to remove the solder from the short point before making connections. file:///E|/_MANUALS/TECHNICS/technics_sl-pd7nasvc_[ET]/NA/SL-PD7/SVC/s0300000000x.html[30/09/2009 12:14:26]... - Page 10 TOP PREVIOUS NEXT file:///E|/_MANUALS/TECHNICS/technics_sl-pd7nasvc_[ET]/NA/SL-PD7/SVC/s0300000000x.html[30/09/2009 12:14:26]...
-
Page 11: Precaution Of Laser Diode
6. Use of control or adjustments or performance of procedures other than those specified herein may result in hazardous radiation exposure. CAUTION! THIS PRODUCT UTILIZES A LASER. USE OF CONTROLS OR ADJUSTMENTS OR PERFORMANCE OF PROCEDURES OTHER THAN THOSE SPECIFIED HEREIN MAY RESULT IN HAZARDOUS RADIATION EXPOSURE. TOP PREVIOUS NEXT file:///E|/_MANUALS/TECHNICS/technics_sl-pd7nasvc_[ET]/NA/SL-PD7/SVC/s0400000000x.html[30/09/2009 12:14:26]... -
Page 12: Protection Circuitry
2. Determine the cause of the problem and correct it. 3. Turn on the power once again after one minute. Note: When the protection circuitry functions, the unit will not operate unless the power is first turned off and then on again. TOP PREVIOUS NEXT file:///E|/_MANUALS/TECHNICS/technics_sl-pd7nasvc_[ET]/NA/SL-PD7/SVC/s0500000000x.html[30/09/2009 12:14:27]... -
Page 13: Accessories
6 Accessories TOP PREVIOUS NEXT AC power supply cord... 1 pc. Stereo connection cable... 1 pc. TOP PREVIOUS NEXT file:///E|/_MANUALS/TECHNICS/technics_sl-pd7nasvc_[ET]/NA/SL-PD7/SVC/s0600000000x.html[30/09/2009 12:14:27]... -
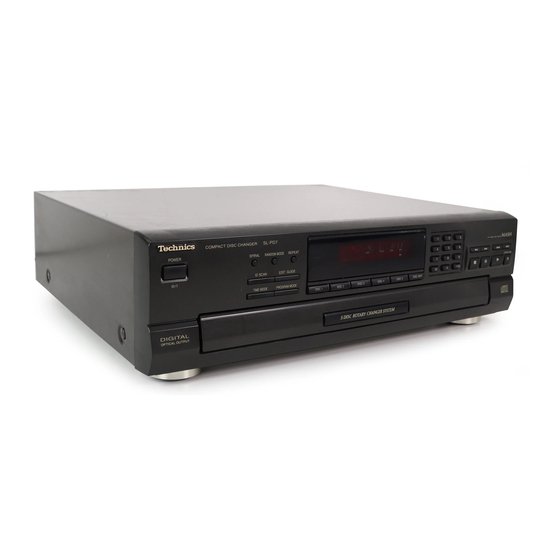
Page 14: Front Panel Controls
7 Front Panel Controls TOP PREVIOUS NEXT 7.1 Front Panel TOP PREVIOUS NEXT file:///E|/_MANUALS/TECHNICS/technics_sl-pd7nasvc_[ET]/NA/SL-PD7/SVC/s0700000000x.html[30/09/2009 12:14:28]... -
Page 15: Front Panel
7.1 Front Panel TOP PREVIOUS NEXT TOP PREVIOUS NEXT file:///E|/_MANUALS/TECHNICS/technics_sl-pd7nasvc_[ET]/NA/SL-PD7/SVC/s0701000000.html[30/09/2009 12:14:28]... -
Page 16: Operation Checks And Main Component Replacement Procedures
3. Select items from the following index when checks or replacement are required. Content Checking Procedure for each major P.C.B........................P.g. 7~9 8.1 Checking Procedure for each major P.C.B. TOP PREVIOUS NEXT file:///E|/_MANUALS/TECHNICS/technics_sl-pd7nasvc_[ET]/NA/SL-PD7/SVC/s0800000000x.html[30/09/2009 12:14:29]... -
Page 17: Checking Procedure For Each Major P.c.b
8.1 Checking Procedure for each major P.C.B. TOP PREVIOUS NEXT Step 1 Remove all the screws. Step 3 Remove all the screws and remove top cabinet as shown. file:///E|/_MANUALS/TECHNICS/technics_sl-pd7nasvc_[ET]/NA/SL-PD7/SVC/s0801000000.html[30/09/2009 12:14:30]... - Page 18 Release the connectors CN601 and CN602. Step 5 Remove all the screws. Step 6 Pull the front panel in both direction of arrow B to unlock the rib and then remove the front in the direction of arrow A. file:///E|/_MANUALS/TECHNICS/technics_sl-pd7nasvc_[ET]/NA/SL-PD7/SVC/s0801000000.html[30/09/2009 12:14:30]...
- Page 19 Keep the close lock gear pressed in the direction shown, and move the tray in the direction shown. Step 10 Fit the claw of the tray and the claw of the Base tray guide (left & right side). Step 11 Remove the screw and the Rotary tray. file:///E|/_MANUALS/TECHNICS/technics_sl-pd7nasvc_[ET]/NA/SL-PD7/SVC/s0801000000.html[30/09/2009 12:14:30]...
- Page 20 Step 12 Remove the connector CN403. Step 13 Remove the screw. Step 14 Pull the claw in the direction shown and remove the tray. file:///E|/_MANUALS/TECHNICS/technics_sl-pd7nasvc_[ET]/NA/SL-PD7/SVC/s0801000000.html[30/09/2009 12:14:30]...
- Page 21 Step 15 Remove all the screws. Step 16 Release the connectors CN302 and CN404. file:///E|/_MANUALS/TECHNICS/technics_sl-pd7nasvc_[ET]/NA/SL-PD7/SVC/s0801000000.html[30/09/2009 12:14:30]...
- Page 22 TOP PREVIOUS NEXT file:///E|/_MANUALS/TECHNICS/technics_sl-pd7nasvc_[ET]/NA/SL-PD7/SVC/s0801000000.html[30/09/2009 12:14:30]...
-
Page 23: Self-Diagnostic Display Function
2. Self-diagnostic fault results appear on the FL display for approximatelly one second as “H15” at location (A), “H16” at (B) and “H18” at (C), during the above cycle. To Return to Normal Display Press the power button to off the unit, and then turn it on again. To Display Self-Diagnostics Results Again Follow steps 1 through 3 of “Entering Self-Diagnostic Mode” above. file:///E|/_MANUALS/TECHNICS/technics_sl-pd7nasvc_[ET]/NA/SL-PD7/SVC/s0900000000x.html[30/09/2009 12:14:32]... - Page 24 ) button is pressed, the CD tray closes momentarily but then opens again, or opens momentarily and then closes again. Faulty rotary turret rotation detection. Example : The turret continues to turn at the inintial position without Check the optical sensor (D501) and replace if necessary. stopping. TOP PREVIOUS NEXT file:///E|/_MANUALS/TECHNICS/technics_sl-pd7nasvc_[ET]/NA/SL-PD7/SVC/s0900000000x.html[30/09/2009 12:14:32]...
-
Page 25: Type Illustrations Of Ics, Transistors& Diodes
10 Type Illustrations of ICs, Transistors& Diodes TOP PREVIOUS NEXT TOP PREVIOUS NEXT file:///E|/_MANUALS/TECHNICS/technics_sl-pd7nasvc_[ET]/NA/SL-PD7/SVC/s1000000000x.html[30/09/2009 12:14:33]... - Page 26 AN8885SBE1 (28p) UPD78044F186 (80p) BA4558FDXE2 BA6247N AN8739SBE2 BA033T MN662790RSC (80p) 2SD2037ETA 2SB1238QRTV2 2SA1037AKSTX 2SD2144STA 2SD1859QRTV2 2SC2785FETA KRA103MTA KRC107MTA KRC111MTA 2SD1862QTV2 KRC101MTA MTZJ3R6BTA GL380 RVD1SS133TA MTZJ30BTA PT381 MTZJ5R1BTA Cathode MTZJ5R6BTA Cathode MTZJ6R2CTA Anode MTJZ6R8CTA Cathode Anode MTJZ9R1BTA Anode MTZJ9R1CTA RL1N4003S-P RSQGP1S53V SG-206S Cathode Anode...
-
Page 27: Terminal Functions Of Ics
TOP PREVIOUS NEXT 11.1 IC701 (AN8885SBE1) Servo Amplifier 11.2 IC702 (MN662790RSC) Servo processor/ Digital signal processor/ Digital filter/ D/A converter 11.3 IC703 (AN8739SBE2) Focus coil/ Tracking coil/ Traverse motor/ Spindle motor driver 11.4 IC401 (C2BBGD000075) Microprocessor TOP PREVIOUS NEXT file:///E|/_MANUALS/TECHNICS/technics_sl-pd7nasvc_[ET]/NA/SL-PD7/SVC/s1100000000x.html[30/09/2009 12:14:33]... -
Page 28: Ic701 (An8885Sbe1) Servo Amplifier
Power-down input OFTR OFTR output N.C. 3T-ENV output N.C. N.C. TE amp input TEOUT TE amp output FEOUT FE amp output FE amp input VREF Reference voltage output TBAL Tracking balance control FBAL Focus balance control TOP PREVIOUS NEXT file:///E|/_MANUALS/TECHNICS/technics_sl-pd7nasvc_[ET]/NA/SL-PD7/SVC/s1101000000.html[30/09/2009 12:14:34]... -
Page 29: Ic702 (Mn662790Rsc) Servo Processor/ Digital Signal Processor/ Digital Filter/ D/A Converter
RF detection signal input ("L" : detection) Dropout signal input ("H" : Dropout) LDON Laser on signal output ("H" : ON) PLLF2 I/O N.C. DSLF2 Tracking Offset alignment output/DSL Balance Output (DA Output) WVEL N.C. RF signal input file:///E|/_MANUALS/TECHNICS/technics_sl-pd7nasvc_[ET]/NA/SL-PD7/SVC/s1102000000.html[30/09/2009 12:14:35]... - Page 30 RF signal polarity assignment input (at "H" level, RSEL="H", at "L" level, RESL="L") IOVOD 5V supply input PSEL Test terminal (connected to Gnd) MSEL SMCK oscillating frequency designation input (“L”:4.2336 MHz, “H”:8.4672 MHz) SSEL SUBQ output mode select (“H”:Q-code buffer mode) TOP PREVIOUS NEXT file:///E|/_MANUALS/TECHNICS/technics_sl-pd7nasvc_[ET]/NA/SL-PD7/SVC/s1102000000.html[30/09/2009 12:14:35]...
-
Page 31: Ic703 (An8739Sbe2) Focus Coil/ Tracking Coil/Traverse Motor/ Spindle Motor Driver
Motor driver (4) forward-action output N.C. PGND2 Ground connection (2) for driver PVCC2 Power supply (2) for driver N.C. Power supply terminal VREF Reference voltage input Motor driver (4) input Motor driver (3) input RSTIN Reset terminal N.C. TOP PREVIOUS NEXT file:///E|/_MANUALS/TECHNICS/technics_sl-pd7nasvc_[ET]/NA/SL-PD7/SVC/s1103000000.html[30/09/2009 12:14:37]... -
Page 32: Ic401 (C2Bbgd000075) Microprocessor
Remote control sensor input Not used, connected to GND /TLOCK Optical servo condition (tracking) input /FLOCK Optical servo condition (focus) input STAT Status signal (CRC,CUE,CLVS,TTSTOP, FCLV,SQCK) Power supply terminal (+5V) POWER Power ON/OFF output terminal SYNCHRO Not used, open file:///E|/_MANUALS/TECHNICS/technics_sl-pd7nasvc_[ET]/NA/SL-PD7/SVC/s1104000000.html[30/09/2009 12:14:38]... - Page 33 Segment signal of FL display Segment signal of FL display Segment signal of FL display Segment signal of FL display Not used, connected to GND Not used, connected to GND Grid signal of FL display TOP PREVIOUS NEXT file:///E|/_MANUALS/TECHNICS/technics_sl-pd7nasvc_[ET]/NA/SL-PD7/SVC/s1104000000.html[30/09/2009 12:14:38]...
-
Page 34: Block Diagram
12 Block Diagram TOP PREVIOUS NEXT TOP PREVIOUS NEXT file:///E|/_MANUALS/TECHNICS/technics_sl-pd7nasvc_[ET]/NA/SL-PD7/SVC/s1200000000x.html[30/09/2009 12:14:40]... - Page 35 OPTICAL PICKUP IC701 AN8885SBE1 SERVO AMP SEMICONDUCTOR LASER OFTR DET. TENV Q701 LASER POWER DRIVE OFTR OFTR DET. LDON /RFDET /RFDET DET. PHOTO DETECTOR FEOUT Subtracter VCBA VREF Subtracter VCBA N.C. TRACKING FOCUS COIL COIL JK321 SYNDROME DIGITAL AUDIO CALCULATION INTERFACE PHASE FREQUENCY...
- Page 36 SIGNAL LINES CD SIGNAL LINE IC11 BA033T REGULATOR D11~D14 REGULATOR D42,D43 CURRENT CONTROL PT11 D51,D52 Q18,Q19 POWER SUPPLY CONTROL D31,D32 REGULATOR JK11 AC INLET Q11,Q12 SWITCH IC801 Q32,Q33 BA4558FDXE2 FL DRIVE L.P.F. JK801 CD SIGNAL FILTER AMP TO FL DISPLAY LCH OUT Q801(Q802) MUTING...
-
Page 37: Schematic Diagram
Cover the parts boxes made of plastics with aluminium foil. Put a conductive mat on the work table. Ground the soldering iron. Do not touch the pins of IC, LSI or VLSI with fingers directly. TOP PREVIOUS NEXT file:///E|/_MANUALS/TECHNICS/technics_sl-pd7nasvc_[ET]/NA/SL-PD7/SVC/s1300000000x.html[30/09/2009 12:14:40]... - Page 38 SCHEMATIC DIAGRAM -1 : +B SIGNAL LINE : CD SIGNAL LINE CD SERVO CIRCUIT R701 OPTICAL PICKUP CIRCUIT Q701 C701 2SA1037AKSTX 6.3V33 3.2V C703 LASER POWER DRIVE LASER DIODE 6.3V100 Q701 CN701 2.7V ((2.3V)) 0.9V ((2V)) C704 R750 LD GND NBOUT C707 C714...
- Page 39 SCHEMATIC DIAGRAM - 2 : +B SIGNAL LINE : CD SIGNAL LINE R717 C727 50V1 C725 1000P R721 C726 1000P R718 C728 50V1 C731 6.3V220 CN702 Lch OUT C730 C733 C732 A.GND 6.3V220 C754 Rch OUT 470P +3.3V C753 470P D.GND LD SW C743...
- Page 40 SCHEMATIC DIAGRAM-3 MAIN CIRCUIT : +B Signal Line : -B Signal Line : CD Signal line LOADING C462 MOTOR 0.01 CIRCUIT R412 UP/DOWN (CN551) ON DGND SCHEMATIC R411 4.7K OPEN DIAGRAM-6 CN404 Q461, 462 R463 KRC111MTA MOTOR CONTROL R461 Q461 ((6.83V)) ((0V)) D461...
- Page 41 SCHEMATIC DIAGRAM-4 : +B Signal Line : -B Signal Line : CD Signal line JK321 DGND C322 C321 6.3V 100 0.01 +5.0V C805 390P Q801, 802 2SD2144STA IC801 MUTING C803 R805 R807 ((0.01V)) C809 R813 R819 16V 10 8.2k ((0.03V)) 6.3V 47 ((0.01V)) R811...
-
Page 42: Power Switch
SCHEMATIC DIAGRAM-5 :+B Signal Line PANEL CIRCUIT FL601 RSL0274-F CN601 MAIN CIRCUIT (CN401) ON SCHEMATIC DIAGRAM-3 CN602 STBY MAIN CIRCUIT (CN402) ON SCHEMATIC DIAGRAM-3 R660 R659 R652 R658 R656 R655 R654 R653 R651 R650 R657 4.7K 2.2K 1.8K 6.8K 2.7K 1.2K POWER SWITCH... - Page 43 SCHEMATIC DIAGRAM-6 : +B Signal line SENSOR CIRCUIT IC501 BA6247N MOTOR DRIVE TRAYMOTOR Direction Select Drive CIRCUIT IC501 P.GND D502 LOAD TURN RSQGP1S53V DIREC FC502 FC502 +8.5V MAIN CIRCUIT (CN403) on VREF SCHEMATIC P.GND DIAGRAM-3 +8.5V D501 GL380 SPEED POSITION D.GND CN501 Q501...
-
Page 44: Printed Circuit Board
14 Printed Circuit Board TOP PREVIOUS NEXT TOP PREVIOUS NEXT file:///E|/_MANUALS/TECHNICS/technics_sl-pd7nasvc_[ET]/NA/SL-PD7/SVC/s1400000000x.html[30/09/2009 12:14:41]... - Page 45 CD SERVO P.C.B (REPX0192E) (RF) TP20 X701 TJ701 TP23 C717 R714 TP19 TP21 TP29 C716 C721 R709 C744 TP24 C722 R712 TP18 C723 C724 R742 C725 TP25 IC701 TP26 TP27 C731 C753 TP22 C754 C711 J702 C718 C712 IC702 C713 J712 R705 C747...
- Page 46 MAIN P.C.B. (REPX0249D) TP11 C321 J154 R420 J321 C322 R423 CN302 R463 R425 C461 R461 D461 R811 C815 J145 J406 C807 J144 R809 J405 C809 C803 R428 D801 IC801 J403 J142 C801 R815 J218 J700 Q475 CN403 R427 J216 J312 Z301 R851 R810...
- Page 47 TP13 TP15 TP14 TP10 J154 R420 R422 R423 R424 R463 R425 R426 C461 R461 D461 J144 R462 J404 R428 J402 J142 R430 J218 J140 CN403 D462 J216 J138 J506 J502 Q401 J213 CN404 R415 C407 R413 J132 C404 J800 R852 C403 R414 J311...
- Page 48 PANEL P.C.B. (REPX0248D) FL601 CN602 J622 S603 S602 S601 J623 J624 J615 J614 R650 R652 R651 S621 S622 S623 S624 S606 S605 S604 R655 R654 R653 FWD SKIP REV SKIP REV SEARCH FWD SEARCH S609 S607 S608 R669 R670 R671 R665 R668 R667...
- Page 49 FL601 J622 J623 J624 CN601 S616 S615 S614 REPEAT RANDOM MODE SPIRAL R680 R679 S634 S633 EDIT ID SCAN GUIDE R678 S631 S632 S625 S628 S626 S629 S630 R677 S627 R672 R673 R674 R675 R676 TIME MD PROGRAM DISC DISC 3 DISC 2 DISC 5 DISC 4...
-
Page 50: Troubleshooting Guide
15 Troubleshooting Guide TOP PREVIOUS NEXT TOP PREVIOUS NEXT file:///E|/_MANUALS/TECHNICS/technics_sl-pd7nasvc_[ET]/NA/SL-PD7/SVC/s1500000000x.html[30/09/2009 12:14:42]... -
Page 51: Wiring Connection Diagram
16 Wiring Connection Diagram TOP PREVIOUS NEXT TOP PREVIOUS NEXT file:///E|/_MANUALS/TECHNICS/technics_sl-pd7nasvc_[ET]/NA/SL-PD7/SVC/s1600000000x.html[30/09/2009 12:14:42]... -
Page 52: Parts Location And Replacement Parts List
17.1 CD Loading Mechanism 17.1.1 CD Loading Mechanism Part Location 17.1.2 CD Loading Mechanism Part List 17.2 Cabinet 17.2.1 Cabinet Parts Location 17.2.2 Cabinet Parts List 17.3 Electrical Parts List 17.4 Packing Materials& Accessories Parts List 17.5 Packaging file:///E|/_MANUALS/TECHNICS/technics_sl-pd7nasvc_[ET]/NA/SL-PD7/SVC/s1700000000x.html[30/09/2009 12:14:43]... - Page 53 TOP PREVIOUS NEXT file:///E|/_MANUALS/TECHNICS/technics_sl-pd7nasvc_[ET]/NA/SL-PD7/SVC/s1700000000x.html[30/09/2009 12:14:43]...
-
Page 54: Cd Loading Mechanism
17.1 CD Loading Mechanism TOP PREVIOUS NEXT 17.1.1 CD Loading Mechanism Part Location 17.1.2 CD Loading Mechanism Part List TOP PREVIOUS NEXT file:///E|/_MANUALS/TECHNICS/technics_sl-pd7nasvc_[ET]/NA/SL-PD7/SVC/s1701000000.html[30/09/2009 12:14:44]... -
Page 55: Cd Loading Mechanism Part Location
17.1.1 CD Loading Mechanism Part Location TOP PREVIOUS NEXT TOP PREVIOUS NEXT file:///E|/_MANUALS/TECHNICS/technics_sl-pd7nasvc_[ET]/NA/SL-PD7/SVC/s1701010000.html[30/09/2009 12:14:44]... - Page 56 12:56:30]...
-
Page 57: Cd Loading Mechanism Part List
NUT PLATE ASS’Y 358-8 XQN17+CG5 NUT PLATE ASSY SCREW 358-9 XQS2+A3FZ SPINDLE MOTOR SCREW RME0142 FLOATING SPRING A RME0109 FLOATING SPRING B RMR0698-K1 TRAVERSE CHASSIS RMS0123-1 FIXED PIN B XTN2+6G SCREW RMS0350 FIXED PIN A TOP PREVIOUS NEXT file:///E|/_MANUALS/TECHNICS/technics_sl-pd7nasvc_[ET]/NA/SL-PD7/SVC/s1701020000.html[30/09/2009 12:14:45]... -
Page 58: Cabinet
17.2 Cabinet TOP PREVIOUS NEXT 17.2.1 Cabinet Parts Location 17.2.2 Cabinet Parts List TOP PREVIOUS NEXT file:///E|/_MANUALS/TECHNICS/technics_sl-pd7nasvc_[ET]/NA/SL-PD7/SVC/s1702000000.html[30/09/2009 12:14:46]... - Page 59 17.2.1 Cabinet Parts Location TOP PREVIOUS NEXT TOP PREVIOUS NEXT file:///E|/_MANUALS/TECHNICS/technics_sl-pd7nasvc_[ET]/NA/SL-PD7/SVC/s1702010000.html[30/09/2009 12:47:57]...
- Page 60 13:00:04]...
- Page 61 13:00:09]...
- Page 62 RGBX0007-K CHANGER BADGE RMR0744-W CLAMPER PLATE RMR0624-W2 CLAMPER RMN0185 FL HOLDER RGPX0028H-K FRONT PANEL RGUX0322-K CONTROL BUTTON RYQX0021-K1 PROGRAM BUTTON UNIT [M] XTBS3+8JFZ1 SCREW RGUX0315A-K DISC BUTTON XTBS26+12J SCREW RWJ1806115XX 6P WIRE RMG0200 SHUTTER RUBBER RMR0334 FIXED PLATE file:///E|/_MANUALS/TECHNICS/technics_sl-pd7nasvc_[ET]/NA/SL-PD7/SVC/s1702020000.html[30/09/2009 12:49:08]...
- Page 63 XTB3+10JFZ SCREW RMF0182 TRAY FELT RMR0546-W2 ROLLER RKA0079-A FOOT XTB3+8JFZ SCREW RGB0031-A TECHNICS BADGE RGKX0041-Q DISPLAY WINDOW TOP PREVIOUS NEXT file:///E|/_MANUALS/TECHNICS/technics_sl-pd7nasvc_[ET]/NA/SL-PD7/SVC/s1702020000.html[30/09/2009 12:49:08]...
-
Page 64: Electrical Parts List
Q461 KRC111MTA TRANSISTOR Q462 KRC111MTA TRANSISTOR Q474 KRC101MTA TRANSISTOR Q475 KRC101MTA TRANSISTOR Q501 PT381 TRANSISTOR Q701 2SA1037AKSTX TRANSISTOR Q801 2SD2144STA TRANSISTOR Q802 2SD2144STA TRANSISTOR Q851 KRA103MTA TRANSISTOR Q852 KRC103MTA TRANSISTOR Q853 KRA103MTA TRANSISTOR DIODES RL1N4003S-P DIODE RL1N4003S-P DIODE file:///E|/_MANUALS/TECHNICS/technics_sl-pd7nasvc_[ET]/NA/SL-PD7/SVC/s1703000000.html[30/09/2009 12:49:21]... - Page 65 SW TRACK 7 S608 EVQ21405R SW TRACK 8 S609 EVQ21405R SW TRACK 9 S610 EVQ21405R SW TRACK 10 S611 EVQ21405R SW TRACK 0 S612 EVQ21405R SW STOP S613 EVQ21405R SW POWER S614 EVQ21405R SW SPIRAL S615 EVQ21405R SW RANDOM MODE file:///E|/_MANUALS/TECHNICS/technics_sl-pd7nasvc_[ET]/NA/SL-PD7/SVC/s1703000000.html[30/09/2009 12:49:21]...
- Page 66 21P FFC BOTTOM INSER CN602 RJS1A6211-1 11P FFC BOTTOM INSER CN701 RJS2A6016 16P FFC CONNECTOR CN702 RJS1A6719-1Q 19P FFC CONNECTOR COMPONENT COMBINATION Z301 BL02RN2R65T2 COIL OSCILLATORS X401 RSXY4M23M01T CRYSTAL RESONATOP X701 RSXB16M9J02T CRYSTAL OSCILLATOR DISPLAY TUBE FL601 RSL0274-F FL DISPLAY file:///E|/_MANUALS/TECHNICS/technics_sl-pd7nasvc_[ET]/NA/SL-PD7/SVC/s1703000000.html[30/09/2009 12:49:21]...
- Page 67 10K 1/4W R414 ERDS2TJ471T 470 1/4W R415 ERDS2TJ563T 56K 1/4W R416 ERDS2TJ473T 47K 1/4W R417 ERDS2TJ223T 22K 1/4W R418 ERDS2TJ104T 100K 1/4W R419 ERDS2TJ223T 22K 1/4W R420 ERDS2TJ103T 10K 1/4W R421 ERDS2TJ103T 10K 1/4W R422 ERDS2TJ472T 4.7K 1/4W file:///E|/_MANUALS/TECHNICS/technics_sl-pd7nasvc_[ET]/NA/SL-PD7/SVC/s1703000000.html[30/09/2009 12:49:21]...
- Page 68 6.8K 1/4W R669 ERDS2TJ103T 10K 1/4W R670 ERDS2TJ223T 22K 1/4W R671 ERDS2TJ683T 68K 1/4W R672 ERDS2TJ102T 1K 1/4W R673 ERDS2TJ102T 1K 1/4W R674 ERDS2TJ122T 1.2K 1/4W R675 ERDS2TJ182T 1.8K 1/4W R676 ERDS2TJ222T 2.2K 1/4W R677 ERDS2TJ272T 2.7K 1/4W file:///E|/_MANUALS/TECHNICS/technics_sl-pd7nasvc_[ET]/NA/SL-PD7/SVC/s1703000000.html[30/09/2009 12:49:21]...
- Page 69 1K 1/4W R814 ERDS2TJ102T 1K 1/4W R815 ERDS2TJ472T 4.7K 1/4W R816 ERDS2TJ472T 4.7K 1/4W R817 ERDS2TJ473T 47K 1/4W R818 ERDS2TJ473T 47K 1/4W R819 ERDS2TJ100T 10 1/4W R820 ERDS2TJ100T 10 1/4W R851 ERDS2TJ562T 5.6K 1/4W R852 ERDS2TJ102T 1K 1/4W file:///E|/_MANUALS/TECHNICS/technics_sl-pd7nasvc_[ET]/NA/SL-PD7/SVC/s1703000000.html[30/09/2009 12:49:21]...
- Page 70 ECUV1C104KBV 0.1 16V C714 ECEA0JKA101I 100 6.3V C715 ECUV1H272KBV 2700P 50V C716 ECUV1H821KBN 820P 50V C717 ECUV1C104ZFV 0.1 16V C718 ECUV1A224KBV 0.22 10V C721 ECUV1H100DCV 10P 50V C722 ECUV1H100DCV 10P 50V C723 ECEA1AKA221I 220 10V C724 ECUZ1E104MBN 0.1 25V file:///E|/_MANUALS/TECHNICS/technics_sl-pd7nasvc_[ET]/NA/SL-PD7/SVC/s1703000000.html[30/09/2009 12:49:21]...
- Page 71 0 1/10W RJ710 ERJ6GEY0R00V 0 1/10W RJ712 ERJ6GEY0R00V 0 1/10W RJ713 ERJ6GEY0R00V 0 1/10W RJ714 ERJ6GEY0R00V 0 1/10W RJ721 ERJ3GEY0R00V 0 1/16W RJ722 ERJ3GEY0R00V 0 1/16W RJ723 ERJ3GEY0R00V 0 1/16W RJ724 ERJ3GEY0R00V 0 1/16W RJ725 ERJ3GEY0R00V 0 1/16W file:///E|/_MANUALS/TECHNICS/technics_sl-pd7nasvc_[ET]/NA/SL-PD7/SVC/s1703000000.html[30/09/2009 12:49:21]...
- Page 72 0 1/16W RJ736 ERJ3GEY0R00V 0 1/16W RJ737 ERJ3GEY0R00V 0 1/16W RJ738 ERJ3GEY0R00V 0 1/16W RJ739 ERJ3GEY0R00V 0 1/16W RJ740 ERJ3GEY0R00V 0 1/16W RJ741 ERJ3GEY0R00V 0 1/16W RJ742 ERJ3GEY0R00V 0 1/16W TEST JUMPER TJ701 EYF8CU TEST JUMPER TOP PREVIOUS NEXT file:///E|/_MANUALS/TECHNICS/technics_sl-pd7nasvc_[ET]/NA/SL-PD7/SVC/s1703000000.html[30/09/2009 12:49:21]...
- Page 73 TOP PREVIOUS NEXT Ref. No. Part No. Part Name & Description Remarks PACKING MATERIALS RPGX0745 PACKING CASE RPNX0099-2 POLYFOAM (SET) RPFX0005 MIRAMAT BAG ACCESSORIES RJA0065-A AC CORD RQT5763-P O/I BOOK RQT5764-C O/I BOOK [M]PC RJL2P004B08A STEREO CONNECTOR TOP PREVIOUS NEXT file:///E|/_MANUALS/TECHNICS/technics_sl-pd7nasvc_[ET]/NA/SL-PD7/SVC/s1704000000.html[30/09/2009 12:49:49]...
- Page 74 17.5 Packaging TOP PREVIOUS TOP PREVIOUS file:///E|/_MANUALS/TECHNICS/technics_sl-pd7nasvc_[ET]/NA/SL-PD7/SVC/s1705000000.html[30/09/2009 12:49:56]...
- Page 75 13:02:27]...