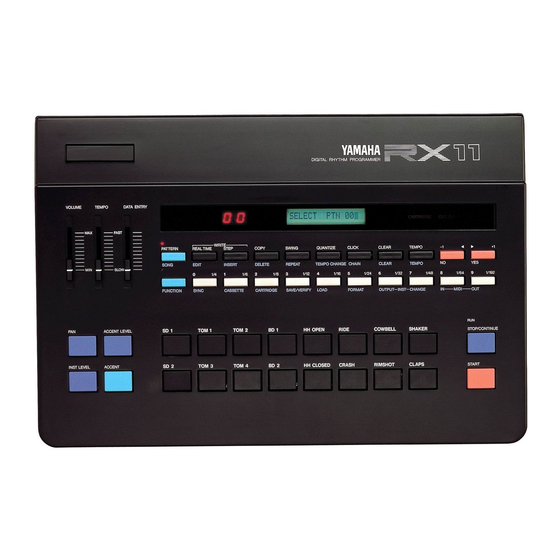
Yamaha RX11 Owner's Manual
Digital rhythm programmer
Hide thumbs
Also See for RX11:
- Owner's manual (37 pages) ,
- Supplementary manual (28 pages) ,
- Owner's manual (37 pages)
Table of Contents
Advertisement
Advertisement
Table of Contents

Related Manuals for Yamaha RX11


Summary of Contents for Yamaha RX11
- Page 1 YAMAHA AUTHORIZED PRODUCT MANUAL DIGITAL RHYTHM PROGRAMMER...
- Page 2 YAMAHA DIGITAL RHYTHM PROGRAMMER OWNER’S MANUAL...
-
Page 3: Table Of Contents
PCM sound storage and reproduction system. With the RX11 you will be able to program virtually any type of rhythm pattern you required for your music, and since the instrument sounds are digitally recorded, they are indistinguishable from live percussion instruments. - Page 4 CONTROL PANEL...
- Page 5 CONNECTIONS...
- Page 7 To avoid broken cords and short circuits, be sure to unplug Be sure to connect the RX11 to an AC power supply that all connectors by grasping the respective plugs—NOT the meets the power supply specifications listed on the rear of cords.
-
Page 8: The Instruments
Medium bass drum 1 Using either a pair of headphones plugged into the RX11 Medium bass drum 2 PHONES jack, a stereo sound system fed from the RX11 L HH OPEN Open Hi-Hat 1 and R OUTPUT jacks, or a sound system incorporating a Open Hi-Hat 2 mixer fed from the RX11’s individual instrument outputs,... -
Page 9: Some Instrument Limitations
The LCD panel will indicate the selected instru- ment followed by the currently set PAN position—e.g. “RIM Some of the RX11 instruments can not be used together on L = 08 R = 08” would indicate that RIMSHOT is currently the same beat: i.e. -
Page 10: Instrument Output
Selecting patterns (EX: pattern 00 through 36 — that can be played immediately. To select a pattern the RX11 must be in the pattern mode— this is the mode that is active when the RX11 is initially turned on. The red LED indicator above the PATTERN label on the green PATTERN/SONG selector is lighted, and the LCD panel reads either “SELECT PTN XX”... -
Page 11: The Start And Stop/Continue Buttons
The second part of the time signature is entered using the fraction markings (1/4, 1/8, 1/6, etc.) over the number buttons. The RX11 will accept time signatures up to 99/32; 1/48 and 1/192 inputs will be ignored. - Page 12 1/4 note, every 1/8 note, etc.— can be adjusted using the CLICK function to be discussed later). The RX11 will continue cycling through the full length of the pattern while you record. Adjust the tempo using the TEMPO control, and start playing.
-
Page 13: Step-Write Pattern Programming
“Quantize” section been reached for each bar. The RX11 will cycle back to the below. Then come back to this section and try out first beat of bar 1 after the last beat of the last bar has been the function. -
Page 14: Quantize
Enter BD on first bent — QUANTIZE Applied to the Step-Write Mode — In the step write mode, the quantize function can save pro- gramming time by minimizing the number of steps required to enter each part. If, for example, QUANTIZE is set to 1/16, the beat count will proceed from 1 to 16 per bar. -
Page 15: Click Time
Single patterns can be cleared by selecting the pattern to be cleared and then pressing the CLEAR button. To confirm your intention to clear the pattern the RX11 LCD panel will respond with “CLEAR PTN XX?” —where “XX” is the number of the selected pattern. -
Page 16: Instrument Clear
If a pattern is already programmed in the pattern number to which a pattern or connected pair of patterns will be copied, the RX11 will confirm your intention to write a new pattern into that location with “REWRITE PTN XX?” on the LCD panel. -
Page 17: The Swing Function 16
Pattern Copy function works ONLY in the real time write mode, and must be set to the required value before writing the pattern or rhythm lines within a pattern to which swing is to be applied. Further, the swing function works only with quantize values of 1/8 or 1/16. -
Page 18: Song Operations
When used in a song, the individual patterns are Song Editing (EX: pattern 01 + 03 + 12 +..) referred to as the “parts” of the song. The RX11 has a song memory which is separate from the pattern memory, and is capable of storing up to 10 different songs (numbered 0 through 9). -
Page 19: The Delete Function
Insert (EX: insert new part-pattern 32- between parts 2 and 3) Delete (EX: delete part 3) Repeats The repeat function can save a considerable amount of programming time by making it possible to repeat any part or group of parts up to 100 times. The repeat function is used in the edit mode. -
Page 20: Programming Tempo Changes
Entering Repeats (EX: repeat part 3, 3 times) The TEMPO CHANGE function is used in the edit mode. Locate the part IMMEDIATELY BEFORE the desired tempo change using the –1/NO and +1/YES buttons, then press the TEMPO CHANGE button. The LCD panel will respond with “TEMPO IS 00 UP”. -
Page 21: Song Clear
Basically, the tempo change range is +50. Larger tempo changes can be programmed, however, by entering two consecutive tempo changes. The only restriction is that the total tempo range of the RX11 is from 40 to 250, and no tempo change can exceed these limits. Song Clear Single songs can be cleared by selecting the song to be cleared and then pressing the CLEAR button. -
Page 22: Cassette Operations
Save/Verify The SAVE/VERIFY button permits access to two functions: 1) Save actually stores the data in the RX11 memory onto cassette tape, and 2) Verify automatically compares the data written onto the cassette with that in the RX11 memory in order to confirm that the data has been properly saved. -
Page 23: Load
. Load Save Data to Cassette and Verify To load data from a cassette tape into the RX11 memory, first enter the cassette control mode by pressing the CAS- SETTE button while holding down the FUNCTION button. -
Page 24: Cartridge Operations
CARTRIDGE button. Format The first step in using a RAM-1 data cartridge for storage of RX11 patterns and songs is to format the cartridge. This is All Save done by first turning the cartridge’s memory protect switch OFF, inserting the cartridge firmly into the RX11 cartridge... -
Page 25: Single Save
+1/YES button, then input the cartridge pattern memory location number into which the pattern is to be saved. Press +1/YES again and the RX11 will reconfirm your intention to save the pattern with the Enter CRT number “ARE YOU SURE?”... -
Page 26: All Load
“MEM” number, and pressing –1/NO again returns to the “LOAD SINGLE PTN?” display, from which you can return This function loads the entire RX11 pattern and song memory to the cartridge control mode by pressing the –1/NO button from the data cartridge. Press the LOAD button in the again. -
Page 27: Midi Functions
5. START/STOP/CONTINUE TRANSMISSION & RECEP- 1. MIDI CLOCK RECEPTION & TRANSMISSION TION The RX11 can be synchronized to the clock of an external Start, stop and continue commands controlling pattern, MIDI sequencer or music computer (such as the Yamaha song or song chain operation can be transmitted to QX-series sequencers or CX5M Music Computer). -
Page 28: Sync Modes
3 – RECEIVE CHANNEL (1 through 16) – When the OMNI mally, the LCD panel will read “INTERNAL CLOCK” mode is turned OFF, the RX11 must be set to receive MIDI indicating that the internal sync mode is selected. To select data on a specific channel. -
Page 29: Instrument Key Numbers
“CH INFO AVAIL” (default para- or “RECEIVE CH = XX” display. meter). This means that the RX11 is ready to receive MIDI data. To turn MIDI reception OFF press the -1/NO button, causing the display to read “CH INFO UNAVAIL”. The Instrument Key Numbers +1/YES and –1/NO buttons turn this function on or off,... -
Page 30: The Initialize Function
BULK DUMP REQUEST signal from an SYSTEM EXCLUSIVE INFORMATION includes PARA- external MIDI device while the RX11 is in the song or pat- METER CHANGE, BULK DATA, and BULK DUMP RE- tern modes, if the MIDI OUT button is pressed instead of the QUEST data. - Page 31 RX11 will return to the pattern or song mode, but the SYSTEM EXCLUSIVE AVAILABLE mode will remain active. MIDI Transmission Parameters...
-
Page 32: Error Messages
: the transmitting equipment–e.g. the transmitting equipment power is turned OFF or ON while the RX11 is in the MIDI PTN MEMORY FULL! receive mode. In either case, check the RX11 MIDI receive... -
Page 33: Specifications
SPECIFICATIONS SOUND SOURCE D I S P L A Y ROM: 256 KBIT WAVE ROM x 6 LCD: 16 CHARACTERS NO. OF VOICES: 29 LCD DISPLAY 7 SEGMENTS x 2 COLUMNS LED INDICATOR: PATTERN, SONG, CARTRIDGE, EXT MEMORY CAPACITY CLK, RUN NO. -
Page 34: Pattern Chart
PATTERN CHART... - Page 35 B computing device in accordance with combo equipment dealer for suggestions and/or corrective measures. If you can not locate a franchised Yamaha those specifications listed in subpart J of part 15 of the FCC rules. Those rules are designed to provide a reason- combo equipment dealer in your general area contact able measure of protection against such interference.
- Page 36 YAMAHA Yamaha Corporation of America 6600 Orangethorpe Avenue, P.O. Box 6600, Buena Park, CA 90622-6600 10/27/97 26997 RX11 OM...