Table of Contents
Advertisement
Quick Links
INSTALLATION INSTRUCTIONS
HEAT PUMP OUTDOOR UNITS FEATURING
EARTH-FRIENDLY R-410A REFRIGERANT
(-)PNL-*AZ MODEL SERIES - 13 SEER
(-)PPL-JAZ MODEL SERIES - 14 SEER
!
RECOGNIZE THIS SYMBOL AS AN INDICATION OF IMPORT
WARNING
!
THESE INSTRUCTIONS ARE INTENDED AS AN AID TO
QUALIFIED, LICENSED SERVICE PERSONNEL FOR PROPER
INSTALLATION, ADJUSTMENT AND OPERATION OF THIS
UNIT. READ THESE INSTRUCTIONS THOROUGHLY BEFORE
ATTEMPTING INSTALLATION OR OPERATION. FAILURE TO
FOLLOW THESE INSTRUCTIONS MAY RESULT IN IMPROPER
INSTALLATION, ADJUSTMENT, SERVICE OR MAINTENANCE
POSSIBLY RESULTING IN FIRE, ELECTRICAL SHOCK,
PROPERTY DAMAGE, PERSONAL INJURY OR DEATH.
PLEASE READ CAREFULLY AND KEEP IN A SAFE PLACE FOR FUTURE REFERENCE BY A SERVICEMAN
[ ] INDICATES METRIC CONVERSIONS
DO NOT DESTROY THIS MANUAL
ANT SAFETY INFORMA
(14 SEER MODELS &
13 SEER MODELS IN
CERTAIN MATCHED
SYSTEMS)
r e f r i g e r a n t
TION!
92-20522-43-07
SUPERSEDES 92-20522-43-06
Advertisement
Table of Contents
Troubleshooting

Related Manuals for Rheem PNL-*AZ Series


Summary of Contents for Rheem PNL-*AZ Series
-
Page 1: Installation Instructions
INSTALLATION INSTRUCTIONS HEAT PUMP OUTDOOR UNITS FEATURING EARTH-FRIENDLY R-410A REFRIGERANT r e f r i g e r a n t (-)PNL-*AZ MODEL SERIES - 13 SEER (-)PPL-JAZ MODEL SERIES - 14 SEER RECOGNIZE THIS SYMBOL AS AN INDICATION OF IMPORT ANT SAFETY INFORMA TION! WARNING... -
Page 2: Table Of Contents
TABLE OF CONTENTS 1.0 SAFETY INFORMATION ..........3 2.0 GENERAL INFORMATION . -
Page 3: Safety Information
1.0 SAFETY INFORMATION WARNING These instructions are intended as an aid to qualified, licensed service per- sonnel for proper installation, adjustment and operation of this unit. Read these instructions thoroughly before attempting installation or operation. Failure to follow these instructions may result in improper installation, adjust- ment, service or maintenance possibly resulting in fire, electrical shock, prop- erty damage, personal injury or death. -
Page 4: General Information
2.0 GENERAL WARNING The manufacturer’s warranty does not cover any damage or defect to the air conditioner caused by the attachment or use of any components. Accessories or devices (other than those authorized by the manufactur- er) into, onto or in conjunction with the air conditioner. You should be aware that the use of unauthorized components, accessories or devices may adversely affect the operation of the air conditioner and may also endanger life and property. -
Page 5: Dimensions
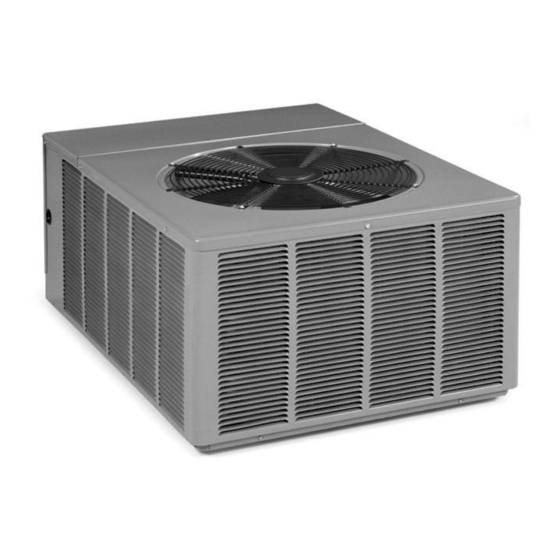
2.3 DIMENSIONS (SEE FIGURE 1) UNIT MODEL NUMBER EXPLANATION FIGURE 1 DIMENSIONS AND INSTALLATION CLEARANCES (-)PNL – 036 COOLING CONNECTION FITTING AIR DISCHARGE AIR DISCHARGE ALLOW 600 [1524 mm] CLEARANCE Z - SWEAT WITH SCROLL ALLOW 60” [1524 mm] CLEARANCE COMPRESSOR VARIATIONS A - SERIES = FULL-FEATURED... -
Page 6: Electrical And Physical Data
2.4 ELECTRICAL & PHYSICAL DATA (SEE TABLES 1 & 2) TABLE 1 (-)PNL ELECTRICAL AND PHYSICAL DATA ELECTRICAL PHYSICAL Model Compressor Fuse or HACR Fan Motor Minimum Refrig. Outdoor Coil Weight Phase Number Circuit Breaker Full Load Circuit Rated Load Locked Rotor Frequency (Hz) (-)PNL-... -
Page 7: Locating Unit
3.0 LOCATING UNIT 3.1 CORROSIVE ENVIRONMENT The metal parts of this unit may be subject to rust or deterioration if exposed to a corrosive environment. This oxidation could shorten the equipment’s useful life. Corrosive elements include, but are not limited to, salt spray, fog or mist in seacoast areas, sulphur or chlorine from lawn watering systems, and various chemical conta- minants from industries such as paper mills and petroleum refineries. -
Page 8: For Units With Space Limitations
FIGURE 2 RECOMMENDED ELEVATED INSTALLATION ELEVATION ABOVE ANTICIPATED SNOW- ’FALL IS NECESSARY. DO NOT BLOCK OPENINGS IN BASE PAN. REFER TO FIGURE 1. 3.4 FOR UNITS WITH SPACE LIMITATIONS In the event that a space limitation exists, we will permit the following clearances: Single Unit Applications: Heat pump grille side clearances below 6 inches will reduce unit capacity and efficiency. -
Page 9: Factory-Prepferred Tie-Down Method
3.7 FACTORY-PREFERRED TIE-DOWN METHOD INSTRUCTIONS IMPORTANT: These instructions are intended as a guide to securing equipment for wind-load ratings of “120 MPH sustained wind load” and “3-second, 150 MPH gust.” While this procedure is not mandatory, the Manufacturer does recommend that equipment be properly secured in areas where high wind damage may occur. -
Page 10: Refrigerant Connections
4.0 REFRIGERANT CONNECTIONS All units are factory charged with Refrigerant 410A. All models are supplied with service valves. Keep tube ends sealed until connection is to be made to prevent system contamination. 5.0 REPLACEMENT UNITS To prevent failure of a new heat pump unit, the existing tubing system must be cor- rectly sized and cleaned or replaced. -
Page 11: Vertical Separation
7.3 VERTICAL SEPARATION Keep the vertical separation to a minimum. Use the following guidelines when installing the unit: DO NOT exceed the vertical separations as indicated on Table 5. It is recommended to use the smallest liquid line size permitted to minimize sys- tem charge which will maximize compressor reliability. -
Page 12: Tubing Connections
TABLE 4 SUCTION LINE LENGTH/SIZE VS. CAPACITY MULTIPLIER (R-410A) ⁄ 2 Ton ⁄ 3 Ton ⁄ 4 Ton 5 Ton Unit Size Suction Line 3/4 " I.D. 3/4 " I.D. 3/4 " I.D. 7/8 " I.D. 7/8 " I.D. 7/8 " I.D. 7/8 "... - Page 13 TABLE 5 LIQUID LINE SIZE — OUTDOOR UNIT ABOVE OR BELOW INDOOR COIL Liquid Line Size Outdoor unit above or below indoor coil Line Size (Heat Pumps Only) System Connection Line Size Total Equivalent Length - Feet Capacity Size (Inch OD) (Inch I.D.) Maximum Vertical Separation - Feet ⁄...
-
Page 14: Demand Defrost Control
8.0 DEMAND DEFROST CONTROL AND HIGH/LOW PRESSURE CONTROLS The demand defrost control is a printed circuit board assembly consisting of solid state control devices with electro-mechanical outputs. The demand defrost control monitors the outdoor ambient temperature, outdoor coil temperature, and the com- pressor run-time to determine when a defrost cycle is required. -
Page 15: High/Low Pressure Control Monitoring
8.6 HIGH/LOW PRESSURE CONTROL MONITORING - ENHANCED DEFROST CONTROL ONLY (Units with Model Numbers Ending with “AZ”). Status of high and low pressure controls is monitored by the enhanced feature demand defrost control and the following actions are taken. High Pressure Control – Provides active protection in both cooling and heating modes at all outdoor ambient temperatures. -
Page 16: Start Up & Performance
to both the high and low sides of the system through adequate connections. Use the largest size connections available since restrictive service connections may lead to false readings because of pressure drop through the fittings. IMPORTANT: Compressors (especially scroll type) should never be used to evacu- ate the heat pump system because internal electrical arcing may result in a dam- aged or failed compressor. -
Page 17: Final Leak Testing
Calculate actual charge required with installed liquid line size and length using: 1/4” O.D. = .3 oz./ft. 5/16” O.D. = .4 oz./ft. 3/8” O.D. = .6 oz./ft. 1/2” O.D. = 1.2 oz./ft. With an accurate scale (+/– 1 oz.) or volumetric charging device, adjust charge dif- ference between that shown on the unit data plate and that calculated for the new system installation. -
Page 18: Grounding
13.2 GROUNDING A grounding lug is provided near the contactor for a ground wire. WARNING The unit must be permanently grounded. Failure to do so can cause elec- trical shock resulting in severe personal injury or death. 13.3 CONTROL WIRING (See Figure 4) If the low voltage control wiring is run in conduit with the power supply, Class I insu- lation is required. -
Page 19: Time Delay Control (Tdc)
NOTE: The installation of a crankcase heater is recommended if the system charge exceeds the values in Table 8. All 3-phase models come with a crankcase heater facto- ry installed. TABLE 8 MAXIMUM SYSTEM CHARGE VALUES: (-)PNL/(-)PPL Charge Limit Model Compressor Without Size*... -
Page 20: Troubleshooting
15.0 TROUBLE SHOOTING In diagnosing common faults in the heat pump system, develop a logical thought pattern as used by experienced technicians. The charts which follow are not intend- ed to be an answer to all problems but only to guide the technician’s thinking. Through a series of yes and no answers, follow the logical path to a likely conclu- sion. -
Page 21: Cooling Mechanical Checks Flow Chart
15.2 COOLING MECHANICAL CHECKS FLOW CHART Unit Running? Go to Electrical Pressure problems? Checks Flow Chart High Head Pressure Low Head Pressure Low Suction Pressure Dirty Outdoor Coil Low on Charge Dirty Filters Inoperative Outdoor Fan Open IPR Valve Dirty Indoor Coil Overcharge Low Ambient Temperature Inadequate Indoor Air Flow... -
Page 22: Heating Mechanical Checks Flow Chart
15.3 HEATING MECHANICAL CHECKS FLOW CHART Unit Running? Go to Electrical Pressure problems? Checks Flow Chart High Head Pressure Low Head Pressure Low Suction Pressure Dirty Filters Low on Charge Dirty Outdoor Coil Dirty Indoor Coil Low Indoor Temperature Inadequate Air Flow Over Outdoor Coil Inoperative Indoor Blower Open IPR Valve... -
Page 23: Defrost Mechanical Checks Flow Chart
15.4 DEFROST MECHANICAL CHECKS FLOW CHART DEFROST SYSTEM No Defrost Incomplete Defrost Excessive Defrost Reversing Valve Stuck Poor Sensor Location Wrong Defrost Control Timer Setting No Defrost Timer Wrong Defrost Control Control Power Timer Setting Poor Sensor Location Failed Defrost Control Failed Defrost Relay Low System Charge (doesn’t stop O.D. -
Page 24: Subcooling Calculation
15.5 SUBCOOLING CALCULATION TABLE 10 TEMPERATURE PRESSURE CHART 1. Measure the liquid pressure at the liquid line service valve. TEMP R-410A 2. Convert the liquid line pressure to saturated temperature. See Table 10. (Deg. F) PSIG 3. Measure the liquid line temperature at the liquid line service valve. -150 —... -
Page 25: General Troubleshooting Chart
15.6 GENERAL TROUBLE SHOOTING CHART WARNING Disconnect all power to unit before servicing. Contactor may break only one side. Failure to shut off power can cause electrical shock resulting in personal injury or death. SYMPTOM POSSIBLE CAUSE REMEDY Unit will not run •... -
Page 26: Service Analyzer Chart
15.7 SERVICE ANALYZER CHARTS COMPRESSOR OVERHEATING SYMPTOMS POSSIBLE CAUSE CHECK/REMEDIES High superheat Low charge Check system charge Faulty metering device Restricted cap tube, TEV (TXV) Power element superheat adjustment Foreign matter stopping flow High internal load Hot air (attic) entering return Heat source on;... - Page 27 SYMPTOMS POSSIBLE CAUSE CHECK OR REMEDIES Short cycling of compressor (cont.) Low charge Check system charge Low evaporator air flow Dirty coil Dirty filter Duct too small or restricted Faulty run capacitor Replace Faulty internal overload Replace compressor Faulty Compressor Valves Fast equalization/ Replace compressor and examine Low pressure difference...
- Page 28 LOSS OF LUBRICATION SYMPTOMS POSSIBLE CAUSE CHECK OR REMEDIES Compressor failures Line tubing too long Add oil to the recommended level Line tubing too large Reduce pipe size to improve oil return Low suction pressure Low charge Check system charge Refrigerant leaks Repair and recharge Cold, Noisy compressor - Slugging...
- Page 29 THERMOSTATIC EXPANSION VALVES SYMPTOMS POSSIBLE CAUSE CHECK OR REMEDIES High Superheat, Low Suction Pressure Moisture freezing and blocking valve Recover charge, install filter-drier, evacuate system, recharge Dirt or foreign material blocking valve Recover charge, install filter-drier, evacuate system, recharge Low refrigerant charge Correct the charge Vapor bubbles in liquid line Remove restriction in liquid line...
- Page 30 THERMOSTATIC EXPANSION VALVES SYMPTOMS POSSIBLE CAUSE CHECK OR REMEDIES Superheat is low to normal Unequal evaporator circuit loading Ensure air flow is equally distributed with low suction pressure through evaporator Check for blocked distributor tubes Low load or airflow entering Ensure blower is moving proper air evaporator coil Remove/Correct any air flow...
-
Page 31: Wiring Diagrams
16.0 WIRING DIAGRAMS FIGURE 5 SINGLE-PHASE WIRING DIAGRAM (-)PNL/(-)PPL-***JAZ (208/230V SINGLE PHASE) - Page 32 FIGURE 6 THREE-PHASE WIRING DIAGRAM (-)PNL-***CAZ (208/230V THREE-PHASE)
- Page 33 FIGURE 7 THREE-PHASE — 480V WIRING DIAGRAM (-)PNL-***DAZ (460V THREE-PHASE)
- Page 36 CM 1208...