Table of Contents
Advertisement
Advertisement
Table of Contents

Related Manuals for Bissell POWERFORCE HELIX 1240 series


Summary of Contents for Bissell POWERFORCE HELIX 1240 series
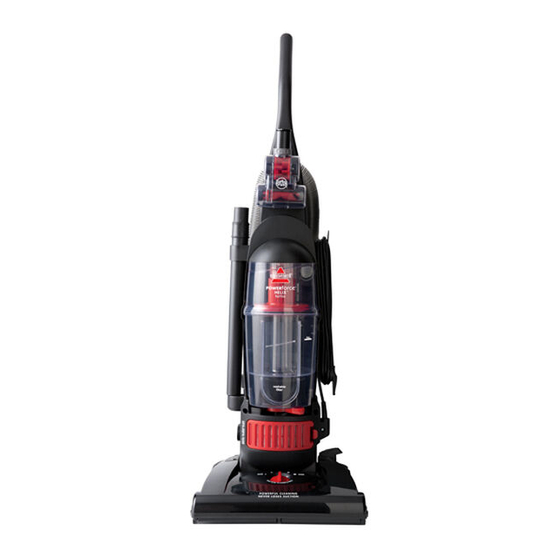
- Page 1 1240, 68C7 SERIES *Product images may vary...
-
Page 2: Safety Instructions
If the plug does not fit fully in the outlet, reverse the plug. If it still does not fit, contact a qualified electrician to install a proper outlet. Do not change the plug in any way. www.BISSELL.com... -
Page 3: Table Of Contents
Thanks for buying a BISSELL vacuum Safety Instructions... 2 We’re glad you purchased a BISSELL vacuum. Everything we know about Product View....4... -
Page 4: Product View
To reduce the risk of electric shock, turn danger of suffocation, keep away from you are familiar with all instructions and power switch off and disconnect polarized babies and children. operating procedures. plug from electrical outlet before performing maintenance or troubleshooting checks. www.BISSELL.com... -
Page 5: Assembly
6. Place the TurboBrush® Tool in the bracket by aligning the bottom of bracket with the opening of the brush roll and snap the TurboBrush® Tool into place. www.BISSELL.com... -
Page 6: Operations
Never place your fingers under the cleaner when it is running. Never place powerfoot on furniture or uneven surfaces. Do not place vacuum cleaner close enough to objects to pull them into rotating brush. www.BISSELL.com... -
Page 7: Height Adjustments/Tools
TurboBrush® Tool (Select Models): Use rotating brush action for small flat areas such as stairs, and cushions. Press down gently and pull towards you in a raking motion. Too much pressure will cause the brush to stop rotating. www.BISSELL.com... -
Page 8: Maintenance & Care
Pull straight down and remove. Make sure all parts are completely dry before replacing. 8. To replace primary separator, position top of primary separator inside clear center cavity and turn toward the right to lock tabs into place. www.BISSELL.com... -
Page 9: Cleaning/Replacing Post-Motor Filter
Remove and replace when filter becomes dirty. The white, pleated post-motor filter is NOT washable. 3. Replace the door by inserting the tabs on the left side and snapping the right side into place. post-motor filter www.BISSELL.com... -
Page 10: Checking Rotating Floor Brush/Drive Belt
Put right side brush roll end cap back into the housing. Pull on the brush roll applying tension to the drive belt. Put left side end cap back in the housing. passageway 9. Reposition brush cover and fasten six screws back into place. motor pulley www.BISSELL.com... -
Page 11: Replace Drive Belt
Reattach the foot hose and secure with screw. 6. If the clog persists, follow steps for checking rotating floor brush on page 10 and inspect the air passageway for obstructions. www.BISSELL.com... -
Page 12: Turbobrush Tool Maintenance
5. Replace brush inside belt and place ends into slots on the sides. 6. Reposition top cover making sure to line up inside tab at the front with the opening on the cover. Twist collar until opening is at the bottom to lock into place. www.BISSELL.com... -
Page 13: Troubleshooting
Please do performed by an authorized service representative. not return Thank you for selecting a BISSELL product. this product For any questions or concerns, BISSELL is happy to to the store. be of service. Contact us directly at 1-800-237-7691. www.BISSELL.com... -
Page 14: Replacement Parts
Style 12 203-1215 Pre-Motor Filter 1602290 Post Motor Filter, Allergen, Style 12 203-7171 TurboBrush® Tool 203-7170 TurboBrush® Bracket Febreze and related trademarks are owned by the Procter & Gamble Company, Cincinnati, Ohio and used under license by Bissell Homecare, Inc. www.BISSELL.com... -
Page 15: Warranty
Limited One-Year Warranty Subject to the *EXCEPTIONS AND EXCLUSIONS identified below, upon Website: receipt of the product BISSELL will repair or replace (with new or www.BISSELL.com remanufactured components or products), at BISSELL’s option, free of charge from the date of purchase by the original purchaser, for Call: one year any defective or malfunctioning part. -
Page 16: Product Registration
Sunday 10am - 7pm ET Visit the BISSELL website: www.BISSELL.com When contacting BISSELL, have model number of cleaner available. Please record your Model Number: ___________________ Please record your Purchase Date: ___________________ NOTE: Please keep your original sales receipt. It provides proof of purchase date in the event of a warranty claim.