Advertisement
Available languages
Available languages
Quick Links
C.
MEMORY BUTTON
Recalls the maximum or minimum temperature of individual channels
D.
ALARM/24HR ALARM OFF BUTTON
Sets the time for the alarms
E.
MODE/SET BUTTON
Toggles the display modes and confirms entry while setting the values for
Wireless Thermometer with Self-Setting
the display
Atomic Clock
F.
RADIO RECEPTION SIGNAL
Indicates the condition of radio reception
G. UP ( + ) BUTTON
MODEL: RMR112A
Advances the value of a setting
USER'S MANUAL
H. ZONE BUTTON
Selects the US time zone
MAIN UNIT
I .
ALARM (AL) ON/OFF BUTTON
Enables or disables the alarms
J.
RESET BUTTON
Returns all settings to default values
°
°
K.
C/
F SLIDE SWITCH
Selects between Centigrade (°C) and Fahrenheit (°F)
L.
BATTERY COMPARTMENTS
One on each side. Each accommodates an AA-size battery
M. TABLE STAND
For standing the main unit on a flat surface
N.
WALL-MOUNT RECESSED HOLE
For mounting the main unit on a wall
MAIN FEATURES: REMOTE UNIT
A.
LCD
Displays the current temperature monitored by the remote unit
B.
LED INDICATOR
Flashes when the remote unit transmits a reading
°
°
C
C/
F SLIDE SWITCH
Selects between Centigrade (°C) and Fahrenheit (°F)
D.
CHANNEL SLIDE SWITCH
+
ZONE
Designates the remote unit Channel 1, Channel 2 or Channel 3
E.
RESET BUTTON
Returns all settings to default values
F.
BATTERY COMPARTMENT
Accommodates two AA-size batteries
G. BATTERY DOOR
Watertight sealed door is removed by sliding in downward motion.
H. WALL-MOUNT HOLDER
Supports the remote unit in wall-mounting
I.
REMOVABLE TABLE STAND
For standing the remote unit on a flat surface
REMOTE UNIT
BEFORE YOU BEGIN
For best operation:
A
C
1. Assign different channels to different remote units.
B
D
2. Insert batteries for remote units before inserting batteries into the main unit.
C
F
RESET
CH
1
2
3
3. Place the main unit as close as possible next to the remote unit, reset the
E
main unit after installing batteries. This will ensure easier synchronization
between the transmission and reception of signals.
F
4. Position the remote unit and main unit within effective transmission range,
which, in usual circumstances, is 20 to 30 meters or 60 to 100 feet.
NOTE: The effective range is vastly affected by the building materials and
G
where the main and remote units are positioned. Try various set-ups for best
result.
Though the remote units are weather-resistant, they should be placed away
from direct sunlight, rain or snow.
BATTERY AND CHANNEL INSTALLATION:
REMOTE UNIT
The remote unit uses two AA-size batteries. To install them:
1. Gently press against battery door and slide downward to remove.
H
2. Select the channel number on the CHANNEL slide switch.
Each remote unit (up to 3) will need to be set to a different channel.
I
3. Select the temperature display unit on the
C
F
RESET
CH
1
2
3
ENGLISH
INTRODUCTION
Thank you for purchasing the Oregon Scientific RMR112A Indoor-Outdoor
Thermometer with 433MHz-cable free temperature sensor and radio-controlled
calendar clock.
4. Insert the batteries according to the polarities shown inside the battery
compartment.
This unique, versatile unit includes the indoor temperature, outdoor temperature
and calendar clock station. The remote unit transmits the outdoor temperature
5. Replace the battery compartment door.
back to the main unit via a radio signal.
Replace the batteries when the low-battery indicator of the particular channel
lights up on the main unit. (Repeat the steps described in section "BEFORE
The main unit has large read-outs for indoor temperature, calendar, clock and
temperatures collected and transmitted by the remote unit. The main unit can
YOU BEGIN")
support up to three remote units.
NOTE: Once a channel is assigned to a remote unit, you can only change the
channel by removing the batteries from the remote unit or resetting the main
The main unit is capable of keeping track of the maximum and minimum
temperature of different sites. No wire installation is required.
unit.
The RMR112A operates at 433MHz. The calendar clock is radio-controlled. It
automatically synchronizes its current time and date when it receives the radio
Standard Alkaline batteries contain signifcant amounts of water. Because of
signal generated from Colorado, USA (WWVB) which is operated by the US
this they will freeze in low temperatures of approximately 10°F (-12°C).
Department of Commerce's National Institute of Standards and Technology.
Disposable Lithium batteries have a much lower threshold for temperature with
You can also set the calendar clock manually when it is out of range of the
an estimated freezing range of below -40°F (-40°C). The Liquid Crystal Display
atomic clock signal. Other features include five-language display, crescendo
in outdoor thermometers will remain operational to -20°F (-29°C) with adequate
alarm and interchangeable display modes.
power.
Wireless ranges can be impacted by a variety of factors such as extremely cold
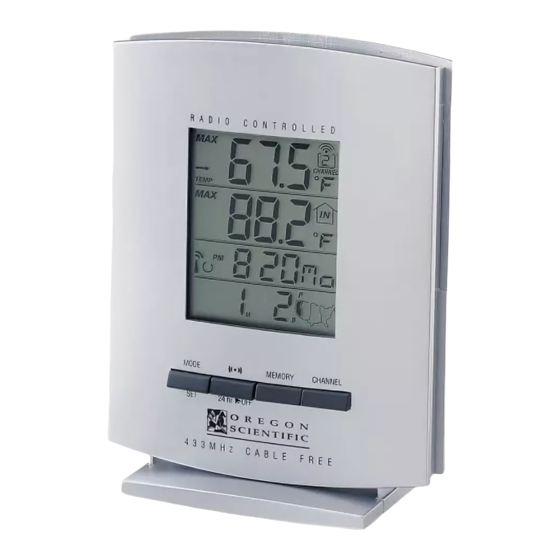
MAIN FEATURES: MAIN UNIT
temperatures. Extreme cold may temporarily reduce the effective range between
thesensor and the base station. If the unit's performance fails due to low
A.
FOUR-LINE DISPLAY
temperature, the unit will resume proper functioning as the temperature rises to
Facilitates easy reading of remote and indoor temperatures and calendar
clock
within the normal temperature range (i.e no permanent damage will occur to
the unit due to low temperatures).
B.
CHANNEL BUTTON
Selects among different channels
BATTERY INSTALLATION: MAIN UNIT
The main unit uses two AA-size batteries. To install them,
1. Slide open the battery compartment doors.
2. Insert the batteries according to the polarities shown inside the battery
compartment.
3. Replace the battery compartment doors.
Replace the batteries when the low-battery indicator of the indoor temperature
lights up. (Repeat the steps described in section "BEFORE YOU BEGIN")
LOW BATTERY WARNING
When it is time to replace batteries, the respective low-battery indicator will
show up when the respective channel is selected. The battery level of the main
unit will be shown in the indoor temperature area when it is running low.
HOW TO USE THE TABLE STAND OR WALL
MOUNTING
The main unit has a removable table stand, which when connected, can support
the unit on a flat surface. Or you can remove the stand, store it on the back of
the unit and mount the unit on a wall using the recessed screwhole.
Wall-mount
Table stand
+
ZONE
+
ZONE
+
ZONE
As for the remote unit, it comes with a wall-mount holder and a removable
stand. Use either to hold the unit in place.
Wall-mount
Table stand
THE RESET BUTTON
This button is only used when the unit is operating in an unfavorable way or
malfunctioning. Use a blunt stylus to hold down the button. All settings will
return to their default values.
°
°
C/
F slide switch.
GETTING STARTED
Once batteries are in place for the remote units, they will start transmitting
temperature readings at 30-second intervals.
C
F
RESET
CH
1
2
3
The main unit will also start searching for signals once batteries are installed.
Upon successful reception, the individual channel temperatures will be displayed
on the top line and the indoor temperature on the second line. The main unit
will automatically update its readings at about 30-second intervals.
If no signals are received, blanks "----" will be displayed and the kinetic wave
icon will show " . ". Press CHANNEL and MEMORY at the same time to
enforce another search for about 30 seconds. This is useful in synchronizing the
transmission and reception of the remote and main units.
Repeat this step whenever you find discrepancies between the reading shown
on the main unit and that on the respective remote unit.
HOW TO CHECK REMOTE AND INDOOR
TEMPERATURES
The indoor temperature is shown on the second line of the display.
The remote temperature is shown on the top line of the display.
(One remote unit comes in your package. Up to two additional remote units can
date with the Atomic Clock's signal, but it also automatically adjusts for Daylight
be purchased and set to the additional two channels.)
Saving Time.
To check the remote temperatures, press CHANNEL to go from one channel to
Your RMR112A also offers daily alarm clock function with day and date
another. The kinetic wave display on the channel number indicates the reception
display.
of that particular channel is in good order.
If no readings are received from one particular channel for more than two minutes,
Indicators
Meaning
blanks "---" will be displayed until further readings are successfully searched.
Check to ensure that the remote unit is sound and secure. You can wait for a
little while or press CHANNEL and MEMORY at the same time to enforce an
Your last signal reception was excellent and time
synchronization with the US Atomic Clock has
immediate search. Of course no reading will be shown if no remote unit is
assigned to that channel.
Taken place.
The temperature trend indicator on the screen shows the trend of samplings
Your last signal reception was insufficient and it
is recommended that you reposition or rotate the
collected at that particular remote site. One of three trends will be shown: rising,
steady or falling.
antenna.
The displayed time has been manually set and is
not synchronized by the radio signal.
Arrow
indicator
Your radio reception is disabled and no signal
No indicator
reception will be initiated unless it is enabled
again.
Temperature
Rising
Steady
Falling
Trend
SELECTING THE APPROPRIATE TIME ZONE
CAUTION: Do not press and hold the ZONE button for more than three seconds.
If the temperature goes above or below the temperature measuring range of the
main unit or the remote unit (stated in specification), the display will show
Press and release the ZONE button to advance the time zone one step. If you
"HHH" for over high or "LLL" for under low.
press and hold the ZONE button, it will deactivate the automatic time signal
reception. (The tower icon will disappear.) To reactivate the time search, press
and hold the + button for three seconds.
HOW TO READ THE KINETIC WAVE DISPLAY
• Press the ZONE button located on the back of the unit until the correct US
The kinetic wave display shows the signal receiving status of the main unit.
time zone is indicated on the LCD panel by a darkened section of the US
map in the lower right corner of the LCD panel
There are three possible forms:
To see the time in a different time zone:
• Press the ZONE button located on the back of the unit to move one zone at
The unit is in searching mode.
a time until the desired zone is indicated on the display panel.
Temperature readings are securely reg-
The correct time for that zone will automatically be displayed.
istered.
No signals.
SETTING THE ALARM
• Press the ((•)) button until the ((•)) symbol appears in the lower left corner of
the display panel. The alarm time will then also be displayed at the bottom
MAXIMUM AND MINIMUM TEMPERATURES
of the display panel.
The maximum and minimum recorded indoor temperatures and those of each
channel will be automatically stored in memory. To display them,
• Press and hold the ((•)) button until the hour portion of the alarm time is
flashing.
1. Select the channel to be checked.
• Press + button located on the back to increase the hour by one. Or press and
2. Press MEMORY once to display the maximum temperature and press again
hold + button to rapidly advance the hour.
to display the minimum temperature. The respective indicators, MAX or
MIN will be displayed.
When the hour is set:
To clear the memory, select the channel and hold down MEMORY for two
• Press ((•)) button again and the minutes will flash.
seconds. The maximum and minimum temperatures will be erased. If you press
• Press + button located on the back to increase by one minute. Or press and
MEMORY now, the maximum and minimum temperatures will have the same
hold the + button to rapidly advance the minute to the desired time.
values as the current ones until different readings are recorded.
When the alarm time is set:
• The alarm will automatically arm itself. This will be indicated by the bell
DISCONNECTED SIGNALS
icon, just above the ((•)) icon on the display panel.
If without obvious reasons the display for a particular channel goes blank, press
CHANNEL and MEMORY at the same time to force an immediate search. If
If you do not want the alarm to sound at the time you just set:
that fails, check to ensure that:
• Press the AL ON/OFF key until the bell icon disappears.
1. The remote unit of that channel is still in place.
2. The batteries of both the remote unit and main unit are good. Replace as
ENABLING/DISABLING THE ALARM
necessary.
To turn the alarm on or off:
NOTE: When the temperature falls below the freezing point for extended periods
• Press the AL ON/OFF button
of time, the batteries of outdoor units may freeze, lowering their voltage supply
and the effective range. This may be resolved by the use of Lithium 1.5-volt
NOTE: If the alarm is on, the bell icon will appear in the lower left corner of
AA batteries which will supply voltage at much lower temperatures.
the LCD. If the alarm is off, there will be no bell icon.
3. The transmission is within range and path is clear of obstacles and
When the alarm sounds there are two ways to turn it off:
interference. Shorten the distance when necessary.
•
Press ((•)) or AL ON/OFF button The alarm will not sound again until the
next day.
TRANSMISSION COLLISION
•
Press AL ON/OFF again. The alarm will not sound again until reactivated.
Signals from other household devices, such as doorbells, home security systems
and entry controls, may interfere with those of this product and cause temporarily
MANUALLY SETTING THE TIME AND DATE
reception failure. This is normal and does not affect the general performance of
the product. The transmission and reception of temperature readings will resume
IMPORTANT: It is highly unlikely that you should ever need or want to set
once the interference recedes.
these features manually; however, in the event that you should travel outside
NOTE: SELECTION OF °C OR °F
the United States and want this capability, we include these instructions. As
soon as any manual setting changes are made, the display will indicate a loss of
The type of temperature display is selected on the main unit with the °C/°F slide
signal strength (see SIGNAL STRENGTH INDICATOR) to indicate that the
switch.
clock is now running on manual settings instead of signals received from the
Select °C for Centigrade or °F for Fahrenheit.
Atomic Clock. It is very unlikely that your unit will receive the time and date
signal in this mode. To reactivate the atomic signal press the reset button on the
NOTE: The remote temperature display on the main unit is dominated by the
rear of the unit or remove and reinsert the batteries.
selection on the °C/°F slide switch of the main unit. Whatever the display units
of the remote sensors are, they will be automatically converted to read in the °C/
Setting the Time
°F selection of the main unit.
•
Press and hold MODE button until the hour segment of the time flashes
•
Press + button until the desired hour appears on the LCD panel
ABOUT RADIO RECEPTION
NOTE: Be sure to check the AM or PM symbol for accuracy
The split-second, precise timelines of RMR112A is achieved through its
•
pre-tuned internal radio receiver that responds to a special 60kHz frequency
Press MODE button again until the minute segment of the time flashes
time signal, generated by the US Atomic Clock, one of the most accurate clocks
•
Press + button until the desired minutes appear on the LCD panel
in the world.
•
Press MODE button five more times to exit setting mode
This extraordinary timepiece, located outside Boulder, Colorado, is operated by
the US Department of Commerce's National Institute of Standards and Tech-
Setting the Year
nology.
•
Press and hold MODE button until the hour segment of the time display
Your RMR112A automatically activates its receiver for 2 to 10
flashes
minutes immediately upon battery insertion. Do not be concerned if your
RMR112A does not receive a signal within the first 72 hours. It will continue to
•
Press MODE button twice more until you see a year appear on the display
seek a signal six times every 24 hours. Due to possible interference, the best
•
Press + button until the desired year appears on the display
reception often occurs between midnight and 4 am. If your unit has not picked
up a signal after 48 hours, remove and reinsert the batteries in the late evening.
•
Press MODE button four more times to exit the set mode and resume
Do not adjust the time zone until after the clock has picked up the signal.
normal time keeping.
Setting the Month
SIGNAL STRENGTH
•
Press and hold MODE button until the hour segment of the time display
You may not receive a signal immediately. Please be patient with the first
flashes
receptions of the time signal. Due to possible interference, the best reception
•
Press MODE button three more times until you see the month digit flash on
often occurs between midnight and 4 am. If your unit has not picked up a signal
the display.
after 48 hours, remove and reinsert the batteries in the late evening. Do not
adjust the time zone until after the clock has picked up the signal. Once the
•
Press + button until the desired month appears on the display
RMR112A has received a time signal, updates are accomplished with greater
•
ease. This unit like other radio equipment is most effective when it is placed
Press MODE button three more times to exit the set mode and resume normal
near a window. You may need to move or reposition your RMR112A.
time keeping.
Remember RMR112A not only sets itself to synchronize its digital time and
Setting the Date
Power
•
Press and hold MODE button until the hour segment of the time display
Main unit
flashes
•
Remote sensing unit
Press MODE button four more times until you see the date flash on the
display
•
Weight
Press + button until the desired date appears on the display
Main unit
•
Press MODE button two more times to exit the set mode and resume normal
time keeping.
Remote sensing unit
IMPORTANT: As soon as any manual setting changes are made, the display
will indicate a loss of signal strength (see SIGNAL STRENGTH INDICATOR)
Dimension
to indicate that the clock is now running on manual settings instead of signals
received from the Atomic Clock.
Main unit
Setting the Language
•
Press and hold MODE button until the hour segment of the time display
Remote sensing unit
flashes.
•
Press MODE button five more times until you see a single letter (E, D, F, I
or S) appear on the display next to the time.
•
Press + button until the desired language indicator appears on the display (E
ABOUT OREGON SCIENTIFIC
for English, D for German, F for French ,I for Italian and S for Spanish).
Visit our website (www.oregonscientific.com) to learn more about Oregon
•
Press MODE button one more time to exit the set mode and resume normal
Scientific products such as digital cameras; MP3 players; children's electronic
time keeping
learning products and games; projection clocks; health and fitness gear; weather
stations; and digital and conference phones. The website also includes contact
information for our Customer Care department in case you need to reach us, as
WARNINGS
well as frequently asked questions and customer downloads.
This product is designed to give you years of service if handled properly. Observe
We hope you will find all the information you need on our website, however if
the following guidelines:
you're in the US and would like to contact the Oregon Scientific Customer
•
Care department directly, please visit:
Never immerse the product in water. This can cause electrical shock and
damage the product.
www2.oregonscientific.com/service/default.asp
•
Do not subject the main unit to extreme force, shock, or fluctuations in
OR
temperature or humidity.
Call 1-800-853-8883.
•
Do not tamper with the internal components.
For international inquiries, please visit:
•
Do not mix old and new batteries. Do not mix alkaline, standard (carbon-
www2.oregonscientific.com/about/international.asp
zinc), or rechargeable (nickel-cadmium) batteries.
•
Do not use rechargeable batteries with this product.
FCC STATEMENT
•
Remove the batteries if storing this product for a long period of time.
This device complies with Part 15 of the FCC Rules. Operation is subject to the
following two conditions: (1) This device may not cause harmful interference,
•
Do not scratch the LCD display.
and (2) This device must accept any interference received, including interference
that may cause undesired operation.
TROUBLESHOOTING
WARNING Changes or modifications not expressly approved by the party
responsible for compliance could void the user's authority to operate the
Check here before contacting our customer service department.
equipment.
NOTE This equipment has been tested and found to comply with the limits for
PROBLEM
SYMPTOM
REMEDY
a Class B digital device, pursuant to Part 15 of the FCC Rules. These limits are
designed to provide reasonable protection against harmful interference in a
Calendar
Strange date / month
Change language
residential installation.
Cannot adjust clock
Disable Atomic Clock
This equipment generates, uses and can radiate radio frequency energy and, if
Clock
not installed and used in accordance with the instructions, may cause harmful
Cannot auto-synch
1. Adjust batteries
interference to radio communications. However, there is no guarantee that
2. Press RESET
interference will not occur in a particular installation. If this equipment does
cause harmful interference to radio or television reception, which can be
3. Manually activate
determined by turning the equipment off and on, the user is encouraged to try to
Atomic Clock feature
correct the interference by one or more of the following measures:
Temp
Shows "LLL" or
Temperature is out-of-
• Reorient or relocate the receiving antenna.
"HHH"
range
• Increase the separation between the equipment and receiver.
Remote
Check batteries
Cannot locate
• Connect the equipment into an outlet on a circuit different from that to which
sensor
remote sensor
the receiver is connected.
Check location
• Consult the dealer or an experienced radio / TV technician for help.
Cannot change
Check all sensors for
channel
proper operation
DECLARATION OF CONFORMITY
Data does not match
Initiate a manual sensor
main unit
search
The following information is not to be used as contact for support or sales.
Please call our customer service number (listed on our website at
www.oregonscientific.com), or on the warranty card for this product) for all
inquiries instead.
SPECIFICATIONS
We
Temperature Measurement
Name:
Oregon Scientific, Inc.
Main unit
Address:
19861 SW 95th Ave., Tualatin, Oregon 97062 USA
Indoor Temperature measurement
Telephone No.:
1-800-853-8883
Displayed IN temperature range
: -9.9°C to +70.0°C (-9.9°F to 158.0°F)
Proposed operating range
: -5.0°C to +50.0°C (23.0°F to 122.0°F)
declare that the product
Temperature resolution
: 0.1°C (0.2°F)
Remote Temperature measurement
Product No.: RMR112A
Displayed OUT temperature range: -50.0°C to +70.0°C (-58.0°F to 158.0°F)
Product Name:Multi-Channel IN-OUT Thermometer with Cable Free Sensor
and RF Clock
Proposed operating range
: -5.0°C to +50.0°C (23.0°F to 122.0°F)
Manufacturer:IDT Technology Limited
Temperature resolution
: 0.1°C (0.2°F)
Address:
Block C, 9/F, Kaiser Estate,
Remote unit
Phase 1, 41 Man Yue St.,
Displayed range
: -50.0°C to +70.0°C (-58.0°F to 158.0°F)
Hung Hom, Kowloon,
Proposed operating range
: -30.0°C to +60.0°C (-22°F to 140.0°F)
Hong Kong
Temperature resolution
: 0.1°C (0.2°F)
RF Transmission Frequency
: 433 MHz
is in conformity with Part 15 of the FCC Rules. Operation is subject to the
Number of Remote unit
: Maximum of 3
following two conditions: 1) This device may not cause harmful interference.
2) This device must accept any interference received, including interference
RF Transmission Range
: Maximum 30 meters or 100 feet
that may cause undesired operation.
Temperature sensing cycle
: around 30 seconds
Radio Controlled Clock
Main time set and synchronized by Radio Signal WWVB for USA
12hr display with hh : mm ss
- The contents of this manual is subject to change without further notice.
Date Format : Month . Day
- Due to printing limitations, the displays shown in this manual may differ
from the actual display.
Day of week selectable in 5 language (E, D, F, I, S)
- The contents of this manual may not be reproduced without the permission
Four time zones with date and day
of the manufacturer.
2-minute crescendo alarm
: use 2 pcs UM-3 or "AA" 1.5V alkaline
battery
: use 2 pcs UM-3 or "AA" 1.5V alkaline
battery
: 8.08 ounces (229 g)
: 3.08 ounces (87.3g)
: 136 x 108 x 27 mm or
5.35 x 4.25 x 1.06 inches
(L x W x T)
: 105 x 70 x 22.5 mm or
4.13 x 2.76 x 0.89 inches
(L x W x T)
CAUTION
Advertisement

Related Manuals for Oregon Scientific RMR112A


Summary of Contents for Oregon Scientific RMR112A
- Page 1 Do not be concerned if your RMR112A does not receive a signal within the first 72 hours. It will continue to • Press MODE button twice more until you see a year appear on the display The RMR112A operates at 433MHz.
- Page 2 Verifique que la unidad remota sea resistente y segura. Puede esperar Rango de operación propuesto ADVERTENCIA DE BATERIA BAJA que el reloj haya obtenido la señal. Una vez que el RMR112A haya recibido una un momento o presionar CANAL y MEMORIA al mismo tiempo para forzar •...
- Page 3 Press and hold MODE button until the hour segment of the time display correctement enregistrés . RMR112A does not receive a signal within the first 72 hours. It will continue 2. Insérez les piles des capteurs avant celles de l’appareil principal.
- Page 4 Plage de la température intérieure : -9,9 °C à 70,0 °C (-9,9 °F à 158,0 °F) IMPORTANTE: Es muy probable que alguna vez necesite o desee configurar La cronología precisa e instantánea del RMR112A se logra a través de su re- puede determinarse al encender o apagar el equipo, se recomienda que el usuario en fonctionnement manuel au lieu d’être synchronisée par l’horloge atomique.