LG LDG4315ST Owner's Manual
Hide thumbs
Also See for LDG4315ST:
- Service manual (93 pages) ,
- Owner's manual (120 pages) ,
- Service manual (93 pages)
Table of Contents
Advertisement
Available languages
Available languages
Quick Links
OWNER'S MANUAL
GAS RANGE
Read this owner's manual thoroughly before operating the appliance
and keep it handy for reference at all times.
WArnInG
If the information in this manual is not followed exactly, a fire or explosion
may result causing property damage, personal injury or death.
• Do not store or use gasoline or other flammable vapors and liquids in the
vicinity of this or any other appliance.
• WHAT TO DO IF YOU SMELL GAS
- Do not try to light any appliance.
- Do not touch any electrical switch.
- Do not use any phone in your building.
- Immediately call your gas supplier from a neighbor's phone. Follow the
gas supplier's instructions.
- If you cannot reach your gas supplier, call the fire department.
• Installation and service must be performed by a qualified installer, service
agency, or the gas supplier.
LDG4315ST
LDG4315BD
LDG4313ST
LDG4311ST
LDG4311SB
MFL68920501_03
LDG4311SW
www.lg.com
Advertisement
Table of Contents

Related Manuals for LG LDG4315ST


Summary of Contents for LG LDG4315ST
- Page 1 - Immediately call your gas supplier from a neighbor's phone. Follow the gas supplier's instructions. - If you cannot reach your gas supplier, call the fire department. • Installation and service must be performed by a qualified installer, service agency, or the gas supplier. LDG4315ST LDG4315BD LDG4313ST LDG4311ST LDG4311SB LDG4311SW www.lg.com...
-
Page 2: Table Of Contents
TABLE OF CONTENTS TABLE OF COnTEnTS PrODUCT FEATUrES Lockout Start Time (Delayed Timed Cook) Cook Time (Timed Cook) IMPOrTAnT SAFETY Removing and Replacing the Oven Racks InSTrUCTIOnS Recommended Baking and Roasting Guide Bake Convection Bake PrODUCT OVErVIEW Cookware for Convection Cooking Convection Roast Parts Broil... -
Page 3: Product Features
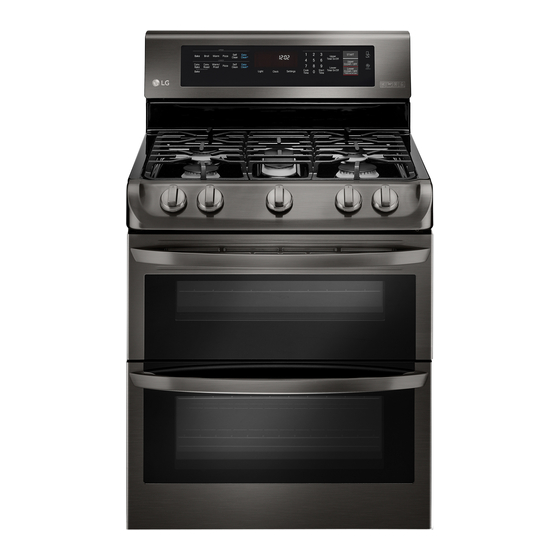
PRODUCT FEATURES PrODUCT FEATUrES Multiple Gas Burner Sizes Choose a burner to fit the size of your cookware. Cooking multiple items at once is possible by using different burners at the same time. Safe and Convenient Gas range Provides safety and convenience for cooking. Upper Oven / Lower Oven Separate upper and lower ovens. -
Page 4: Important Safety Instructions
Always contact your service agent or manufacturer about problems that you do not understand. Download this owner's manual at: http://www.lg.com This is the safety alert symbol. This symbol alerts you to potential hazards that can result in property damage and/or serious bodily harm or death. - Page 5 IMPORTANT SAFETY INSTRUCTIONS IMPOrTAnT SAFETY nOTICE The Safe Drinking Water and Toxic Enforcement act requires the Governor of California to publish a list of substances known to the state to cause birth defects or other reproductive harm, and requires businesses to warn customers of potential exposure to such substances. Gas appliances can cause minor exposure to four of these substances, namely benzene, carbon monoxide, formaldehyde and soot, caused primarily by the imperfect combustion of natural or LP gas.
- Page 6 IMPORTANT SAFETY INSTRUCTIONS WArnInG • Gas leaks may occur in the system and result in a serious hazard. Gas leaks may not be detected by smell alone. Gas suppliers recommend you purchase and install a UL approved gas detector. Install and use in accordance with the gas detector manufacturer’s instructions.
- Page 7 IMPORTANT SAFETY INSTRUCTIONS WArnInG • Disconnect the electrical supply before servicing the appliance. • Never use the appliance door as a step stool or seat, as this may result in possible tipping of the appliance and serious injuries. • This product should not be installed below ventilation type hood systems that direct air in a downward direction.
-
Page 8: Surface Burners
IMPORTANT SAFETY INSTRUCTIONS SUrFACE BUrnErS WArnInG • Even if the top burner flame goes out, gas is still flowing to the burner until the knob is turned to the Off position. If you smell gas, immediately open a window and ventilate the area for five minutes prior to using the burner. - Page 9 IMPORTANT SAFETY INSTRUCTIONS CAUTIOn • To prevent burns, always be sure that the controls for all burners are in the Off position and all grates are cool before attempting to remove them. • If you smell gas, turn off the gas to the range and call a qualified service technician. Never use an open flame to locate a leak.
- Page 10 10 IMPORTANT SAFETY INSTRUCTIONS OVEn When opening the door of a hot oven, stand away from the range. The hot air and steam that escape can cause burns to hands, face and eyes. WArnInG • Never block any slots, holes or passages in the oven bottom or cover an entire rack with materials such as aluminum foil.
-
Page 11: Energy Saving Tips
IMPORTANT SAFETY INSTRUCTIONS EnErGY SAVInG TIPS • Multiple-rack cooking saves time and energy. Whenever possible, cook foods requiring the same cooking temperature together in one oven. • For optimal performance and energy savings, follow the guides on page 31 for proper rack and pan placements. -
Page 12: Product Overview
Broiler pan scouring pad (1ea) nOTE • Contact LG Customer Service at 1-800-243-0000 (1-888-542-2623 in Canada) if any accessories are missing. • For your safety and for extended product life, only use authorized components. • The manufacturer is not responsible for product malfunction or accidents caused by the use of separately purchased, unauthorized components or parts. -
Page 13: Installation
INSTALLATION InSTALLATIOn Before Installing the range Make sure your range is properly installed and grounded by a qualified installer, according to the installation instructions. Any adjustment and service should be performed only by qualified gas range installers or service technicians. In the Commonwealth of Massachusetts •... -
Page 14: Installing The Range
14 INSTALLATION Installing the range Choosing the Proper Location Do not locate your range where it may be subject to Unpacking and Moving the range strong drafts. Any openings in the floor or wall behind the range should be sealed. Make sure the openings CAUTIOn around the base of the range that supply fresh air •... -
Page 15: Dimensions And Clearances
INSTALLATION Dimensions and Clearances Provide proper clearance between the range and adjacent combustible surfaces. These dimensions must be met for safe use of your range. The location of the electrical outlet and pipe opening (see Gas Pipe and Electrical Outlet Locations, page 14) may be adjusted to meet specific requirements. The range may be placed with 0" clearance (flush) at the back wall. -
Page 16: Providing Adequate Gas Supply
16 INSTALLATION Providing Adequate Gas Installing the Anti-tip Device Supply Anti-tip Wall plate bracket Your range is designed to operate at a pressure of Screw must enter wood or 5" of water column on natural gas or 10" of water concrete column on LP. -
Page 17: Connecting The Range To Gas
INSTALLATION Connecting the range to Gas WArnInG • Do not use a flame to check for gas leaks. Shut off the range gas supply valve before removing the old range and leave it off until the new hook-up • Isolate the range from the gas supply system has been completed. -
Page 18: Electrical Connections
18 INSTALLATION Electrical Connections Do not use an adapter plug. Disconnecting of the power cord places undue strain on the adapter and leads to eventual failure of the adapter ground Electrical requirements terminal. 120 Volt, 60 Hz, properly grounded dedicated circuit Installation must conform with local codes or, in the protected by a 15 or 20 Amp circuit breaker, or slow absence of local codes, with the National Fuel Gas... -
Page 19: Assembling The Surface Burners
INSTALLATION Assembling the Surface Quality of Flames Burners The combustion quality of the burner flames needs to be confirmed visually. A Yellow flames - Call for service. CAUTIOn Do not operate the burners without all parts in B Yellow tips on outer cones - This place. -
Page 20: Leveling The Range
20 INSTALLATION Leveling the range Checking Operation of Bake / Broil Burners Level the range by adjusting the leveling legs. To check ignition of the Bake burner, follow the steps Extending the legs slightly may also make it easier to below: insert the rear leg into the anti-tip bracket. -
Page 21: Operation
OPERATION OPErATIOn CAUTIOn WHAT TO DO IF YOU SMELL GAS Gas Surface Burners • Open windows. • Do not try to light any appliance. Before Use • Do not touch any electrical switch. Read all instructions before using. • Do not use any phone in your building. Make sure that all burners are properly placed. -
Page 22: Burner Locations
22 OPERATION Burner Locations Using the Gas Surface Burners Your gas range cooktop has four or five sealed gas Be sure that all of the surface burners and grates burners, depending on the model. These can be are placed in the correct positions. assembled and separated. -
Page 23: Using A Wok
OPERATION In Case of Power Failure Using a Wok In case of a power failure, you can light the gas If using a wok, use a 14-inch or smaller flat-bottomed surface burners on your range with a match. piece of wok. Make sure that the wok bottom sits flat on the grate. -
Page 24: Using The Griddle
24 OPERATION Using the Griddle (on some models) Preheat the griddle according to the guide below and adjust for the desired setting. Preheat Cook Type of Food Conditions Setting Warming Tortillas 5 (MED) Pancakes HI 5 min. Hamburgers HI 5 min. Fried Eggs HI 5 min. -
Page 25: The Oven
OPERATION The Oven Do not block, touch or place items around the oven vent during cooking. Before Use Your oven is vented through ducts at the center above the burner grate. Do not block the oven vent when Read all instructions before using. cooking to allow for proper air flow. -
Page 26: Control Panel Overview
26 OPERATION Control Panel Overview 1 Oven Controls 5 nFC Tag On 2 Features 6 Smart Diagnosis 3 number Keys 7 Clear Off / Lockout Key 4 Start Key 8 Gas Surface Burners Flashing Time If the oven displays a flashing clock, touch Clock and reset the time, or touch any key to stop the flashing. -
Page 27: Changing Oven Settings
OPERATION Changing Oven Settings Minimum & Maximum Default Settings Clock All of the features listed have a minimum and a The clock must be set to the correct time of day in maximum time or temperature setting that can be order for the automatic oven timing functions to work entered into the control. -
Page 28: Timer On/Off
28 OPERATION Timer On/Off Settings Touch the Settings key repeatedly to toggle through The Upper or Lower Timer On/Off serves as an extra timer in the kitchen that beeps when the set time has and change oven settings. run out. It does not start or stop cooking. The Settings key allows you to The Upper or Lower Timer On/Off feature can be •... -
Page 29: Adjusting The Oven Thermostat
OPERATION Adjusting the Oven Thermostat Adjusting the Beeper Volume Your new oven may cook differently from the one Touch Settings repeatedly until Beep appears in it replaced. Use your new oven for a few weeks to the display. become more familiar with it before changing the temperature settings. -
Page 30: Start Time (Delayed Timed Cook)
30 OPERATION Start Time (Delayed Timed Cook) Cook Time (Timed Cook) The automatic timer of the Delayed Timed Cook Set the oven to cook for a specific length of time function turns the oven on and off at the time you using the Timed Cook feature. -
Page 31: Removing And Replacing The Oven Racks
OPERATION removing and replacing the Oven • If cooking on multiple racks in the lower oven, place a standard rack in position 1 and an offset racks rack in position 4. Place the cookware as shown in the multiple rack image, with cookware on the top CAUTIOn rack placed toward the front and cookware on the •... -
Page 32: Bake
32 OPERATION Bake Baking Chart This chart is only for reference and can be used for Bake is used to prepare foods such as pastries, both the upper and lower ovens. Adjust the cook time breads and casseroles. The oven can be programmed according to your recipe. -
Page 33: Convection Bake
OPERATION Convection Mode Convection Baking Chart If auto conversion is disabled, reduce standard The convection system uses a fan to circulate heat recipe temperature by 25 °F (14 °C) for Convection evenly within the oven. This improves heat distribution Bake. Temperatures have been adjusted in this and allows for even cooking and excellent results, chart. -
Page 34: Cookware For Convection Cooking
34 OPERATION Cookware for Convection Cooking Convection roast Any cookware safe for use in a conventional oven will The Convection Roast feature is designed to give work in a convection oven. But for best results, keep optimum roasting performance. Convection Roast the following in mind. -
Page 35: Broil
OPERATION Broil Setting the Upper oven to Broil Touch Broil once for Hi and twice for Lo. Your oven is designed for closed-door broiling. Broil uses an intense heat radiation from the upper gas burner. Touch Start. The Broil function works best when broiling thin, tender cuts of meat (1"... - Page 36 36 OPERATION recommended Broiling Guide The size, weight, thickness, starting temperature, and your preference of doneness will affect broiling times. This guide is based on meats at refrigerator temperature. For best results when broiling, use a pan designed for broiling. Upper oven Food Quantity and/or Thickness...
-
Page 37: Pizza
OPERATION Pizza Warm This function automatically sets the upper or lower This function will maintain an oven temperature of oven temperature to cook either frozen pizza with 170 °F. The Warm function will keep cooked food regular or rising crust, or freshly made pizza. Simply warm for serving up to three hours after cooking has choose the type of pizza (see chart) and set the finished. -
Page 38: Proof
38 OPERATION Proof This feature maintains a warm oven for rising yeast leavened products before baking. Setting the Proof Function Use rack position 2 or 3 for proofing. Touch Warm/Proof until Proof appears in the display. Touch Start. Touch Clear/Off when proofing is finished. nOTE •... -
Page 39: Smart Features
SMArT FEATUrES Check Use read and Write/P2P receive. Before Using Tag On The Tag On function allows you to conveniently use LG Smart Diagnosis™, set the cook mode and ® EasyClean features, and communicate with your appliance using a smart phone. To use the Tag On... -
Page 40: Using Tag On With Applications
NFC antenna inside the back of the smart phone matches the position of the Tag On Touch an LG appliance's Tag On logo with an NFC- icon on the appliance. (The position of the antenna equipped smart phone to use the LG Smart Oven cannot be seen, so the LG Smart Oven application application's LG Smart Diagnosis™, Oven Settings,... -
Page 41: Maintenance
MAINTENANCE MAInTEnAnCE Cleaning Burner Heads/Caps For even and unhampered flame, the slits in the CAUTIOn burner heads must be kept clean at all times.The burner heads and caps (and the oval burner head • Do not clean this appliance with bleach. and cap assembly) can be lifted off. -
Page 42: Burner Grates
42 MAINTENANCE Burner Grates Cleaning the Burner Grates The range consists of three separate professional- CAUTIOn style grates. For maximum stability, these grates • Do not lift the grates out until they have cooled. should only be used when in their proper position. The two side grates can be interchanged from left •... -
Page 43: Cleaning The Exterior
Off position and pull them straight off the 1-888-542-2623(CANADA) stems. or visit our website at: www.lg.com • To replace the knobs, make sure the knob has the Off position centered at the top, and slide the knob directly onto the stem. -
Page 44: Door Care Instructions
Compared to the more intense Self Clean process, your LG oven gives you the option of cleaning with LESS HEAT, LESS TIME, and virtually NO SMOKE OR FUMES. -
Page 45: Cleaning Tips
MAINTENANCE When to Use EasyClean ® Suggested Types of Common Food Items Example of Oven Soiling Soil Pattern Cleaning Method Soils That Can Soil Your Oven Cheese Small drops or or other Pizza spots ingredients Steaks, broiled ® EasyClean Fish, broiled Light splatter Fat/grease Meat roasted at low... - Page 46 46 MAINTENANCE Spray or pour the remaining 1 cup (8 oz or 250 Clean the oven cavity immediately after the ® ml) of water onto the bottom center of the oven EasyClean cycle by scrubbing with a wet, cavity. The indentation on the oven bottom non-scratch scouring sponge or pad.
-
Page 47: Self Clean
MAINTENANCE Self Clean During the Self Clean cycle, the cooktop elements and warming drawer cannot be used. The Self Clean cycle uses extremely hot temperatures nOTE to clean the oven cavity. While running the Self Clean • Remove oven racks and accessories before cycle, you may notice smoking or an odor. - Page 48 48 MAINTENANCE After the Self Clean Cycle CAUTIOn • The oven door remains locked until the oven Do not force the oven door open when the lock temperature has cooled. icon is displayed. The oven door remains locked until the oven temperature has cooled. Forcing •...
-
Page 49: Changing The Oven Light
MAINTENANCE Changing the Oven Light removing and replacing the Lift-Off Oven Doors The oven light is a standard 40-watt appliance bulb. It turns on when the oven door is open. When the oven door is closed, touch Light to turn it on or off. CAUTIOn WArnInG •... -
Page 50: Lower Oven
50 MAINTENANCE Lower Oven Lift the door up until it is clear of the hinges. removing the Door about 30° Fully open the door. Unlock the hinge locks, rotating them as far toward the open door frame as they will go. Lock Slot Unlock... - Page 51 MAINTENANCE replacing the Door Firmly grasp both sides of the door at the top. With the door at the same angle as the removal position, seat the indentation of the hinge arms into the bottom edge of the hinge slots. The notch in the hinge arms must be fully seated into the bottom edge of the slots.
-
Page 52: Troubleshooting
52 TROUBLESHOOTING TrOUBLESHOOTInG Can I use aluminum foil to catch drippings in my oven cavity? Never use aluminum foil to line the bottom or sides of FAQs the oven or the warming drawer. The foil will melt and stick to the bottom surface of the oven, and will not be What types of cookware are recommended for removable. - Page 53 TROUBLESHOOTING Why aren't the function buttons working? Is it safe for my convection fan, broil burner or ® heater element to get wet during EasyClean Make sure that the range is not in Lockout mode. The lock will show in the display if Lockout is activated. Yes.
-
Page 54: Before Calling For Service
54 TROUBLESHOOTING Before Calling for Service Before you call for service, review this list. It may save you time and expense. The list includes common occurrences that are not the result of defective workmanship or materials in this appliance. Symptoms Possible Cause / Solution •... - Page 55 TROUBLESHOOTING Symptoms Possible Cause / Solution Too much soil in the oven. Open the windows to get rid of the smoke from the Too much smoke room. Touch the Upper Clear/Off or Lower Clear/Off key. Wait until the light goes during the Self Clean off before trying to open the oven door.
-
Page 56: Smart Diagnosis
56 SMART DIAGNOSIS™ SMArT DIAGnOSIS™ Smart Diagnosis™ Through the Call Center Call the LG call center at: (LG U.S.) 1-800-243- 0000 (LG Canada) 1-888-542-2623. When instructed to do so by the call center Should you experience any problems with your range,... -
Page 57: Warranty
WArrAnTY (USA) Should your LG Gas Range fail due to a defect in materials or workmanship under normal home use, during the warranty period set forth below, LG will at its option repair or replace the product. This limited warranty is valid only to the original retail purchaser of the product and applies only when purchased and used within the United States including U.S. - Page 58 • The removal and reinstallation of the Product if it is installed in an inaccessible location or is not installed in accordance with published installation instructions, including LG’s owner’s and installation manuals. • Damage resulting from misuse, abuse, improper installation, repair, or maintenance. Improper repair includes use of parts not approved or specified by LG.
- Page 59 WARRANTY Problem Cause Prevention • Burner cap color 1. Scratching • Do not use steel wool or change and lost shine abrasive cleansers to clean. 2. Use of detergent or abrasive cleansers • To remove burnt-on food, soak the burner heads in hot water for 20–30 minutes.
- Page 60 60 WARRANTY Problem Cause Prevention • Oven shows error The regulator valve is closed. • Check with installer first code (F9, F19) but cooktop burners are working. Lever’s open Lever’s closed position position • Flames too bigon The installer missed part of the conversion. •...
- Page 61 LG Electronics at the number below. For assistance or service, call 1-800-243-0000. If you need further assistance, you can write to LG with any questions or concerns at the address below: LG Electronics, 201 James Record Road, Huntsville, Alabama 35813...
- Page 62 Memo...
- Page 63 - Si no puede comunicarse con su compañía de gas, llame al departamento de bomberos. • La instalación y el mantenimiento deben ser realizados por un instalador, una agencia de mantenimiento o una compañía de gas calificados. LDG4315ST LDG4315BD LDG4313ST LDG4311ST...
- Page 64 ÍNDICE ÍNdICE CARACtERÍStICAS dEL - Ajuste del volumen del indicador sonoro - Selección de grados Fahrenheit o Celsius PROdUCtO Lockout (Bloqueo) Start Time [Delayed Timed Cook] (Hora de INStRUCCIONES IMPORtANtES inicio [Cocción temporizada retardada]) dE SEGURIdAd Cook Time [Timed Cook] (Tiempo de cocción [Cocción temporizada]) Extracción y colocación de los estantes del dESCRIPCIÓN GENERAL dEL...
- Page 65 CARACTERÍSTICAS DEL PRODUCTO CARACtERÍStICAS dEL PROdUCtO varios tamaños de quemadores de gas Elija un quemador que coincida con el tamaño de su batería de cocina. Es posible cocinar varias cosas a la vez si utiliza más de un quemador. Cocina de gas segura y conveniente Brinda seguridad y conveniencia para cocinar.
-
Page 66: Instrucciones Importantes De Seguridad
Siempre comuníquese con su agente de servicio técnico o con el fabricante cuando haya problemas que no comprenda. Descargue este manual del propietario en: http://www.lg.com Este es el símbolo de alerta de seguridad. Este símbolo le advierte sobre posibles riesgos que pueden ocasionar daños materiales, lesiones personales graves o la muerte. - Page 67 INSTRUCCIONES IMPORTANTES DE SEGURIDAD • Retire los cajones calentadores o de almacenamiento e inspeccione visualmente que la pata de nivelación trasera esté insertada por completo en el soporte antivuelco. • Consulte el manual de instalación para ver la instalación adecuada del soporte antivuelco. AvISO IMPORtANtE dE SEGURIdAd La ley sobre agua potable y calidad toxicológica requiere que el gobernador de California publique una lista de sustancias que el estado considera que causan defectos de nacimiento u otras lesiones...
- Page 68 INSTRUCCIONES IMPORTANTES DE SEGURIDAD AdvERtENCIA • Las raspaduras o los impactos grandes en las puertas de vidrio pueden causar que los vidrios se rompan. • Pararse, apoyarse o sentarse sobre las puertas o los cajones de esta cocina podría causar lesiones personales graves y daños a la cocina.
- Page 69 INSTRUCCIONES IMPORTANTES DE SEGURIDAD PRECAUCIONES dE SEGURIdAd PARA LA INStALACIÓN Pida que el instalador le muestre el lugar de la válvula que corta el gas de la cocina y cómo apagarla si fuera necesario. AdvERtENCIA • Haga que un instalador calificado instale y conecte a tierra su cocina de acuerdo con las Instrucciones de instalación.
- Page 70 INSTRUCCIONES IMPORTANTES DE SEGURIDAD QUEMAdORES dE SUPERFICIE AdvERtENCIA • Incluso si la llama del quemador superior se apaga, el gas sigue saliendo hacia el quemador hasta que la perilla se coloque en la posición Off. Si huele gas, abra la ventana de inmediato y ventile el área durante cinco minutos antes de volver a usar el quemador.
- Page 71 INSTRUCCIONES IMPORTANTES DE SEGURIDAD PRECAUCIÓN • Los alimentos para freír deben estar tan secos como sea posible. La escarcha o la humedad sobre los alimentos pueden hacer que la grasa caliente burbujee y se derrame por los costados del recipiente. •...
- Page 72 10 INSTRUCCIONES IMPORTANTES DE SEGURIDAD HORNO dE AUtOLIMPIEZA Asegúrese de limpiar el exceso de derrames antes de operar la función Autolimpieza. PRECAUCIÓN • No deje alimentos, bandejas del asador, utensilios, estantes, etc., en el horno durante el ciclo de autolimpieza. •...
- Page 73 INSTRUCCIONES IMPORTANTES DE SEGURIDAD AdvERtENCIA • Si hubiera un incendio causado por la grasa en la bandeja del asador, toque Upper Clear/Off o Lower Clear/Off y mantenga cerrada la puerta del horno para contener el fuego hasta que se apague. •...
- Page 74 (1 c/u) NOtA • Comuníquese con el Servicio de atención al cliente de LG al 1-800-243-0000 (1-888-542-2623 en Canadá) si faltara algún accesorio. • Para su seguridad y para extender la vida útil del producto, solo debe utilizar componentes autorizados.
- Page 75 INSTALACIÓN INStALACIÓN Antes de instalar la cocina Haga que un instalador calificado instale y conecte a tierra su cocina de acuerdo con las Instrucciones de instalación. Cualquier ajuste o servicio debe ser completado solo por instaladores de cocinas de gas calificados o técnicos de servicio. En el Commonwealth de Massachusetts •...
- Page 76 14 INSTALACIÓN Instalación de la cocina Elección de la ubicación adecuada No instale la cocina donde podría estar sujeta a fuertes desembalaje y traslado de la cocina corrientes de aire. Debe sellar todas las aberturas del piso o la pared que están detrás de la cocina. Asegúrese de que las PRECAUCIÓN aberturas alrededor de la base de la cocina que brindan aire fresco para la combustión y la ventilación no estén obstruidas...
- Page 77 INSTALACIÓN dimensiones y espacios libres Deje suficiente espacio entre la cocina y las superficies combustibles adyacentes. Se deben cumplir estas dimensiones para usar de manera segura su cocina. La ubicación del tomacorriente y la abertura de la tubería (consulte Ubicaciones de tubería de gas y tomacorriente eléctrico en la página 14) se deben ajustar para cumplir los requisitos específicos.
- Page 78 16 INSTALACIÓN Cómo brindar el suministro Instalación del dispositivo antivuelco adecuado de gas Soporte antivuelco Placa de pared El tornillo debe Su cocina está diseñada para funcionar con una presión de 5" atravesar la de columna de agua a gas natural o 10" de columna de agua a madera o el hormigón Asegúrese de suministrar a su cocina el tipo de gas para el...
- Page 79 INSTALACIÓN Conexión de la cocina al gas AdvERtENCIA • No use una llama para detectar fugas de gas. Corte el suministro de gas a la cocina con la válvula antes de retirar la cocina antigua y déjela de ese modo hasta que se •...
- Page 80 18 INSTALACIÓN Conexiones eléctricas No utilice un enchufe adaptador. Desconectar el cable de alimentación genera tensión indebida en el adaptador y genera una falla eventual en el terminal a tierra del adaptador. Requisitos eléctricos La instalación debe cumplir los códigos locales o, en ausencia Circuito exclusivo conectado a tierra de forma adecuada de de estos, según lo establecido en el Código Nacional de Gas 120 V CA y 60 Hz protegido por interruptor de circuito de 15 o...
- Page 81 INSTALACIÓN Ensamblaje de los Calidad de las llamas quemadores de superficie Debe confirmar visualmente la calidad de combustión de las llamas de los quemadores. PRECAUCIÓN A Llamas amarillas - Solicite mantenimiento. No haga funcionar los quemadores sin todas las piezas B Puntas amarillas en conos externos - colocadas.
- Page 82 20 INSTALACIÓN Nivelación de la cocina Verificación de funcionamiento de los quemadores para hornear / asar Nivele la cocina ajustando las patas de nivelación. Si extiende Para verificar el encendido del quemador para hornear, siga las patas ligeramente, podría ser más fácil insertar la pata los pasos a continuación: trasera en el soporte antivuelco.
- Page 83 FUNCIONAMIENTO FUNCIONAMIENtO PRECAUCIÓN QUÉ HACER SI HUELE GAS Quemadores de superficie a • Abra las ventanas. • No intente encender ningún aparato. • No toque ningún interruptor eléctrico. Antes de usar • No use ningún teléfono en su edificio. Lea todas las instrucciones antes de usar. •...
- Page 84 22 FUNCIONAMIENTO Ubicaciones de los quemadores Uso de los quemadores de gas de superficie La placa de cocción de su cocina de gas tiene cuatro o cinco quemadores a gas sellados, según el modelo. Estos se pueden Asegúrese de que todos los quemadores de superficie y ensamblar y separar.
- Page 85 FUNCIONAMIENTO En caso de apagón Uso de un wok En caso de corte de energía eléctrica, puede encender los Si utiliza un wok, use uno de 14 pulgadas o menos con fondo quemadores de superficie de su cocina con una cerilla. plano.
- Page 86 24 FUNCIONAMIENTO Uso de la parrilla (en algunos modelos) Precaliente la parrilla según la guía a continuación y ajuste para lograr la configuración deseada. Condiciones de Ajuste de tipo de alimentos precalentamiento cocción Calentar tortillas 5 (MED) Panquecas ALTO 5 min ALTO Hamburguesas ALTO 5 min...
- Page 87 FUNCIONAMIENTO El horno No bloquee, toque ni coloque elementos alrededor de la ventilación del horno durante la cocción. Antes de usar Su horno se ventila a través de conductos en el centro sobre el quemador. No bloquee la ventilación del horno cuando cocine Lea todas las instrucciones antes de usar.
- Page 88 26 FUNCIONAMIENTO descripción general del panel de control 1 Controles del horno 5 NFC tag On 2 Funciones 6 Smart diagnosis 3 teclas numéricas 7 tecla Borrar apagado / Bloqueo 4 tecla de inicio 8 Quemadores de gas de superficie Hora intermitente Si el horno muestra un reloj intermitente, toque Clock y restablezca la hora o presione cualquier tecla para detener el indicador intermitente.
- Page 89 FUNCIONAMIENTO Cambio de las configuraciones Configuraciones mínimas y máximas predeterminadas del horno Todas las funciones detalladas tienen un ajuste mínimo y Clock (Reloj) máximo de tiempo o temperatura que puede ingresarse en el control. Cada vez que se toca una tecla de control, suena un El reloj se debe configurar en la hora correcta del día para pitido.
- Page 90 28 FUNCIONAMIENTO timer On/Off (temporizador Settings (Ajustes) encendido/apagado) Toque la tecla Settings varias veces para ir cambiando entre las diferentes configuraciones del horno y modificarlas. La función Temporizador encendido/apagado Superior o La tecla Settings permite Inferior se desempeña como temporizador adicional que suena, cuando se agota el tiempo configurado.
- Page 91 FUNCIONAMIENTO Ajuste del termostato del horno Ajuste del volumen del indicador sonoro El horno nuevo podría cocinar de manera diferente a su Toque Settings varias veces hasta que Beep aparezca horno anterior. Use el horno nuevo durante algunas semanas en la pantalla. para familiarizarse con él antes de cambiar los ajustes de temperatura.
- Page 92 30 FUNCIONAMIENTO Start time [delayed timed Cook] PRECAUCIÓN (Hora de inicio [Cocción temporizada • Utilice el reloj temporizador automático al cocinar retardada]) carnes curadas o congeladas y la mayoría de las frutas y los vegetales. Los alimentos que pueden echarse El temporizador automático de la función Cocción temporizada a perder fácilmente como la leche, huevos, pescado, retardada enciende y apaga el horno a la hora que usted...
- Page 93 FUNCIONAMIENTO Guía de recomendaciones para Cambio del tiempo de cocción durante la cocción hornear y rostizar Por ejemplo, para cambiar el tiempo de cocción de 30 minutos a 1 hora y 30 minutos, haga lo siguiente. • Centre los recipientes para horno sobre los estantes para Toque Cook time.
- Page 94 32 FUNCIONAMIENTO Bake (Hornear) Cuadro de horneado Este cuadro solo sirve como referencia y se puede usar para el La función Hornear se utiliza para preparar alimentos como horno superior y el inferior. Ajuste el tiempo de cocción según pasteles, panes y estofados. Es posible programar el horno su receta.
- Page 95 FUNCIONAMIENTO Modo de convección Cuadro de horneado por convección Si la conversión automática está desactivada, reduzca El sistema de convección usa un ventilador para hacer circular la temperatura estándar de la receta 25 °F (14 °C) para el calor de manera pareja dentro del horno. Esto mejora la hornear por convección.
- Page 96 34 FUNCIONAMIENTO Recipientes para cocción por Convection Roast (Rostizado por convección convección) Cualquier recipiente que se pueda usar en un horno La función para Rostizar por convección está diseñada para convencional funcionará en horno por convección. Para ofrecer resultados de rostizado óptimos. El rostizado por obtener mejores resultados, considere la siguiente información.
- Page 97 FUNCIONAMIENTO Broil (Asar) Configuración del horno superior para asar Su horno está diseñado para asar con la puerta cerrada. Al Toque Broil una vez para Hi y dos veces para Lo. asar, usa una radiación de calor intensa desde el quemador de gas superior.
- Page 98 36 FUNCIONAMIENTO Guía de recomendaciones para asar El tamaño, el peso, el espesor, la temperatura inicial y su preferencia de cocción afectarán el tiempo de asado. Esta guía se basa en carnes a temperatura de refrigerador. Para obtener mejores resultados al asar, use una bandeja especial para asar. Horno superior Posición Primer...
- Page 99 FUNCIONAMIENTO Pizza (Pizza) Warm (Calentar) Esta función configura automáticamente la temperatura Esta función mantendrá el horno a una temperatura de 170 °F. del horno superior o del horno inferior para cocinar pizza Esta función mantendrá caliente la comida cocida para servir congelada, con masa alta o masa regular, o pizza fresca.
- Page 100 38 FUNCIONAMIENTO Proof (Leudar) Esta característica mantiene el horno tibio para leudar productos con levadura antes de hornearlos. Configuración de la función Leudar Use el estante en la posición 2 o 3 para el leudado. Toque Warm/Proof hasta que aparezca Proof en la pantalla.
- Page 101 Marque Use Read and Write/P2P receive INtELIGENtES Antes de usar tag On La función Tag On le permite usar convenientemente la función LG Smart Diagnosis™, configurar el modo de cocción y las ® funciones EasyClean y comunicarse con el electrodoméstico a través de un teléfono inteligente.
- Page 102 Tag On en el aparato. (La posición de la antena no un teléfono inteligente equipado con NFC para usar las puede verse, por lo que la aplicación LG Smart Oven (Horno funciones LG Smart Diagnosis™, configuraciones del horno y inteligente de LG) intentará...
- Page 103 MANTENIMIENTO MANtENIMIENtO Limpieza de las tapas/los cabezales del quemador PRECAUCIÓN Para lograr que la llama salga pareja y libremente, las aberturas en los cabezales de los quemadores deben estar • No limpie este electrodoméstico con blanqueador. siempre limpias. Las tapas y los cabezales del quemador (y •...
- Page 104 42 MANTENIMIENTO Rejillas de los quemadores Limpieza de las rejillas de los quemadores La cocina incluye tres rejillas profesionales independientes. Para lograr la estabilidad máxima, estas rejillas solo se deben PRECAUCIÓN usar en la posición correcta. Las dos rejillas laterales se pueden intercambiar de izquierda a derecha y del frente a la •...
-
Page 105: Panel De Control
Off centrada en la parte 1-800-243-0000 (EE. UU.) 1-888-542-2623 (Canadá) superior y deslice la perilla directamente sobre el o visite nuestro sitio web en: www.lg.com vástago. NOtA Puerta del horno Para evitar las rayas, no use limpiadores abrasivos en •... -
Page 106: Estantes Del Horno
En comparación con el proceso más intenso de Autolimpieza, el horno LG le brinda la opción de limpiar con MENOS CALOR, en MENOS TIEMPO y, prácticamente, SIN HUMO NI VAPORES. - Page 107 MANTENIMIENTO ® Cuándo usar EasyClean Método sugerido de Forma de la tipos de Alimentos comunes que Ejemplo de suciedad en el horno limpieza suciedad suciedad pueden ensuciar el horno Gotitas o Queso u otros Pizza manchitas ingredientes Bistecs, asados ® EasyClean Pescado, asado Salpicadura leve...
- Page 108 46 MANTENIMIENTO Rocíe o vierta la taza restante (8 oz o 250 ml) de agua Limpie la cavidad del horno inmediatamente después del ® en el centro de la base de la cavidad del horno. La ciclo EasyClean . Para ello, friegue con una esponja o hendidura en la base del horno debe estar totalmente un paño de limpieza húmedos que no rayen.
- Page 109 MANTENIMIENTO Self Clean (Autolimpieza) Durante el ciclo de Autolimpieza, no se pueden usar las hornallas de la placa de cocción ni el cajón calentador. El ciclo de Autolimpieza usa temperaturas sumamente altas NOtA para limpiar la cavidad del horno. Mientras se ejecute el ciclo •...
- Page 110 48 MANTENIMIENTO después del ciclo de Autolimpieza PRECAUCIÓN • La puerta permanece trabada hasta que baja la temperatura No fuerce la puerta del horno para abrirla cuando vea el del horno. icono del candado. La puerta permanece trabada hasta que baja la temperatura del horno. Si abre la puerta a la •...
- Page 111 MANTENIMIENTO Cambio de la luz del horno Remoción y reemplazo de la puerta removible del horno La luz del horno es una bombilla estándar para electrodomésticos de 40 vatios. Se enciende cuando se abre la puerta del horno. Cuando la puerta esté cerrada, toque Light PRECAUCIÓN para encenderla o apagarla.
- Page 112 50 MANTENIMIENTO Horno inferior Levante la puerta hasta que se suelte de las bisagras. Remoción de la puerta aproximadamente 30° Abra totalmente la puerta. Desbloquee las trabas de las bisagras. Para ello, gírelas alejándolas lo más posible del marco de la puerta abierta.
- Page 113 MANTENIMIENTO Colocación de la puerta Tome firmemente ambos lados de la puerta desde la parte superior. Con la puerta en el mismo ángulo que la posición de remoción, apoye la hendidura de los brazos de las bisagras en el borde inferior de las ranuras de las bisagras.
- Page 114 52 SOLUCIÓN DE PROBLEMAS SOLUCIÓN dE ¿Puedo usar papel de aluminio para que recolecte las gotas en la cavidad del horno? PROBLEMAS Nunca utilice papel de aluminio para revestir la base o los costados del horno o el cajón calentador. El papel se derretirá y se pegará...
- Page 115 SOLUCIÓN DE PROBLEMAS ¿Por qué no funcionan los botones de función? ¿Es seguro que el ventilador de convección, el quemador para asar o el elemento calentador se mojen durante la Asegúrese de que la cocina no esté en modo Lockout. El ®...
- Page 116 54 SOLUCIÓN DE PROBLEMAS Antes de llamar al servicio técnico Antes de llamar para solicitar servicio, revise esta lista. Puede ahorrarle tiempo y gastos. La lista incluye sucesos comunes que no son consecuencia de problemas de fabricación ni de los materiales de este aparato. Síntomas Causas / soluciones posibles •...
- Page 117 SOLUCIÓN DE PROBLEMAS Síntomas Causas / soluciones posibles Demasiada suciedad en el horno. Abra las ventanas para que el humo salga del ambiente. Toque demasiado humo durante las teclas Upper Clear/Off o Lower Clear/Off. Espere a que la luz se apague antes de intentar el ciclo de autolimpieza.
- Page 118 SMARt dIAGNOSIS™ Smart diagnosis™ a través del centro de atención Llame al centro de atención de LG al: (LG EE. UU.) 1-800-243-0000 (LG Canadá) 1-888-542-2623. Cuando el agente del centro de atención se lo indique, Si tiene problemas con su cocina, esta tiene la capacidad de sostenga el micrófono de su teléfono sobre el logotipo...
- Page 119 GARANtÍA (EE. UU.) Si la cocina a gas LG fallara debido a defectos de materiales o de fabricación en el uso doméstico normal, durante el período de garantía que se establece a continuación, LG tendrá la opción de reparar o reemplazar el producto. Esta garantía limitada solo es válida para el comprador minorista original del producto y será...
- Page 120 • El retiro y la reinstalación del producto si está instalado en un lugar inaccesible o no está instalado de acuerdo con las instrucciones de instalación publicadas, lo que incluye los manuales de instalación y del propietario de LG. • Daños resultantes de mal uso, abuso, instalación, reparación o mantenimiento incorrectos. Una reparación incorrecta incluye el uso de piezas no aprobadas o especificadas por LG.
- Page 121 GARANTÍA Problema Causa Prevención • La tapa del quemador 1. Rayas • No use esponjas metálicas cambió de color y perdió ni limpiadores abrasivos para 2. Uso de detergente o limpiadores abrasivos brillo. limpiar. • Para remover los alimentos quemados, sumerja las cabezas de los quemadores en agua caliente durante 20 a 30 minutos.
- Page 122 60 GARANTÍA Problema Causa Prevención • El horno muestra un La válvula reguladora está cerrada. • Consulte primero con el instalador. código de error (F9, F19), pero los quemadores del anafe están funcionando. Posición abierta Posición cerrada de la palanca. de la palanca.
- Page 123 LG Electronics al número que aparece a continuación. Para obtener asistencia o servicio técnico, llame al 1-800-243-0000. Si necesita más ayuda, puede escribir a LG para dirigir sus preguntas o inquietudes a la dirección que aparece a continuación: LG Electronics, 201 James Record Road, Huntsville, Alabama 35813...
- Page 124 LG Customer Information Center 1-800-243-0000 1-888-542-2623 CANADA Register your product Online! www.lg.com Printed in Korea...