Table of Contents
Advertisement
Quick Links
Advertisement
Table of Contents

Related Manuals for Magnavox MDR868H


Summary of Contents for Magnavox MDR868H
- Page 1 Owner’s Manual Manuel del Propietario Manuel du Propriétaire MDR868H MDR867H MDR865H HD DVR/DVD RECORDER with Digital Tuner Necesita ayuda inmediata? 1-866-341-3738 1-866-341-3738 1-866-341-3738 INSTRUCCIONES SIMPLIFICADAS INCLUIDOS EN ESPAÑOL. © 2015 Funai Electric Co., Ltd.
-
Page 2: Safety Information
1. INTRODUCTION Safety Information The Model and Serial Numbers of this unit may be found on the cabinet. You should Record and retain those Numbers for future reference. Model Number: Serial Number: WARNING: TO REDUCE THE RISK OF FIRE OR ELECTRIC SHOCK, DO NOT EXPOSE THIS APPARATUS TO RAIN OR MOISTURE. - Page 3 – Under conditions of high humidity. – After heating a cold room. For MDR868H and MDR867H, do Not Connect your PC directly to the LAN terminal of the unit. Notice for Progressive Scan Output •...
-
Page 4: License
End of life directives ■ Cleaning the disc lens MAGNAVOX pays a lot of attention to produce environmental- • If this unit still does not perform properly although you friendly products in green focal areas. Your new DVR contains refer to the relevant sections in “Troubleshooting” in this materials which can be recycled and reused. -
Page 5: Trademark Information
Corporation and Sony Corporation. operate. Symbol Description MAGNAVOX is a Registered trademark of Philips North America Corporation and is used by Funai Electric Co., Ltd. and Features depend on what model you have purchased Funai Corporation, Inc. under license from Philips Electronics... -
Page 6: Table Of Contents
Table of Contents 1. INTRODUCTION 5. RECORDING Safety Information ......... 2 Information on Recording ....28 License....................4 Before Recording ........29 Maintenance ..................4 Registering an External HDD..........29 Environmental Care..............4 How to Insert a Disc ...............29 End of life directives..............4 Basic Recording & Trademark Information.............5 One-Touch Timer Recording..... - Page 7 7. EDITING 12. OTHERS Deleting a Title................41 Troubleshooting ........66 Deleting Multiple Titles............41 Error Message ................71 Renaming a Title................42 Glossary ..........73 Protecting a Title .................42 Specifications......... 74 Language Code ........75 LIMITED WARRANTY ...... 76 8. NETWORK Network Settings ......... 43 13.
-
Page 8: Functional Overview
Recording mode will automatically be adjusted so the Titles will fit nicely in the remaining space of the Disc. 2TB hard disk (MDR868H): 2TB hard disk (MDR868H): This unit is equipped with a 2TB HDD which allows you to Record Programs for up to a total of 2000 hours (with HD mode). - Page 9 This unit supports Playback of AVCHD format files (from high Playback. definition Video camcorders) Recorded on a Disc. Your high For more free Mobile App information, please visit definition personal archive file is playable in HD quality. www.magnavox.com Editing Others EXT. HDD DVD-RW Video DVD-R Video ■...
-
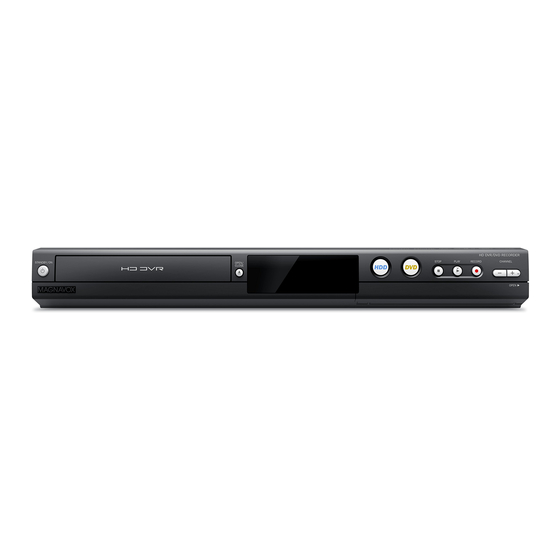
Page 10: Front Panel
• Press to Stop Playback or Recording. 1 PLAY button * ) The unit can also be turned on by pressing these Buttons. • Press to Start Playback or Resume Playback. Rear Panel Available on MDR868H, MDR867H only. ANTENNA DIGITAL OUT AUDIO VIDEO... -
Page 11: Display Message
Display Message : Appears when a disc : Appears when the : Appears when the is loaded on the Disc Disc Tray is Opening. Disc Tray is closing. Tray or checking for a disc on the Tray. : Appears when the : Appears when the : Appears when the External Input is L1. -
Page 12: Remote Control
H (Previous) button Remote Control • During Playback, press H to return to the beginning of the current Chapter and then press H as needed to go back to previous Chapter(s). C (Stop) button • Press to Stop Playback or Recording. 10 Number buttons •... - Page 13 Installing the Batteries in the Remote Control Using the Remote Control Install 2 AAA (1.5V) batteries matching the polarity indicated Keep in mind the following when using the Remote Control inside battery compartment of the Remote Control. • Make sure that there are no obstacles between the Remote Control and the infrared sensor window on the unit.
-
Page 14: Connections
2. CONNECTIONS Connection ■ Read this first: Disconnect the AC Power cords on this unit, TV and other devices from the AC outlet. Make the Connections as illustrated below. After making all the Connections, connect the AC Power cords on the devices. Antenna Connection (Required) Rear of this unit [MDR868/867H ow w/LAN connector]... -
Page 15: Connecting To A Tv Using Video / Audio Cables
Connecting to a TV Using Video / Audio Cables RCA Audio Cables (supplied) RCA Video Cable (supplied) VIDEO IN L- AUDIO IN -R AUDIO VIDEO ANTENNA ANTENNA AUDIO AUDIO AUDIO VIDEO VID D EO AUDIO VIDEO S ET H DMI OUT 900mA (VHF / UHF) AUDIO... -
Page 16: Connecting To A Tv Using An Hdmi Cable
Connecting to a TV Using an HDMI Cable • HDMI outputs the Digital Video / Audio signals without converting to them to Analog signals. • No Audio connection is required as Digital Audio is sent through the HDMI cable. • High speed HDMI Cable (also known as HDMI category 2 Cable) is recommended for better compatibility. •... -
Page 17: Setting For An External Device
Setting for an External Device Connect the external device properly to the unit by using either L2 and L2-S (Front) or L1 (Rear) input jacks. When connecting an external device with a monaural output to this unit, use AUDIO L jack L2 (Front) or L1 (Rear). Use S-Video or the RCA Video/Audio Cables for this Connection. -
Page 18: Connection To The Network
Connection to the Network MDR868/867H By connecting this unit to the Internet, you can Update the Software via the Internet and access Network services. Note(s) • For a stable Connection, Wired Connection is recommended when using the following Features. (Using following Features with Wireless LAN Connection can be affected by other devices using Radio Frequencies.) –... -
Page 19: Digital Audio Connection
Digital Audio Connection HDMI Audio Connection AV Receiver / Amplifier with an HDMI Input jack AV Receiver / Amplifier with an HDMI Input jack HDMI OUT HDMI Cable ANTENNA DIGITAL OUT R AU UDIO VIDEO OPTICAL HDMI OUT HDMI IN (not supplied) HDMI HDMI OU... -
Page 20: Connecting To An External Hdd
Connecting to an External HDD Rear of this unit [MDR868/867H below w/LAN connector] ANTENNA DIGITAL OUT AUDIO VIDEO OPTICAL RESET HDMI OUT U SB U SB 900mA 900mA AUDIO VIDEO AC plug USB Cable 900mA (If External HDD has it) (not supplied) External HDD (not supplied) - Page 21 Select “Register External HDD in this Important Notes for the HDD and External HDD’s Important Notes for the HDD and External HDD s device” using [ K/ L ], then press [ OK ]. • This unit is equipped with an Internal HDD. •...
-
Page 22: Initial Setup
3. INITIAL SETUP Initial Setting Before You Start Please follow the Instructions below to complete the Initial Setting. Finding the Viewing Channel on your While the Welcome screen is Displayed, Select “Next”, then press [ OK ]. After you have completed all of the Connections to your TV, review the steps below. - Page 23 Daylight Saving Time Select “Old” or “Off” using [ K/ L ], then press [ OK ] . • If you Select “Old”, time will move forward one hour on the second Sunday in March and move back one hour on the first Sunday in November. •...
- Page 24 After the Connection Test, the test result will be Network Connection Displayed.Press [ OK ]. MDR868/867H • Please move on to ‘Network Function’ on page 25. If you would like to proceed with the Network Connection “Manual” Method setting, perform this setting. If you would like to Skip this setting, Select “No”...
- Page 25 Network Function FL Dimmer MDR868/867H Select a desired item using [ K/ L ], then Select “Use” or “Do Not Use” using [ K/ L ], press [ OK ]. then press [ OK ]. Front Panel Display gets Darker when •...
-
Page 26: Viewing Tv
4. VIEWING TV Detailed Information on the Program You can check the information on the TV Program that is While Viewing TV currently On-Air. Press [ INFO ] while viewing a TV Program. Channel Selection Select a Channel using [ CH +/− ] or [ the Number buttons ] on the Remote Control. -
Page 27: Closed Caption
Closed Caption Disc Search Closed Captioning Displays the Audio voice of the TV Program When you Play the disc, you can Play it by specifying the as Text superimposed on TV screen. number. • When you view a TV Program, you can Play the below For TV Programs, refer to ‘Caption Settings’... -
Page 28: Recording
5. RECORDING About External HDD The Registered External HDD can be used in the same manner Information on Recording as the internal HDD. • Recording / editing on write protected External HDD is not possible. Before you make a Recording, read the following Information. ■... -
Page 29: Before Recording
Before Recording Basic Recording & One-Touch Timer Recording Registering an External HDD Follow the steps below to Record a TV Program. If you would like to make a Recording to an External HDD, you need to Register the External HDD with this unit beforehand. Note(s) (Refer to ‘External HDD Connection’... -
Page 30: Scheduled Recording
Press [ C (Stop) ] to Stop Recording. Scheduled Recording • Confirmation message will appear. (Recording will be continued.) Select “Yes” to Stop Recording. Select “No” You can Program the unit to Record up to 100 Programs within to Continue Recording. a month in advance. - Page 31 Enter the Date using [ K/ L ], then press Alternate Recording Alternate Recording [ 1 (Cursor)]. In the following cases, the unit will detect and automatically Record to the HDD even when External HDD or DVD is Selected as the Recording Media. –...
-
Page 32: Hints For Scheduled Recording
To Stop the Scheduled Recording in Progress Skip the Scheduled Recording Period You can deactivate the Scheduled Recording period (Daily, TUE- Press [ C (Stop) ] on the Remote Control. SAT, MON-SAT, MON-FRI or Weekly) temporarily. Confirmation message will appear. Select “Yes”, then Press [ SCHEDULE REC. -
Page 33: Pause Tv
• 4 hours has passed since “PAUSE TV” was Started. Actual recording Program B • The HDD becomes full during “PAUSE TV”. • A Scheduled Recording Starts. For MDR868H and MDR867H, a program set later (Program B and Program C) has priority. ■ “PAUSE TV” Delete: Program A The Title Recorded with “PAUSE TV”... -
Page 34: Dubbing
Selected Title Dubbing Dubbing ■ Preparing for Dubbing : Information on Dubbing • Register an External HDD to this unit. (Refer to ‘External HDD Connection’ on page 20.) You can Dub the contents. • Insert a disc to be dubbed or Recordable Disc in this unit. - Page 35 ■ To Add a Title: Press [ 1 (Cursor)] to move the cursor to the Sub Menu. Select “Add”. Select all the Titles to be added using [ K/ L ], then press ■ [ 1 (Cursor)] to Select “OK” in the Sub Menu. To Change the Title Order: The Titles are now Registered in the Dubbing List.
-
Page 36: Playback
Playable files JPEG 1. Thumbnail Highlighted Title will be Played with sound. 2. Icons : Indicating the Title currently being (MDR868H/MDR867H), Recorded. (MDR865H) :Indicating the Title is protected. is a trademark of DVD Format/Logo Licensing Cor- poration. : Indicating that Title has not been Played. -
Page 37: Hint For Hdd / External Hdd / Dvd Playback
Hint for HDD / External HDD / DVD Playback from the Title List Playback Press [ TITLE ] to call up the Title List. • To Exit the Title List, press [ TITLE ]. With each HDD / External HDD / DVD Recording, a separate Title will be created. -
Page 38: Special Playback
Select the file or Folder you want to Play using [ K/ L ], then For Disc: press [ OK ]. During Playback, press [ C (Stop) ]. • Press [ B (Play) ] or [ OK ] to move to any lower •... -
Page 39: Step By Step Playback
Note(s) Step by Step Playback When you Play a Title being Recorded. • You can also use the special Playback functions such as During Playback, press [ F (Pause) ]. [ g (Forward) ],[ h (Reverse) ], etc. • Playback will be paused and sound will be muted. •... -
Page 40: Switching Subtitles
Switching Subtitles Repeat Playback DVD-Video may have subtitles in 1 or more Languages. Press [ MENU ] during Playback. Available subtitle Languages can be found on the disc case. You • Sub Menu window will appear. can Switch subtitle Languages anytime during Playback. Select “Repeat”... -
Page 41: Editing
7. EDITING Select the Title you wish to Delete using [ K/ L ], then press [ OK ]. Deleting a Title You can Delete a Title which you do not need anymore. Please be advised that the Title once Deleted cannot be brought back. -
Page 42: Renaming A Title
Note(s) Renaming a Title • In Character Set, the Number 1 pushed Repeatedly can be used to Input the following Symbols, Press [ TITLE ]. – ., @, -, _, /, :, !, ", #, $, %, &, ', (, ), *, +, ,, ;, •... -
Page 43: Network
8. NETWORK Manual Select “Wired” using [ K/ L ], then press MDR868/867H [ OK ]. This section describes the procedures for Network setup. By performing the Network Connection setup, you can use the Select “Manual” using [ K/ L ], then press Network features, such as Network Update function. - Page 44 Default Gateway:Manual Proxy Setting Proxy Setting Select “Default Gateway” using [ K/ L ], then press Proxy Address [ OK ]. Select “Proxy Setting” using [ K/ L ], then press [ OK ] • Default gateway Address entry window will appear. Select “Use”...
- Page 45 ■ For Wireless Connection Select “Auto” using [ K/ L/ 0 / 1 ], then press [ OK ]. Press [ HOME ], then Select “Settings” “General Settings” “Network”, then press • Connection test will Start and the test result will be Displayed.
- Page 46 PIN Code Method Easy Connect Easy Connect This method lets you configure the wireless Network using PIN Select this if your Wireless Networks has a PBC button . It is Code method. the easiest way to set up a wireless Connection. If it fails, try “Easy Select “PIN Code Method”...
-
Page 47: Network Server
• Depending on the connected Mobile device, this unit Note(s) may convert an HD Title to SD for Streaming. • This function is available on MDR868H and MDR867H To Stop Video Streaming, press [ C (Stop) ]. only. • To use the Network Server function on a Mobile device, •... -
Page 48: Scheduled Recording For Downloadable Title
9. SOFTWARE Scheduled Recording for Downloadable Title Software Update Press [ SCHEDULE REC. ]. You can check the Software information and set the Network Update setting. Select “New” using [ K/ L ], and press [ OK ]. Press [ HOME ], then Select “Settings” “General Settings”... -
Page 49: Network Update
You can Update the Software via the Internet. Be sure that you Prepare a blank disc. have completed the Network configuration beforehand. Access the URL: www.magnavox.com , then Select “Network Update”, using [ K/ L ], download the latest Software to disc using a then press [ OK ]. -
Page 50: 10. Function Setup
10. FUNCTION SETUP Video General Settings Adjusting the Video mode or some other picture functions. In the setup Menu, you can customize the various kinds of settings with your preferences. ➠ p. 51 Refer to the following Instructions to navigate through the setup Menu. -
Page 51: Video
Video Aspect ratio 16:9 of the Video Source Select a desired item using [ K/ L ], then press [ OK ]. Resolution” is set to When “HDMI Video “480p” or when you Resolution” is set to connect this unit “720p”... -
Page 52: Audio
Still Mode DRC (Dynamic Range Compression) Use this feature to set the type of still image when Playback is This compression function will reduce the volume of the paused. Select “Auto” usually. loudest sounds and amplify quieter sounds to make it easier to hear voices or raise the average sound level. -
Page 53: Display
Caption Settings Display Closed Caption refers to Text of dialog or descriptions Displayed On-screen. Select a desired item using [ K/ L ], then Use this Menu to change the settings for Closed Caption. press [ OK ]. Sets the Selected item in references below. Select a desired item using [ K/ L ], then press [ OK ]. -
Page 54: Background Color
<Edge Type> Caption Style Caption Style Edge type of the Displayed caption can be Switched. The following settings can be configured. None Raised Depressed Uniform Left Drop Shadow Right Drop Shadow <Edge Color> Edge color of the Displayed caption can be Switched. White Black <User Setting>... -
Page 55: Hdmi
TV Screen Protection HDMI Audio Out While the setup Menu is shown, you do not operate any key on If you do not wish to output the Audio through HDMI, you can Remote Control for 15 minutes, then setup Menu will be Clear set the HDMI Audio output Off. -
Page 56: Playback
Note(s) Playback • If your Select ‘Other’ for ‘Audio Language’, ‘Subtitle Language’, ‘Disc Menu Language’, press the 4-digit Code Select a desired item using [ K/ L ], then useing [ the Number buttons ]. Refer to ‘Language press [ OK ]. Code’... -
Page 57: Recording
Variable Skip/Replay Recording Assign [ 0 ( O REPLAY) ] or [ 1 ( P SKIP) ] to Skip or Auto Chapter rewind by a certain amount of Time when they are pressed during Playback. The unit inserts Chapter marks periodically during Recording. Using the auto Chapter Menu, you can set this function Off or Select a desired item using [ K/ L ], then change the Time period. -
Page 58: Others
Subtitle Recording Remote Control Record to DVD with Closed Caption or not. Code Select Code Select Select a desired item using [ K/ L ], then Sets the remote conntrol Code 1/2/3 for your Remote Control. press [ OK ]. By setting the Remote Control Code to this unit, you can prevent other devices from responding when you use the Record to DVD with Closed Caption. - Page 59 Select “Old” using [ K/ L ], then press [ OK ]. Clock Configure the Clock, Time zone and Daylight Saving Time • Channel selection window will appear. settings. Select a Channel using [K/L], then press If the Clock is not set correctly, Scheduled Recording does not [ OK ].
-
Page 60: Channel Settings
Auto Channel Preset Channel Settings If you Switch input signal wires (e.g. between Antenna and CATV) or if you move the unit to a different area after the Be sure the RF Cable is correctly connected to this unit and you Initial Setting or if you restore the DTV Channels you Deleted, are Registered with your Cable Digital TV provider when you it is recommended to search a new Channel. - Page 61 Add Channels Antenna Out This function lets you add the Channels that were not added by Set whether you want the Antenna signal to passthrough when “Auto Channel Preset” due to the reception conditions during the Power is Off (Standby) mode. the initial setup.
-
Page 62: Child Lock
Setting TV and Movie Ratings Child Lock Movie ratings lock is the rating system created by MPAA. TV You can prevent children from viewing certain types of ratings lock has controlled access to individual Programs based Programs or Channels by locking the TV controls using specific on their age and content ratings. - Page 63 Canadian English / Canadian French Ratings US TV Movie Description Rating You can Select ratings for Canadian English / Canadian French Rating Broadcasting. TV-MA Mature audience only NC-17 — No one under 17 admitted Select “Canadian English Rating” or Children under 17 require accompanying “Canadian French Rating”...
-
Page 64: Digital Audio Preference
Downloadable Rating Digital Audio Preference You can set Region Rating. You can set the interpretive Broadcasting by an Audio Select “Downloadable Rating” using [ K/ L ], explanation. then press [ OK ]. Select “Digital Audio Preference” using • If this unit has not received a Rating Table, a Message [ K/ L/ 0 / 1 ], then press [ OK ]. -
Page 65: Media Management
11. MEDIA Finalize You will need to finalize DVD-RW/-R to Play them back on MANAGEMENT other DVD players. Finalizing may take several minutes up to an hour. Media Management A shorter Recording period on the disc will require a longer Time period for finalization. -
Page 66: 12. Others
12. OTHERS Troubleshooting Before requesting service for this unit, check the table below for a possible cause of the problem you are experiencing. Some simple checks or a minor adjustment on your part may eliminate the problem and restore proper operation. Symptom Remedy The Power does not turn On. - Page 67 No image from HDMI Connection. • Check the HDMI Connection. (Check the status of the HDMI related indications.) • Check the correct SOURCE or INPUT on the DTV device that has correctly selected the Signal from this unit's HDMI output •...
- Page 68 TV aspect ratio does not match your • Check the TV aspect ratio. (Refer to page 51) TV screen. Playback picture is distorted. • During Fast Forward or Fast Reverse, Playback picture may be distorted. This Color of the picture is abnormal. is not a malfunction.
- Page 69 • Cannot guarantee about third party’s Remote Controls. Please contact the remote manufacturer if you have any problem with it. • If above solutions do not solve the problem, please call our customer support at 1-866-341-3738 or visit www.magnavox.com/support for additional assistance.
- Page 70 Cannot connect to the Network. • Check if the Ethernet Cable Connection is properly made. Turn On the modem or broadband Router. • Check the Network settings. • Check if the broadband Router and/or modem is correctly connected. Sometimes Video quality is poor when •...
-
Page 71: Error Message
Error Message Error message Cause Solution Disc Error • Unplayable disc is inserted in • Insert a standardized playable disc which bear Playback feature may not be the unit. the Logos on page 36. available on this Disc. • The disc is upside down. •... - Page 72 Error message Cause Solution —Please check the USB Device.— • The connected External • Please disconnect the External HDD. Abnormality occurred in USB HDD is detected to have an Connection. overcurrent condition. USB device has been Stopped automatically. —Please Check the External HDD •...
-
Page 73: Glossary
Glossary Analog Audio JPEG (joint photographic experts group) An electrical signal that directly represents sound. Compare JPEG is a method of compressing still image files. You can copy this to Digital Audio which can be an electrical signal, but is an JPEG files from your personal computer to a disc, and Play them indirect representation of sound. -
Page 74: Specifications
Specifications General MDR868H MDR867H MDR865H 1 TB 500 GB Power requirements 120V AC +/- 10%, 60Hz +/- 5% Power Consumption 35W (Standby: 0.3W) 35W (Standby: 0.3W) 30W (Standby: 0.3W) Dimensions(width x height x depth) 16.5 x 2.4 x 12.0 inches (420 x 60.1 x 305mm) Weight 7.3 lbs. -
Page 75: Language Code
Language Code Language Code Language Code Language Code Language Code Abkhazian 4748 Greek 5158 Nauru 6047 Telugu 6651 Afar 4747 Greenlandic 5758 Nepali 6051 Thai 6654 Afrikaans 4752 Guarani 5360 Norwegian 6061 Tibetan 4861 Albanian 6563 Gujarati 5367 Occitan 6149 Tigrinya 6655 Amharic... -
Page 76: Limited Warranty
LIMITED WARRANTY LIMITED WARRANTY NINETY (90) DAY LABOR / ONE (1) YEAR PARTS WARRANTY COVERAGE: This warranty does not apply (a) to damage caused by accident, This warranty obligation is limited to the terms as set forth abuse, misuse, neglect, misapplication, or non-supplied product, below. -
Page 77: 13. Español
13. ESPAÑOL Botón H (anterior) • Durante la reproducción, presione H para regresar al inicio del capítulo actual y después presione H como se necesite para regresar al (los) capítulo(s) previo(s). Control remoto Botón C (detener) • Presione para detener la Reproducción o Grabación. 10 Botones de número •... -
Page 78: Grabación Básica Y Grabación De Temporizador De Un Toque
■ Para Detener la Grabación de Temporizador de Grabación básica y Grabación Un Toque dentro del tiempo especificado: • Presione [ (Detener) ]. Aparecerá el mensaje de de temporizador de un toque confirmación. Seleccione “Sí” para detener la grabación. Nota(s) Siga los pasos siguientes para grabar un programa de TV. - Page 79 Nombre de título, Fecha, Hora, Canal y Estación de Grabación alterna Grabación alterna transmisión.) En los siguientes casos, la unidad detectará y grabará 2. Fecha y hora actual automáticamente en el HDD aunque se seleccione HDD 3. Icono de grabación (Aparece cuando la Grabación Externo o DVD como medio de grabación.
-
Page 80: Consejos Para Grabación Programada
Para detener la Grabación programada en progreso Omitir el Periodo de Grabación programado Puede desactivar el periodo de Grabación programada (diario, Presione [ (Detener) ] en el control remoto. MARTES-SÁBADO, LUNES-S+ABADO, LUNES-VIERNES o Aparecerá el mensaje de confirmación. Seleccione “Sí”, semanal) temporalmente. -
Page 81: Pausa De Tv
Programa B • Comienza una grabación programada. ■ Para MDR868H y MDR867H, un programa ajustado más tarde “Pausa de TV” Borrar: (Programa B y Programa C) tiene prioridad. El Título grabado con “Pausa de TV” no se borrará al detener simplemente con “Pausa de TV”. -
Page 82: Durante Reproducción
idiomas de subtítulo disponibles se pueden encontrar en la caja Durante Reproducción del disco. Puede cambiar los idiomas de subtítulo en cualquier momento durante la reproducción. Presione [ MENU ] durante la reproducción. Reproducción rápida • Aparecerá la ventana de Sub Menú. Seleccione “Subtítulo”... -
Page 83: Garantía Limitada
GARANTÍA LIMITADA NOVENTA (90) DÍAS EN MANO DE OBRA / UNA (1) AÑO EN PARTES COBERTURA DE GARANTÍA: Esta garantía no aplica (a) a daños causados por accidente, abuso, La obligación de ésta garantía se limita a los términos establecidos mal uso, negligencia, mala aplicación o por productos no provistos a continuación.