Sony Cyber-Shot DSC-H7 Instruction Manual
Hide thumbs
Also See for Cyber-Shot DSC-H7:
- Instruction manual (200 pages) ,
- Manual (140 pages) ,
- Handbook (137 pages)
Table of Contents
Advertisement
Digital Still Camera
Instruction Manual
DSC-H7/H9
For details on the advanced operations, please access
"Cyber-shot Handbook" and "Cyber-shot Step-up Guide"
contained on the supplied CD-ROM via a computer.
Operating Instructions
Before operating the unit, please read this manual thoroughly, and retain it for future reference.
© 2007 Sony Corporation
GB
3-196-623-11(1)
Advertisement
Table of Contents

Related Manuals for Sony Cyber-Shot DSC-H7


Summary of Contents for Sony Cyber-Shot DSC-H7
-
Page 1: Instruction Manual
For details on the advanced operations, please access “Cyber-shot Handbook” and “Cyber-shot Step-up Guide” contained on the supplied CD-ROM via a computer. Operating Instructions Before operating the unit, please read this manual thoroughly, and retain it for future reference. © 2007 Sony Corporation 3-196-623-11(1) -
Page 2: Important Safeguards
The model and serial numbers are located SAFEGUARDS on the bottom. Record the serial number in the space provided below. Refer to these numbers whenever you call upon your Sony dealer regarding this product. For your protection, please read these safety Model No. DSC-H7/H9... -
Page 3: Replacement Parts
Cleaning long periods of time, unplug it from the wall outlet and disconnect the antenna or cable system. Unplug the set from the wall outlet before This will prevent damage to the set due to cleaning or polishing it. Do not use liquid cleaners lightning and power-line surges. -
Page 4: Read This First
BATTERIES Declaration of Conformity Trade Name: SONY Lithium-Ion batteries are Model No.: DSC-H7 recyclable. Responsible Party: Sony Electronics Inc. You can help preserve our environment by returning your Address: 16530 Via Esprillo, used rechargeable batteries to San Diego, CA 92127U.S.A. -
Page 5: For Customers In Europe
CAUTION For Customers in Europe You are cautioned that any changes or This product has been tested and found compliant modifications not expressly approved in this with the limits set out in the EMC Directive for manual could void your authority to operate this using connection cables shorter than 3 meters (9.8 equipment. - Page 6 If the plug supplied with this equipment has a detachable fuse cover, be sure to attach the fuse cover after you change the fuse. Never use the plug without the fuse cover. If you should lose the fuse cover, please contact your nearest Sony service station.
-
Page 7: Table Of Contents
Table of contents IMPORTANT SAFEGUARDS ..............2 Read this first .................... 4 Notes on using your camera ..............8 Getting started ................10 Checking the accessories supplied ............10 1 Preparing the battery pack ..............12 2 Inserting the battery pack/a “Memory Stick Duo” (not supplied) ..13 3 Turning the camera on/setting the clock .......... -
Page 8: Notes On Using Your Camera
Notes on using your camera Internal memory and “Memory Notes on the LCD screen, the Stick Duo” back up LCD finder and the lens Do not turn off the camera or remove the battery • The LCD screen and the LCD finder are pack or “Memory Stick Duo”... - Page 9 No compensation for contents of the recording The contents of the recording cannot be compensated for if recording or playback is not possible due to a malfunction of your camera or recording media, etc.
-
Page 10: Getting Started
Getting started Checking the accessories supplied • Battery charger BC-CSG/BC-CSGB/ • Shoulder strap (1) BC-CSGC (1) • Remote Control (1) • Power cord (mains lead) (1) (not supplied in the USA and Canada) • Lens hood (1)/Adaptor ring (1) • Rechargeable battery pack NP-BG1 (1)/ Battery case (1) •... -
Page 11: Remote Control
Remote Control may not function properly. In this case, replace the battery with a To change the battery of the Sony CR2025 lithium battery. Remote Control Use of another battery may present a risk of fire or explosion. -
Page 12: Preparing The Battery Pack
(wall socket). • When charging is finished, disconnect the power cord (mains lead) from the wall outlet (wall socket), and remove the battery pack from the battery charger. • Designed for use with compatible Sony batteries. -
Page 13: Inserting The Battery Pack/A "Memory Stick Duo" (Not Supplied)
2 Inserting the battery pack/a “Memory Stick Duo” (not supplied) Insert the “Memory Stick Insert the battery pack while Duo” all the way in as pressing the battery eject shown in the illustration lever with the tip of the Battery/“Memory Stick until it clicks. - Page 14 To remove the battery pack/“Memory Stick Duo” Open the battery/“Memory Stick Duo” cover. “Memory Stick Duo” Battery pack Slide the battery eject lever. Make sure that the Be sure not to drop the battery pack. access lamp is not lit, then push the “Memory Stick Duo”...
-
Page 15: Turning The Camera On/Setting The Clock
3 Turning the camera on/setting the clock (Playback) button POWER button z button Control button HOME button Press the POWER button or press (Playback) button. Set the clock with the control button. Select the date display format with v/V, then press z. Select each item with b/B and set the numeric value with v/V, then press z. -
Page 16: Shooting Images Easily
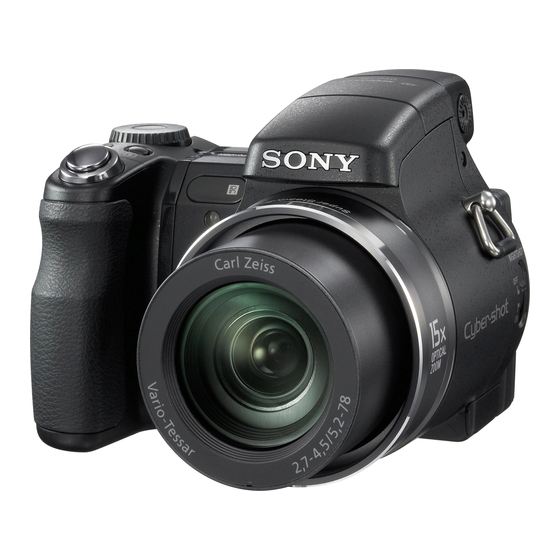
Shooting images easily Finder Microphone Shutter button Mode dial Macro button W/T (Zoom) button DISP button MENU button Flash button Control button Self-timer button HOME button Tripod receptacle (bottom) Select the desired function from the mode dial. When shooting still images (Auto Adjustment mode): Select When shooting movies: Select... -
Page 17: Mode Dial/Zoom/Flash/Macro/Self-Timer/Display/Finder/Lens Hood
Mode dial/Zoom/Flash/Macro/Self-timer/Display/Finder/Lens hood Using the mode dial Using the zoom Set the mode dial to the desired function. Press T to zoom, press W to undo zoom. Auto Adjustment Flash (Selecting a flash mode Allows easy shooting with the settings for still images) adjusted automatically. - Page 18 DISP Changing the screen To shoot using the finder display With the FINDER/LCD button, you can choose to shoot either using the finder or Press v (DISP) on the control button. the LCD screen. When you use the finder, Each time you press v (DISP) button, the the image does not appear on the LCD LCD screen or the LCD finder changes as screen.
- Page 19 Attaching the lens hood Storing the lens hood Position the lens hood as shown below and Attach the adaptor ring while the power is turn the lens hood clockwise until it clicks. off. Adaptor ring Turn the position ring and position the indicator of the adaptor ring to the indicator of this camera, as illustrated below.
-
Page 20: Shooting With Manual Adjustment
Shooting with manual adjustment Using the wheel dial You can change the following settings by using the wheel dial. ISO value • Shutter speed • Aperture value • Exposure value (EV) • AF range finder frame • AF range finder frame indicator indicator Exposure value –... -
Page 21: Viewing/Deleting Images
Viewing/deleting images MENU button (Playback) button (playback zoom)/ (Index) button (playback zoom) button Multi connector (side) Control button (inside)/ HOME button Wheel dial (outside) Speaker (bottom) Press (Playback) button. If you press when the camera is powered off, the camera is turned on automatically and set to playback mode. -
Page 22: Viewing An Index Screen
Viewing an index screen Press (Index) button to display the index screen while a still image is displayed. Then, select an image with v/V/b/B. To return to the single image screen, press z. • You can also access the index screen by selecting [ Index Display] in (View Images) on the HOME screen. -
Page 23: Learning The Various Functions - Home/Menu
Learning the various functions – HOME/Menu Using the HOME screen The HOME screen is the gateway screen for all the functions of your camera. You can select the shooting mode or playback mode, or change the settings from the HOME screen. -
Page 24: Home Items
For details on the operation 1 page 23 HOME items Press HOME button displays the following items. Details on the items are displayed on the screen by the guide. Category Items Shooting Shooting View Images Single Image Index Display Slide Show Printing, Other Print Music Tool... -
Page 25: Using Menu Items
Using menu items MENU button Control button z button Press MENU to display the menu. Function Guide • The menu will be displayed only during shooting and playback mode. • Different items will become visible depending on the selected mode. Select the desired item with v/V on the control button. -
Page 26: Menu Items
For details on the operation 1 page 25 Menu items The available menu items vary depending on the camera mode. The shooting menu is available only in the shooting mode, and the viewing menu is available only in the playback mode. Also, the menu items available vary depending on the mode dial position. - Page 27 For details on the operation 1 page 25 Menu for viewing (Delete) Deletes images. (Slide Show) Plays back a series of images. (Retouch) Retouches images. (Protect) Prevents accidental erasure. Adds a Print order mark on image that you want to print out. (Print) Prints images using a PictBridge compliant printer.
-
Page 28: Enjoying Your Computer
Enjoying your computer You can display images shot with the camera on the computer. Also, you can use still images and movies from the camera more than ever by taking advantage of the software. For details, refer to “Cyber-shot Handbook”. Supported Operating Systems for USB connection and application software (supplied) For Windows users... -
Page 29: Viewing "Cyber-Shot Handbook" And "Cyber-Shot Step-Up Guide
Viewing “Cyber-shot Handbook” and “Cyber-shot Step-up Guide” For Windows users For Macintosh users Turn on your computer, and insert the CD- Turn on your computer, and insert the CD- ROM (supplied) into the CD-ROM drive. ROM (supplied) into the CD-ROM drive. Follow the instructions below. -
Page 30: Indicators On The Screen
Indicators on the screen Each time you press v (DISP) button, the display changes (page 18). Battery remaining When shooting still images Low battery warning Image size Mode dial/Menu (Scene Selection) P S A M Mode dial Night Shot (DSC-H9 only) White balance When shooting movies Recording mode... - Page 31 AE/AF lock Recording/playback Media Standby Standby/Recording a movie Recording folder Playback folder ISO400 ISO number Remaining number of NR slow shutter recordable images Shutter speed 12/12 Image number/Number of images recorded in selected F3.5 Aperture value folder +2.0EV Exposure Value 00:00:00 Remaining recordable time AF range finder frame...
-
Page 32: Battery Life And Memory Capacity
Battery life and memory capacity Battery life and number of images that can be recorded/viewed The tables show the approximate number of • Shooting in the following situations: images that can be recorded/viewed and the – [AF Mode] is set to [Single]. battery life when you shoot images in –... -
Page 33: Number Of Still Images And Recording Time Of Movies
• The number of images listed is for when [REC Mode] is set to [Normal]. • When the number of remaining shootable images is greater than 9,999, the “>9999” indicator appears. • When images recorded using earlier Sony models are played back on this camera, the display may differ from the actual image size. -
Page 34: Troubleshooting
3 Initialize the settings (page 24). 4 Consult your Sony dealer or local authorized Sony service facility. Please understand that you give your consent that the contents of the internal memory, Music files may be checked when you send your camera to be repaired. -
Page 35: Shooting Still Images/Movies
The battery remaining indicator is incorrect. • This phenomenon occurs when you use the camera in an extremely hot or cold location. The displayed battery remaining differs from the current one. Fully discharge and then charge • the battery pack to correct the display. The battery pack is discharged. -
Page 36: Precautions
Precautions Do not use/store the camera in On moisture condensation the following places If the camera is brought directly from a cold to a warm location, moisture may condense inside or • In an extremely hot, cold or humid place outside the camera. -
Page 37: Specifications
Specifications [Power, general] Camera Power: Rechargeable battery pack NP-BG1, 3.6 V [System] AC-LS5K AC Adaptor (not supplied), 4.2 V Image device: 7.18 mm (1/2.5 type) color CCD, Power consumption (during shooting with the Primary color filter LCD screen): Total pixel number of camera: DSC-H9: Approx. - Page 38 Trademarks • is a trademark of Sony Corporation. • “Memory Stick”, , “Memory Stick PRO”, , “Memory Stick Duo”, , “Memory Stick PRO Duo”, , “Memory Stick Micro”, “MagicGate”, and are trademarks of Sony Corporation. • Microsoft, Windows and DirectX are either...
- Page 40 Additional information on this product and answers to frequently asked questions can be found at our Customer Support Website. Printed on 70% or more recycled paper using VOC (Volatile Organic Compound)-free vegetable oil based ink. Printed in Japan...