Table of Contents
Advertisement
Advertisement
Table of Contents

Related Manuals for Mitsubishi PD-4265


Summary of Contents for Mitsubishi PD-4265
- Page 1 Owner’s Guide Mitsubishi Plasma Display PD-4265 & PD-5065...
-
Page 3: Read Before Operating Equipment
IMPORTANT SAFETY INSTRUCTIONS (PD-4265/PD-5065) Read before operating equipment 1. Read these instructions. 2. Keep these instructions. 3. Heed all warnings. 4. Follow all instructions. 5. Do not use this apparatus near water. 6. Clean only with a dry cloth. 7. Do not block any of the ventilation openings. Install in accordance with the manufacturer’s instructions. -
Page 4: Important Information
Important Information Precautions Please read this manual carefully before using your Mitsubishi plasma display and keep the manual handy for future reference. CAUTION RISK OF ELECTRIC SHOCK DO NOT OPEN CAUTION:TO REDUCE THE RISK OF ELECTRIC SHOCK, DO NOT REMOVE COVER. NO USER-SERVICEABLE PARTS INSIDE. - Page 5 *ORBITER - Uneven phosphor aging/burn-in reduction feature. To minimize the risk of uneven phosphor aging/burn-in when displaying still images, the Mitsubishi PD-4265 and PD-5065 offers a built-in feature known as ORBITER. The ORBITER feature intermittently shifts the screen image horizontally and vertically in small increments. This intermittent screen movement is usually not evident in full motion video.
- Page 6 WARNING: Do not leave stationary or letterbox images on-screen for extended periods of time. Mix types of pictures shown. Uneven phosphor aging is NOT covered by your warranty. The normal use of a TV should include a mixture of TV picture types.
-
Page 7: Cleaning Safeguards
Cleaning Safeguards Plasma Display Screen & Cabinet Please follow the cleaning safeguards listed below to prevent damage to your Plasma Display and retain this document for future reference. IMPORTANT: No Abrasives! DO NOT use any kind of abrasive cloth or cleaner or ammonia on the Plasma Display’s screen or cabinet. -
Page 8: Contents Of The Package
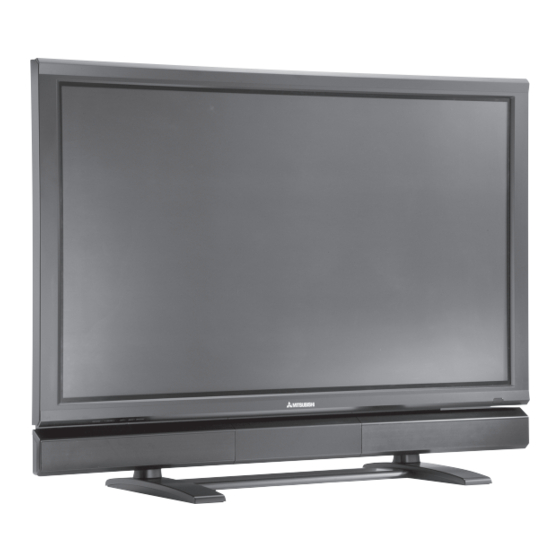
Introduction Introduction to the PD-4265/ PD-5065 Plasma Displays Mitsubishi’s PD-4265/PD-5065 plasma displays are a seamless blend of cutting-edge visual technology and sophisticated design. The displays sleek techno-art lines blend in well with most environments. The displays crisp, vivid image quality will transform data from any graphic medium from PCs to DVD players into art. -
Page 9: Table Of Contents
Checking the frequencies, polarities of input signals, and resolution ... 29 MonitorLink Control ... 30 Troubleshooting ... 31 Technical Specifications PD-4265 ... 33 Technical Specifications PD-5065 ... 34 Table of Signals Supported PD-4265 ... 35 Table of Signals Supported PD-5065 ... 37 Warranty ... 39... -
Page 10: Installation
(2") (2") The distance between the surrounding objects and the back of the display should be greater than 4.1" for PD-4265 and greater than 5" for PD-5065. The base can not touch surrounding object. How to use the safety metal fittings... -
Page 11: Part Names And Function
Part Names and Function Front View MENU/ENTER VOLUME LEFT/- RIGHT/+ INPUT/EXIT MENU/ENTER VOLUME q REMOTE SENSOR WINDOW Receives the signals from the remote control. w POWER/STANDBY Indicator When the power is on ... Lights green. When the power is in the standby mode ... Lights red. e INPUT / EXIT BUTTON Switches the input. -
Page 12: Side View / Rear View
Side View A AC IN Connect the included power cord here. B EXT SPEAKER L and R Maintain the correct polarity. The wire is connected to the EXT SPEAKER terminal and the (negative) speaker wire is connected to the EXT SPEAKER terminal on both LEFT and RIGHT channels. -
Page 13: Remote Control
Remote Control SLEEP INFO FORMAT ADJUST DEVICE COMP 1 INPUT 1 INPUT 2 COMP 2 INPUT 3 MONLINK q POWER ON/STANDBY Switches the power to ON or STANDBY mode. w SLEEP Press this button to activate the off timer. e INFO Displays the source settings on the screen. -
Page 14: Battery Installation And Replacement
How to use the remote control Battery Installation and Replacement Insert the 2 “AAA” batteries, making sure insert them with the proper polarity. 1.Remove the remote control’s back cover by gently pressing the rigid tab in the direction of the arrow. 2.Install the batteries according to the (+) and (–) indication inside the case. -
Page 15: Connections
Connections INPUT 1- 3 VCR or Laser Disc Player To video inputs on the plasma display Document Camera DVD Player IBM VGA or Compatibles Macintosh or Compatibles (Desk top type) Monitor adapter for Macintosh (not included) To Mini D-Sub 15 pin connector on the plasma display Mitsubishi HD Receiver/Controller (i.e. -
Page 16: Connecting Your Pc Or Macintosh Computer
Connecting Your PC or Macintosh Computer Connecting your PC or Macintosh computer to your plasma display will enable you to display your computer’s screen image for an impressive presentation. The plasma display supports the signals described on pages 35-38. To connect a PC or Macintosh simply: 1. -
Page 17: Monitorlink Connections
MonitorLink™ Connections MonitorLink and MonitorLink Control 1. Connect a HDMI to HDMI cable from the MONLINK OUTPUT of a Mitsubishi HD-6000 Receiver/Controller to the MONLINK input on the plasma display. A HDMI to HDMI cable and a RS-232C cable are included in the HD-6000 accessory box. -
Page 18: Cable Management Pd-4265
Cable Management for PD-4265 Cable Management Cover assembly Cable Management Depending on cable thickness and number of cables, the Cable Management Cover might not close. In this case, please remove the Cable Management Cover. When Cable Management Cover is removed, please fasten cables to back panel using attached Clamp. -
Page 19: Cable Management Pd-5065
Cable Management for PD-5065 Cable Management Cover assembly Cable Management Depending on cable thickness and number of cables, the Cable Management Cover might not close. In this case, please remove the Cable Management Cover. When Cable Management Cover is removed, please fasten cables to back panel using attached Clamp. -
Page 20: Basic Operations
Basic Operations POWER To turn the unit ON and OFF: 1. Plug the power cord into an active AC power outlet. 2. Press the POWER ON button (on the remote control) to turn on the unit. The monitor’s POWER/STANDBY indicator will light up (green) when the unit is on. -
Page 21: Sleep/Off Timer
SLEEP/OFF TIMER To set the off timer: The off timer can be set to turn the power off after 30, 60, 90 or 120 minutes. 1. Press the SLEEP button to start the timer at 30 minutes. 2. Press the SLEEP button to the desired time. 3. -
Page 22: Format Sizes
Format Sizes Format Operation (manual) With this function, you can select one of six screen sizes. When viewing videos or digital video discs 1. Press the FORMAT button on the remote control. 2. Within 3 seconds ... Press the FORMAT button again. The screen size switches as follows: →... -
Page 23: Format Operation With Computer Signals
Format Operation with Computer Signals Switch to the wide screen mode to expand the 4 : 3 image to fill the entire screen. 1. Press the FORMAT button on the remote control. 2. Within 3 seconds ... Press the FORMAT button again. The screen size switches as follows: →... -
Page 24: Menu Controls
Menu Controls Menu Operations The following describes how to use the menus and the selected items. 1. Press the MENU/ENTER button on the remote control to display the MAIN MENU. MAIN MENU SET UP PICTURE AUDIO FUNCTION SIGNAL INFO. IMAGE ADJ. SEL. -
Page 25: Menu Tree Operations
Menu Tree :Shaded areas indicate the default value. ←→ button to adjust. The default value is at the center. : Press the Main menu Sub menu Sub menu 2 PICTURE PICTURE MEMORY OFF/MEMORY1-6 ←→ CONTRAST ←→ BRIGHTNESS ←→ SHARPNESS ←→ COLOR TINT R←→G... - Page 26 Main menu Sub menu Sub menu 2 FUNCTION POWER MGT. ON←→OFF INPUT SKIP ON←→OFF LONGLIFE MANUAL/AUTO PEAK BRIGHT ORBITER INVERSE/WHITE SOFT FOCUS ORBITER MENU MENU CONTRAST NORMAL/LOW Main menu Sub menu Sub menu 2 SIGNAL INFO. *1 Only when AUTO PICTURE is OFF. *2 RGB/PC only Information Restoring the factory default settings...
-
Page 27: Picture Settings Menu
Picture Settings Menu Storing picture settings This function allows you to store in memory the current input signal and PICTURE menu settings and to recall these settings when necessary. There are six picture memory locations available, and notes of up to 15 characters can be added to each. Example: Storing picture settings at MEMORY1 Press MENU/ENTER button to access MAIN MENU. -
Page 28: Reducing Noise In The Picture
Reducing noise in the picture Use these settings if the picture has noise due to poor reception or when playing video tapes which have poor picture quality. Example: Setting “NR-3” Press MENU/ENTER button to access MAIN MENU. ▲ ▼ buttons to select the PICTURE menu and Use the then press the MENU/ENTER button. -
Page 29: Setting The Color Temperature
Setting the color temperature Use this procedure to set color tone produced by the plasma display. Example: Setting “HIGH” Press MENU/ENTER button to access MAIN MENU. ▲ ▼ buttons to select the PICTURE menu and Use the then press the MENU/ENTER button. Use the ▲... -
Page 30: Adjusting The Pedestal Level
Adjusting the pedestal level (black level) This feature adjusts the video black level in a video image. Example: Setting “3.75%” Press MENU/ENTER button to access MAIN MENU. ▲ ▼ buttons to select the PICTURE menu and Use the then press the MENU/ENTER button. Use the ▲... -
Page 31: Audio Settings Menu
Audio Settings Menu Adjusting the treble, bass and left/right balance and audio input select The treble, bass and left/right balance can be adjusted to suit your tastes. Example: Adjusting the bass Press MENU/ENTER button to access MAIN MENU. ▲ ▼ buttons to select the AUDIO menu and Use the then press the MENU/ENTER button. -
Page 32: Set Up Settings Menu
SET UP Settings Menu Setting the language for the menus The menu display can be set to one of eight languages. Example: Setting the menu display to “DEUTSCH” Press MENU/ENTER button to access the MAIN MENU. ▲ ▼ buttons to select the SET UP menu and Use the then press the MENU/ENTER button. -
Page 33: Setting The Black Level For Hdmi Signal
Information RGB SELECT modes One of these 7 modes must be selected in order to display the following signals correctly. AUTO: Select the suitable mode for the specifications of input signals as listed in the table “Computer input signals supported by this system” on page 7 of Model Information. -
Page 34: Setting The Gray Level For The Sides Of The Screen
Setting the gray level for the sides of the screen Use this procedure to set the gray level for the parts on the screen on which nothing is displayed when the screen is set to the 4:3 size. Example: Setting “GRAY LEVEL” to “5” Press MENU/ENTER button to access the MAIN MENU. -
Page 35: Resetting To The Default Values
Resetting to the default values Use these operations to restore all the settings (PICTURE, AUDIO, IMAGE ADJUST, SET UP, etc) to the factory default values. Refer to pages 15 & 16 for items to be reset. Press MENU/ENTER button to access the MAIN MENU. ▲... -
Page 36: Functions Settings Menu
Function Settings Menu Setting the power management for computer images This energy-saving (power management) function automatically reduces the displays power consumption if no operation is performed for a certain amount of time. Example: Turning the power management function on Press MENU/ENTER button to access the MAIN MENU. ▲... - Page 37 PEAK BRIGHT Use this to activate the brightness limiter. Example: Setting “PEAK BRIGHT” to “75%” Follow the instructions given in the “Reducing burn-in of the screen” section. Bring up the LONGLIFE menu. Use the ▲ ▼ buttons to select PEAK BRIGHT setting. Use the buttons to change PEAK BRIGHT setting.
-
Page 38: Signal Information Menu
ORBITER MENU Use this to set menu shift. Example: Setting “ORBITER MENU” to “OFF” Follow the instructions given in the “Reducing Burn-in of the screen” section. Bring up the LONGLIFE menu. Use the ▲ ▼ buttons to select ORBITER MENU setting. Use the buttons to turn the ORBITER MENU on or off. -
Page 39: Monitorlink Control
MonitorLink Control Application These specifications cover the communications control of the plasma monitor by external equipment. Use a crossed (reverse) cable. Type of connector: D-Sub 9-pin male Pin No. Pin Name Pin No. No Connection DSR (DCE side ready) RXD (Receive data) RTS (Ready to send) TXD (Transmit data) CTS (Clear to send) -
Page 40: Troubleshooting
Troubleshooting If the picture quality is poor or there is some other problem, check the adjustments, operations, etc., before requesting service. Symptom Picture moves intermittently around the screen. Mechanical sound is heard. The unit emits a crackling sound. Picture is disturbed. Sound is noisy. - Page 41 *1 Overheat protector If the display becomes too hot, the overheat protector will be activated and the display will be turned off. If this happens, turn off the power to the display and unplug the power cord. If the room where the display is installed is particularly hot, move the display to a cooler location and wait for the display to cool for 60 minutes.
-
Page 42: Technical Specifications Pd-4265
PD-4265 Specifications Screen Size 36.1"(H) 20.4"(V) inches 918(H) 518(V) mm diagonal 42" Aspect Ratio 16 : 9 Resolution 1024(H) 768(V) pixels Pixel Pitch 0.036"(H) 0.027"(V) inches 0.897(H) 0.675(V) mm Color Processing 4,096 steps, 68.7 billion colors Signals Synchronization Range Horizontal : 15.5 to 110 kHz (automatic : step scan) Vertical : 50.0 to 120.0 Hz... -
Page 43: Technical Specifications Pd-5065
PD-5065 Specifications Screen Size 43.5"(H) 24.5"(V) inches 1106(H) 622(V) mm diagonal 50" Aspect Ratio 16 : 9 Resolution 1365(H) 768(V) pixels Pixel Pitch 0.032"(H) 0.032"(V) inches 0.81(H) 0.81(V) mm Color Processing 4,096 steps, 68.7 billion colors Signals Synchronization Range Horizontal : 15.5 to 110 kHz (automatic : step scan) Vertical : 50.0 to 120 Hz (automatic : step scan) -
Page 44: Table Of Signals Supported Pd-4265
Table of Signals Supported Supported resolution (PD-4265) • When the screen mode is NARROW, each signal is converted to a 768 dots 768 lines signal. (Except for * • When the screen mode is STANDARD, each signal is converted to a 1024 dots 768 lines signal. - Page 45 *1 Only when using a graphic accelerator board that is capable of displaying 852 480. *2 Display only 640 lines with the screen center of the vertical orientation located at the center. *3 The picture is displayed in the original resolution. The picture will be compressed for other signals. *4 The aspect ratio is 5:4.
-
Page 46: Table Of Signals Supported Pd-5065
Table of Signals Supported Supported resolution (PD-5065) • When the screen mode is NARROW, each signal is converted to a 1024 dots 768 lines signal. (Except for * • When the screen mode is STANDARD, each signal is converted to a 1365 dots 768 lines signal. (Except for * Computer input signals supported by this system Vertical Dots... - Page 47 *1 Only when using a graphic accelerator board that is capable of displaying 852 480. *2 This signal is converted to a 1024 dots *3 The picture is displayed in the original resolution. *4 The aspect ratio is 5:4. This signal is converted to a 960 dots 768 lines signal. *5 Normally the RGB select mode suite for the input signals is set automatically.
-
Page 48: Warranty
Mitsubishi Plasma Display Panel Limited Warranty MITSUBISHI DIGITAL ELECTRONICS AMERICA, INC. (“MDEA”) warrants to the original purchaser of this Plasma Display Panel that if purchased from an authorized MITSUBISHI Audio/Video Dealer, should it prove defective by reason of improper workmanship and/or material: a. -
Page 49: Declaration Of Conformity
FCC Rules. Mitsubishi Digital Electronics America 9351 Jeronimo Road Irvine, CA 92618 (949) 465-6000 Plasma Display Class B Peripheral PD-4265/PD-5065 Mitsubishi Digital Electronics America 9351 Jeronimo Road Irvine, CA 92618 Printed in Japan 7S802311...