Table of Contents

Related Manuals for Bernina 880


Summary of Contents for Bernina 880
- Page 1 BERNINA 880...
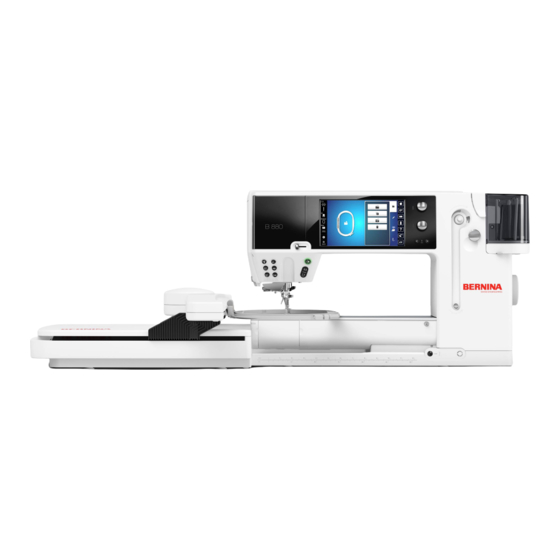
- Page 2 The BERNINA 880 is our top model - and during its development not only was focus placed on technique and ease of use but also the design of the product was well considered.
-
Page 3: Important Safety Instructions
This may deflect the needle, causing it to WARNING! break. 10. Do not use bent needles. 11. Always use the original BERNINA stitch plate. To reduce the risk of burns, fire, electric shock or The wrong stitch plate can cause needle injury to persons: breakage. -
Page 4: Environmental Protection
Safety Instructions SERVICING DOUBLE- Environmental Protection BERNINA is committed to the protection INSULATED PRODUCTS of the environment. We strive to minimize the environmental impact of In a double-insulated product two systems of our products by continuously improving insulation are provided instead of grounding. No... -
Page 5: Table Of Contents
Contents Contents Contents Sewing Threading Double/Triple Needle ⦁ Threading Double Needle Important Safety Instructions ⦁ Working with the Double needle ⦁ Triple Needle Environmental Protection ⦁ Changing the thread Key to Signs Changing the presser foot ⦁ Removing the presser foot Breadcrumb navigation ⦁... - Page 6 Programming the foot control ⦁ Back to basic settings ⦁ Programming securing stitches BERNINA Dual Transport ⦁ Automatic thread cutter ⦁ Balance BERNINA Dual Transport ⦁ Raising the presser foot ⦁ Back to basic setting Embroidery settings eco description ⦁ Calibrating the hoop ⦁...
- Page 7 Contents Practical stitches Altering the balance ⦁ Balance with direct entry length buttonholes Overview Practical stitches ⦁ Balance with direct entry length keyhole or round Selecting stitch pattern buttonholes ⦁ Direct-Option 1 ⦁ Balance for manual keyhole or round buttonhole ⦁...
- Page 8 ⦁ BSR Function deactivation ⦁ Overwriting ⦁ Deleting BERNINA Dual Feed History ⦁ Presser Feet Selection ⦁ Switching on BERNINA Dual Feed ⦁ Switching off BERNINA Dual Feed Fabrics Contents Embroidery Alphabets Accessory Embroidery Overview Alphabets Standard Accessory ⦁ Lettering ⦁...
- Page 9 Overview Display ⦁ Embroidering the motifs Entry to Embroidery mode ⦁ Closing the «Shape designer»-Display Embroidery Alphabet Combinations BERNINA Embroidery motifs Creating combinations BERNINA Stitch patterns ⦁ Adding a motif My Design ⦁ Duplicating a motif Embroidery motif from USB stick ⦁...
- Page 10 Contents Importing stitch patterns from the Exotic Rainforest sewing mode Floral Etchings Projects Selecting stitch patterns in the sewing mode Shaping designs Selecting stitch patterns in the embroidery mode 193 Monograms Saving the motif DesignWorks designs Memory Embroidery computer BC Embellishment USB stick BC Quilting BC Borders...
-
Page 11: Key To Signs
Key to Signs Key to Signs DANGER! Very important! Risk of injury! ATTENTION! Very important! Risk of damage! Tips! Breadcrumb navigation 1 Setup program is selected 2 Sewing settings are selected 3 Programming «Function»-button/«Function»-icon is selected 4 Programming hovering position of the presser foot is selected ⦁... -
Page 12: Accessory Sewing
Accessory Accessory Sewing Standard Accessories 1 Presser foot lifter 2 Foot control 3 Soft Cover with pocket 4 Accessory box 5 Power cable 6 Seam guide for slide-on table 7 Straight-/CutWork stitch plate 8 Slide-on table 9 7 bobbins (one of them in the sewing computer) 10 Adjustable guides 11 Wire threader for threading cording for bobbin play... -
Page 13: Presser Feet
7 No. 5 Blind stitch foot 8 No. 18 Button sew-on foot 9 No. 20C Open embroidery foot 10 No. 40C Sideways motion foot 11 No. 42 BSR foot 12 No. 26 Embroidery foot Visit www.bernina.com for more accessory information. 034791.51.04_2014-02_Manual_B880_EN... -
Page 14: Accessory Box Free Standing
Store the bobbins in the respective compartment of the accessories box. The bobbin of the B 880, exclusive to BERNINA, supplies up to 40% more lower thread. If the bobbin is not inserted correctly, an error message is displayed. -
Page 15: Overview Sewing Computer
Overview sewing computer Overview sewing computer Front view Detail view 034791.51.04_2014-02_Manual_B880_EN... - Page 16 ⦁ «Home»-button headframe ⦁ «Setup»-button 38 Special-accessories port ⦁ «Tutorial»-button 39 BSR-connection ⦁ «Creative Consultant»- 40 BERNINA Dual Feed button 41 Darning hoop connection ⦁ 42 Slide-on table socket «Help»-button ⦁ 43 Free Hand System «eco»-button ⦁ «clr»-button (clear) connection...
-
Page 17: Important Sewing Information
Important Sewing information Important Sewing information Thread Be sure to select the appropriate thread type and weight for the fabric. For a perfect sewing result, thread and fabric quality play an important role. It is recommended to use quality brands. Cotton threads ̶... -
Page 18: Needles, Threads
Important Sewing information Needles, threads Correct needle/Thread combination To sew optimally, the thread should travel smoothly down the long groove on the front of the needle. Too thin thread or too thick needle The thread has too much clearance in the long groove. Skipped stitches and damage to the thread can occur. -
Page 19: Overview Needles
Important Sewing information Overview needles Universal Metafil 130/705 H/60-100 130/705 H-MET/75-80 or H-SUK/90-100 Normal point, slightly rounded Large eye For nearly all natural and synthetic Sewing with metallic threads fabrics (woven and knitted) Jersey/Stretch Cordonnet (Topstitching) 130/705 H-S, H-SES, H-SUK/70-90 130/705 H-N/80-100 Ball point Small ball point, long eye... -
Page 20: Sewing Preparation
Sewing preparation Sewing preparation Battery ⦁ please remove the protective sticker of the battery before taking the sewing computer in use Power Switch/Power Cable 1 Power Switch The sewing computer is switched on («I») and off («0») with the power switch. the sewing computer is switched on 0 the sewing computer is switched off 2 Power plug socket... -
Page 21: Foot Control
⦁ wind the cable around the reel ⦁ plug cable into 6 USA/Canada only: Use only foot controller type LV-1 with sewing computer B 880. Slide-on table The slide-on table increases sewing surface. Attaching the slide-on table ⦁ turn the handwheel or press the «Needle stop up/down»-button (see page 15) ►... -
Page 22: Presser Foot Lifter
Sewing preparation Presser foot lifter Raising or lowering presser foot via FHS. Attaching the Free Hand System ⦁ insert into the opening 1 Raising and lowering the presser foot ⦁ with your knee, push lever to the right ⦁ you should be able to operate the FHS with your knee in your normal sitting position ►... -
Page 23: Winding The Bobbin
Sewing preparation Winding the Bobbin Preparation ⦁ turn power switch on (to «I») ⦁ place empty bobbin on Pin 1, white mark in front ► the bobbin winding screen appears ► the amount of bobbin fill is recognized by the system and displayed by a bar above the selectable bobbin fill ⦁... -
Page 24: Removing The Bobbin
Sewing preparation Removing the Bobbin ATTENTION! Only remove the bobbin if the hook is at the end position (threading position). Removing the Bobbin ⦁ open bobbin cover ► the hook system swings to the front ⦁ push the latch in the center of the bobbin to the left ⦁... -
Page 25: Threading The Upper Thread
Sewing preparation Threading the Upper Thread ATTENTION! Do not start the threaded sewing-/embroidery computer if there is no fabric on the stitch plate. The sewing-/embroidery computer must be switched ON for threading. Automatic ⦁ place thread spool on the rear or center spool pin 1 ⦁... -
Page 26: Changing The Needle
Sewing preparation Changing the needle Removing the needle ⦁ raise the needle ⦁ remove or lower presser foot (see page 27, 39) ⦁ turn power switch to «0» (off) ⦁ loosen the needle clamp screw 1 using the gray screwdriver ⦁... -
Page 27: Threading Double/Triple Needle
Sewing preparation Threading Double/Triple Needle Threading Double Needle ⦁ touch the «Security Program»-icon ⦁ touch the corresponding needle icon in the «Security Program»-Display ⦁ close the «Security Program»-Display ⦁ place a thread spool on the center spool pin and one on the rear spool pin and thread the corresponding guides on the telescopic rod ⦁... -
Page 28: Changing The Presser Foot
Sewing preparation Changing the presser foot Removing the presser foot ⦁ raise the needle and presser foot ⦁ turn power switch to «0» (off) ⦁ raise the clamping lever 1 ⦁ remove the presser foot Attaching the presser foot ⦁ guide the presser foot upwards over the cone ⦁... -
Page 29: Thread-Guide-And-Lubricating Unit
Sewing preparation Thread-Guide-and-Lubricating Unit ATTENTION! The silicone fluid must ONLY be used for thread lubrication. Never use it to lubricate the hook system! As a thread-guide eyelet (Fig. 1) Use the unit without lubricator for a controlled guiding of the thread into the pretensioner, e.g. -
Page 30: Various Options Of Application
Sewing preparation ATTENTION! It is absolutely essential to use the correct foam disc under the thread spool. Various Options of Application ̶ Vertical thread unwinding (with or without lubricator) from normal spool pin or optional multiple spool holder (Fig. 5-7) ̶... -
Page 31: Upper Thread Tension
Basic settings are applied automatically when a stitch pattern or program is selected. The upper thread tension is set optimally at the BERNINA factory and the sewing computer has been tested. Metrosene-/Seralon thread size 100/2 (Company Mettler, Switzerland) is used for upper and lower thread. -
Page 32: Lower Thread Tension
Sewing preparation Lower Thread Tension ⦁ hold bobbin case 1 firmly with your left hand ⦁ with your right hand, turn the hand wheel clockwise until the setting tool can be slid over the lug at the slider Basic value: ̶... -
Page 33: Security Program
Sewing preparation Security Program ⦁ touch the «Needle»- or «Stitch plate»-icon ► «Needle-/Stitch plate overview»-Display appears Display ► yellow flag = recommended, optimal selection ► green flag = optimal element is selected If an inappropriate needle/stitch plate has been selected for the selected stitch pattern, an animation will be displayed and the sewing computer cannot be started. -
Page 34: Selecting A Presser Foot
Sewing preparation Selecting a Presser Foot For every selected stitch pattern the optimal presser foot is displayed in «Presser foot selection»-icon. ATTENTION! It is IMPORTANT to select the attached presser foot to enable the sewing computer to recognize it and to activate the respective safety settings. -
Page 35: Altering Presser Foot Pressure
Sewing preparation Altering presser foot pressure ⦁ touch the «Presser foot pressure»-icon ► presser foot pressure scale is displayed ⦁ turn stitch width or stitch length knob to the left or to the right or ⦁ touch the «-»- or «+»-icon ►... -
Page 36: Alarm
Sewing preparation Alarm ⦁ touch the «Clock»-icon Setting the time of the alarm By touching the icon 1 the input fields are activated or deactivated. ⦁ touch icon 1 ⦁ turn stitch width or stitch length knob or ⦁ touch the «+»- or «-»-icon ►... -
Page 37: Feed Dog And Fabric Feed
Sewing preparation Feed dog and Fabric feed With each stitch the feed dog moves forward by one step. The length of this step is determined by the stitch length selected. With a very short stitch length the steps are very short. The fabric moves relatively slowly under the presser foot, even at full sewing speed, e.g. - Page 38 Notes Notes 034791.51.04_2014-02_Manual_B880_EN...
-
Page 39: Functions
Functions Functions Overview «Function»-buttons «Start/Stop/hover»-button ATTENTION! ̶ starts and stops the sewing computer when operating with or without foot control The «Automatic threader»-button mustn‘t be activated with one of these presser feet attached ̶ starts and stops the BSR-Function if the BSR nos. -
Page 40: Needle Stop»-Button
Functions «Needle stop»-button Stitch width and Stitch length Knobs ⦁ press the button (Multifunction) ► the needle is raised or lowered in the same ̶ to adjust stitch width or stitch length way as by sinking the heel back on the foot ̶... -
Page 41: Display
Display Display Overview Main Display System settings 1 Home 2 Setup-Program 3 Tutorial 4 Creative Consultant 5 Help 6 ECO 7 Clear settings External Functions/Views 8 Upper thread tension 9 Security needle 10 Presser foot indicator/Presser foot selection 11 Presser foot pressure 12 Security stitch plate 13 Feed dog recognition 14 Filling bobbin/Winding the lower thread... -
Page 42: Selection
Display Selection 24 Fit to screen 25 Single and combi mode 26 Stitch Designer 27 Scroll right/left Stitch Pattern Area 28 Stitch pattern selection Stitch Pattern Display 29 Display of the stitch pattern selected 30 Information 034791.51.04_2014-02_Manual_B880_EN... -
Page 43: Functions - Display
6 Altering pattern length/Stitch density 7 Stitch Counter 8 Multi-Directional sewing 9 Long stitch 10 Distorting stitch patterns 11 Balance 12 Balance BERNINA Dual Transport 13 Permanent reverse sewing 14 Backstepping 15 Personal memory permanent 16 Reset Scrolling Functions Needle stop down/up (permanent) When not all functions are shown directly, please proceed as ⦁... - Page 44 Functions - Display Altering stitch density 3 Certain decorative stitches (e.g. No. 401) allow an alteration of the stitch density. The set stitch pattern length will not be affected. ⦁ touch the «+»-icon ► the stitch density is reduced in 0.05 mm-steps ►...
- Page 45 ⦁ touch the icon ► Balance BERNINA Dual Transport the altered stitch pattern is saved Adjusting the feed of the upper fabric layer. Reset ⦁ touch the icon ►...
- Page 46 Notes Notes 034791.51.04_2014-02_Manual_B880_EN...
-
Page 47: Overview Functions Buttonholes
Functions - Display Overview Functions Buttonholes ⦁ press the «Buttonhole»-button ⦁ select the buttonhole ⦁ touch the «i»-icon Altering the buttonhole 1 Programming the buttonhole length 2 Buttonhole length direct entry 3 Stitch counter buttonhole 4 Manual buttonhole 5 Buttonhole slit width 6 Balance 7 Backstepping 8 Personal memory permanent... -
Page 48: Overview Functions Alphabets
2 Font size in alphabets 3 Mirror Image left/right 4 Mirror Image up/down 5 Altering the pattern length 6 Multi-Directional sewing 7 Balance 8 Balance BERNINA Dual Transport 9 Permanent reverse sewing 10 Backstepping 11 Personal memory permanent 12 Reset Pattern repeat Multi-Directional sewing ⦁... -
Page 49: Overview Functions Combi Mode
6 Long stitch (without alphabets) 7 Deleting 8 Editing a combination at cursor position 9 Editing the whole combination 10 Balance 11 Balance BERNINA Dual Transport 12 Permanent reverse sewing 13 Backstepping Font size in alphabets Long stitch (without alphabets) ⦁... - Page 50 Functions - Display ⦁ touch the «Combi mode»-icon ⦁ select the stitch pattern ⦁ touch the «i»-icon ⦁ touch the «Cursor position»-icon Functions 1 Combination subdivider (1) 2 Combination subdivider (2) 3 Securing Combination subdivider (1) ̶ every combination can be subdivided into several parts ̶...
- Page 51 Functions - Display ⦁ touch the «Combi mode»-icon ⦁ select the stitch pattern ⦁ touch the «i»-icon ⦁ touch the «Edit whole combination»-icon Functions 1 Combination repeat 2 Mirror Image left/right 3 Multi-Directional sewing 4 Deleting Combination repeat Adjusting the length in the combination ⦁...
- Page 52 Functions - Display ⦁ touch the «Combi mode»-icon ⦁ creating combinations ⦁ touch the «Editing mode»-icon ⦁ touch the «i»-icon Functions 1 Connecting stitches/Moving single patterns in a combination 2 Moving multiple stitch patterns of a combination 3 Mirror Image left/right 4 Mirror Image up/down 5 Balance 6 Multi-Directional sewing...
-
Page 53: Setup-Program
Setup-Program Setup-Program Overview «Setup»-Display The Setup-Program enables an individual adjustment of the Display surface and the settings according to your personal requirements. After setting the sewing computer to your personal requirements, all changes made in the Setup-Program are saved, even when the sewing computer is switched off. -
Page 54: Sewing Settings
Setup-Program Sewing settings ⦁ touch the «Sewing setting»-icon 1 Altering Upper thread tension 2 Sewing speed control 3 Securing stitches at pattern begin 4 Programming «Function»-buttons/«Function»-icon 5 Programming the foot control Altering Upper thread tension ⦁ touch the «Thread tension»-icon ⦁... -
Page 55: Programming «Function»-Buttons/«Function»-Icon
Setup-Program Programming «Function»-buttons/«Function»-icon ⦁ touch the «Function»-icon 1 Automatic securing program 2 Programming «Securing»-button 3 Hover position of the presser foot 4 Automatic thread cutter and securing stitches 5 Programming «Quick reverse»-button 6 Presser foot position with needle stop down ⦁... -
Page 56: Automatic Thread Cutter And Securing Stitches
Setup-Program Automatic thread cutter and securing stitches ⦁ touch «Thread cutter»-icon The number and type of the securing stitches before the thread is cut can be programmed. ► standard = no securing stitches programmed ⦁ touch icon 12 ► icon 13 is activated ►... -
Page 57: Programming The Foot Control
Setup-Program Programming the foot control ⦁ touch the «Foot control»-icon Standard = icon 1 is activated. ⦁ back heel kick in the foot control ► the needle is raised or lowered ⦁ touch icon 2 Programming securing stitches ► when the icon 3 is activated, the number and type of securing stitches can be programmed via back-heel-kick on the foot control ►... -
Page 58: Embroidery Settings
Setup-Program Embroidery settings ⦁ touch the «Embroidery settings»-icon 1 Altering Upper thread tension 2 Altering Embroidery speed control 3 Calibrating the hoop 4 Fabric Thickness 5 Activating or deactiving securing stitches 6 Automatic cut The settings for the upper thread tension 1 and embroidery speed 2 can be adjusted in the same way like the settings for sewing (see page 53). -
Page 59: Fabric Thickness
Setup-Program Fabric Thickness ⦁ touch the «Fabric thickness»-icon ⦁ if the fabric 7 is ticker than 4 mm, e.g. toweling, select 7.5 mm-icon or 10 mm-icon ► this ensures that the embroidery hoop is only moved when the needle is no longer in the material ►... -
Page 60: Personal Settings
Setup-Program Personal settings ⦁ select «Personal setting»-icon ⦁ select the desired Display and wallpaper color ⦁ touch the «Text»-icon 1 Welcome text ⦁ create or change Welcome Text 2 Space bar is at the bottom of the letter keys. ► Welcome text appears in the text icon 2 above the letter keys ⦁... -
Page 61: Altering The Acoustic Signals
Setup-Program Altering the acoustic signals Selecting Stitch Pattern/Function/BSR ⦁ touch the «Acoustic signal»-icon By touching 1 the signals are activated or deactivated. Stitch patterns and function selection 2 can be confirmed acoustically. ⦁ select the desired sound for the stitch patterns/functions by touching the sound icon 1-4 ⦁... -
Page 62: Display Settings
Setup-Program Display settings ⦁ touch the «Display setting»-icon Brightness ⦁ move the slider 1 in the upper part of the Display to the left/right using the Touchscreen pen or the finger or ⦁ turn the stitch width knob or ⦁ touch the «+»/«-»-icon ►... -
Page 63: Basic Setting
Setup-Program Basic setting ⦁ touch the «Basic settings»-icon Back to basic setting Choose from following options: 1 Reset Sewing 2 Reset Embroidery 3 Reset All ⦁ touch the icon, whose settings should be reset to basic setting ⦁ having touched Reset Sewing, also deletes the data in the personal program ⦁... -
Page 64: Cleaning/Update
Updating the sewing-/embroidery computer ATTENTION! Do not remove the BERNINA USB stick until there is a message which indicates the end of the update. ⦁ insert BERNINA USB stick with the new software version ⦁... -
Page 65: Cleaning The Thread Clamp/Thread Catcher
Setup-Program Cleaning the thread clamp/Thread catcher ⦁ touch the «Cleaning»-icon Cleaning the thread clamp ⦁ touch icon 1 ⦁ clean the thread clamp according to the instructions Cleaning the thread catcher ⦁ touch icon 2 ⦁ clean the thread catcher according to the instructions 034791.51.04_2014-02_Manual_B880_EN... -
Page 66: Lubricating The Sewing-/Embroidery Computer
Setup-Program Lubricating the sewing-/embroidery computer ⦁ touch the «Lubricating»-icon ⦁ oil the sewing-/embroidery computer according to the instructions and the animation Packing position Do not move the embroidery arm of the embroidery module by hand. Follow the on-screen instructions to fit the embroidery module back into its original packaging. -
Page 67: Information
Service data ⦁ touch «Service data»-icon The service data of the present condition of the sewing-/embroidery computer can be saved on a USB stick and sent to the BERNINA-dealer: ⦁ insert USB stick to sewing-/embroidery computer ⦁ touch the «LOG»-icon ►... -
Page 68: Tutorial
Tutorial Tutorial Overview Tutorial The tutorial provides information and explanations about the different areas of sewing. ⦁ touch the «Tutorial»-button ► «Tutorial»-Display appears 1 Threading 2 Sewing techniques 3 BSR 4 Embroidery 5 Presser foot 6 Buttonholes 7 Quilting 8 Trouble Shooting 9 Needle 10 Miscellaneous 11 Free Hand System (FHS) -
Page 69: Creative Consultant
Creative Consultant Creative Consultant Overview Creative Consultant The creative consultant provides information and help with various sewing techniques. After selecting the fabric and the desired sewing technique suggestions for suitable needles, presser feet etc. are displayed. ► presser foot pressure and upper thread tension are set automatically ⦁... -
Page 70: Help Program
Help Program Help Program The Help Program provides information about individual stitch patterns and function icons in the Display. ⦁ touch the «Help Program»-button ⦁ select the desired stitch pattern or the desired function Stitch patterns The Display shows the following information: ►... -
Page 71: Balance
Balance Practical and decorative stitches, alphabets The sewing computer is tested and optimally set before it leaves the BERNINA factory. Different fabrics, threads and stabilizers can affect programmed stitches so that they are not sewn out properly. These effects can be corrected with the electronic Balance so that the stitch formation can be adjusted where necessary to suit the material. -
Page 72: Vertical Corrections
«i»-icon ⦁ touch the «Balance Dual Transport»-icon Balance BERNINA Dual Transport The top fabric layer is fed too little (the bottom layer extends past the cut edge) = it becomes longer in relation to the bottom fabric layer: ⦁... -
Page 73: Eco Description
eco description When the work is interrupted for longer periods, the sewing-/embroidery computer can be put into energy-saving mode. Activating eco ⦁ touch the «eco»-button ► the Display gets dark ► power consumption is reduced and the sewing light turns off Deactivating eco ⦁... - Page 74 Notes Notes 034791.51.04_2014-02_Manual_B880_EN...
-
Page 75: Practical Stitches
Practical stitches Practical stitches Overview Practical stitches ⦁ touch the «Practical stitch»-button ► the practical stitches are visible in the Display ⦁ further practical stitches are visible by scrolling Straight stitch Blind stitch For non-elastic materials; all straight stitch work, For most types of materials;... - Page 76 Practical stitches Lycra stitch Blindstitch narrow All two-way stretch fabrics; flat joining seams and For blind hems in fine materials hems, reinforced seaming on underwear Stretch stitch Triple Straight stitch with long stitch For highly elastic fabrics; open seam for sportswear Reinforced seams in heavy fabrics, visible hems and seams Reinforced overlock...
-
Page 77: Selecting Stitch Pattern
Practical stitches Selecting stitch pattern Direct-Option 1 ⦁ select the desired main category 1-5 1 Practical stitches 2 Decorative stitches 3 Alphabets 4 Buttonholes 5 Quilt stitches 6 Personal program/Memory 7 History ► the available stitch patterns are visible in the Display area 8 ⦁... -
Page 78: Customizing Stitch Patterns Individually
Practical Stitches Customizing stitch patterns individually A stitch pattern can be individually altered according to the fabric and the application. The adjustments described here are applicable for all practical and many decorative stitches. The personal memory is unlimited; it can hold as many stitch alterations as needed: ̶... -
Page 79: Personal Memory Permanent
Practical stitches Personal memory permanent The basic settings programmed by BERNINA can be altered and saved and remain active even when the sewing computer is switched off. Altering basic settings ⦁ select stitch pattern, e.g. zig-zag ⦁ alter stitch width and stitch length via the knobs Saving alterations ⦁... -
Page 80: Altering Stitch Width And Stitch Length
Practical stitches Altering stitch width and stitch length ⦁ turn the knobs or ⦁ touch stitch width or stitch length Display ⦁ touch the «-»/«+»-icon in the respective Display or ⦁ move the slider in the Display using the Touchscreen pen or the finger Can be altered while sewing. -
Page 81: Application Examples Of Practical Stitches
Practical stitches Application Examples of Practical Stitches Straight stitch Reverse pattern foot No. 1C/1D Straight Stitch No. 1 After turning on the sewing computer the straight stitch will appear. ► the needle is up Application Suitable for all fabrics. Adjust the stitch length to suit the fabric E. -
Page 82: Triple Zig-Zag
Practical stitches Triple Zig-zag Reverse pattern foot No. 1C/1D Triple Zig-zag No. 7 In firm materials, particularly for denim, deckchair covers, awnings. Seams on often washed items. Finish raw edges first. Use Jeans needle for very firm materials. 034791.51.04_2014-02_Manual_B880_EN... -
Page 83: Zipper
Practical stitches Zipper Zipper foot No. 4D Straight stitch No. 1 Preparation ⦁ close seam to the zipper beginning ⦁ sew securing stitches ⦁ baste seam closed and clean ⦁ finish the seam allowance ⦁ iron the seam ⦁ open the zipper ⦁... -
Page 84: Manual Darning
Practical stitches Manual darning Darning foot No. 9 (optional accessory) Straight stitch No. 1 Holes or worn areas «Replacing» threads along the lengthside and crosswise in every material. Preparation ⦁ lower the feed dog ⦁ attach the Slide-on table ⦁ hoop the fabric into the round embroidery hoop (optional accessory) ►... -
Page 85: Automatic Darning
Practical stitches Automatic Darning Reverse pattern foot No. 1C Buttonhole foot No. 3A Simple darning program No. 22 Quick darning of holes or worn areas Replaces threads along the lengthwise grain in all materials. Preparation ⦁ hoop light weight materials in the round embroidery hoop (optional accessory) ►... -
Page 86: Reinforced Darning, Automatic
Practical stitches Reinforced darning, automatic Buttonhole foot No. 3A Reinforced darning program No. 23 Quick darning of holes or worn areas Replaces threads along the lengthwise grain in all materials. Preparation ⦁ hoop light weight materials in the round embroidery hoop (optional accessory) ►... -
Page 87: Finishing Edges
Practical stitches Finishing Edges Reverse pattern foot No. 1C Zig-zag No. 2 ̶ for all fabrics ̶ for finishing raw edges ̶ elastic seams ̶ decorative sewing Finishing edges ⦁ guide edge of fabric into the center of the presser foot ⦁... -
Page 88: Topstitching Edges
Practical stitches Topstitching edges Blindstitch foot No. 5 Reverse pattern foot No. 1C Edge stitch foot No. 10/10C/10D (optional accessory) Straight stitch No. 1 Narrow edgestitching Outer edges ⦁ place edge of fold left against the guide on the blindstitch foot ⦁... -
Page 89: Blind Hems
Practical stitches Blind Hems Blindstitch foot No. 5 Blindstitch No. 9 For invisible hems in medium to heavy weight cotton, wool and blended materials. Preparation ⦁ finish the raw edges ⦁ fold the hem and baste or pin in place ⦁... -
Page 90: Securing Program
Practical stitches Securing Program Reverse pattern foot No. 1C Securing Program No. 5 ̶ for all fabrics ̶ secures beginning and end of seam Sewing long seams with straight stitch Even securing by defined stitch count. Sewing start ⦁ press the foot control ►... -
Page 91: Flat Joining Seam
Practical stitches Flat joining seam Reverse pattern foot No. 1C Stretch overlock No. 13 Ideal for fluffy or thick materials such as terry cloth, felt and leather etc. Sewing ⦁ overlap fabric edges ⦁ sew along the fabric edge ⦁ the needle should sew over the edge of the top layer on the right side ►... -
Page 92: Height Compensation Of Uneven Layers
Practical stitches Height Compensation of uneven layers The feed dog works accurately when the foot is level. If the presser foot is at an angle when sewing over a thick seam, the feed dog cannot grip. The fabric may jam. To solve this problem, place one, two or three compensating plates as required behind the needle under the presser foot to level it. -
Page 93: Buttonholes
Buttonholes Buttonholes Overview Buttonholes Buttonholes are not only practical closures, they can also be used as a decorative effect. All buttonholes can be programmed and sewn in different ways. ⦁ touch the «Buttonhole»-button ⦁ scroll to see more buttonholes Standard buttonhole Keyhole buttonhole with horizontal bartack For light to medium weight fabrics;... - Page 94 Buttonholes Decorative Keyhole buttonhole with horizontal bartack For firmer, non-stretch materials: jackets, coats, leisure wear Decorative buttonhole with double pointed bartack For decorative buttonholes in firmer, non-elastic fabrics Decorative Stretch Buttonhole For light to medium weight knits Button sew-on program For buttons with 2 and 4 holes Eyelet with small zig-zag Openings for cords and narrow ribbons, decorative...
-
Page 95: Important Information
Buttonholes Important information Marking the length of manual buttonholes ⦁ mark the buttonhole length in the desired position ⦁ use Buttonhole foot No. 3C (optional accessory) Marking the length of automatic buttonholes ⦁ mark the length of just one buttonhole ►... -
Page 96: Stabilizer
Buttonholes Stabilizer ̶ interfacing provides durability and stability to the buttonhole ̶ choose the interfacing according to the material being used ̶ when using thick or fluffy materials an embroidery stabilizer can be used ► therefore the fabric feeds better 034791.51.04_2014-02_Manual_B880_EN... -
Page 97: Cord
Buttonholes Cord In general ̶ cords reinforce buttonholes and enhance their appearance ̶ mainly suitable for buttonhole No. 51 ⦁ position the work accordingly Ideal cords ̶ Perle cotton No. 8 ̶ strong hand-sewing thread ̶ fine crochet yarn Cord with the automatic Buttonhole foot No. 3A ⦁... -
Page 98: Altering The Balance
Buttonholes Altering the balance ⦁ touch the «i»-icon ⦁ touch the «Balance»-icon Balance with direct entry length buttonholes The balance alterations have the same effect on both beads. Balance with direct entry length keyhole or round buttonholes The balance alterations have the same effect on both beads. The keyhole or eye is balanced as follows: ⦁... -
Page 99: Programming Buttonholes
Buttonholes Programming buttonholes Standard and stretch buttonhole with auto-length, automatically Buttonhole foot No. 3A The lens on the automatic Buttonhole foot No. 3A automatically registers the length of the buttonhole for exact duplication. For buttonholes of 4-31 mm, depending on the buttonhole type. The slide foot must lie perfectly flat on the fabric! If the slide foot rests on a seam allowance, the length cannot be measured accurately. -
Page 100: Automatic With Direct Entry Length
Buttonholes Automatic with Direct Entry Length Buttonhole foot No. 3A Programming the buttonhole length Buttonholes can be sewn to a specific length with the Buttonhole foot No. 3A. Buttonhole length = cutting length in mm. ⦁ select the desired buttonhole ⦁... -
Page 101: Automatic Round And Keyhole Buttonhole
Buttonholes Automatic round and keyhole buttonhole Buttonhole foot No. 3A The slide foot must lie perfectly flat on the fabric! If the slide foot rests on a seam allowance, the length cannot be measured accurately. Automatic Round and Keyhole buttonhole No. 54-58, 68 Programming buttonholes ⦁... - Page 102 Buttonholes Round buttonhole No. 64, buttonhole with double pointed bartack No. 66 and decorative buttonhole with double pointed bartack No. 69 Programming the buttonhole ⦁ sew the first bead forward ⦁ stop the sewing computer ⦁ press «Quick reverse»-button ► «auto»...
-
Page 103: Heirloom Buttonhole
Buttonholes Heirloom Buttonhole Buttonhole foot No. 3A Heirloom buttonhole No. 63, 65, Round buttonhole with pointed bartack No. 67, Knitware buttonhole No. 70 Programming buttonholes ⦁ sew first bead forward ⦁ stop the sewing computer ⦁ press «Quick reverse»-button ► «auto»... -
Page 104: Buttonhole In Long Term Memory
Buttonholes Buttonhole in Long Term Memory ⦁ touch the «Memory»-button Programming the buttonhole ⦁ touch the «Save»-icon 1 ► a Display with four folders appears ⦁ select the folder where the buttonhole is to be saved, e.g. 1 ⦁ touch the yellow-framed «Save»-icon ►... - Page 105 Buttonholes Altering saved buttonhole ⦁ touch the «i»-icon ⦁ touch the «Direct entry length»-icon ⦁ alter the length of the saved buttonhole ⦁ touch the «i»- or «Close»-icon ⦁ reprogram the buttonhole as described ⦁ touch the «Memory»-button Deleting a saved buttonhole ⦁...
-
Page 106: 7- Or 5-Step Buttonhole, Manually
Buttonholes 7- or 5-step Buttonhole, manually Buttonhole foot No. 3C (optional accessory) ⦁ select the desired buttonhole ⦁ touch the «i»-icon ⦁ touch the «man»-icon The length of the beads is manually determinded when sewing. Bartack, eye and securing stitches are pre-programmed. The individual steps can also be selected by scrolling, by using the arrow icons, by direct selection or by touching the «Quick reverse»-button. -
Page 107: Button Sew-On Program
Button sew-on program Button sew-on program ⦁ touch the «Buttonhole«-button ⦁ touch the «Button sew-on program»-icon Darning foot No. 9 (optional accessory) Button sew-on foot No. 18 Button sew-on program No. 60 For buttons with 2 and 4 holes. Sewing on Buttons Buttons sewn on for decorative purposes only are stitched without a «thread shank». -
Page 108: Eyelet Program
Eyelet Program Eyelet Program ⦁ touch the «Buttonhole«-button ⦁ touch the «Eyelet program»-icon Reverse pattern foot No. 1C Open embroidery foot No. 20C Eyelet with small zig-zag No. 61 Straight stitch eyelet No. 62 Sewing eyelets ⦁ select eyelet ⦁ position fabric under the presser foot and sew eyelet program ►... -
Page 109: Decorative Stitches
Decorative Stitches Decorative Stitches Overview Decorative Stitches ⦁ press «Decorative stitch»-button ► Display shows an overview of the categories ⦁ select the desired category ► the desired category is activated ⦁ select desired stitch pattern ⦁ touch icon 1 ► the Display changes to the big overview ⦁... -
Page 110: Tapering
Decorative Stitches Tapering Tapering is a technique in which the stitch patterns come to a point at the beginning and end. Four different angles are pre-programmed and another angle can be determined manually. No combinations can be created with tapering patterns. ⦁... -
Page 111: Tapering Functions
4 Programming the length of section 2 by Entering mm 5 Mirror Image left/right 6 Distorting stitch patterns 7 Manual setting the Length of Section 2 8 Balance 9 Balance BERNINA Dual Transport 10 Backstepping 11 Personal memory permanent 12 Reset Programming the length of section 2 ►... - Page 112 Balance To balance forward and reverse stitches. Balance BERNINA Dual Transport Adjusting the feed of the upper fabric layer. Backstepping The last 200 needle penetrations of a stitch pattern are retraced, i.e.
-
Page 113: Stitch Designer
Decorative Stitches Stitch Designer The stitch designer allows you to create your own stitch designs or to edit existing stitch patterns. Stitch designer functions ⦁ touch the «Stich Designer»-icon ► «Edit»-Display appears 1 Undo 2 Redo 3 Absolute point position 4 Zoom minus 5 Zoom plus 6 Selecting all points... - Page 114 Decorative Stitches Select all points Creating new stitch design ⦁ touch the icon ⦁ touch the icon ► ► the complete stitch design is activated and can be an empty Display appears ► edited with the selectable functions a new stitch design can be created Selection from a defined point Deleting ⦁...
-
Page 115: Creating Or Editing Stitch Design
Decorative Stitches Creating or editing stitch design Opening the Stitch Designer ⦁ touch the «Stitch Designer»-icon ► the last active stitch pattern appears in the «Edit»-Display and can be edited ⦁ touch the «Create new stitch design»-icon ► the «Edit»-Display is empty ►... -
Page 116: Selecting And Moving A Single Point
Decorative Stitches Selecting and moving a single point ⦁ touch the function «Moving points» 1 and select the desired point or ⦁ select the desired point via the «up»/«down»-arrows ► the point can be moved via the two knobs ► the function «Inserting stitch»... -
Page 117: Reversing The Stitch Sequence
Decorative Stitches Reversing the stitch sequence ⦁ create a stitch design ⦁ touch the «Select all points»-icon ⦁ touch the «Duplicate»-icon ► the stitch design is duplicated ⦁ touch the «Mirror Image left/right»-icon ► the active stitch design is mirrored laterally ⦁... -
Page 118: Application Examples Of Decorative Stitches
Decorative Stitches Application examples of Decorative stitches Cross Stitch Reverse pattern foot no. 1C/1D or Open embroidery foot No. 20C or 20D (optional accessory) Cross Stitch ̶ cross stitching is a traditional technique, and extends the range of decorative stitches ̶... -
Page 119: Pintucks
Decorative Stitches Pintucks Sew delicate and decorative pintucks easily with the cording attachment. The tube on the attachment provides ample room for a cord to be inserted for sewing raised pintucks. Pintuck feet (optional accessory) ̶ No. 30 (3 grooves) = 4 mm double needle: for heavy weight materials ̶... - Page 120 Decorative Stitches Attaching the cording attachment Attach it simply by screwing it to the stitch plate with the screw provided. ⦁ insert the positioning pin into the right thread hole and fasten the fixing screw in the left thread hole Inserting the cord ⦁...
-
Page 121: Bobbin-Play Sewing
Decorative Stitches Bobbin-Play Sewing Reduce the winding speed to wind decorative threads on the bobbin. Free motion sewing The bobbin can be filled different thread material. For free-motion stitching to add texture. This method is similar to «normal» free-motion sewing, but is done on the wrong side of the fabric. -
Page 122: Quilt Stitches
Quilt Stitches Quilt Stitches Overview Quilt Stitches Various stitch patterns are available which are used especially in quilting, for patchwork or for appliqué. ⦁ touch the «Quilt stitch»-button ⦁ select desired stitch pattern ► the stitch width cannot be altered with certain stitch patterns ►... -
Page 123: Application Examples Of Quilt Stitches
Quilt Stitches Application examples of Quilt stitches Handlook quilt stitch Reverse pattern foot No. 1C Handlook quilt stitch No. 1328, 1347, 1348, 1350 Suitable for all fabrics and work which should look «hand sewn». Thread ̶ Upper thread = Monofilament ̶... -
Page 124: Free-Motion Quilting
Quilt Stitches Free-motion quilting Darning foot No. 9 (optional accessory) Straight stitch No. 1 Free-motion quilting For all types of free motion quilting work. Preparation ⦁ pin top layer, batting and backing together, or baste if necessary ⦁ attach slide-on table ⦁... -
Page 125: Bsr (Bernina Stitch Regulator)
BSR (BERNINA Stitch Regulator) Quilting with BSR BSR-Function The BSR presser foot reacts to the movement of the fabric under the foot and controls the speed of the sewing computer up to the maximum speed possible. The following applies: the faster the fabric is moved, the higher the speed of the sewing computer. -
Page 126: Preparation
For an even sewing start (the first stitch) the foot control must be pressed and the fabric moved simultaneously. This also applies for sewing points and straight stitching within a round form. If the BSR function is deactivated and later re-activated without the sewing computer being switched off in between, the last selected BSR mode is active. -
Page 127: Functions In The Bsr Mode
Functions in the BSR mode Needle stop down (standard) ► the arrow points down on «BSR»-Display ► the sewing computer stops with needle down, when taking foot off foot control or when «Start/Stop»-button is pressed Needle stop up ⦁ touch the «Needle stop»-icon in the Display ►... -
Page 128: Beeper (Audio Signal) Activation/Deactivation
Beeper (audio signal) activation/deactivation ⦁ press «Setup»-button ⦁ touch the «Acoustic signal»-icon Selecting sound for BSR in the Setup Program ► one sound is set as default (active) ⦁ touch the icon 1 showing the loudspeaker for BSR ► the loudspeaker turns white and the icon dark ►... -
Page 129: Activating Bsr Sewing Function
Activating BSR Sewing Function 1st Option: BSR-Function via the foot control. ⦁ plug in the foot control ⦁ press the foot control ► presser foot is lowered ⦁ press the foot control again ► BSR mode starts ► a red light appears on the presser foot ⦁... - Page 130 Notes Notes 034791.51.04_2014-02_Manual_B880_EN...
-
Page 131: Bernina Dual Feed
If an incorrect presser foot is attached, the sewing computer will not start with the dual feed engaged. An error message will appear. With the BERNINA Dual Feed the top and bottom layer of fabric are fed simultaneously. Striped and checkered patterns can be matched perfectly by even feeding. -
Page 132: Fabrics
BERNINA Dual Feed Fabrics Difficult-to-work-with fabrics (with a nap, slippery, sticky etc.): ̶ velvet, normally sewn with the grain ̶ toweling ̶ Jersey, especially when sewing it crosswise to knit ̶ fake fur or coated fake fur ̶ fleece-types of fabrics ̶... -
Page 133: Alphabets
Alphabets Alphabets Overview Alphabets Block, Double Block, Script and Comic Sans alphabets as well as Quilting Text, Cyrillic and Cyrillic script can be sewn in two different sizes. Monograms can be sewn in three different sizes. Block, Double Block, Script and Comic alphabets as well as Quilting Text, Cyrillic and Cyrillic script can also be sewn in lower case letters. -
Page 134: Combining Characters
Alphabets Combining characters Individual letters and rows of the same letter of the same alphabet are sewn in single mode. Letters for names, addresses, words, etc. are combined and sewn in combi mode. ⦁ touch the «Combi mode»-icon ⦁ touch the icon with the desired letter ►... -
Page 135: Correcting The Combination
Alphabets Correcting the combination Inserting character The letter is inserted below the cursor. Activating desired place: ⦁ select or scroll to required letter in the Editing Area ► the stitch pattern combination is moved to the starting position of the desired stitch pattern in the stitch altering area ►... -
Page 136: Monograms
Alphabets Monograms Monograms are stitched in sideways motion. ► start (white dot) and end (red cross) are visible in the Stitch Altering Area ► the stitch width cannot be altered ► is displayed by a symbol ⦁ touch the «Fit to screen»-icon ►... -
Page 137: Monogram Sizes
Alphabets Monogram Sizes Font size 1 = 30 mm ► when starting the monogram category the size is 1 is activated (big «A» is dark) ► monograms in size 1 are individual letters ► the sewing computer sews and stops automatically Font size 2 = 20 mm ⦁... -
Page 138: Personal Program
Personal Program Personal Program Creating a personal Display Use the Personal Program to create a folder with stitches you use the most for a special project. Stitch patterns as well as their alterations are saved in the Personal Program. The following alterations can be saved: ̶... -
Page 139: Programming/Saving Second Stitch Pattern
Personal Program ⦁ touch the «Save»-icon 4 or ► the altered zig-zag is saved ► the Display closes Programming/Saving second stitch pattern ⦁ touch the «Buttonhole«-button ⦁ select standard buttonhole No. 51 ⦁ save the stitch pattern as desribed above ⦁... -
Page 140: Altering/Overwriting Stitch Patterns
Personal Program Altering/Overwriting stitch patterns Selecting stitch patterns ⦁ press «Personal program»-button 1 ⦁ touch the «Open»-icon ⦁ touch desired folder ⦁ select zig-zag ⦁ make alterations ► stitch width and stitch length are altered (yellow numbers) ⦁ touch the «Back»-icon 2 ⦁... -
Page 141: Deleting Stitch Patterns
Personal Program Deleting stitch patterns Selecting stitch patterns ⦁ touch the «Personal program»-button ⦁ touch the «Delete»-icon 1 ⦁ select the desired folder or ⦁ insert the USB stick ⦁ touch the «USB stick»-icon ⦁ select the stitch pattern to be deleted ⦁... -
Page 142: Combi Mode
Combi Mode Combi Mode The sewing-/embroidery computer has a memory system where both, the sewing and embroidery memories are saved. In the sewing memory stitch patterns, lettering and numbers can be combined and saved. « » In the sewing memory each Drawer can store a maximum of 70 stitch patterns as long as there is sufficient free space (capacity) available. -
Page 143: Deleting Stitch Patterns
Combi Mode Deleting Stitch patterns Deleting individual stitches ⦁ touch the «i»-icon ⦁ touch the «Delete»-icon ► the stitch pattern above the cursor is deleted ⦁ touch the «Delete»-icon as many times until the Stitch Altering Area is empty or ⦁... -
Page 144: Opening A Saved Combination
Combi Mode Opening a saved combination ⦁ touch the «Combination overview»-icon ⦁ touch the «Memory»-button ⦁ touch the «Open»-icon 1 ► a summary of the saved combinations appears ⦁ touch the desired drawer ► the saved combination appears in the Stitch Altering Area 034791.51.04_2014-02_Manual_B880_EN... -
Page 145: Correcting A Stitch Pattern Combination
Combi Mode Correcting a stitch pattern combination Inserting a stitch pattern ⦁ select the desired position in the combination or in the Editing Area ⦁ select a new stitch pattern ► the new stitch pattern is inserted below the selected stitch pattern To insert a stitch pattern at the beginning of a combination the cursor must be positioned above the first stitch pattern. -
Page 146: Adjusting The Width Within The Combination
Combi Mode Adjusting the width within the combination The width of all stitch patterns within a combination can be adjusted in relation to the widest stitch pattern. ⦁ touch the «i»-icon ⦁ touch the «Edit whole combination»-icon ⦁ touch the «Stitch width scale»-icon 3 ►... -
Page 147: Moving Individual Stitch Patterns In A Combination
Combi Mode Moving individual stitch patterns in a combination ⦁ touch the «Combination overview»-icon ⦁ select desired stitch pattern ⦁ touch the «i»-icon ⦁ touch the «Connecting stitches»-icon ⦁ move the stitch pattern in 0.1 mm steps using the knobs or «+»/«-»-icons or ⦁... -
Page 148: Stitch Pattern Combination
Combi Mode Stitch pattern combination Overwriting ⦁ program a new stitch combination ⦁ touch the «Memory»-button ⦁ touch the «Save»-icon ⦁ select the drawer to be overwritten (e.g. 3) ⦁ touch to confirm Touch to cancel the overwriting procedure. Deleting ⦁... -
Page 149: History
History History ⦁ press «History»-button ► the last maximum 24 sewn stitches appear ► a stitch already contained in the History Display will be overwritten when sewing restarts 034791.51.04_2014-02_Manual_B880_EN... -
Page 150: Accessory Embroidery
Accessory Accessory Embroidery Standard Accessory 1 Embroidery hoop oval, 145x255 mm 2 Embroidery template for embroidery hoop oval, VAR 00 3 Embroidery hoop medium, 100x130 mm 4 Embroidery template for medium embroidery hoop 5 Embroidery hoop small, 72x50 mm 6 Embroidery template for embroidery hoop small, blue 7 USB-connecting cable 8 Embroidery needle pack (SUK) -
Page 151: Embroidery Module
Preparation Embroidery module Detail view 1 Embroidery arm 2 Sewing computer guide rails 3 Bracket for attaching the embroidery hoop 4 Connection to the sewing computer 5 Connection for the embroidery module 034791.51.04_2014-02_Manual_B880_EN... -
Page 152: Important Embroidery Information
Important Embroidery information Important Embroidery information Embroidery threads A good quality thread is essential for embroidery to avoid poor stitch quality, thread breakage, etc. Embroidery is particularly effective if you use 40wt glossy rayon or polyester embroidery threads as upper threads. They are available in a wide range of colors for beautiful embroidery. -
Page 153: Choosing The Embroidery Motif
Scaling/Sizing motifs Motifs can be scaled/sized using the on-screen icons or with the BERNINA Embroidery Software on the PC. Increasing/decreasing in a range of +/- 20% provides the best results. -
Page 154: Different Stitch Types
Important Embroidery information Different stitch types Underlay stitches Underlay stitches are the foundation of a motif and are used to stabilize the base material and hold it in shape. They also prevent the covering stitches of the motif from sinking into the knit or the nap of the material. Satin stitch The needle moves left to right and vice versa. -
Page 155: Preparing For Embroidery
Preparing for embroidery Preparing for embroidery Attaching the Module ATTENTION! The slide-on table must not be attached while the embroidery module is being attached or removed. When attaching the embroidery module ensure that all the units are on the same even surface! The embroidery computer may run at high speeds when embroidering. -
Page 156: Embroidery Foot/Embroidery Needle
Preparing for embroidery Embroidery foot/Embroidery needle Embroidery needle Embroidery needles (130/705 H-SUK) provide a larger eye and are slightly rounded. This avoids thread abrasion when using Rayon- and cotton embroidery thread. ̶ use SUK-needles ̶ depending on the embroidery thread use a size No. 70-SUK to No. 90-SUK needle ̶... -
Page 157: Embroidery Hoop
⦁ attach the embroidery template holder ⦁ place the template in the inner hoop, so the BERNINA logo is at the front edge (by the arrows) and can be read ► in this position the embroidery template clicks into the inner hoop Hooping the material ⦁... -
Page 158: Stabilizer
Stabilizer Stabilizer Stabilizers Tear-away stabilizers ̶ excess is easily torn away ̶ one or more layers can be used ̶ available in different weights ̶ for more stability, apply to the wrong side of the material with temporary adhesive spray before hooping ̶... -
Page 159: Iron-On Interfacing
Stabilizer Iron-on interfacing Iron-on interfacings are available in a variety of weights. Iron-on interfacings should be selected to suit the material being used. Use an iron-on interfacing which is easily removable from the material. ⦁ iron-on interfacings are pressed (fused) to the wrong side of the material Application: To provide body and shape for materials onto which motifs will be placed, use in conjunction with appropriate stabilizer. -
Page 160: Functions
Functions Functions Overview «Function»-buttons embroidery computer 1 «Start/Stop/hover»-button Press the button to start or stop the embroidery computer. 2 «Automatic thread cutter»-button ⦁ press the button ► the upper and the lower thread are cut automatically 3 «Presser foot position»-button ⦁... -
Page 161: Overview Display
Overview Display Overview Display Entry to Embroidery mode ⦁ press the «Home»-button Embroidery mode ⦁ touch the «Embroidery mode»-icon 2 ► the «Embroidery»-Display appears Sewing mode ⦁ touch the «Sewing mode»-icon 1 ► the «Sewing»-Display appears Embroidery computer To select embroidery motifs from the folders «Alphabets», «Motifs», «Stitch patterns»... -
Page 162: Embroidery Alphabet
Overview Display Embroidery Alphabet ⦁ touch the «Alphabet»-icon ⦁ select the desired alphabet 1 Drifter 2 Childs Play 3 Victoria 4 King Charles 5 Alice 6 Chicago 7 Anniversary 8 Swiss Block 9 Quilt Block 10 Old English 11 Russian Textbook 12 Jikharev Back to Folder menu Back to the «Folder»-Display. -
Page 163: Bernina Embroidery Motifs
1 Exotic Rainforest 2 Floral Etchings 3 Diane Gaudynski Quilting 4 Projects 5 Shaping Designs 6 Monograms 7 DesignWorks 8 BERNINA Classic Collection ⦁ select the desired embroidery motif folder BERNINA Stitch patterns ⦁ touch the «Stitch pattern»-icon ⦁ select the desired stitch pattern folder ►... -
Page 164: Embroidery Motif From Usb Stick
Overview Display Embroidery motif from USB stick ⦁ insert USB stick ⦁ touch the «USB stick»-icon ⦁ touch the desired motif or folder 034791.51.04_2014-02_Manual_B880_EN... -
Page 165: Edit»-Display
Overview Display «Edit»-Display 1 Upper thread tension 2 Security needle 3 Presser foot Indicator/Presser foot selection 4 Select hoop/Hoop Indicator 5 Security stitch plate 6 Feed dog recognition 7 Filling bobbin 8 Time Display 9 Selection 10 Edit 11 Color number 12 Embroidery menu Upper thread tension ►... - Page 166 Overview Display Feed dog recognition In Embroidery Mode the feed dog is lowered automatically by default and indicated by the yellow feed dog symbol. Filling bobbin The remaining thread on the bobbin is displayed. ⦁ touch the icon ► an animation shows how to thread the bobbin Time Display The time is displayed.
-
Page 167: Overview «Edit»-Display
Overview Display Overview «Edit»-Display ⦁ select alphabet or motif ⦁ touch the «i»-icon ⦁ touch the «Zoom plus»-icon Some functions feature tips for the operating of the stitch width and stitch length knobs. Functions 1 Move the view of the motif 2 Move the view of the motif within the hoop 3 Zoom minus 4 Zoom plus... - Page 168 Overview Display Move motif Endless Embroidery Display of the alteration in 1/10 mm. Opens to display to combine a border. ⦁ turn the stitch width knob ► the motif is moved in sideways (horizontally) ⦁ turn the stitch length knob Letter manipulation ►...
- Page 169 Overview Display ⦁ touch the «Hoop size»-icon Functions 1 Hoop relocator 2 Park embroidery hoop 3 Park embroidery module in sewing mode 4 Show Grid 5 Motif center 6 Virtual positioning 7 Select hoop/Hoop Indicator Hoop relocator Select hoop/Hoop Indicator ►...
- Page 170 Notes Notes 034791.51.04_2014-02_Manual_B880_EN...
-
Page 171: Overview Embroidery Menu
Overview Display Overview Embroidery menu ⦁ press the «Embroidery menu»-button Some functions feature tips for the operating of the stitch width and stitch length knobs. Functions 1 Color information 2 Selection 3 Basting 4 Move hoop 5 Edit 6 Embroidery sequence control 7 Cutting connecting stitches 8 Color number 9 Color resequence... -
Page 172: Overview Selection Menu
Overview Display Overview Selection menu ⦁ press the «Selection»-button Functions 1 Open new motif 2 Add motif 3 Save motif 4 Delete motif Open new motif ► the overview of the previous Display is opened (Alphabet, Motifs, Stitch patterns, My Designs) ⦁... -
Page 173: Overview Color Display
Overview Display Overview Color Display ⦁ press the «Color number»-button Color wheel ⦁ touch the icon ► the «Color wheel»-Display opens Change thread brand ⦁ touch the icon ► various thread brands appear in the Display Motif color information ⦁ touch the «up/down»-icons to move through the motif color information 034791.51.04_2014-02_Manual_B880_EN... -
Page 174: Motifs
Overview Display Motifs Selecting a motif Various embroidery motifs from the «Alphabets», «Motifs», «Stitch patterns» and «My Designs» files can be selected. Alphabets Selecting alphabet ⦁ touch the «Alphabet»-icon ► various alphabet types appear in the Display ⦁ touch the desired «Alphabet»-icon or use the «0-9»-icon to select the desired alphabet Entering/Correcting lettering ►... -
Page 175: Bernina Embroidery Motifs
Motifs BERNINA embroidery motifs All BERNINA embroidery motifs can either be embroidered as-is, or edited using the various functions offered by the embroidery computer. Motif Overview The motifs are displayed in folders according to topics. ⦁ touch the «Motif»-icon ⦁... -
Page 176: Motifs In Combination With Functions
Motifs Motifs in combination with functions To activate the functions touch the appropriate icon and make adjustments via the stitch width and stitch length knobs. Moving the motif ⦁ touch the «i»-icon ⦁ touch the «Move motif»-icon ⦁ turn the stitch width knob ►... -
Page 177: Rescale The Motif Proportionally
Motifs Rescale motif proportionally ⦁ touch the «i»-icon ⦁ touch the «Rescale motif proportionally»-icon ⦁ turn width/stitch length knob to the right ► the motif is enlarged ⦁ turn the stitch width/stitch length knob to the left ► the motif is reduced ►... -
Page 178: Select Hoop
Motifs Select hoop ⦁ touch the «Select hoop»-icon For best embroidery results always use the smallest hoop possible for the motif. ⦁ select the desired hoop ► the selected hoop is framed in white and marked in the corner top right ⦁... -
Page 179: Absolute Embroidery Check
Motifs Absolute Embroidery check By using the Touchscreen pen or finger, any position within the motif can be selected directly in the «Edit»-screen. ⦁ select and edit motif ⦁ attach the respective hoop The the «Motif center»-icon must be deactivated in order to apply the Absolute check. -
Page 180: Zoom
Motifs Zoom ⦁ touch the «Zoom+»-icon 1-5x ► the view of the motif is enlarged by one step ⦁ touch the «Zoom-»-icon 1-5x ► the enlarged view of the motif is scaled-down by one step Moving the motif ⦁ touch the «Move»-icon ⦁... -
Page 181: Endless Embroidery
Motifs Endless Embroidery When embroidering a border, it is advantageous to use the Mega or Jumbo Hoop. The fabric requires less rehooping than with the Oval Hoop. We recommend marking reference lines on the fabric, and using the template when hooping and rehooping. Here, the reference lines must run parallel to the lines on the template. - Page 182 Motifs ⦁ touch to confirm ► the «Edit»-Display appears ⦁ touch the «i»-icon ► the function overview closes ⦁ change to the Embroidery Display and embroider the border In the embroidery menu it‘s possible to change the embroidery speed. ⦁ after the reference points are stitched, touch the «Endless embroidery»- icon ►...
-
Page 183: Shape Designer
Motifs Shape designer Motifs can be arranged in different default formations. The embroidery motif can be placed anywhere with the finger or the Touchscreen pen. ⦁ select the desired embroidery motif ⦁ select the desired hoop ⦁ touch the «i»-icon ⦁... -
Page 184: Rotating The Motifs
Motifs Icon 2 must be dectivated. ⦁ touch the «+»/«-»»-icon with the finger or the Touchscreen pen ► the size of the formation is enlarged/scaled-down horizontally ⦁ touch the yellow-framed icon in the center ► the basic setting is reset Icon 2 must be deactivated. -
Page 185: Combinations
Motifs Combinations Creating combinations As combinations are created, layers appear to the right of the hoop. They show the order of the motif as it is created. The layers can be used to select motifs for editing. Deleting is also possible from the layers, by touching and holding and moving to the right/left. -
Page 186: Lettering
Motifs Lettering Lettering (e.g. words) can be combined with other alphabet characters or motifs. The words (e.g. Made to create) can be combined individually and/or positioned individually. Combining ⦁ touch the «Alphabet»-icon ► various alphabet types are visible in the Display ⦁... -
Page 187: Lettering And Embroidery Motifs
Motifs Lettering and Embroidery motifs Depending on the application, the characters are added after an embroidery motif is selected or the characters are combined first and then added to the motif (e.g. embellished lettering). Combining ⦁ select the desired embroidery motif ►... -
Page 188: Change Stitch Type
Motifs Change stitch type ⦁ touch the «i»-icon ⦁ touch the «Change stitch type»-icon 1 Altering stitch type. 2 Altering stitch density. ⦁ touch the «Change stitch type»-icon ► the basic setting of the step stitch is activated If the motif is enlarged substantially, long satin stitches occur, tunneling the fabric. -
Page 189: Fill Stitch Types
Motifs Fill stitch types The embroidery motifs are filled with satin or step stitches. Satin stitch The needle moves left to right and vice versa. Step stitch (Fill stitch) The needle stitches in straight rows at regular intervals. ⦁ touch the «Change stitch type»-icon Changing stitch type The satin stitch fill changes to a maximum of 8 mm long step stitches fill (basic setting). -
Page 190: Motif Colors
Motifs Motif colors Reallocating motif colors ⦁ touch the «Color number»-icon in the Display ⦁ scroll with the arrow icons, if necessary, until the color to be changed appears ⦁ select the color to be changed (e.g. 1) ⦁ touch the «Thread color»-icon ⦁... -
Page 191: Adjusting The Brightness Of The Colors
Motifs Adjusting the brightness of the colors ⦁ move the slider 3 to the left/right using the finger or the Touchscreen pen or ⦁ turn the stitch length knob ► the brightness of the color gets brighter or darker ⦁ touch the «Back»-icon 4 ►... -
Page 192: Embroidering The Motif By Color
Motifs Embroidering the motif by color ⦁ press the «Embroidery menu»-button ► «Color resequence»-icon is inactive (standard, gray) ► the colors of a motif are not reduced, the embroidery sequence remains as set originally. The number of color changes 9 remains as it is Reducing color changes ⦁... -
Page 193: Basting
Motifs Basting ⦁ press the «Embroidery menu»-button ⦁ touch the «Basting»-icon The embroidery motif is outlined with a basting stitch. This serves as an additional anchoring of the project so that the fabric and stabilizer are adhered. ⦁ touch the «Basting»-icon again ►... -
Page 194: Importing Stitch Patterns From The Sewing Mode
Motifs Importing stitch patterns from the sewing mode Stitch patterns or stitch pattern combinations can be imported from the sewing mode to the embroidery mode and they can be edited like embroidery motifs. Therefore e.g. endless embroidery patterns are combined, duplicated, mirrored etc. -
Page 195: Saving The Motif
Saving the motif Embroidery motifs from the embroidery computer, the USB stick or designs created in the BERNINA Embroidery Software can be altered in different ways, then saved. Embroidery motifs can either be saved in the embroidery computer memory or on an USB stick. -
Page 196: Overwriting Motifs
Saved motifs in the memory or on an USB stick can be overwritten directly by another motif. ⦁ select the desired motif ⦁ insert the BERNINA USB stick ⦁ press the «Selection»-button ⦁ touch the «Save»-icon The motif to be saved is displayed in a yellow frame. -
Page 197: Deleting Saved Single Motif
Motifs Deleting saved single motif ⦁ insert the USB stick ⦁ press the «Selection»-button ⦁ touch the «Delete»-icon ⦁ touch the «USB stick»-icon or ⦁ touch the «Embroidery computer»-icon ⦁ select the motif to be deleted ⦁ touch to confirm ►... -
Page 198: Deleting All Saved Motifs
Motifs Deleting all saved motifs It is possible to delete the content of the folder «My Designs» or the Memory Stick all at once. ⦁ press the «Setup»-button ⦁ touch the «Sewing computer settings»-icon ⦁ touch the «Basic settings»-icon When embroidering there are two options to choose from: 1 My Designs 2 USB stick (Stick must be inserted) ⦁... -
Page 199: Starting To Embroider
Motifs Starting to embroider Select hoop ⦁ select a motif ► the selected motif is displayed in the optimal (the smallest) hoop ► the «Select hoop»-icon 1 Displays the recommended hoop ⦁ attach the recommended hoop Attaching the embroidery hoop ⦁... -
Page 200: Embroidery Menu
Motifs Embroidery menu ► the embroidery menu opens ► the motif is ready for embroidering Embroidering using the «Start/Stop/hover»-button ⦁ press the «Start/Stop/hover»-button, until the embroidery computer starts ► the embroidery computer sews approximately 7 stitches and stops automatically ► a Display indicates that the thread tail has to be cut at the beginning of the motif ⦁... -
Page 201: End Of Embroidery
Motifs End of embroidery ⦁ after completing the motif touch the icon 1 to finish the embroidery process, or touch the «Endless Embroidery»-icon 2 again to repeat the border embroidery Embroidering via foot control When embroidering via the foot control always keep it depressed. ⦁... -
Page 202: Thread Breakage When Embroidering
Motifs Thread breakage when embroidering The upper or lower thread may occasionally run out or break when you are embroidering. When this happens, the embroidery computer stops automatically, provided that the thread and bobbin indicators are activated in the Setup-Program. Upper or lower thread breaks ►... -
Page 203: Cleaning
⦁ hold the bobbin retainer with the left hand and turn the handwheel with the right hand until the hook race can be seen ⦁ apply a minimal amount of BERNINA-oil in the hook race ⦁ insert the bobbin ⦁... -
Page 204: Exchanging The Battery
Cleaning ATTENTION! The battery must be kept out of the reach of children. Don't use rechargable batteries. Don't throw batteries into fire. Danger of explosion! Do not throw away batteries with your household waste but dispose of them in an environmental way via the public collection system. -
Page 205: Troubleshooting
̶ upper thread incorrectly threaded ⦁ check the threading path of the upper thread ̶ needle blunt or bent ⦁ use new BERNINA quality needle ̶ poor quality needle ⦁ use new BERNINA quality needle ̶ upper thread too tight/too slack ⦁... - Page 206 BERNINA dealer Update error ⦁ ̶ USB stick is not recognized use a BERNINA USB stick ̶ Update process is blocked (hourglass ⦁ remove the stick and turn the sewing computer off and on stays on Display) again.
- Page 207 ⦁ ̶ main motor is not running remove any thread remnants in the hook area, also refer to «Hook blocked», page 209 ⦁ ̶ incorrect presser foot for BERNINA attach a «D» presser foot Dual Feed switched on 034791.51.04_2014-02_Manual_B880_EN...
- Page 208 Troubleshooting General Explanation Repair Messages ̶ winding a bobbin ⦁ wind bobbin as shown in the animations ⦁ ̶ too much fabric under presser foot reduce amount of fabric under presser foot ⦁ ̶ contact between embroidery computer reconnect embroidery module and switch off and on the and embroidery module is interrupted embroidery computer due to vibrations...
- Page 209 Troubleshooting General Explanation Repair Messages ̶ the button of the automatic thread ⦁ turn the sewing-/embroidery computer off cutter has been pressed and the ⦁ turn the handwheel clockwise until the needle is at highest needle is blocked at the bottom position ⦁...
- Page 210 If necessary make use of considerable up to large force ⦁ if not possible: contact the nearest BERNINA dealer Step 9: ⦁ remove the bobbin and, if necessary, cut the thread Step 10: ⦁...
- Page 211 Troubleshooting General Explanation Repair Messages Hook blocked DANGER! This tool is supposed to be used for the described application only! ⦁ cut the threads at the stitch plate and remove the sewing good ⦁ remove the presser foot, the needle and the stitch plate ⦁...
- Page 212 Troubleshooting General Explanation Repair Messages ̶ maintaining the sewing-/embroidery ⦁ open the bobbin cover and remove the bobbin computer ⦁ turn sewing-/embroidery computer off ⦁ remove presser foot, needle and stitch plate ⦁ clean the sewing-/embroidery computer as instructed ⦁ ̶...
- Page 213 USB stick be recovered ⦁ ̶ BERNINA USB stick is not inserted insert BERNINA USB stick and do not remove during the update process ⦁ ̶ the new software version is not save the new software version on the BERNINA USB stick...
-
Page 214: Overview Stitch Patterns
Stitch patterns Overview Stitch patterns Practical stitches Buttonholes Decorative stitches Florals 034791.51.04_2014-02_Manual_B880_EN... - Page 215 Stitch patterns Florals Sideways Motion Cross stitches Satin stitches Satin Stitches Sideways Motion 034791.51.04_2014-02_Manual_B880_EN...
- Page 216 Stitch patterns Ornamental stitches Heirloom stitches 034791.51.04_2014-02_Manual_B880_EN...
- Page 217 Stitch patterns Heirloom Sideways Motion Novelty Stitches Novelty Sideways Motion Tassel stitches 034791.51.04_2014-02_Manual_B880_EN...
-
Page 218: Quilt Stitches
Stitch patterns Filigree Stitches Sideways Motion Quilt stitches Tapering Stitches 034791.51.04_2014-02_Manual_B880_EN... - Page 219 Stitch patterns Skyline Stitches International 034791.51.04_2014-02_Manual_B880_EN...
-
Page 220: Alphabets
Stitch patterns Alphabets Block alphabet Double-Block 034791.51.04_2014-02_Manual_B880_EN... - Page 221 Stitch patterns Script 034791.51.04_2014-02_Manual_B880_EN...
- Page 222 Stitch patterns Alphabet Quilting Text 034791.51.04_2014-02_Manual_B880_EN...
- Page 223 Stitch patterns Comic Sans Monograms 034791.51.04_2014-02_Manual_B880_EN...
- Page 224 Stitch patterns Cyrillic 034791.51.04_2014-02_Manual_B880_EN...
- Page 225 Stitch patterns Cyrillic Script 034791.51.04_2014-02_Manual_B880_EN...
- Page 226 Stitch patterns Hiragana 034791.51.04_2014-02_Manual_B880_EN...
- Page 227 Stitch patterns Katakana Kanji 034791.51.04_2014-02_Manual_B880_EN...
- Page 228 Notes Notes 034791.51.04_2014-02_Manual_B880_EN...
-
Page 229: Overview Motifs
Embroidery motifs Overview Motifs Diane Gaudynski DG02 DG01 DG03 136.3mm 103.6mm 134.7mm DG04 DG05 DG06 131.3mm 144.6mm 132.4mm DG07 DG08 DG09 130.6mm 132.4mm 133.0mm DG10 DG11 DG12 132.9mm 67.5mm 132.7mm Free Standing Lace CutWork Design (designs) Broderie anglaise PaintWork Design (designs) Fringes CrystalWork Design (designs) Applications... -
Page 230: 034791.51.04_2014-02_Manual_B880_En
Embroidery motifs DG13 DG14 DG15 127.5mm 132.9mm 134.3mm DG16 DG17 DG18 136.0mm 135.4mm 107.3mm DG19 DG20 DG21 132.6mm 129.9mm 134.9mm DG22 132.1mm 034791.51.04_2014-02_Manual_B880_EN... -
Page 231: Exotic Rainforest
115.4mm 115.4mm BE10707* BE10708* BE10709* 140.3mm 140.3mm 123.8mm BE10710* BE10711* BE10712* 123.8mm 61.3mm 61.3mm BE10713* BE10714* BE10715* 108.8mm 108.8mm 64.5mm BE10716* BE10717* BE10718* 32.0mm 50.7mm 45.8mm * This design has special effects. For more information please go to www.bernina.com/8series. 034791.51.04_2014-02_Manual_B880_EN... - Page 232 94.8mm 109.8mm BE10725* BE10726* BE10727* 32.2mm 65.4mm 32.1mm BE10728* BE10729* BE10730* 27.0mm 27.2mm 115.9mm BE10731* BE10732* BE10733* 132.9mm 81.9mm 111.0mm BE10734* BE10735* BE10736* 139.1mm 60.2mm 63.2mm * This design has special effects. For more information please go to www.bernina.com/8series. 034791.51.04_2014-02_Manual_B880_EN...
- Page 233 Embroidery motifs BE10737* BE10738* BE10739* 97.5mm 18.9mm 138.0mm BE10740* BE10741* BE10742* 96.1mm 70.0mm 70.0mm BE10743* BE10744* BE10745* 66.2mm 66.2mm 66.6mm BE10746* BE10747* 103.0mm 70.1mm * This design has special effects. For more information please go to www.bernina.com/8series. 034791.51.04_2014-02_Manual_B880_EN...
-
Page 234: Floral Etchings
Embroidery motifs Floral Etchings BC01501 BC01502 BC01503 86.2mm 56.1mm 74.7mm BC01504 BC01505 BC01506 137.7mm 118.4mm 103.0mm BC01507 BC01508 BC01509 95.8mm 122.3mm 90.2mm BC01510 BC01511 BC01512 87.1mm 84.4mm 17.7mm BC01513 BC01514 BC01515 79.1mm 75.5mm 61.2mm BC01516 BC01517 BC01518 71.3mm 85.8mm 73.6mm 034791.51.04_2014-02_Manual_B880_EN... - Page 235 Embroidery motifs BC01519 BC01520 BC01521 64.2mm 65.0mm 40.4mm BC01522 BC01523 BC01524 141.7mm 145.5mm 48.9mm BC01525 BC01526 BC01527 18.8mm 135.3mm 79.7mm BC01528 BC01529 BC01530 72.2mm 134.5mm 58.5mm BC01531 BC01532 48.2mm 114.2mm 034791.51.04_2014-02_Manual_B880_EN...
-
Page 236: Projects
115.9mm 29.3mm BE110210 BE110215* BE110216* 32.6mm 102.8mm 93.0mm BE110220* BE110222* OC85116 114.3mm 168.5mm 143.1mm OC85118 OC85124 OC85125 102.1mm 96.8mm 123.9mm OC85131 OC85134 SM06 122.1mm 113.5mm 246.0mm * This design has special effects. For more information please go to www.bernina.com/8series. 034791.51.04_2014-02_Manual_B880_EN... - Page 237 Embroidery motifs SM07 SM08 SM09 87.1mm 86.7mm 127.5mm SM10 SM11 62.8mm 139.2mm 034791.51.04_2014-02_Manual_B880_EN...
-
Page 238: Shaping Designs
Embroidery motifs Shaping designs DEC023 DEC003 DEC004 39.8mm 19.7mm 20.4mm DEC007 DEC012 DEC013 36.4mm 47.9mm 70.0mm DEC014 DEC015 DEC017 18.1mm 70.5mm 19.6mm DEC018 DEC019 DEC020 31.7mm 39.5mm 23.6mm DEC022 DEC002 DEC024 36.1mm 16.7mm 70.4mm 034791.51.04_2014-02_Manual_B880_EN... - Page 239 Embroidery motifs DEC025 DEC026 DEC027 51.5mm 32.5mm 61.1mm DEC028 DEC029 DEC030 93.9mm 78.2mm 53.8mm DEC032 DEC033 DEC034 52.7mm 70.3mm 74.3mm DEC037 DEC042 DEC043 64.2mm 38.0mm 38.4mm DEC044 DEC045 DEC046 44.0mm 22.5mm 65.0mm 034791.51.04_2014-02_Manual_B880_EN...
- Page 240 Embroidery motifs DEC061 DEC062 DEC063 30.3mm 21.5mm 19.7mm DEC064 DEC065 DEC067 24.4mm 36.1mm 62.1mm DEC068 DEC071 DEC074 41.1mm 10.9mm 24.8mm DEC075 DEC082 DEC084 48.2mm 34.6mm 38.6mm DEC088 DEC091 DEC092 40.4mm 44.0mm 50.0mm 034791.51.04_2014-02_Manual_B880_EN...
- Page 241 Embroidery motifs DEC094 DEC095 DEC096 32.2mm 52.2mm 46.8mm DEC098 DEC100 DEC101 23.4mm 37.1mm 34.0mm DEC102 DEC103 DEC104 21.6mm 12.2mm 10.3mm DEC105 DEC106 DEC107 14.7mm 37.3mm 9.9mm 034791.51.04_2014-02_Manual_B880_EN...
-
Page 242: Monograms
Embroidery motifs Monograms D765 D766 D767 82.7mm 65.1mm 69.3mm D768 D769 D770 71.7mm 70.1mm 59.9mm D771 D772 D773 66.2mm 70.3mm 49.0mm D774 D775 D776 59.8mm 73.7mm 66.4mm D777 D778 D779 76.8mm 68.9mm 63.9mm 034791.51.04_2014-02_Manual_B880_EN... - Page 243 Embroidery motifs D780 D781 D782 63.4mm 64.0mm 65.7mm D783 D784 D785 58.3mm 66.2mm 71.8mm D786 D787 D788 80.4mm 73.2mm 74.7mm D789 D790 D791 73.9mm 58.3mm 50.1mm D792 D793 D794 56.8mm 48.6mm 54.5mm 034791.51.04_2014-02_Manual_B880_EN...
-
Page 244: Designworks Designs
DW11* DW06* DW07* SS 10 SS 12 7.89mm 121.8mm 154.9mm DW09* DW01* DW02* 125.6mm 138.0mm 191.0mm DW03* DW04* DW05* 335.2mm 94.0mm 249.6mm DW10* DW08* 184.4mm 102.5mm * This design has special effects. For more information please go to www.bernina.com/8series. 034791.51.04_2014-02_Manual_B880_EN... -
Page 245: Bc Embellishment
Embroidery motifs BC Embellishment NB403 NB728 HG079 78.1mm 97.5mm 116.0mm FQ881 FB336 FB377 129.2mm 122.0mm 121.0mm FB385 NB646 FQ072 131.1mm 98.5mm 79.7mm NB101 NB708 FB433 99.3mm 137.8mm 120.9mm FB106 FB323 FB335 128.1mm 64.6mm 102.9mm 034791.51.04_2014-02_Manual_B880_EN... - Page 246 125.6mm 75.1mm 105.2mm NA959* NB385 NB481 75.6mm 86.2mm 123.4mm NB711 Fuchsia Tassel Jewel Quilt 88.6mm 85.9mm 98.0mm NB391 NB377 HG318 82.2mm 147.9mm 115.2mm Floral Tree 109.2mm * This design has special effects. For more information please go to www.bernina.com/8series. 034791.51.04_2014-02_Manual_B880_EN...
-
Page 247: Bc Quilting
Embroidery motifs BC Quilting BD569 BD554 BD567 120.6mm 109.9mm 107.9mm BD394 BD553 BD412 97.0mm 113.8mm 89.4mm BD513 BD501 BD568 63.5mm 63.5mm 109.5mm BD562 BD563 BD666 63.9mm 89.7mm 145.5mm BD669 Quilt10 Quilt07 67.1mm 139.7mm 139.7mm 034791.51.04_2014-02_Manual_B880_EN... - Page 248 Embroidery motifs Quilt9 Quilt11 Quilt02 139.6mm 139.6mm 101.7mm Quilt03 Quilt 04 139.7mm 139.7mm 034791.51.04_2014-02_Manual_B880_EN...
-
Page 249: Bc Borders
97.9mm HG341 FB422* FB436 63.8mm 52.3mm 132.8mm FQ559 NA914 NA912 136.4mm 120.3mm 115.1mm NA909 OC33411 CM473 100.4mm 24.2mm 31.8mm NB520 Battenburg Border FQ408 26.3mm 81.3mm 30.0mm * This design has special effects. For more information please go to www.bernina.com/8series. 034791.51.04_2014-02_Manual_B880_EN... - Page 250 Embroidery motifs FQ810 D349 CM471 23.6mm 39.5mm 59.1mm FQ785 BD582 92.6mm 48.6mm 034791.51.04_2014-02_Manual_B880_EN...
-
Page 251: Bc Flowers
Embroidery motifs BC Flowers FQ061 FQ801 FQ273 46.0mm 75.2mm 88.6mm FQ055 FQ905 FB478 84.4mm 109.9mm 109.5mm WS641 FQ041 FM443 72.6mm 54.0mm 49.1mm WS655 CM418 FP246 116.5mm 45.7mm 65.6mm FP814 FQ522 FQ527 88.0mm 56.5mm 90.3mm 034791.51.04_2014-02_Manual_B880_EN... - Page 252 Embroidery motifs FQ562 Aster Rose 90.3mm 71.9mm 63.9mm FQ722 FB268 80.0mm 123.7mm 034791.51.04_2014-02_Manual_B880_EN...
-
Page 253: Bc Seasons
Embroidery motifs BC Seasons HG053 HG053 HE919 HE919 HE543 HE543 122.1mm 122.1mm 89.1mm 89.1mm 73.4mm 73.4mm CM287 CM287 CM426 CM426 NB317 NB317 90.4mm 90.4mm 45.8mm 45.8mm 87.4mm 87.4mm NB039 NB039 HG460 HG460 NB769 NB769 97.0mm 97.0mm 91.8mm 91.8mm 128.5mm 128.5mm BD603 BD603 FQ749... -
Page 254: Bc Children
CK667* CK667* 77.9mm 77.9mm 106.7mm 106.7mm 99.8mm 99.8mm CK738 CK738 Cow and Kitty Cow and Kitty Duck Family Duck Family 89.1mm 89.1mm 98.8mm 98.8mm 95.2mm 95.2mm * This design has special effects. For more information please go to www.bernina.com/8series. 034791.51.04_2014-02_Manual_B880_EN... - Page 255 Embroidery motifs Puppy Turtle Dinosaur 98.8mm 95.8mm 98.8mm Stargazer HE456 Bunny 88.3mm 90.2mm 78.6mm 034791.51.04_2014-02_Manual_B880_EN...
-
Page 256: Bc Hobby
Embroidery motifs BC Hobby SP980 LT870 NB036 97.5mm 63.2mm 35.7mm Air Ballon SR067 SP989 95.2mm 87.5mm 101.6mm SP266 Race car RC675 75.8mm 99.2mm 101.6mm RC244 SR589 FB158 88.4mm 95.2mm 39.5mm LT604 SR551 FB148 88.8mm 120.3mm 101.1mm 034791.51.04_2014-02_Manual_B880_EN... -
Page 257: Bc Animals
Embroidery motifs BC Animals MT028 CM142 FQ617 103.3mm 56.5mm 118.0mm WM785 FQ624 WP217 84.6mm 64.5mm 93.9mm WP244 WS610 LJ599 136.8mm 127.3mm 93.2mm FQ394 FQ515 LJ600 98.3mm 118.5mm 95.7mm WM783 Jewel Butterfly FQ600 109.1mm 88.6mm 112.6mm FQ106 109.3mm 034791.51.04_2014-02_Manual_B880_EN... -
Page 258: Bc Flowers Outline
Embroidery motifs BC Flowers Outline FQ434 FQ274 NB668 100.0mm 63.0mm 114.3mm FQ331 HE700 NB513 84.6mm 103.1mm 103.7mm WS673 FQ108 FQ161 67.7mm 118.9mm 128.7mm Cross stitch flower Cross stitch flower 2 HG390 29.9mm 79.6mm 71.4mm Border black 38.5mm 034791.51.04_2014-02_Manual_B880_EN... -
Page 259: Bc Switzerland
Embroidery motifs BC Switzerland 019_Swiss 007_Flower 008_Flower 42.4mm 150.4mm 102.9mm 002_Bell 022_Swiss 009_Flower 50.4mm 29.3mm 102.1mm 011_Flowers 013_Garland 012_Flowers 77.9mm 102.8mm 78.8mm 023_Village 191.6mm 034791.51.04_2014-02_Manual_B880_EN... - Page 260 Notes Notes 034791.51.04_2014-02_Manual_B880_EN...
-
Page 261: Alphabets
Alphabets Alphabets Drifter Drifter Childs Play Childs Play Victoria Victoria King Charles King Charles Alice Alice Chicago Chicago Anniversary Anniversary Swiss Block Swiss Block 034791.51.04_2014-02_Manual_B880_EN... - Page 262 Alphabets Quilt Block Old English Old English Russian Textbook Russian Textbook Jikharev Jikharev 034791.51.04_2014-02_Manual_B880_EN...
-
Page 263: Index
⦁ Back ⦁ Balance Balance ⦁ ⦁ Big view of the Display Back to basic setting ⦁ ⦁ Combining lettering BERNINA Dual Transport ⦁ Correcting the combination ⦁ Buttonhole ⦁ Correction 134, 173 ⦁ Correcting 70, 71 ⦁ Deleting lettering ⦁... - Page 264 Index Bobbin winder pre-tension ⦁ Test-sewing ⦁ With direct length entry Brightness ⦁ With double pointed bartack, narrow 124-128 ⦁ Attaching presser foot to sewing computer ⦁ Beeper/sound selection ⦁ Display Cable ⦁ ⦁ Functions Connection 15, 20 ⦁ ⦁ Modes Plugging in ⦁...
- Page 265 ⦁ ⦁ Altering pattern length Manual ⦁ Backstepping ⦁ Darning and embroidery thread Balance 48, 51 ⦁ Balance BERNINA Dual Transport ⦁ Darning hoop connection Combination repeat ⦁ Combination subdivider (1) ⦁ Dealer details Combination subdivider (2) ⦁ Connecting stitches ⦁...
- Page 266 Zoom minus ⦁ Altering proportionally 166, 167, 176 ⦁ Zoom plus ⦁ Altering thread brand 172, 190 ⦁ By BERNINA 163, 194 ⦁ Embroidery 149-201 Changing the colors of the motif via the color ⦁ Alphabet wheel 172, 189 ⦁...
- Page 267 ⦁ ⦁ Troubleshooting 204-212 Altering pattern length ⦁ Backstepping Endless embroidery 166, 167, 180-181 ⦁ Balance ⦁ Balance BERNINA Dual Transport Entry ⦁ Reset ⦁ Embroidery mode ⦁ Letter size with alphabets ⦁ Sewing mode ⦁ Mirror Image left/right/down/up ⦁...
- Page 268 Altering pattern length ⦁ Altering stitch density ⦁ Lettering Backstepping ⦁ Balance ⦁ Altering size 134, 142 ⦁ Balance BERNINA Dual Transport ⦁ Balance ⦁ Reset ⦁ Choosing lower case letters ⦁ Distorting stitch patterns ⦁ Combining ⦁ Long stitch ⦁...
- Page 269 Index Memory Overlock ⦁ Embroidery computer ⦁ Double overlock ⦁ Sewing computer 40, 141-147 ⦁ Knit ⦁ Reinforced Menu selection ⦁ Stitches 74-75 ⦁ Alphabets ⦁ Stretch ⦁ Buttonholes ⦁ Vari ⦁ Decorative stitches ⦁ Overview History ⦁ ⦁ Personal Program/Memory Alphabets 132, 161, 173, 219-226, 239 ⦁...
- Page 270 Index Practical stitches 74-91 Programming «Function»-buttons/ ⦁ Bartack program «Function»-icon 53, 54 ⦁ Basting stitch 75, 89 ⦁ Blind stitch 74, 88 Programming the foot control 53, 56 ⦁ Blind stitch narrow ⦁ Chainstitch ⦁ Cover stitch effect ⦁ Darning manual/automatic/reinforced 83-85 Quick Reverse button ⦁...
- Page 271 Index Seam ⦁ Fabric thickness 57, 58 ⦁ Blind ⦁ Information 60, 66 ⦁ Edges ⦁ Language selection ⦁ Visible ⦁ Lifting presser foot ⦁ Lubricating sewing-/embroidery computer 63, 65 Seam guide ⦁ Monitoring 52, 59 ⦁ As guide ⦁ Overview Display ⦁...
- Page 272 Index Sewing light Step stitch Sewing on button Stipple quilting Sewing settings Stitch Designer ⦁ Altering upper thread tension ⦁ Absolute point position ⦁ Automatic securing program ⦁ Closing stitch designer 112, 113 ⦁ ⦁ Automatic thread cutter Confirming the entry 112, 113 ⦁...
- Page 273 Triple straight stitch 74, 80 Backstepping 110, 111 ⦁ Balance 110, 111 ⦁ Triple zig-zag 74, 81 Balance BERNINA Dual Transport 110, 111 ⦁ Configuring the bead tapering ⦁ Troubleshooting 204-212 Distorting stitch patterns 110, 111 ⦁ Manual setting the Length of Section 2 110, 111 ⦁...
- Page 274 Notes Notes 034791.51.04_2014-02_Manual_B880_EN...
- Page 275 Imprint Text Herbert Stolz/Susanne Ribi Graphics www.sculpt.ch Pictures Patrice Heilmann, CH-Winterthur Typesetting, Layout Susanne Ribi Copyright 2013 BERNINA International AG, CH-Steckborn 2014/02 en 034791.51.04 034791.51.04_2014-02_Manual_B880_EN...