Table of Contents
Advertisement
Available languages
Available languages
Models No.
• Connection and Initial Setup Procedures are on pages 10 and 13.
E
As an
NERGY
product or product model meets the
energy efficiency.
Please read these instructions carefully before attempting to connect, operate,
or adjust this product. Please save this manual.
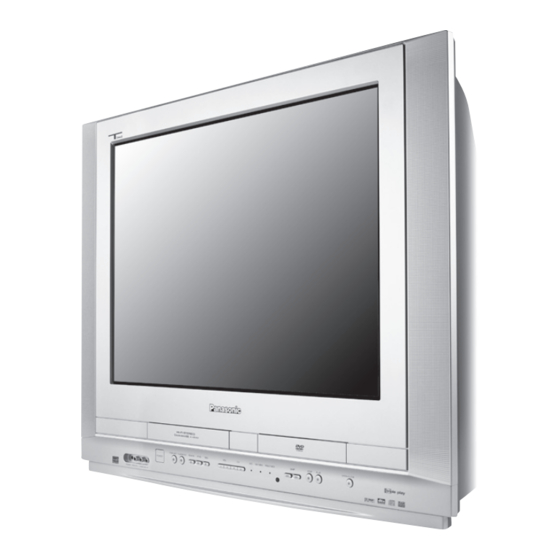
This operating instruction book is designed for use with models PV-DF2035-K and
PV-DF2735-K. Illustrations in this manual show the PV-DF2735-K. Fea tures may vary, so please
read care ful ly.
For assistance, please call : 1-800-561-5505 or visit us at www.panasonic.ca
TV / DVD / VCR Combination
PV-DF2035-K/PV-DF2735-K
S
TAR
®
Partner, Panasonic has determined that this
E
NERGY
Operating Instructions
MULTI FORMAT PLAYBACK
*Ability to play back may depend on recording
conditions.
S
TAR
guidelines for
®
Advertisement
Chapters
Table of Contents

Related Manuals for Panasonic OmniVision PV-DF2035-K


Summary of Contents for Panasonic OmniVision PV-DF2035-K
-
Page 1: Operating Instructions
This operating instruction book is designed for use with models PV-DF2035-K and PV-DF2735-K. Illustrations in this manual show the PV-DF2735-K. Fea tures may vary, so please read care ful ly. For assistance, please call : 1-800-561-5505 or visit us at www.panasonic.ca... -
Page 2: Before Using
Before Using Congratulations Safety Precaution On your purchase of one of the most sophisticated and reliable Be sure to read the following cautions carefully. products on the market today. Used properly, it will bring you and WARNING your family years of enjoyment. Please fill in the information below. The serial number is on the tag located on the back of your unit. -
Page 3: Safety Precautions
Safety Precautions WARNING TO PREVENT FIRE OR SHOCK HAZARD, DO NOT EXPOSE THIS EQUIPMENT TO RAIN OR MOIS TURE. CAUTION TO PREVENT ELECTRIC SHOCK, MATCH WIDE BLADE OF PLUG TO WIDE SLOT IN WALL SOCKET. FULLY INSERT. CAUTION: CAUTION: UNIT IS A CLASS I LASER PRODUCT. LASER RADIATION WHEN OPEN. -
Page 4: Important Safeguards And Precautions
IMPORTANT SAFEGUARDS AND PRE CAU TIONS WARNING TO REDUCE THE RISK OF ELECTRIC SHOCK, FIRE, INJURY TO PERSONS OR DAMAGE TO THIS PRODUCT, READ AND RETAIN ALL SAFETY AND OPERATING INSTRUCTIONS. HEED ALL WARNINGS IN THE MANUAL AND ON THE PRODUCT. INSTALLATION USING THE UNIT POWER SOURCE CAUTION... -
Page 5: Table Of Contents
Table of Contents Getting Before Using ..........................2 Started Safety Precautions ........................3 IMPORTANT SAFEGUARDS AND PRECAUTIONS ............... 4 Information ..........................6 TV and VCR Location of Controls ....................... 8 Operation Connections ........................... 10 Tuning TV ..........................13 TV Operation .......................... 16 MTS Broadcast / TV Stereo System .................. -
Page 6: Information
Information Information (Unit, Cassette) Head Cleaning Playing older or damaged tapes may eventually cause video heads Loading the Batteries to become clogged. Head Clog Sensor During playback this screen appears if Open the cover. clogging is detected. To clear message VIDEO HEADS MAY from screen, press PLAY on the remote NEED CLEANING... -
Page 7: Disc Handling
• Do not write on label side of disc. DVD-R discs • Never use record cleaning sprays, benzine, Panasonic DVD-R recorded and finalized* on a Panasonic DVD thinner, static electricity prevention liquids, or any other solvent. video recorder are played as DVD-Video on this unit. -
Page 8: Location Of Controls
Location of Controls Remote Control Buttons When this button is pressed in TV / VCR mode, 19 TV/VCR Sets to TV/VCR mode. OPEN / CLOSE / the tape is ejected. This button is inoperative TRACKING UP / Reduces picture noise during Playback and EJECT if pressed during recording. - Page 9 Unit Buttons Front View <Model PV-DF2735-K unit shown> STOP: Lights up during recording. In Built In Speakers Equipped with 2 front speakers. REC Indicator STOP/ Stops playback. Rec Pause or OTR Pause mode, (RED) Audio Input Connect from other component. EJECT EJECT: the Indicator flashes.
-
Page 10: Connections
Connections Notes on con nec tions • Turn off the power supply for all com po nents before making any connections. • If the cables necessary for connecting a component to the system are not included with the component or available as an option, you may need to fashion a cable to suit the component concerned. - Page 11 Connecting the Audio Output Terminal Enjoy the powerful movie theatre and hall-like sound available with multiple channel audio found on DVDs by connecting an amplifier and speakers. There are two types of connection, digital and analog. WARNING Don’t place the unit on amplifier or equipment that may become hot.
- Page 12 Pro Logic from the same DVD movies that provide full 5.1 channel Dolby Digital soundtracks, as well as from titles with the Dolby Surround mark. For information on Panasonic or Technics Dolby Pro Logic Surround Sound Decoders please contact your local dealer.
-
Page 13: Tuning Tv
Tuning TV Case 1 10/25/2005 TUE 11:45AM EJECT DST:ON Settings are made automatically. When SETTING : CH 10 POWER complete, this screen appears. AUTO CLOCK SET COMPLETED NUMBER Keys ADD/DLT Case 2 ACTION SELECT If setup is incomplete, the following screen ▲▼◄►/ appears. - Page 14 Manual Clock Setting Add or Delete a Chan nel To add channel: Press ACTION to display MAIN MENU. Select channel with NUMBER keys and press ADD/DLT. Press ▲▼◄► to select “CLOCK.” CHANNEL 08 ADDED MAIN MENU LOCK LANGUAGE CLOCK SELECT: SET:SET :ACTION To delete channel:...
- Page 15 Time Zone Adjust Change Language Setting (Only when Auto Clock is set.) Press ACTION to display MAIN MENU. Press ACTION to display MAIN MENU. Press ▲▼◄► to select “LANGUAGE.” Press ▲▼◄► to select “CLOCK.” MAIN MENU MAIN MENU LOCK LANGUAGE LOCK LANGUAGE CLOCK CLOCK...
-
Page 16: Tv Operation
TV Operation Method 2: Press INPUT. The display will change as follows. RAPID LINE1 LINE2 TUNER TUNE NUMBER MUTE keys Method 3: INPUT 100 key Press ACTION for MAIN MENU. ACTION SELECT Press ▲▼◄► to select “TV”, then press SET for ▲▼◄►/ SET UP TV screen. - Page 17 Rapid Tune Weak Signal Display Feature Press R-TUNE to display the last channel you were watching. When “ON” is selected, the picture is displayed even when a broadcast signal is weak or non-existent. Press ACTION to display MAIN MENU. Press ▲▼◄► to select “CH.” Audio Mute Press SET to display SET UP CHANNEL screen.
-
Page 18: Mts Broadcast / Tv Stereo System
MTS Broadcast / TV Stereo System Receivable Broadcast Types The following are possible audio broadcast types and on-screen displays. The signal being received is indicated with a “ ” mark DISPLAY while the selected audio mode is indicated with an arrow. To change the audio mode for these broadcasts, see the “Audio Mode for TV Viewing”... -
Page 19: Tv Timer Features
TV Timer Features • Make sure a tape is inserted if Playback ON-TIMER mode mode is selected. selection order • Make sure a disc is inserted if Disc (DVD/ Lowest CD/Video CD) mode is selected. CH01 Disc DISPLAY channel Highest CH125 channel ADD/DLT... -
Page 20: Closed Caption System
Closed Caption System Press ▲▼ to select “CAPTION”. Press SET to display CAPTION screen. SET UP TV CAPTION INPUT SELECT :TUNER MUTE SET UP VIDEO/AUDIO DVD VOL ADJUST :+2 ACTION SELECT: SET:SET SELECT :ACTION ▲▼◄►/ Press ▲▼ to select “CAPTION MODE.” Press SET repeatedly to select mode. - Page 21 Caption On Mute Feature Press ACTION three times to return to the normal screen. Closed Caption narration, if available, is displayed when MUTE button is pressed for silence. Press MUTE to mute the sound and display closed Press ACTION to display MAIN MENU. captioning.
-
Page 22: Video / Audio Setting
Video / Audio Setting Press ▲▼ to select “VIDEO MENU.” Press SET repeatedly to select desired mode. SET UP VIDEO/AUDIO VIDEO MENU :NORMAL VIDEO ADJUST AUDIO MENU :MUSIC AUDIO ADJUST ACTION SELECT: SET:SET :ACTION SELECT ▲▼◄►/ NORMAL Factory setting. MOVIE Picture is adjusted for a movie-like feel. - Page 23 Video Adjustment Audio Adjustment Press ACTION to display MAIN MENU. Press ACTION to display MAIN MENU. MAIN MENU MAIN MENU Press ▲▼◄► to select “TV.” Press ▲▼◄► to select “TV.” Press SET to display SET UP TV Press SET to display SET UP TV LOCK LANGUAGE LOCK LANGUAGE screen.
-
Page 24: Before Using The Vcr
Before using the VCR EJECT TV/VCR DISPLAY NUMBER keys ADD/DLT CH▲▼ STOP STILL/ Insert STOP / CH▲▼ REC Indicator PAUSE a tape EJECT AUDIO SPEED PROG Before using VCR Functions Inserting a Tape Confirm that tape is inserted. Insert a tape. Press TV/VCR. -
Page 25: Recording Television Programs
Recording Television Programs Record On a Tape Stop Recording Insert a tape with record tab. Press STOP to stop recording. • The unit power comes on automatically. Press CH ▲▼ or NUMBER keys to Select Channel. • For “LINE” input, see page 16. Press SPEED to select recording speed. -
Page 26: Timer Recording
Timer Recording Review, Replace or Clear Program Con tents : Set up to 8 Programs (Recording is not in progress) SET PROGRAM You can set up to 8 programs to be recorded while you are Press PROG to display SET TIMER PROGRAMMING away. -
Page 27: Playing Vcr
Playing VCR Slow Motion picture EJECT a. Press STILL/PAUSE. TV/VCR b. Press FF/SLOW+ (increases speed) or REW/SLOW- (decreases speed) in Still mode. c. Press PLAY to release. TRACKING NUMBER keys Frame by Frame picture a. Press STILL/PAUSE. ACTION b. Press STILL/PAUSE in Still mode. c. - Page 28 Zero Search Index Search To quickly return to a specific tape counter location. Search System is ... Each time a recording is made, an invisible index mark is placed Press DISPLAY during playback to display the on the tape. When timer recordings are made, program index Counter.
- Page 29 Commercial Skip Manual Tracking Control Use during Playback and Slow Motion mode to reduce picture By pressing CM/ZERO in Playback mode you can skip over 1, 2, noise. Press the 3 or 6 number key on the remote control or or 3 minutes of recorded tape as desired.
-
Page 30: Copy Your Tapes (Dubbing)
Copy Your Tapes (Dub bing) Refer to page 10 “Connecting the “1, 2” Input Terminal” before you perform this operation. IMPORTANT Unauthorized exchanging and/or copying of copyrighted recordings may be copyright infringement. Note: • Please note that some tapes cannot be dubbed on this unit. Also, it is not possible to dub DVD/CD/Video CD to VHS tape using this unit. Playback (Source) unit Recording (Editing) unit Insert blank tape with record tab. -
Page 31: V-Chip Control Features
V-Chip Control Features Press NUMBER keys to enter your secret code. • Take care that you are not observed entering the secret code. LOCK ENTER 4-DIGIT CODE NUMBER **-- keys ADD/DLT ACTION ENTER :0-9 (CLEAR) :ACTION SELECT ▲▼◄►/ Enter same code again for confirmation. LOCK CONFIRM 4-DIGIT CODE ****... - Page 32 US TV PROGRAMS Ratings If LOCK menu is not displayed, perform “Enter Secret Code” steps on page 31. Press ▲▼ to select “US TV PROGRAMS.” • “NEXT PAGE” displays CANADIAN V-Chip setting menu. Please US MOVIES Ratings refer to page 33 for more details on Canadian tapes or broadcasts. Press ▲▼...
- Page 33 Canadian French Language Ratings Canadian English Language Ratings Press ▲▼ to select “NEXT PAGE.” Press ▲▼ to select “NEXT PAGE.” Press SET to display screen. Press SET to display screen. LOCK LOCK US MOVIES :OFF US MOVIES :OFF CHANGE SETTINGS CHANGE SETTINGS US TV PROGRAMS :OFF...
- Page 34 US MOVIES Ratings Chart Canadian French Language Ratings Chart GENERAL AUDIENCE: All ages admitted. General Audience PARENTAL GUIDANCE: Some material may not be suitable for children. 8 ANS + Not recommended for young children PARENTS CAUTIONED: PG-13 Programming may not be suitable for children under Some material may be inappropriate for children under 13.
-
Page 35: Display Features
Display Features TV/VCR Status & Clock Display Press DISPLAY DISPLAY to display or remove the overlay. 12:00PM CH 08 0:25 -0:12:34 STEREO MONO RATING:PG-13 1 Function Status 2 Rec Time Remaining (OTR mode only, see page 25.) 3 Receivable Broadcast Types (See page 18.) 4 Rating level 5 Current Time... -
Page 36: Basic Disc Operation
Basic Disc Operation OPEN / CLOSE POWER DISPLAY NUMBER keys SELECT ▲▼◄►/ MENU PLAY REW / SLOW- FF/SLOW+ STOP TITLE STILL / POWER Insert STOP PLAY OPEN / SKIP+ ►►Ι PAUSE disc CLOSE SKIP- Ι◄◄ SUB TITLE AUDIO ZOOM If an interactive DVD* or a Video CD with playback If a remote control button does not work when pressed, press the control*... - Page 37 • When appears on the screen while a button is being pressed, it means that the corresponding operation is prohibited by the unit or the disc. Auto-Power Off function Forward/Reverse Chapter/Track Skip DVD-V DVD-V Power turns off after unit is in stop mode with wallpaper displayed Press SKIP+ ►...
- Page 38 RESUME Function Audio Soundtrack Language DVD-V DVD-V The unit memorizes the point where STOP is pressed (STOP ► You can change the audio soundtrack language, selected at display on screen). Settings for DVD Operation, to a different language if available. Press PLAY to resume play from this point.
- Page 39 • When appears on the screen while a button is being pressed, it means that the corresponding operation is prohibited by the unit or the disc. Vocal selection for Karaoke discs Information Display DVD-V DVD-V When DISPLAY is pressed, On-Screen Displays show disc Press AUDIO in Play mode to display the audio information and unit information.
-
Page 40: Dvd-Ram Operation
DVD-RAM Operation Press PLAYLIST or D.NAVI to display Play List OPEN / CLOSE or Direct Navigator menu for easy title or scene POWER selection. Example: Play List menu Recorded time NUMBER Play List No. length keys Page No. SELECT ▲▼◄►/ PLAYLIST Play List Page1/5... - Page 41 • When appears on the screen while a button is being pressed, it means that the corresponding operation is prohibited by the unit or the disc. Play List Direct Navigator If the DVD-RAM features a Play List, your preselected list of If the DVD-RAM features Direct Navigator, a list of recorded titles favourite scenes is displayed for easy access.
-
Page 42: Disc Operation -Using Information Screen
Disc Operation -Using Information Screen- c.Disc currently being played: The type of disc currently inserted is displayed. d.Elapsed playing time: Go to a different scene by entering an elapsed playing time, then DISPLAY SET. NUMBER • This function does not work with some discs. keys •... - Page 43 • When appears on the screen while a button is being pressed, it means that the corresponding operation is prohibited by the unit or the disc. Disc information screen 2 Disc information screen 3 Press DISPLAY in Play or Press DISPLAY in Play or T R A C K : 1 2 T R A C K : 1 2 T I M E : 0 0 : 3 5 : 1 2...
- Page 44 • When appears on the screen while a button is being pressed, it means that the corresponding operation is prohibited by the unit or the disc. Disc information screen 4 Unit information screen 4 Press DISPLAY in Play or Stop mode to display “On- Press DISPLAY twice in Play or Stop mode to Screen Display.”...
-
Page 45: Special Disc Operation
Special Disc Operation Press ▲▼ to select “PROGRAM PLAY.” Press SET to display screen. P L A Y M O D E P R O G R A M P L A Y NUMBER R A N D O M P L A Y keys CLEAR S E L E C T... - Page 46 Program Repeat Play Random Play Tracks are played in random order. Do steps 1-11 on page 45. Press ACTION in Stop mode to display MAIN MENU. Press DISPLAY to display Disc Information screen. (Disc Information Screen) Press ▲▼◄► to select “DVD.” T R A C K : 1 2 Press SET to display DVD MAIN MENU.
- Page 47 • When appears on the screen while a button is being pressed, it means that the corresponding operation is prohibited by the unit or the disc. DVD Volume Adjust V.S.S. (Virtual Surround Sound) DVD-V DVD-V Some DVDs are recorded at lower than average volume levels. Enjoy a surround-like effect if you are using two front speakers only.
-
Page 48: Settings For Dvd Operation
Settings for DVD Operation Press ▲▼ to select an item. Press SET repeatedly for desired language. D I S C L A N G U A G E S A U D I O : E n g l i s h NUMBER S U B T I T L E : A U T O... - Page 49 • When appears on the screen while a button is being pressed, it means that the corresponding operation is prohibited by the unit or the disc. Language Code List Language Code Language Code Language Code Abkhazian 6566 Hindi 7273 Scots Gaelic 7168 Afar 6565...
- Page 50 Selecting AUDIO OUTPUT DRC (Dynamic Range Compression) DVD-V OFF: Normal audio range is selected. (Factory preset) Select the digital output to be output from the optical digital audio output connector of the unit. For dynamic sound even at low volume. This is useful for late- night listening.
- Page 51 • When appears on the screen while a button is being pressed, it means that the corresponding operation is prohibited by the unit or the disc. Selecting STILL MODE Selecting TV MODE DVD-V DVD-V Set to reduce jitter in a displayed still picture or a motion picture. Set the screen display style for widescreen video material playback.
-
Page 52: Warning And Instruction Displays
Warning and Instruction Displays These displays will alert you to a missed operation or provide further instructions. CAUTION Page If you attempt to set or review a Timer Recording or set the On-Timer and the Clock is not PLEASE SET CLOCK BY PRESSING ACTION KEY set... -
Page 53: Glossary
Glossary Angle Regional Code Some DVD discs feature scenes simultaneously shot from different This is a copyright protection measure unique to DVD-Video. There angles. The ANGLE button can be used to view the scene from are 6 regional codes worldwide. In order to play a disc encoded with different angles. -
Page 54: Before Requesting Service
Before Requesting Service Check the following points once again if you are having trouble with your unit. PROBLEM CORRECTION Page Completely insert Power Plug into an AC outlet. No power… Set POWER button to ON. Auto power-off (shut off) occurs after about 5 min. in DVD mode with no operation, or if Power turns itself off... -
Page 55: Limited Warranty/Servicentre List
5770 Ambler Drive, Mississauga, Ontario L4W 2T3 PANASONIC PRODUCT – LIMITED WARRANTY Panasonic Canada Inc. warrants this product to be free from defects in materials and workmanship and agrees to remedy any such defect for a period as stated below from the date of original purchase. -
Page 56: Specifications
Specifications Display 20 inch, measured diagonally pure flat Picture Tube (PV-DF2035-K) Picture Tube 27 inch, measured diagonally pure flat Picture Tube (PV-DF2735-K) Video Recording System 4 rotary heads helical scanning system 1 track (Normal) Audio Track 2 channel (Hi-Fi Audio Sound) Tuner Broad cast Channels VHF 2 ~ 13, UHF 14 ~ 69... -
Page 57: Index
Index Forward/Reverse Rapid Scene Search [Disc] ..37 Remote Control Buttons ......8 Accessories ..........2 Forward/Reverse scene search [Tape] . 27 Remote Sensor ........9 ACTION button ........8 Frame by Frame Picture [Disc] ....37 Repeat Play ........... 27 AC Power Plug ........9 Frame by Frame picture [Tape] ..... - Page 58 5770 Ambler Drive, Mississauga, Ontario L4W 2T3 (905) 624-8447 Calgary: 6835-8 Street N.E., Calgary, Alberta T2E 7H7 (403) 295-3955 Vancouver: 12111 Riverside Way, Richmond, BC V6W 1K8 (604) 278-4211 Panasonic Canada Inc. 5770 Ambler Drive, Mississauga, Ontario L4W 2T3 Printed in Indonesia (905) 624-5010 LSQT0939 A www.panasonic.ca...
- Page 59 Ce manuel d’utilisation se rapporte aux modèles PV-DF2035-K et PV-DF2735-K. Les illustrations figurant dans ce manuel s’appliquent au PV-DF2735-K. Les caractéristiques sont susceptibles de varier. Veuillez lire attentivement. Pour de l’aide, composez le 1-800-561-5505 ou visitez notre site Internet à www.panasonic.ca...
- Page 60 Avant l’utilisation Mesures de sécurité Félicitations Vous avez arrêté votre choix sur l’un des produits les plus Veuillez lire attentivement les mesures de sécurité suivantes. perfectionnés et les plus fiables sur le marché. Utilisé correctement, AVERTISSEMENT il ne manquera pas de procurer à vous et à votre famille des années de plaisir.
- Page 61 Mesures de sécurité AVERTISSEMENT AFIN DE PRÉVENIR TOUT RISQUE D’INCENDIE OU DE CHOCS ÉLECTRIQUES, NE PAS EXPOSER CET APPAREIL À LA PLUIE OU À UNE HUMIDITÉ EXCESSIVE. ATTENTION POUR ÉVITER LES CHOCS ÉLECTRIQUES, INTRODUIRE LA LAME LA PLUS LARGE DE LA FICHE DANS LA BORNE CORRESPONDANTE DE LA PRISE ET POUSSER JUSQU’AU FOND.
- Page 62 IMPORTANTES MESURES DE SÉCURITÉ AVERTISSEMENT AFIN DE PRÉVENIR TOUT RISQUE DE CHOCS ÉLECTRIQUES, D’INCENDIE, DE BLESSURES AINSI QUE TOUT DOMMAGE À L’APPAREIL, LIRE ET CONSERVER LES MESURES DE SÉCURITÉ ET LE MANUEL D’UTILISATION. TENIR COMPTE ÉGALEMENT DE TOUTES LES MISES EN GARDE INDIQUÉES DANS LE MANUEL ET INSCRITES SUR L’APPAREIL.
- Page 63 Table des matières Préparatifs Avant l’utilisation ........................2 Mesures de sécurité ........................ 3 IMPORTANTES MESURES DE SÉCURITÉ ................4 Informations ..........................6 Fonctionnement du téléviseur et Emplacement des commandes ....................8 magnétoscope Raccordements ........................10 Réglage des canaux ......................13 Visionnement .........................
-
Page 64: Informations
Informations Informations (Appareil, cassette) Nettoyage des têtes La lecture de bandes usées ou endommagées peut encrasser les Insertion des piles têtes vidéo. Têtes vidéo avec système de détection Si les têtes ont besoin d’être nettoyées, l’écran ci-contre apparaît à la lecture Ouvrir le couvercle. - Page 65 Disques DVD-R les rayures peuvent provoquer des sauts de lecture et de la distorsion. Les disques DVD-R Panasonic enregistrés et finalisés* sur un enregistreur DVD Panasonic sont lus comme DVD-Vidéo sur cet • Ne pas écrire sur le côté portant l’étiquette.
- Page 66 Emplacement des commandes Télécommande Pour la sélection de l’angle de vision désiré en 15 Angle mode DVD. 16 Enregistrement Enregistrement d’un programme. Pour appeler l’écran REGLAGE PROGRAMMATION. Permet la programmation 17 Programmation de l’enregistrement différé et de la minuterie de mise sous tension automatique.
- Page 67 Commandes du combiné Panneau avant de l’appareil <Le modèle PV-DF2735-K est illustré> Haut-parleurs Cet indicateur s’allume pendant Arrêt: 2 haut-parleurs avant. incorporés un enregistrement. En mode Arrête la lecture. Indicateur Arrêt / Éjection pause à l’enregistrement ou lors Éjection: Bornes d’entrée Pour le raccordement à...
- Page 68 Raccordements Nota concernant les raccordements • Couper l’alimentation sur tous les appareils avant d’effectuer les raccordements. • Si les câbles nécessaires au raccordement d’un appareil auxiliaire ne sont pas fournis avec l’appareil ou sont vendus séparément, il peut être nécessaire de fabriquer ou d’acheter le câble approprié. •...
- Page 69 Raccordement à la borne de sortie audio Pour profiter d’un environnement sonore caractéristique d’une salle de cinéma ou de concert en reproduisant la piste sonore multicanal des DVD à l’aide d’un amplificateur et d’enceintes acoustiques. Deux types de raccordement sont possibles : analogique et numérique. AVERTISSEMENT Ne pas placer l’appareil sur un amplificateur ou un appareil susceptible...
- Page 70 Dolby Surround. Pour plus de renseignements sur les récepteurs avec décodeur ambiophoniques Dolby Pro Logic Panasonic, contacter votre détaillant. Fabriqué sous licence de Digital Theater Systems Inc. Brevets 5,451,942, 5,956,674, 5,974,380, 5,978,762, 6,487,535 ainsi que d’autres brevets en instance aux États-Unis et dans...
-
Page 71: Réglage Des Canaux
Réglage des canaux Cas 1 10/25/2005 MAR 11:45AM Éjection HR ETE:OUI Les réglages sont effectués REGLAGE : CA 10 Interrupteur automatiquement. Les réglages terminés, REGLAGE AUTOMATIQUE DE l’écran ci-contre s’affiche. L’HORLOGE COMPLETE Touches numériques Ajout / effacement Cas 2 Action Si le réglage est incomplet, l’écran Sélection ci-contre s’affiche. - Page 72 Ajout ou effacement d’un canal Réglage manuel de l’horloge Pour ajouter un canal: Appuyer sur ACTION pour afficher l’écran MENU. Sélectionner le canal au moyen des touches numériques, puis appuyer sur ADD/DLT. Appuyer sur ▲▼◄► pour sélectionner “HORLOGE”. CANAL 08 AJOUTE MENU BLOCAGE LANGUE TELE...
- Page 73 Fuseau horaire Réglage de la langue (Seulement lorsque le réglage de l’horloge a été fait Appuyer sur ACTION pour afficher l’écran MENU. automatiquement.) Appuyer sur ACTION pour afficher l’écran MENU. Appuyer sur ▲▼◄► pour sélectionner “LANGUE”. Appuyer sur ▲▼◄► pour sélectionner MENU “HORLOGE”.
-
Page 74: Visionnement
Visionnement Méthode 2: Appuyer sur la touche INPUT. L’affichage change de la manière suivante. Syntonisation LIGNE1 LIGNE2 BLC ACCORD rapide Touches Sourdine Méthode 3: numériques Entrée Appuyer sur ACTION pour afficher le menu. Touche 100 Action Appuyer sur ▲▼◄► pour sélectionner “TELE”, Sélection puis appuyer sur SET pour afficher le menu ▲▼◄►/... - Page 75 Syntonisation rapide Avis de signal faible Appuyer sur la touche R-TUNE pour syntoniser le dernier canal Lorsque “OUI” est sélectionné, une image est affichée même si le sélectionné. signal capté est faible ou qu’aucun signal n’est émis sur le canal syntonisé.
-
Page 76: Réception D'émissions Multivoie/Réception Stéréo
Réception d’émissions multivoie/réception stéréo Modes de réception possibles La liste ci-dessous comporte les différents modes audio possibles d’émissions télévisées avec leur affichage. Le signal reçu est Affichage identifié par le symbole “ ”, tandis que le mode audio sélectionné est indiqué par une flèche. Pour modifier le mode audio de ces émissions, consulter la section “Sélection du mode audio de la réception télé”. -
Page 77: Minuterie Du Téléviseur
Minuterie du téléviseur • S’assurer qu’une cassette est insérée Ordre des sélections du si le mode lecture magnétoscope est mode de mise sous tension sélectionné. Canal le • Si le mode Disque (DVD/CD/CD-Vidéo) CA01 Disque Affichage plus bas a été sélectionné, s’assurer qu’un disque est en place. -
Page 78: Affichage Des Sous-Titres
Affichage des sous-titres Appuyer sur ▲▼ pour sélectionner “SOUS-TITRES”. Appuyer sur SET pour afficher l’écran SOUS-TITRES. REGLAGE TELEVISEUR SOUS-TITRES Sourdine SELECT SOURCE:BLC ACCORD REGLAGE VIDEO/AUDIO REGLAGE VOL. DVD:+2 Action Sélection SEL. REGLER:SET :ACTION ▲▼◄►/ Réglage Appuyer sur ▲▼ pour sélectionner “MODE S/ TITRES”. - Page 79 Affichage des sous-titres en sourdine Appuyer à trois reprises sur ACTION pour revenir à l’écran normal. Sur réception d’une émission avec sous-titrage, une pression de la touche MUTE appelle l’affichage des sous-titres. Appuyer sur MUTE pour couper le son et afficher les Appuyer sur ACTION pour afficher l’écran MENU.
-
Page 80: Réglage Vidéo/Audio
Réglage vidéo/audio Appuyer sur ▲▼ pour sélectionner “MENU VIDEO”. Appuyer sur SET à plusieurs reprises pour sélectionner le mode. REGLAGE VIDEO/AUDIO MENU VIDEO:NORMAL REGLAGE IMAGE MENU AUDIO:MUSIQUE REGLAGE SON Action Sélection SEL. REGLER:SET :ACTION ▲▼◄►/ Réglage NORMAL Réglage implicite. FILM Image ajustée pour les films. - Page 81 Réglage vidéo Réglage audio Appuyer sur ACTION pour afficher l’écran MENU. Appuyer sur ACTION pour afficher l’écran MENU. MENU MENU Appuyer sur ▲▼◄► pour Appuyer sur ▲▼◄► pour sélectionner “TELE”. sélectionner “TELE”. BLOCAGE LANGUE BLOCAGE LANGUE Appuyer sur SET pour afficher Appuyer sur SET pour afficher TELE HORLOGE CANAL...
-
Page 82: Avant D'utiliser Le Magnétoscope
Avant d’utiliser le magnétoscope Éjection Télé-magnétoscope Affichage Touches numériques Ajout / effacement Changement de canal ▲▼ Arrêt Pause / Arrêt Insérer une Arrêt / Indicateur Changement sur image cassette. Éjection d’enregistrement de canal ▲▼ Audio Enregistrement Enregistrement Programmation Vitesse Avant d’utiliser les fonctions du magnétoscope Insertion d’une cassette Vérifier qu’une cassette a été... -
Page 83: Enregistrement D'émissions De Télévision
Enregistrement d’émissions de télévision Enregistrement sur bande Arrêt de l’enregistrement Insérer une cassette munie de sa languette de Appuyer sur STOP pour arrêter l’enregistrement. protection. • L’appareil est automatiquement mis en marche. Appuyer sur CH ▲▼ ou sur les touches numériques pour sélectionner le canal. - Page 84 Enregistrement différé Révision, modification ou annulation de la programmation : Réglage de jusqu’à 8 programmes (Aucun enregistrement en cours) La mémoire accepte jusqu’à 8 programmes d’enregistrement REGLAGE PROGRAMMATION Appuyer sur PROG pour différé. PROGRAMMATION MINUTERIE afficher l’écran REGLAGE MINUTERIE MISE S/TENSION MINUTERIE-SOMMEIL: 0 PROGRAMMATION.
-
Page 85: Utilisation Du Magnétoscope
Utilisation du magnétoscope Lecture au ralenti Éjection a. Appuyer sur STILL/PAUSE. Télé-magnétoscope b. Appuyer sur FF/SLOW+ (augmentation de la vitesse) ou sur REW/SLOW- (diminution de la vitesse) en mode arrêt sur image. Pistage c. Appuyer sur PLAY pour désactiver. Touches numériques Avance image par image a. - Page 86 Repérage à zéro Recherche de programme par index Cette fonction permet de revenir à un point donné sur la bande. Système de repérage ... À chaque enregistrement, un signal d’index est enregistré sur Appuyer sur DISPLAY pendant la lecture pour la bande.
- Page 87 Commande de pistage manuel Saut de pauses publicitaires En mode lecture, une pression sur CM/ZERO fait sauter 1, 2 ou 3 Pendant la lecture ou le ralenti, utiliser cette fonction pour réduire minutes de la bande enregistrée, selon le réglage. la distorsion de I’image.
-
Page 88: Duplication (Copie De Cassettes)
Duplication (Copie de cassettes) Se reporter à la section “Raccordement aux bornes d’entrée audio/vidéo 1 et 2” à la page 10 avant d’exécuter cette opération. Mise en garde L’échange ou la copie non autorisés d’enregistrements peut enfreindre la loi sur les droits d’auteur. Nota: •... -
Page 89: Discrétion Parentale
Discrétion parentale Appuyer sur les touches numériques pour entrer le mot de passe. • Prendre soin que le code secret ne soit connu de personne d’autre. BLOCAGE Touches ENTRER UN CODE numériques A 4 CHIFFRES **-- Ajout / Action effacement ENTRER:0-9 :ACTION Sélection... - Page 90 Classifications des émissions télé Si le menu BLOCAGE n’est pas affiché, se reporter à américaines la section “Entrer le mot de passe” à la page 31. Classifications des films américains Appuyer sur ▲▼ pour sélectionner “EMISSIONS TELE USA”. • “PAGE SUIVANTE” affiche le menu des classifications canadiennes. Appuyer sur ▲▼...
- Page 91 Classifications canadiennes Classifications québécoises Appuyer sur ▲▼ pour sélectionner “PAGE Appuyer sur ▲▼ pour sélectionner “PAGE SUIVANTE”. SUIVANTE”. Appuyer sur SET pour appeler l’affichage. Appuyer sur SET pour appeler l’affichage. BLOCAGE BLOCAGE FILMS USA :NON FILMS USA :NON MODIFIER REGLAGE MODIFIER REGLAGE EMISSIONS TELE USA:NON EMISSIONS TELE USA:NON...
- Page 92 Tableau des classifications des films américains Tableau des classifications québecoises AUDITOIRE GÉNÉRAL: Auditoire général Convient à tous les auditoires. SUPERVISION PARENTS: Certaines scènes pourraient ne pas convenir à un jeune auditoire. 8 ANS + Non recommandé pour de jeunes enfants JUGEMENT PARENTS: Contenu pourrait ne pas convenir à...
-
Page 93: Affichage
Affichage Affichage de l’état et de l’heure Appuyer sur DISPLAY pour faire apparaître ou disparaître l’affichage. Affichage ENREG 12:00PM CA 08 0:25 -0:12:34 STEREO 2 VOIE MONO COTE:PG-13 1 Fonction 2 Durée restante (mode auto-enregistrement seulement, voir page 25) 3 Modes de réception possibles (voir à... -
Page 94: Utilisation De Base Du Disque
Utilisation de base du disque Ouverture / fermeture Interrupteur Affichage Touches numériques Sélection ▲▼◄►/ Menu Réglage Lecture Rebobinage / ralenti- Avance accélérée / Arrêt ralenti+ Titre Pause / Arrêt Interrupteur Insérer un Arrêt Ouverture / Lecture Saut+ ►►Ι sur image disque fermeture Saut- Ι◄◄... - Page 95 • Lorsque le symbole s’affiche sur pression d’une touche, cela signifie que la fonction demandée ne peut être utilisée. Mise hors contact automatique Saut avant/arrière d’un chapitre ou d’une plage DVD-V DVD-V Le contact est automatiquement coupé lorsque le combiné est laissé...
- Page 96 Fonction de poursuite Langue de la piste audio DVD-V DVD-V L’appareil mémorise l’endroit où la touche STOP a été pressée Il est possible de changer la langue de la piste audio réglée au (l’indication ARRET ► s’affiche à l’écran). Appuyer sur PLAY pour moment des réglages initiaux du DVD si la langue choisie est poursuivre la lecture à...
- Page 97 • Lorsque le symbole s’affiche sur pression d’une touche, cela signifie que la fonction demandée ne peut être utilisée. Sélection de la piste audio sur les Affichage des informations disques Karaoké DVD-V Sur pression de la touche DISPLAY, des affichages donnent des informations DVD-V sur le disque de même que des informations sur l’état de l’appareil.
-
Page 98: Opération Avec Disque Dvd-Ram
Opération avec disque DVD-RAM Pour faciliter la sélection de titre ou de scène, Ouverture / fermeture appuyer sur PLAYLIST ou D.NAVI pour afficher le Interrupteur menu de la liste de lecture ou du navigateur direct. Exemple: Menu de la liste de lecture Durée de Touches Nº... - Page 99 • Lorsque le symbole s’affiche sur pression d’une touche, cela signifie que la fonction demandée ne peut être utilisée. Navigateur direct Liste de lecture Si le disque DVD-RAM comporte une liste de lecture, la liste de Si le DVD-RAM utilisé comporte la fonction de navigateur direct, lecture des titres présélectionnés par l’utilisateur s’affiche en une liste des titres enregistrés s’affiche.
-
Page 100: Utilisation Du Disque -Écran D'informations
Utilisation du disque -Écran d’informations- c.Disque en cours de lecture: Le type de disque mis en place s’affiche. d.Durée de lecture écoulée: Aller directement à une autre scène en entrant la durée de Affichage lecture écoulée, puis en appuyant sur la touche SET. •... - Page 101 • Lorsque le symbole s’affiche sur pression d’une touche, cela signifie que la fonction demandée ne peut être utilisée. Écran d’informations sur le disque 3 Écran d’informations sur le disque 2 Appuyer sur DISPLAY en Appuyer sur DISPLAY en P L A G E : 1 2 P L A G E : 1 2 D U R E E : 0 0 : 3 5 : 1 2 D U R E E : 0 0 : 0 0 : 2 3...
- Page 102 • Lorsque le symbole s’affiche sur pression d’une touche, cela signifie que la fonction demandée ne peut être utilisée. Écran d’informations sur le disque 4 Écran d’informations sur l’appareil 4 Appuyer sur DISPLAY en mode lecture ou arrêt pour Appuyer sur DISPLAY à deux reprises en mode activer les affichages à...
-
Page 103: Caractéristiques Spéciales
Caractéristiques spéciales Appuyer sur ▲▼ pour sélectionner “LECTURE PROGRAMMEE”. Appuyer sur SET pour afficher. Touches M O D E D E L E C T U R E L E C T U R E P R O G R A M M E E numériques L E C T U R E A L E A T O I R E Effacement... - Page 104 Lecture en reprise programmée Lecture aléatoire Les plages sont lues dans un ordre aléatoire. Suivre les étapes 1-11 à la page 45. Appuyer sur ACTION en mode arrêt pour afficher le Appuyer sur la touche DISPLAY pour afficher les menu. informations sur le disque.
- Page 105 • Lorsque le symbole s’affiche sur pression d’une touche, cela signifie que la fonction demandée ne peut être utilisée. Réglage du volume DVD Rendu ambiophonique virtuel (VSS) DVD-V DVD-V Sur certains DVD, la piste sonore est enregistrée à un volume plus Il est possible d’obtenir un effet ambiophonique avec seulement bas que d’ordinaire.
-
Page 106: Réglages Initiaux Du Dvd
Réglages initiaux du DVD Appuyer sur ▲▼ pour sélectionner une rubrique. Appuyer sur SET à répétition pour sélectionner la langue. L A N G U E S D U D I S Q U E Touches A U D I O : A n g l a i s S O U S - T I T R E S : A U T O numériques... - Page 107 • Lorsque le symbole s’affiche sur pression d’une touche, cela signifie que la fonction demandée ne peut être utilisée. Liste des codes de langue Langue Code Langue Code Langue Code Abhkaze 6566 Gujarati 7185 Roumain 8279 Afar 6565 Haoussa 7265 Russe 8285 Afghan, Pachto...
- Page 108 DRC (Compression dynamique) Sélection de la sortie audio NON: Dynamique normale. (Réglage implicite) DVD-V OUI: Sélectionner le type de signal audio numérique devant être Pour un rendu dynamique même à faible volume ; utile pour une transmis à la prise de sortie audio numérique optique de l’appareil. écoute nocturne.
- Page 109 • Lorsque le symbole s’affiche sur pression d’une touche, cela signifie que la fonction demandée ne peut être utilisée. Arrêt sur image Sélection du type d’écran DVD-V DVD-V Cette fonction permet de réduire le sautillement d’une image fixe ou Sélectionner le type d’affichage de l’image prévue pour un grand en mouvement.
-
Page 110: Avertissements Et Directives
Avertissements et directives Ces affichages indiquent une erreur d’opération ou donnent des instructions supplémentaires. Page Affichage à l’écran Explication REGLER L’HORLOGE Ce message s’affiche dans le cas où la programmation d’un enregistrement différé ou de la minuterie EN APPUYANT SUR ACTION de mise sous tension est tentée sans que l’horloge n’ait d’abord été... -
Page 111: Glossaire
Glossaire Angle LPCM (modulation linéaire par impulsions et codage) Certains DVD contiennent des scènes qui ont été enregistrées Il s’agit de signaux numériques non compressés, comme ceux qui simultanément sous plusieurs angles. Avec ces disques, la même se trouvent sur les CD. scène pourra être visionnée sous un angle différent à... -
Page 112: Guide De Dépannage
Guide de dépannage Vérifier les points suivants si l’appareil présente des problèmes de fonctionnement. Page Problème Solution Insérer la fiche du cordon d’alimentation bien à fond dans la prise secteur. Pas d’alimentation ... S’assurer que le contact est établi. La mise hors contact survient automatiquement lorsque le lecteur DVD est en mode Le contact est automatiquement coupé…... -
Page 113: Garantie/Liste Des Centres De Service
Service à domicile Un (1) an, pièces, main-d’oeuvre et lampe-écran comprises Le service à domicile ne sera offert que dans les régions accessibles par routes et situées dans un rayon de 50 km d’un centre de service agréé Panasonic. LIMITATIONS ET EXCLUSIONS Cette garantie n’est valide que pour les appareils achetés au Canada et ne couvre pas les dommages résultant d’une installation incorrecte, d’un usage... -
Page 114: Spécifications
Spécifications Affichage Tube image ultra plat de 50,8 cm (20 po), mesuré en diagonale (PV-DF2035-K) Tube image Tube image ultra plat de 68,6 cm (27 po), mesuré en diagonale (PV-DF2735-K) Magnétoscope Système d’enregistrement vidéo Balayage hélicoïdal à 4 têtes rotatives 1 piste (normal) Système audio 2 pistes (sonorité... -
Page 115: Index
Index Accessoires ............2 Fonction de poursuite ........38 Rebobinage / ralenti- ........8 Action ............... 8 Fuseau horaire ..........15 Rebobinage accéléré de bande ..... 27 Affichage ............8 Rebobinage automatique ....... 29 Affichage des fonctions et des canaux ... 35 Recherche avant/arrière d’une scène .... - Page 116 5770 Ambler Drive, Mississauga, Ontario L4W 2T3 (905) 624-8447 Calgary: 6835-8 Street N.E., Calgary, Alberta T2E 7H7 (403) 295-3955 Vancouver: 12111 Riverside Way, Richmond, BC V6W 1K8 (604) 278-4211 Panasonic Canada Inc. 5770 Ambler Drive, Mississauga, Ontario L4W 2T3 Imprimé en Indonésie (905) 624-5010 LSQT0939 A www.panasonic.ca...