Table of Contents
Advertisement
Quick Links
Advertisement
Table of Contents

Related Manuals for Pfaff creative 4.5


Summary of Contents for Pfaff creative 4.5
- Page 1 Owner’s Manual...
-
Page 2: Important Safety Instructions
This household sewing machine is designed to comply with IEC/EN 60335-2-28 and UL1594. IMPORTANT SAFETY INSTRUCTIONS When using an electrical appliance, basic safety precautions should always be followed, including the following: Read all instructions before using this household sewing machine. Keep the instructions at a suit- able place close to the machine. - Page 3 FOR EUROPE ONLY: This appliance can be used by children aged from 8 years and above and persons with reduced physical, sensory or mental capabilities or lack of experience and knowledge if they have been given supervision or instruction concerning use of the appliance in a safe way and understand the hazards involved.
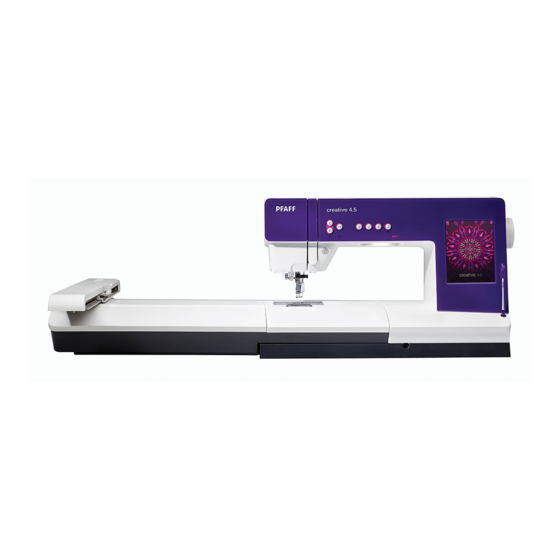
- Page 4 Congratulations! Congratulations on purchasing your new PFAFF ® creative 4.5 sewing and embroidery machine. ™ As a sewing enthusiast, you have acquired one of the most advanced and comprehensive sewing and embroidery machines in the world; it will enable you to transform all your creative ideas into reality using the most highly tuned technology and features.
-
Page 5: Table Of Contents
2:12 Darning ............... 4:18 Buttons and indicators 2:13 Special sewing techniques 4:21 Four direction sewing ..........4:21 Stacking stitches ............4:22 PFAFF creative™ Color Touch Screen 3:1 ® Ribbon stitches ............4:22 Start view Common sewing pop-ups 4:23 Main parts Task bar ................. - Page 6 Directional stitches ............5:5 Duplicate ............... 8:6 Zoom to all ..............5:6 Mirroring ..............8:6 Move design into hoop ..........8:6 Loading and sewing a sequence Undo ................8:6 Saving a sequence Redo ................8:6 Important sequencing information Touch functions Common sequencing pop-ups Move ................
-
Page 7: Introduction
Introduction... -
Page 8: Machine Overview 1:8
17. Button ruler Action indicator 25. Bobbin cover 18. Handwheel 10. Presser foot down and pivot toggle 26. Needle plate 19. PFAFF creative™ Color ® Touch Screen 11. Presser foot up and extra lift 27. Presser foot toggle 20. Built-in USB ports 28. -
Page 9: Rear Side
Rear side 32. Handle 33. IDT™ system 34. Embroidery unit connection socket Top parts 35. Thread guide for needle thread and for bobbin winding 35 36 37 40 41 36. Bobbin winder thread guide and pre-tension device 37. Thread guide 38. -
Page 10: Included Accessories 1:10
Included accessories Accessories 55. Stylus 56. Thread net (2) 57. Edge guide 58. Felt pad (2) 59. USB Embroidery stick 60. Screwdriver 61. Seam ripper 62. Brush 63. Spool cap, large (2) 64. Spool cap, medium 65. Spool cap, small 66. - Page 11 2A - When sewing decorative stitches or short zigzag stitches and other utility stitches with less than 1.0mm stitch length, use this foot. The groove on the underside of the foot is designed IDT™ This foot is used for blindhem stitches. The toe on the foot guides the fabric. The red guide on the foot is designed to ride along the fold of the hem edge.
-
Page 12: Stitch Overview 1:12
Stitch overview Stitch Description 1.1.1 Straight stitch For seaming and topstitching. Select from 37 different needle positions. Note: This stitch makes a stronger tie-off than stitch 2.1.1. 1.1.2 Stretch triple straight Reinforced seam. Topstitching. stitch 1.1.3 Straight stitch reverse Sew continuous reverse with strong tie-off. 1.1.4 Basting stitch Single stitch used for basting. - Page 13 1.2.1 Closed overlock Seam and overcast stretch fabrics in one step. 1.2.2 Closed overlock Seam and overcast in one step. 1.2.3 Closed overlock Seam and overcast in one step with reinforced edge. 1.2.4 Elastic overcast Seam and overcast stretch fabrics in one step. 1.2.5 Standard overcast Seam and overcast stretch fabrics in one step with reinforced edge.
- Page 14 1.3.9 Decorative buttonhole Decorative buttonhole. with triangle tack 1.3.10 Stretch buttonhole Buttonhole for stretch fabrics. 1.3.11 Cross stitch buttonhole Decorative buttonhole. 1.3.12 Decorative buttonhole Decorative buttonhole. 1.3.13 Professional eyelet Professional tailors buttonhole for jackets and trousers. buttonhole 1.3.14 Decorative eyelet Decorative buttonhole for jackets.
-
Page 15: Decorative Stitches
Decorative stitches 2.1 Quilt stitches - 2.2 Quilt stitches - 2.3 Quilt stitches - Handlook stitches Antique quilt stitches Stippling stitches 2.4 Quilt stitches - 2.4 Quilt stitches - 3.1 Needle art stitches - Crazy patch stitches Crazy patch stitches Cross stitches 3.1 Needle art stitches - 3.2 Needle art stitches -... - Page 16 3.3 Needle art stitches - 3.3 Needle art stitches - 3.4 Needle art stitches - Antique hand embroidery stitches Antique hand embroidery stitches Smocking stitches 4.1 Decorative stitches - 4.1 Decorative stitches - 4.2 Decorative stitches - Scallop edges Scallop edges Satin stitches 4.2 Decorative stitches - 4.3 Decorative stitches -...
- Page 17 4.3 Decorative stitches - 4.4 Decorative stitches - 4.4 Decorative stitches - Art stitches Art stitches 4.4 Decorative stitches - 4.5 Decorative stitches - 4.5 Decorative stitches - Art stitches Ornamental stitches Ornamental stitches 4.5 Decorative stitches - 4.6 Decorative stitches - 4.6 Decorative stitches - Ornamental stitches Bows and hearts...
- Page 18 4.7 Decorative stitches - 4.7 Decorative stitches - 4.7 Decorative stitches - Fun stitches Fun stitches Fun stitches 4.8 Decorative stitches - Borders 4.8 Decorative stitches - Borders 5.1 Maxi stitches - Scallop and satin stitches 5.2 Maxi stitches - 5.3 Maxi stitches - 5.4 Maxi stitches - Art stitches...
- Page 19 5.5 Maxi stitches - 5.6 Monogram 5.6 Monogram Stippling stitches 6.1 Sewing techniques - 5.6 Monogram 5.6 Monogram Optional feet stitches 6.1 Sewing techniques - 6.1 Sewing techniques - 6.2 Sewing techniques - Optional feet stitches Optional feet stitches Handlook quilt stitches 1:19...
- Page 20 6.3 Sewing techniques - 6.4 Sewing techniques - 6.4 Sewing techniques - Four direction stitches Stacking stitches Stacking stitches 6.4 Sewing techniques - 6.4 Sewing techniques - 6.5 Sewing techniques - Stacking stitches Stacking stitches Ribbon stitches 1:20...
-
Page 21: Alphabets
Alphabets Cyrillic Comic Grand Outline Script 1:21... - Page 22 1:22...
-
Page 23: Preparations
Preparations... -
Page 24: Connecting The Foot Control Cord
and lift off the machine carrying case. Remove all other packing material and the plastic bag. Slide off the accessory tray and remove the styrofoam inside. Note: Styrofoam left in the accessory tray while sewing may affect stitch quality. The styrofoam is for packing purposes only and should be removed. -
Page 25: Thread Cutter 2:3
Turn the main switch (C) off. Unplug the cord from the wall socket and then from the machine (B). Unplug the foot control cord from the machine (A). Wind the foot control cord and place inside the open area on the underside of the foot control. -
Page 26: Spool Pins 2:4
Spool pins Your machine has two spool pins, a main spool pin and an auxiliary spool pin. The spool pins are designed for all types of thread. The main spool pin is adjustable and can be used both in a horizontal position (the thread reels off the spool) and a vertical position (the thread spool rotates). -
Page 27: Needle Threader
Make sure that the presser foot is raised and the needle is in the up position. cap of the right size. Note: Hold thread with both hands to prevent it from slacking while threading. This ensures that the thread will be positioned properly in the threading path. Pull the thread into the thread guide by pulling it from the front to the back (A). -
Page 28: Thread Sensor 2:6
Replace the sewing needle with a twin needle. Make sure that the presser foot is raised and the needle is in the up position. cap of the right size. Raise the auxiliary spool pin. Slide on a large spool cap and a felt pad. Place the second thread on the spool pin. -
Page 29: Bobbin Winding
Place an empty bobbin on the bobbin spindle, with the logo facing up. Use only the original PFAFF bobbins approved for this model. ® Place the thread spool on the spool pin in horizontal position. Slide a spool cap tightly against the spool. - Page 30 Swing the auxiliary spool pin up. Place an appropriate spool cap, felt pad and thread spool on the spool pin. The needle thread (blue) is placed into the thread guide (A) and underneath the bobbin winder thread guide (B). Pull the bobbin thread (red) counter- clockwise above the bobbin winder thread guide (B) and through the bobbin thread guides (C).
-
Page 31: Idt
IDT™ creative™ For sewing any fabric precisely PFAFF ® 4.5 sewing and embroidery machine provides the ideal solution: the integrated dual feed, IDT™ system. As on industrial machines, the IDT™ system feeds the fabric from the top and bottom at the same time. -
Page 32: Needles 2:10
presser foot Press the presser foot downwards until it disengages from the presser foot holder. Attach presser foot Line up the pins on the foot with the gap underneath the presser foot holder. Press upwards until the foot snaps into place. You can also use the presser foot up/down buttons to raise or lower the presser foot holder. -
Page 33: Changing The Needle 2:11
Changing the needle Use the hole in the multi-purpose tool to hold the needle. Loosen the needle screw. Remove the needle. Insert the new needle, using the multi-purpose side away from you until it will go no further. Tighten the needle screw as tight as it will go. USB ports Your machine has two USB ports –... - Page 34 A PC software package is available for your PFAFF ® creative 4.5 sewing and embroidery machine. It ™ adds the following features: • Communication module allows you to connect the machine to your computer. Required to use the Send To features in any Embroidery software system module.
-
Page 35: Buttons And Indicators 2:13
Buttons and indicators For permanent reverse, press the button once before Lower the presser foot completely. Press the button starting to sew. The reverse indicator (B) will be lit once more to raise the presser foot to pivot height. and the machine sews in reverse until you press The presser foot is lowered automatically when you the button again to cancel. - Page 36 Press immediate tie-off while sewing and your machine sews a few tie-off stitches and stops automatically. By touching the tie-off button once more while the action indicator is lit, the function can be turned off. The tie-off function can be programmed, see chapter 4. When having stopped sewing in the middle of a stitch, press restart to start sewing at the beginning of the stitch again without having to reset any...
-
Page 37: Pfaff ® Creative™ Color Touch Screen
PFAFF creative ® ™ Color Touch Screen... -
Page 38: Creative™ Color Touch Screen 3:1
Color Touch Screen creative ® ™ creative™ Color Touch Screen. This technology provides great resolution and Your machine features the PFAFF ® color. The task bar at the bottom of the screen includes the main functions and help. Every mode has its own color scheme, to make it easier to navigate and use the machine. -
Page 39: Option Bar
The option bar contains different options in sewing mode, Embroidery edit and Embroidery stitch- out. Read more about the options for each mode in chapters 4, 7 and 8. Option bar in sewing mode Option bar in embroidery edit icons There are some icons and functions that are frequently used on the screen. - Page 40 The selection menu contains a selection bar at the bottom with icons for stitches, fonts, designs and Files & Folders. Read more about Files & Folders in chapter 10. Select one of the icons in the selection bar to access the menus.
-
Page 41: Sequencing
menu (2g). Each subcategory in the personal menu has 16 positions to save your own stitches or sequences. Scroll through the stitches in the selected subcategory using the scroll arrows. Select a stitch by touching it. icon (6), and then touch the stitch. The positon will be emptied. -
Page 42: Embroidery Edit
Your machine has four tabs with designs: Personal designs, machine designs, mini designs and quilt designs. Read more about the different design tabs in chapter 8. Touch a tab to display the contents. Select an embroidery design by touching it. Use the scroll bar to browse through additional designs. -
Page 43: Task Bar
To embroider your design, change from Embroidery edit to Embroidery stitch-out by touching the Embroidery stitch-out icon on the task bar. that are useful when embroidering. Read more about Embroidery stitch-out in chapter 9. -
Page 44: Machine Settings
In the Settings menu, you can change default settings and make manual adjustments to the machine settings (A), screen settings (B) and sound settings (C). Touch the icons to activate a function or open a list of choices. The settings are saved even after turning off the machine with one exception: changes made to Options for feed dogs will not be saved when the machine is switched off. - Page 45 The default setting is auto (recommended). to any design using the software package Changes to the default setting are not retained once downloaded via the PFAFF website (see page ® the machine has been turned off. Your machine 2:12).
- Page 46 Once you have increased or decreased the value in the Settings menu, the thread tension control icon will change to green. Note: Contact you authorized PFAFF® dealer if you experience thread tension problems that cannot be helped with the Thread tension compensation.
-
Page 47: Sound Settings
Touch the calibrate icon to open a special view for creative™ Color Touch Screen calibration. PFAFF ® Follow the instructions on the screen to calibrate. You can change the sound settings on your machine for different situations. -
Page 48: Info Menu
Use the info system to easily get help topics and information. The Info menu is a built-in shortened version of the Owner’s manual. When you touch the info menu icon on the task bar, you have four options to select from - category (A), index (B), personal info (C) and text (D). -
Page 49: Sewing Mode
Sewing mode... - Page 50 In sewing mode you can select stitches, adjust and sew them. Use Stitch Creator™ feature and sequencing Recommendations and machine settings are shown at the top of the screen. Sewing recommendations Machine settings Stitch selection area Arrows for scrolling through stitch categories Selected stitch number Mirroring side to side...
-
Page 51: Select A Stitch 4:3
Select a stitch To select a stitch, touch the actual stitch in the stitch selection area (3). You can scroll through the list of stitches by touching the arrows at the right of the stitch selection area (4). The number of the actual subcategory is shown between the arrows (A). -
Page 52: Stitch Width
Your machine will set the best settings for each selected stitch. You can make your own adjustments on the selected stitch. The setting changes only affect the selected stitch. Your changed settings will be reset to default when selecting another stitch. The changed settings are not automatically saved when turning your machine off. -
Page 53: Stitch Density
Stitch Stitch The stitch density control adjusts the density (the density + density - closeness of the satin stitches that make up the entire stitch). The density does not affect the actual length of the entire stitch. Touch + to decrease the density. Touch - to increase the density. -
Page 54: Buttonhole Slit Length
Set the buttonhole slit length by using + to increase and - to decrease when sewing a buttonhole with the Sensormatic buttonhole foot. Touch + to increase and - to decrease the number of stitch repetitions to be sewn, when sewing on a button. - Page 55 Touch + to increase and - to decrease the needle thread tension. For the best stitch appearance and durability make sure the needle thread tension is correctly adjusted, i.e. for general sewing, the threads evenly meet between the two fabric layers (A). If the bobbin thread is visible on the top side of the fabric, the needle thread tension is too tight.
-
Page 56: Free-Motion Options
Note: Optional spring feet can be purchased at your local authorized PFAFF® dealer. Do not use a spring foot if Sensormatic free-motion is activated, since the needle might damage the presser foot. -
Page 57: Save Options
Activate to set the machine in Sensormatic free- motion mode for presser foot 6A. When sewing free-motion at low speed the presser foot will raise and lower with each stitch to hold the fabric on the needle plate while the stitch is being the fabric while sewing. - Page 58 To save a stitch into your Personal menu, touch the save options icon (15) and select save to Personal menu (15b). A new window will open. Choose which subcategory you want to save your stitch in (A). All your previously saved stitches will be shown in the Personal menu.
-
Page 59: Option Bar 4:11
Option bar Speed control This function enables you to easily reduce the maximum Tie-off options sewing speed. Just touch the speed control icon to reduce the speed. To return to normal speed, deselect the icon. You can change the set speed limit. Long touch the speed Stitch programs control icon to get a pop-up. - Page 60 A Tapering program Single stitch program Patchwork program Set number of stitch repetitions in single stitch program Note: Not all programs can be used at the same time. You can sew without closing this pop-up. Tapering increases or decreases the width of the stitch during sewing to create symmetrical or asymmetrical tapers.
- Page 61 The patchwork program makes it possible for you to program an exact seam length that can be sewn repeatedly. This is very useful when quilting. To program a seam length, activate the patchwork program (C). Sew your desired seam length and press the reverse button.
- Page 62 These techniques may require some special presser feet and accessories. zippers There are different ways to sew in zippers. Follow the directions included with your pattern for best results. For some zipper applications it is important to sew close to the teeth of the zipper. The zipper foot 4 can Right side be snapped onto the presser foot holder on the left or right, for stitching on either side of the zipper.
- Page 63 Stich number 1.1.9 can be used to overcast raw edges. Make sure the needle pierces the fabric on the left side and overcasts the edge on the right side. Stitch number 1.1.9 can also be used as an elastic stitch to add elastic to pajamas, skirts and sportswear.
- Page 64 Buttonholes Buttonholes are found in category 1, subcategory 1.3 in the selection menu. You can also scroll buttonhole subcategory. Note: Buttonholes up to 50 mm can be sewn using the Sensormatic buttonhole foot. Both sides of the Sensormatic buttonhole are sewn in the same direction for a more even result.
- Page 65 Manual buttonhole To sew a manual buttonhole, use presser foot buttonhole. Touch the reverse button. The machine sews the bartack and the second column. When the columns are aligned, press the reverse button to sew the second bartack. When you have adjusted your buttonhole, use the repeat buttonhole function (25), to sew identical copies.
- Page 66 You can also use a sew on button foot, available as an optional accessory at your local authorized PFAFF® dealer. Darning a small hole or a tear before it becomes larger can save a garment. Choose a lightweight thread in a color as close to your garment as possible.
- Page 67 A quilt usually consists of three layers, two layers of fabric with a layer of batting sandwiched between. To sew three layers together, you have a wide variety of stitches and techniques to choose from. or make it into cushions, wearable art or other smaller projects.
- Page 68 Free-motion stippling adds texture and interest to your quilt, while keeping the layers together. Free-motion stippling is done with the feed dogs lowered. You move the fabric manually to determine the stitch length. Set your sewing machine for free-motion sewing with a straight stitch. Attach the straight stitch needle plate.
- Page 69 The 6th stitch category includes special sewing technique stitches such as candlewicking, beading stitches, edge stitches, four direction sewing, stacking stitches and ribbon stitches. These techniques may require some special presser feet and accessories. This is indicated by the optional presser foot icon (A).
- Page 70 Sew beautiful decorations in two colors using the stacking stitches. The stacking stitches consist of pairs of matching stitches that are designed to be sewn on top of each other. point for each. Touch Quick Help (29) and one of the stacking stitches to preview what the stitches look like when combined/stacked.
- Page 71 pop-ups or anything that takes time, an hour glass is shown. Bobbin thread low When the bobbin thread is running low, a pop-up message appears giving you an indication that the bobbin needs to be changed soon. This gives you an opportunity to plan where to stop sewing and change the bobbin.
- Page 72 4:24...
-
Page 73: Sequencing
Sequencing... - Page 74 In sequencing, you can create and adjust a sequence of stitches. Combine various 9mm stitches, Maxi Stitches and stitch fonts from the machine or from an external device. Stitches made in Stitch Creator™ feature can also be inserted in a sequence. You can create sequences up to approximately 500mm (20”) long.
- Page 75 Sequencing can be used in both sewing mode and in embroidery mode. To open, just touch the sequencing symbol (A) on the option bar. To close sequencing and sew or embroider your created sequence, touch OK (20) in the top right corner. Note: If sewing mode is active and your programmed stitch is ready to be sewn, you can also close the active function by pressing the foot control, or by pressing the...
- Page 76 To duplicate a stitch, move the cursor to the stitch you want to duplicate. Touch the duplicate icon to copy the selected stitch. Note: Make your adjustments on the stitch before duplicating and the copied stitch includes the adjustments. Use the long touch function to get a pop-up where you can enter the exact number of copies you want to insert.
- Page 77 Horizontal To see your sequence horizontally, touch the preview icon. Your sequence will be shown on a pop-up. If it is too long for the window, it is possible to zoom to all (A) to see the entire sequence. You can also scroll through the sequence with the arrows (B).
- Page 78 If the stitch or sequence is wider than what can be shown on the screen, you may use the zoom to all icon to see the whole width of the sequence. Note: Zoom to all is only visible if the stitch or sequence To sew the sequence touch OK (20) in the top right corner of the screen.
- Page 79 When loaded to Embroidery edit your sequence will become an embroidery design. Go to Embroidery stitch-out and stitch it out as a regular design. If a sequence is selected and you re-open sequencing from embroidery mode, the sequence will remain unchanged. If no sequence is selected, sequencing will be empty when re-opened, ready to create something new.
- Page 80 Adjustments made in sewing mode or embroidery mode will affect the whole sequence. However, these changes will not be saved if you return to sequencing. In Embroidery edit, the position of the sequence will be kept. To adjust individual stitches in the sequence, return to sequencing. Sequencing can be used in either sewing mode or embroidery mode.
-
Page 81: Stitch Creator™ Feature
feature Stitch Creator ™... -
Page 82: Stitch Creator ™ Feature - Overview
Stitch Creator™ feature In Stitch Creator™ feature, you can create completely new stitches and adjust every single stitch point. Or, customize any of the built-in 9mm stitches to create your own version of that stitch. Add, erase, mirror and move stitch points directly on screen. line will help you to create your stitch. -
Page 83: Open And Exit Stitch Creator ™ Feature
Open and exit Stitch Creator™ feature Stitch Creator™ feature can be used in both sewing mode and in embroidery mode. To open, just touch the Stitch Creator™ feature icon (A) on the option bar. To close Stitch Creator™ feature and sew or embroider your created stitch or combination, touch OK (18) in the top right corner of the screen. - Page 84 Long touch the multi-select icon to select all stitch points at the same time. To select the stitch points next to the marked stitch point, touch the multi-select icon and then touch the arrows (12) to select the next stitch point. Use the up arrow to select stitch points before the marked stitch point and the down arrow to select the stitch points after the marked stitch point.
- Page 85 The selected stitch point(s) will be mirrored side to side. 7. Mirroring side to side The selected stitch points will be mirrored end to end. Note: Only enabled if more than one stitch point is selected. 8. Mirroring end to end Touch the triple stitch icon and the selected stitch(es) will be tripled.
-
Page 86: Touch Functions
Touch functions Use your stylus to make changes directly on screen pan and move depending on which touch function is activated. You can also use the arrows in the wheel to make minor adjustments. You can move the selected stitch or stitch points using your stylus on the screen or touch the arrows in the wheel (15). - Page 87 To sew the created stitch touch OK (18) in the top right corner of the screen. The stitch will be loaded to the mode that was active when entering Stitch Creator™ feature; sewing mode or Embroidery edit. If sewing mode is active when closing Stitch Creator™...
- Page 88 In embroidery mode the stitch is saved as a design. Touch the Save to Personal designs icon (A) and See page 8:8 for more information. Stitch Creator™ feature To use Stitch Creator™ feature in either Stitch Creator™ feature can be used in either sewing mode or embroidery mode.
-
Page 89: Embroidery Mode – Preparations
Embroidery mode – preparations... - Page 90 (part number 850135-096, type BE20) and one small unit (part number 850151-096, type BE16). The embroidery units are available at your local authorized PFAFF dealer. ® The selection of hoops differs depending on which embroidery unit you choose for your PFAFF ® creative ™...
- Page 91 overview G Embroidery hoop connector H Outer hoop Inner hoop Quick release Retaining screw M Center marks Built-in About 270 designs are included in the memory in your machine. Page through the creative™ 4.5 Embroidery collection for designs and fonts. The design number, stitch count (number of stitches in the design) and the design size are displayed next to each design.
- Page 92 To store the embroidery unit in the embroidery case, move the embroidery arm to park position by selecting park position on the screen in either Embroidery edit or Embroidery stitch-out. Press the button at the left, underneath the embroidery unit (A) and slide the unit to the left to remove it.
-
Page 93: Slide On The Hoop
Slide on the hoop Make sure that the accessory tray (only on the large embroidery unit, type BE20) on the embroidery unit is closed. Slide the hoop onto the embroidery unit from front to back until it clicks into place. The marked center point on the design should match the starting point of the needle. - Page 94 After attaching the embroidery unit and embroidery foot, insert a bobbin with lightweight bobbin thread. Note: Make sure that the IDT™ system is disengaged. To select a design, open selection menu and touch the design menu icon (A). Locate desired design and touch it once to load to Embroidery edit.
- Page 95 color list (C). movement of the embroidery arm and the hoop. Hold the needle thread and touch the start/stop button (D) or the foot control. The machine starts embroidering. Note: This machine features the automatic function Cut jump stitches. When activated the machine trims the top jump stitch threads and pulls the thread ends to the underside of the fabric.
- Page 96 stops. A pop-up appears asking you to change color. Re-thread with the next color and continue embroidering by pressing start/stop. Each color segment is tied off at the end and the needle thread is cut. 10. When the embroidery is completed, your machine cuts the needle and bobbin thread and stops.
-
Page 97: Embroidery Mode – Edit
Embroidery mode – edit... - Page 98 In Embroidery edit you can adjust, combine, save, delete and restore designs. You do not need to have the embroidery unit connected to your machine to edit your designs. The loaded design(s) are shown in the overview Zoom Options Multi-select Select/deselect design Arrows Group...
-
Page 99: Load A Design
Load a To load a design, open the selection menu (29). Select designs (A) from the selection bar, then choose one of the following four tabs: Designs that you have created, adjusted and/or combined and saved. Built-in Designs that are stored in the permanent sewing machine memory. -
Page 100: Load A Stitch
Load a stitch To load a stitch, select stitches (A) from the selection bar. Select a category and then a subcategory. Touch your desired stitch on the screen to load to Embroidery edit. It is possible to load previously stored patchwork, single stitch and tapering programs into Embroidery edit to stitch-out in the hoop. -
Page 101: Select Design(S)
When loading designs into Embroidery edit, the last loaded design is selected by default. There are two ways to select another design. Either touch it on the screen or step through the designs using the arrows (5). The selected design is surrounded by a green frame. -
Page 102: Stitch-Out Order
Stitch-out order Designs are by default stitched out in the order they are loaded to Embroidery edit. The numbers (A) between the arrows show the position in the stitch- out order for the selected design as compared to the total number of designs in the embroidery area. When the group icon is touched, any designs that are selected on the screen will be grouped together. -
Page 103: Touch Functions
Touch functions You can use your stylus to make adjustments directly on screen, by touching and dragging in the scale, depending on which touch function is active. tune. When move is active, you can move the design(s) above the wheel show in millimeters how far the design has been moved from the center of the hoop, both horizontally and vertically. -
Page 104: Option Bar
Option bar 21. Save to Personal designs 22. More options 23. Select hoop 24. Thread color edit 25. Basic Shape Creator™ feature 26. Embroidery stitch editor 27. Sequencing 28. Stitch Creator™ feature Touch the Save to Personal designs icon (21) to save the design you are working with. - Page 105 To select the correct hoop size, touch the hoop selection icon (23). A pop-up will appear with the hoop choices, including hoops that are available to purchase from your authorized PFAFF dealer. ® After selecting your hoop size, the pop-up will close automatically.
-
Page 106: Thread Color Edit
In thread color edit you can edit the colors in your design. Touch the thread color edit icon (24) to open. Example (A): 1:3, RaRa 40, 2416 means the RobisonAnton 40 weight rayon, color number 2416. Touch the color you want to replace in the color list. -
Page 107: Basic Shape Creator™ Feature
Basic Shape Creator™ Shaping is a unique way to use your beautiful built-in decorative stitches, sequences or even small design elements to form new embroidery designs. Basic Shape Creator™ feature - overview A Select shape Zoom Delete/Duplicate last object D Enter number of designs Select control points Select spacing G Select line positioning... - Page 108 control point A control point is a point affecting the selected shape. Each shape is built by several control points. square (L). An unselected control point is marked with an outlined square (M). All control points are visible when you are editing the points. By adjusting the control points, the selected shape can be changed with unlimited possibilites.
- Page 109 Select Touch the select shape line positioning icon (G) to open a pop-up. You can choose to place the objects on the top of the baseline, or on the baseline or under the baseline. The selected positioning will affect all objects on the shape. Select Select which side of the object is positioned on the baseline.
- Page 110 Basic Shape Creator™ In embroidery mode, open the selection menu, touch the tab for mini designs and select design cm_52.vp3 to load to Embroidery edit. Open Basic Shape Creator™ feature. Select the clockwise circle in the list (A). Touch Enter number of designs (B) to open the keypad, enter 18 and touch OK.
- Page 111 Open the selection menu and select design cm_52. vp3 again. Center it by touching the wheel center icon when the touch function - move is active. Open Basic Shape Creator™ feature. Select the clockwise circle in the list (A). Touch Enter number of designs (B) to open the keypad, enter 16 and touch OK.
- Page 112 Basic Shape Creator™ In embroidery mode, select hoop size 360x200 and open the selection menu. Open stitches and select the linen buttonhole 1.3.1. Note: If you want to change the length, width or density of the buttonhole, use the embroidery stitch editor.
- Page 113 Select touch function - scale, and adjust the line to desired length by touching and dragging on screen or using the arrows in the wheel. Touch Enter number of designs to open the keypad and enter the desired number of buttonholes.
-
Page 114: Embroidery Stitch Editor
Sequences and stitches can be adjusted in Embroidery stitch editor. You can also adjust your own created sequence or stitch, loaded to Embroidery edit (see chapter 5 and 6). Note: When a stitch or a sequence is loaded into Embroidery edit, tie-offs are automatically inserted at the beginning and at the end. - Page 115 Enter Embroidery edit. To create a sequence, open sequencing by touching the icon on the option bar (27). Select stitch number 4.3.20, then 4.3.15, 4.2.1, 4.3.15. Mirror the last inserted stitch end to end. Insert stitch 4.3.19, 4.3.15, 4.2.1, 4.3.15. Mirror the last inserted stitch Close sequencing by touching OK in the top right corner.
- Page 116 Deselect the sequence by touching outside the design on the screen, or step by using the arrows. Open sequencing once again. Select stitch number 4.1.7. Long touch the duplicate icon. In the pop-up that appears, enter 7 and touch OK for a total of eight copies.
-
Page 117: Embroidery Text Editor
Embroidery text editor opens automatically when you select an embroidery font in the selection menu. You can also open embroidery text editor by adjusting an existing text already in Embroidery edit. Just select the text and touch the sequencing icon (27) on the option bar. Note: If the text is created of stitch fonts, sequencing will be opened instead of embroidery text editor. - Page 118 Return to Embroidery edit by touching OK in the top right corner of the screen. Embroidery text editor will close and the text will be loaded into Embroidery edit. If the text was an existing text, it will be placed and rotated in the same way as it was before the adjustment.
- Page 119 pop-ups have selected to delete more than one design. have selected to delete all designs or when using delete long touch. If you keep working on the same design and save again, your machine will not ask again. This pop-up will appear when a function has been chosen that forces the embroidery unit to move outside the limits for the attached hoop.
- Page 120 disk space to save current state This pop-up appears when going to Embroidery stitch-out and the available memory in the machine is low. Because of low memory you might not be able to save current state while embroidering. To clear some memory before starting to embroider, to Embroidery Edit and use Files &...
-
Page 121: Embroidery Mode – Stitch-Out
Embroidery mode – stitch-out... - Page 122 To enter To embroider your design(s), enter Embroidery stitch-out. Make sure the embroidery unit is connected and the selected hoop is securely attached to the embroidery arm. Toggle to Embroidery mode - edit Embroidery stitch-out by touching the Embroidery stitch-out icon (A) above the embroidery mode icon on the task bar.
-
Page 123: Crosshair
When embroidering, a crosshair indicates current needle position on the screen. All colors in the loaded design(s) are shown in the order they will be embroidered. Each listed color shows color order and number. Also shown are the thread manufacturer, thread weight and color number. -
Page 124: Basting
Basting enables you to secure your fabric to a stabilizer placed under it. It is especially useful when the fabric to be embroidered cannot be hooped. Basting provides support for stretchy fabrics. Touch the basting icon (7) to activate basting. Long touch the icon to open a window to select to add the basting stitch around the design area and/ or around the hoop area. -
Page 125: Option Bar
Option bar Touch the icon to activate monochrome embroidery. All designs are shown in a grey color and the machine does not stop for color block changes. To deactivate monochrome embroidery, touch the icon again. To see your design as large as possible, use the full screen. -
Page 126: Hoop Position
Use the hoop position functions to move the hoop to different positions. Current position When you want to return to the current stitch and start embroidering again where the embroidery was interrupted, touch the current position icon. You can also press the start/stop button once to return to the current stitch and start to embroider. -
Page 127: Precise Positioning
Precise positioning allows you to place a design on an exact spot on your fabric. It is also used when you want to embroider a design next to a previously embroidered design. Use zoom and pan to be sure that you are placing the design exactly where you want it. - Page 128 To select You have the ability to check a second position within the design to make sure your design is lined up properly and make further adjustments if necessary. Activate (C), select matching point on screen. A second crosshair will appear, the matching point. Place it at the point where you would like another part of the design to connect.
- Page 129 Check allow lower needle position (K) to temporarily allow the needle to be in a lower position while moving the hoop. The needle can then remain close to the fabric when using precise positioning. Just make sure the needle is above the fabric to prevent damage to the needle and fabric.
- Page 130 2a. To line up the design on the screen with the previously embroidered, select matching point on screen (a) to be the corner. Use the touch function - move or the corner icons. 2b. Select the next function, select maching point on fabric (b) to move the matching point to the right position in the hoop.
- Page 131 stitch-out pop-ups When the embroidery unit is attached, a pop-up asks you to slide off the hoop and clear the machine area for calibrating the embroidery arm. You will also be reminded to disengage the IDT™ system and attach the embroidery presser foot.
- Page 132 Touch OK to keep the design(s) loaded and stay in Embroidery stitch-out. Some cutwork designs can be stitched out using the optional accessory PFAFF Embroidery Cutwork Needle ® Kit, (P/N 820 945-096). These designs are marked with a cutwork needle symbol in the creative™...
-
Page 133: Files & Folders
Files & Folders... -
Page 134: Files & Folders - Overview
Files & Folders to the selection area a default icon is shown in the meantime. Files & Folders - overview Parts of the selection bar Stitches Fonts Designs Files & Folders Quick help Parts of Files & Folders Close and return to previous view Search path Move up one folder level 10. -
Page 135: Browse Files & Folders
• .SHV, .DHV, .VP3, .VIP, .HUS, .PEC, .PES, .PCS, .XXX, .SEW, .JEF, .EXP, .10* and .DST Available The built-in memory can store designs, fonts, is still available in the built-in memory, touch Quick help (5) and then touch either Personal designs (13), shows how much memory is available. - Page 136 USB port. Touch external device (17) to display all connected devices. You can have your computer and another device such as a PFAFF USB embroidery stick connected at the ® same time. Touch either of the devices to explore.
-
Page 137: Open A Folder
It will be loaded to the appropriate window. If you want to open several designs at one time, click on the ones you want to open. Long touch on the last one. All the designs will open in Embroidery edit. Open a folder To open a folder in Files &... - Page 138 Create a Touch the create new folder icon (18) to create a new folder. A pop-up opens where you can enter a name for your folder. another place. and is removed from the folder where it was cut from. to another place. folder where you copied it from.
- Page 139 Files & Folders pop-ups prevents you from deleting anything by mistake. other write protected media. You cannot create a new folder with the same name as another folder on the same level. Create your folder elsewhere or enter a different name for the folder.
- Page 140 or anything that takes time, an hour glass is shown. Only designs can be stored in Personal designs, and Select the proper folder to store in. 10:8...
-
Page 141: Maintenance
Maintenance... -
Page 142: Cleaning The Machine
Note: Do not blow air into the bobbin case area. The dust and lint will be blown into your machine. Note: When using the optional accessory PFAFF Embroidery ® Cutwork Needles, it is neccessary to clean the bobbin area after each embroidered design/project. -
Page 143: Troubleshooting
Troubleshooting For further information please contact your local authorized PFAFF dealer who will be happy to help you. ® Problem/cause Remedy General problems Bobbin alarm does not work? Clean lint from bobbin area and use only the original PFAFF bobbins approved for this model. - Page 144 Is the wrong hoop attached? Slide on the correct hoop. Have your sewing machine serviced regularly by your local authorized PFAFF dealer! ® If you have followed this troubleshooting information and still have problems, take your sewing machine your sewing fabric and bring it to your dealer.
-
Page 145: Blindhem Stitch
Index Built-in designs ............7:3, 10:4 Built-in machine designs ..........8:3 1/4” quilting foot with IDT™ system ......1:11 Built-in mini designs ............8:3 3-dimensional view ............ 8:9, 9:5 Built-in quilt designs ............8:3 Buttonhole, corded ............4:17 Buttonhole, manual............4:17 Buttonholes .............. -
Page 146: Horizontal Preview
................4:18 Fancy stitch foot 2A ............1:11 ............1:15 Fancy stitch foot with IDT™ system 1A ....... 1:10 .................. Feed dogs, options ............3:9 ............Felt pad ..............1:10, 2:4 ..............8:21 File formats ..............10:3 ............5:3 File name ................8:8 .......... -
Page 147: Organize
Personal fonts ..............10:4 Mirroring side to side ............Personal menu ..............3:5 Monochrome ..............9:5 PFAFF® creative™ Color Touch Screen ......1:8 More options ............... 8:9, 9:5 Piecing the quilt top ............4:19 Mouse ................2:11 Place locking point on fabric ........... 9:7 Move ................ - Page 148 Embroidery edit ..............8:23 Embroidery stitch-out ............9:11 Files & Folders ..............10:7 Save current state .............. 9:5 Sequencing ................5:8 Save design ................ 8:8 Sewing ................... 4:23 Save options ............... 4:9 Stitch Creator™ feature ............Save personal default stitch ..........4:10 Position of the marked stitch point ........
- Page 149 Tapering program ..............4:12 Sewing recommendations ..........4:3 Sewing techniques ............4:14 Take-up lever .............. 1:9, 2:5 Sew on a button ............... 4:18 Tapering program ............4:12 Shipping brace ..............7:2 Task bar ................3:2 Side positioning, select ........... 8:13 Text editor ................
-
Page 150: Zoom
........1:11 Zippers, sewing ............... 4:14 Zoom ..............Zoom to all ............Zoom to box ..............8:4, 9:3 Zoom to hoop ..............8:4, 9:3 Zoom to crosshair ..............9:7 11:10... -
Page 151: Intellectual Property
PFAFF dealer, and be sure to visit our website at ® www.pfaff.com for the latest updates of both the software and the Owner’s Manual. We reserve the right to change the machine equipment and the assortment of accessories without prior notice, or make user and the product. - Page 152 413 40 28-26D • English • InHouse • © 2014 KSIN Luxembourg II, S.ar.l. All rights reserved • Printed in Germany on environmentally-friendly paper.